Last updated: Apr 19, 2026
In this part of Queens, homes range from detached houses to tight attached rows and small multifamily buildings. That mix means on a single property you can find steep-slope sections beside flat or low-slope portions, all under the same roofline. Leaks often don't show up on a single uninterrupted plane; they reveal themselves at transitions, like where a porch roof meets the main deck, along parapets, around dormers, above rear additions, or near chimneys. Older structures tend to carry several roofing layers and patch histories, which makes tear-off scope, deck condition, and drainage corrections more important than simply swapping shingles. The pattern is practical: identify the real water paths, not just the obvious wet spots.
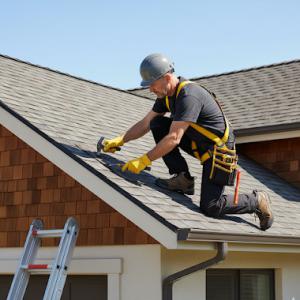
Start with the transitions, because that's where water tends to find a way in. Parapet walls deserve particular attention-look for loose flashing, perched debris, or old sealant joints that have cracked with freeze-thaw cycles. Porch roofs, especially those running off a longer back addition, are a frequent source of leaks if their edge flashing or gutter connections have degraded. Chimneys and dormers are perennial trouble spots in this climate; the chase around a chimney stack, cracked step flashing, or a poorly terminated cap can leak in a heavy rain or after a winter thaw. Never assume a single patch on the main plane covers a broader problem-water can travel along underlayment or decking and appear distant from the source. For low-slope sections, ensure there's a clear drainage path and that any seams or transitions to steeper sections are properly flashed. In older homes, expect evidence of past attempts at patching-peeling sealant, mismatched flashing, or uneven deck surfaces that can trap water.
Older Flushing homes often carry multiple roofing layers. Each layer adds weight and changes how water moves during a storm. A tear-off plan should verify how many layers exist, their material type, and the condition of the underlying deck. Soft spots, rot, or sagging in deck boards near edge details can imply slow leaks that aren't obvious from above. Drainage matters as much as the membrane: check gutter alignment, downspout termination, and any interior drainage changes when additions were added to the back of the house. Where low-slope sections adjoin pitched roofs, ensure a continuous, well-sealed transition with compatible flashing and membrane protection to prevent water wicking into the deck edges.
When planning replacement on a property with both steep-slope and low-slope elements, the logical approach is to address the critical water-entry zones first: parapets, dormer connections, chimney chase details, and rear additions. Because the area can feature several layers, a full tear-off often yields a more durable result than piecemeal patches. Pay particular attention to edge details and ensure that new materials are compatible at transitions. The goal is a continuous, well-sealed envelope that handles the seasonal shifts common here: freezing winters, humid summers, and wind-driven rain from coastal storms. Maintenance follow-up should emphasize regular inspection of flashing joints, sealants, gutters, and any new roof penetrations to sustain performance over time.
Flushing's four-season pattern means winter freeze-thaw cycling can reopen small flashing and masonry-adjacent defects that were quiet during warmer months. That means you should treat any tiny edge crack, vent boot seam, or chimney flashing discoloration as a warning rather than a curiosity. When nights drop below freezing and days bounce above it, those micro-movements widen, leak paths become real, and attic moisture sees greater opportunities to travel down into ceilings. This is not a time to "see how it goes." It's the window where minor issues can suddenly turn into significant repairs if ignored.
Warm, humid summers in Queens can accelerate attic moisture problems and make ventilation and underlayment choices more consequential on asphalt roofs. If your attic lacks adequate intake and exhaust, warm air becomes a stalled oven. Moisture condenses on underlayment and within roof trenches where condensation runs collect. For low-slope areas and tight rowhouse footprints, poor ventilation compounds the risk of mold, peeling interior finishes, and degraded roof deck connections. In practice, that means you prioritize a balanced vent strategy, a well-sealed ridge or soffit area, and an underlayment rated for substantial humidity exposure. Don't assume a "thin" or "short" dry season will keep moisture at bay-Queens summers demand deliberate moisture control.
Spring rain and fall wind events in New York City often disrupt scheduling, so Flushing homeowners frequently need temporary dry-in planning rather than assuming a one-day replacement window. If a storm fronts in during April or October, you may need a robust tarp solution, temporary flash barriers, or a staged replacement plan that preserves interior dryness while crews coordinate with tight access and neighborly schedules. Expect interruptions from rain, wind-driven debris, and neighbor conflicts that push work into back-to-back days or even weeks. Build your project calendar with contingency days and prioritize critical flashings in advance of peak storm seasons.
Spot-check the most vulnerable areas: chimney flashings, roof-to-wall terminations, and valley intersections on low-slope roofs, plus skylight and vent penetrations on pitched roofs. Track any attic condensation patterns after storms and after heat waves. If you detect moisture, plan for an immediate moisture control step-coverts, temporary dry-in, or expedited flashing reseal-before a compelling leak appears. In heavy-wind periods, secure loose materials and ensure temporary protection is in place during the vulnerable shoulder seasons. Your goal is to keep water out during the narrow windows when timing and weather can collide and turn a minor drip into a costly fix.
When you can't wait, these contractors offer fast response times to stop leaks and prevent further damage.
Thomas James Roofing & Waterproofing
(718) 416-5255 www.thomasjamesroofing.com
Serving
4.9 from 52 reviews

Skyward
(718) 878-6748 www.skywardroofing.com
161-03 Horace Harding Expy b1, Flushing, New York
5.0 from 82 reviews
Skyward Roofing - Queens is a professional and trusted roofing company catering to the roofing needs of commercial and residential clients. With vast experience, our team of skilled experts offers quality roofing services customized to meet the special needs of every client. From new installations and repairs to inspections and maintenance, we deliver excellent artistry using quality materials and modern techniques. Dedicated to client satisfaction, we ensure timely project completion, moderate pricing, and a commitment to surpassing client expectations. Reliable, trustworthy, and efficient, we are the most sought-after company for roofing needs. Call us or visit our site for more information.
Eagle Express Contractor
(347) 362-0008 eagleexpresscontractor.com
53-61 70th St, Flushing, New York
5.0 from 82 reviews
At Eagle Express Contractor, we pride ourselves on delivering top-notch roofing services with a commitment to excellence and customer satisfaction. With extensive experience in the roofing industry, our skilled team is equipped to handle projects of all sizes, from minor repairs to large-scale installations. We believe no job is too big or too small for us, and we take every project seriously, ensuring high-quality results every time. Our motto, "One call does all," reflects our dedication to providing comprehensive solutions for all your roofing needs. Contact us today to experience the Eagle Express difference!
Alb Best Way Construction
(516) 244-0547 roofingalbbestway.com
253-17 Northern Blvd, Flushing, New York
5.0 from 75 reviews
ALB BEST WAY HOME IMPROVEMENT is fully licensed, insured, and bonded home improvement and roofing contractor. Specializing in roofing, chimneys, gutters repair, gutters install, gutter cleaning, siding, steps, masonry, skylight, sheetrock and more.

Two Brothers Roofing
35-12 153rd St, Flushing, New York
5.0 from 34 reviews
Servicing North Queens
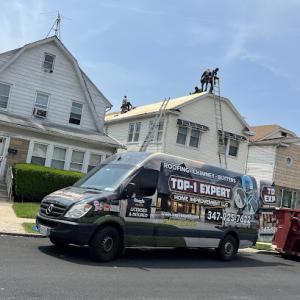
TOP 1 Expert Home Improvement
(347) 925-7622 www.top1expert.com
Serving
5.0 from 348 reviews
With decades of experience in delivering top-quality roofing services, TOP 1 Expert Home Improvement is a family-owned and operated business proudly serving the greater New York and metropolitan area. Our skilled team is committed to offering the highest level of service and craftsmanship in the region.
Lucky Stars Roofing
(646) 767-6531 www.callluckystars.com
Serving
4.9 from 56 reviews
"Excellence is written in the stars! For over 30 years, Bonardi Construction has been servicing Queens, NY, and the surrounding areas with reliable masonry, asphalt and more. Now, we have this incredible new division to dedicate completely to roofing! Lucky Stars Roofing offers the same longstanding quality, craftsmanship and top-level service. From replacement and repair to installation, you can count on us to leave you starstruck. Our services include: ● Roof replacement & repair ● Waterproofing & leak repair ● Shingle replacement ● Storm-damage repair ● Gutter cleaning, repair & installation ● Skylight repair & sealing ● And more!"
Horse GC
Serving
4.7 from 60 reviews
Horse GC General Construction is fully licensed, insured, and bonded contractor. We’re passionate about delivering exceptional construction work. When you hire us, you’re hiring a team of professionals who are trained and skilled to deliver lasting value to your home.

Paragon Chimney & Roofing of Queens
(347) 544-9554 paragonchimneyandroofing.com
Serving
5.0 from 482 reviews
Paragon Chimney & Roofing is dedicated to providing top-quality chimney and roofing services. Our team ensures safety, reliability, and customer satisfaction. Serving New York, we pride ourselves on expert craftsmanship and prompt service. Trust Paragon for all your chimney and roofing needs.
Neat Services
(718) 880-4080 www.neatservicescorp.com
Serving
5.0 from 143 reviews
Neat Services is a licensed roofing and siding contractor in Queens, NY, serving Maspeth, Jackson Heights, Astoria, Forest Hills, and Brooklyn. We specialize in roof replacement, roof repair, siding installation, and window replacement with premium materials (GAF, CertainTeed) and a 25-year workmanship warranty. Bilingual team (English/Español), Directorii-backed, BBB A+, and 143+ five-star Google reviews. Need a roofing contractor near me or siding contractor near me? Call Neat for fast estimates, clear communication, and clean, professional work done right.
Thomas James Roofing & Waterproofing
(718) 416-5255 www.thomasjamesroofing.com
Serving
4.9 from 52 reviews
Since 1999, Thomas James Roofing and Waterproofing has been a trusted name in roofing, siding, and waterproofing. With a dedicated team of experienced professionals, they are committed to delivering high-quality, long-lasting results. Specializing in making each project as seamless and stress-free as possible, Thomas James Roofing and Waterproofing offers expert service with a focus on durability and customer satisfaction. Their skilled craftsmanship ensures that every home is treated with the care and attention it deserves, providing peace of mind and protection for years to come.

HK Builders: Best Roofing Company in Flushing
(718) 479-8888 hkbuilderscorp.com
Serving
4.8 from 119 reviews
HK Builders corporation is well known name in queens for their guaranteed work. We are a top rated in roofing & siding work. From the first nail to the final creative touches our crew will turn your home into a modern, unique, and comfortable place to live. We proudly offer roofing services and siding installation. Give us a call to Schedule appointment. we provide free estimate.
Power Roofing Queens NY
(929) 599-2001 powerroofingnyc.com
Serving
5.0 from 110 reviews
Power Roofing Queens NY is your licensed & insured, family-owned team for roof repair Queens, flat roof, TPO roof, shingle roof upgrades, and same-day emergency roof leak repair. From smart wood-siding installs to seamless rain gutters replacement, we combine top-grade GAF/CertainTeed materials with rapid turn-around and crystal-clear communication. Homeowners and property managers count on our free on-site roof estimates, clean work, and financing guidance to keep projects on budget. Every job is photo-documented, so you get workmanship that lasts through Nor’easters and NYC heat waves. Call today and protect your roof and property with Power that performs.
When a roof replacement is on the table, the permit path is handled by the New York City Department of Buildings rather than a suburban-style office. This means you're dealing with citywide filing and inspection procedures that are standard across Queens, not a stand-alone Flushing-specific permit process. The DOB approach can feel different from what you might be used to in nearby towns, because every step is documented and tracked in a central system. If your home sits tightly among neighbors, that centralized workflow matters: any change to the plan or an inspection hold can ripple across nearby roofs, not just your own stack of shingles.
A roof replacement in Queens typically requires a DOB permit, and for larger scopes or multi-part work, the contractor may need to file formal plans before any tar paper comes off. The plan review isn't something you can skip, even for a routine re-shingle on a rowhouse. Expect the process to involve a drawing set, details on flashing, ventilation, drainage, and load considerations for the existing structure. For homeowners, that means clear communication with the contractor about what is being proposed and how it aligns with current DOB requirements. If your project involves alterations to drainage paths, parapets, or roof-to-wall connections, double-check the plan scope with the permit filer before submission to avoid rework.
Scheduling in Flushing can be affected by the DOB workload. Permit approval and final sign-off don't arrive instantly at the counter. Instead, expect a window that can stretch from several days to a few weeks, depending on how busy the agency is and how thoroughly the submission is prepared. That timing isn't just a bureaucratic nuisance-it can influence project sequencing, especially when weather windows, scaffold access, and coordinated inspections with adjacent properties come into play. If your roof is partially compromised or you're coordinating with other trades, plan for contingencies that acknowledge these inevitable city-led delays.
Once work starts, inspections are the gatekeepers for completion. A typical sequence includes initial compliance checks, mid-project progress reviews if required, and a final sign-off after work is done. In densely built neighborhoods, proximity to shared walls and tight lot lines can prompt additional scrutiny around how the new roof interfaces with neighboring structures and with proper water drainage. If an inspection misses the mark, a retake will be scheduled, potentially delaying the finish date. Keep the contractor's calendar in sync with the DOB's inspection windows to minimize setbacks and ensure the new roof meets city standards.
Never assume the permit is just a formality. Skipping plan filing or attempting to cut corners on required details invites re-submittals and added wait time. Be prepared for potential adjustments to flashing, venting, or roof edge details once the plan is reviewed. In a rowhouse district, even small changes can trigger a domino effect for neighboring properties during the permit lifecycle. Clear, proactive communication with your contractor and a realistic timeline that accounts for city processing will reduce frustration when the clock is ticking on approvals and sign-offs.
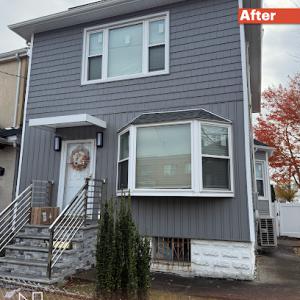
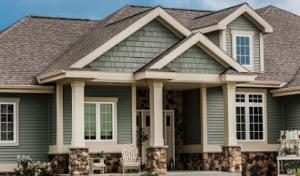
Asphalt shingles remain a practical fit for many Flushing detached homes, but low-slope sections common on Queens additions and porches may require a different roofing system than the main roof. In dense streetscapes, matching the appearance of the primary roof with the new or added section helps maintain curb appeal and avoids mismatched aging. For a two-story row or a tight property with a narrow parapet, a system that integrates flashing and edge details smoothly around the overlooked low-slope areas is essential. Think through how a single material type will handle both slope and porch areas, and plan for seamless transitions where the roof line changes.
Slate, clay tile, and concrete tile appear in the local material mix, but their weight and repair complexity matter more on older structures where framing capacity and access can complicate replacement. Slate and heavy clay or concrete tiles demand careful assessment of underlying framing and attic space. In many older houses, retrofit options or hybrid approaches-using lighter substrates or alternative materials for the upper portions-can prevent overloading the existing structure. When selecting a tile system, pay attention to the ability to crane or hand-carry materials in through tight alleys or shared access points, a common constraint in Flushing's closely spaced blocks. Also consider the long-term repair logistics, since matching color and texture on aging facades adds another layer of planning.
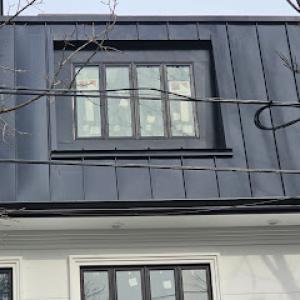
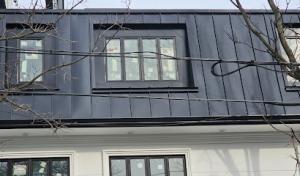
Metal roofing is relevant in Flushing for durability and snow-shedding, but detailing around chimneys, dormers, and neighboring structures is especially important in dense Queens streetscapes. Metal panels can offer excellent wind resistance and quick shedding after storms, but the real-world performance hinges on precise flashing around penetrations and transitions to flat or low-slope sections. In the close-quarters setting, flashing sleeves, J-channels, and sealant choices must be coordinated with neighboring homes to avoid leaks at shared edges. Ensure that ridge vents and exhaust terminations align with adjacent roofs to prevent wind-driven ingress during coastal nor'easters.
Low-slope additions and porch roofs are particularly prone to debris buildup and moisture intrusion if not properly vented and flashed. Choose materials with compatible sealants and underlayment options designed for high humidity and freeze-thaw cycles. Practical color and texture choices help minimize visible wear on older surface fabrics, while ensuring that replacement or repair parts remain available. In all cases, plan for access routes that keep equipment off neighboring roofs and sidewalks, avoiding disruption to the surrounding streetscape during installation and maintenance.
Costs in Flushing are pushed by Queens labor demand, city permit compliance, and the extra setup time required on narrow lots, shared driveways, and tightly spaced homes. When crews have to carry materials up a single-file stair or haul debris through a narrow side passage, the crew time climbs quickly. In practice, this means a higher per-square cost to accommodate careful staging, edge protection for adjacent units, and the need to protect driveways and sidewalks from damage. Expect prices to push toward the upper end of the standard ranges when the roof sits over a crowded building line or shares an alley with neighboring properties.
Access constraints in Flushing can raise labor and debris-handling costs because crews often have less room for staging, tear-off protection, and material loading than in lower-density suburbs. Narrow frontages and multi-family rowhouse configurations force crews to improvise, using compact ladders, portable debris chutes, and careful dumpster placement to avoid blocking street traffic. This setup not only slows progress but also increases the risk of incidental collateral damage if debris is being moved through tight corridors. Budget for extra manpower hours or a contingency to cover these access-related considerations.
Mixed roof geometry common in the neighborhood-such as a pitched main roof plus low-slope rear sections, chimneys, skylights, or dormers-can move a project toward the upper end of the provided per-square ranges. When a roof combines multiple surfaces, each with different fall requirements or waterproofing details, the labor and materials multiply. A likely scenario is a standard pitched area needing the underlayment updated and a separate low-slope section requiring a different membrane system. Dormers and chimney transitions demand additional flashing runs and careful detail work, which compounds both material and labor costs. If the roof includes one or more skylights, plan for flashings and possible window-to-roof sealing upgrades as well.
Material choice directly influences cost volatility in this market. Asphalt shingles remain the most economical, but metal roofing, clay or concrete tiles, and slate introduce material and installation premiums that are amplified by local constraints. For example, heavy tiles demand structural checks and possibly reinforcement, while metal or clay systems may require specialty labor adept at working within tight constraints. Weigh the long-term durability and maintenance expectations against initial price, especially in a climate with freeze-thaw cycles and strong seasonal winds.
Get a clear picture of your project costs upfront - no commitment required.
Skyward
(718) 878-6748 www.skywardroofing.com
161-03 Horace Harding Expy b1, Flushing, New York
5.0 from 82 reviews
Eagle Express Contractor
(347) 362-0008 eagleexpresscontractor.com
53-61 70th St, Flushing, New York
5.0 from 82 reviews
HK Builders: Best Roofing Company in Flushing
(718) 479-8888 hkbuilderscorp.com
Serving
4.8 from 119 reviews
In a neighborhood with dense housing and close lot lines, evidence matters more than you might expect. After a storm year, insurers commonly want clear documentation of roof condition, contractor licensing, and pre- and post-work photos. A well-organized set of images taken from multiple angles-including attic and interior ceilings for signs of leakage-can make a critical difference when an adjuster reviews a claim. Keep copies of every contractor license and insurance certificate, and store them with your storm folder so they're easy to pull if a claim gets complicated.
Because Queens homes are often tight to one another, wind-driven damage can extend beyond your own shingles. Loose materials, branches from neighboring trees, and shared drainage patterns can create collateral issues that complicate a claim. Photograph these conditions promptly: dammed gutters, damaged drip edges, displaced flashing, and any debris that could plausibly worsen moisture intrusion. Documenting how debris interacted with your roof helps distinguish actual storm loss from slow leaks or deferred maintenance, which insurers scrutinize closely.
Homeowners should keep inspection records and leak timelines organized, since underwriting may tighten after active storm seasons. Create a simple chronology: date of initial observations, weather events associated with leaks, interventions, and subsequent readings from professionals. If a roof replacement or major repair occurs, obtain a detailed work log and post-work photos that show completed work and any lingering concerns. This clarity can prevent later disputes about when damage began and who is responsible for addressing it.
New York insurers may scrutinize whether damage was a sudden storm loss versus deferred maintenance, especially after several severe weather years. Having a consistent, well-documented file helps demonstrate that the roof condition was actively monitored and that timely mitigation steps were taken. In the aftermath of a storm, photos, dates, and licensed contractor citations become tangible proof that supports a fair claim and smoother processing.
Connect with contractors who help homeowners navigate the claims process from damage assessment to final approval.
Skyward
(718) 878-6748 www.skywardroofing.com
161-03 Horace Harding Expy b1, Flushing, New York
5.0 from 82 reviews
HK Builders: Best Roofing Company in Flushing
(718) 479-8888 hkbuilderscorp.com
Serving
4.8 from 119 reviews
Chimneys remain a common feature on many Queens homes, and in this neighborhood they're not just a cosmetic detail-they create real flashing and cricket trouble spots. Start by inspecting the area where the chimney meets the roof deck: look for cracked mortar, lifted shingles, and any gaps where water could seep behind the flashing. A properly flashed chimney should shed water away from the chimney base, with a cricket or saddle installed to divert runoff over the sides. In winter, freeze-thaw cycles can push flashing loose, so check for hairline cracks after heavy storms or rapid temperature shifts. If you notice damp spots on ceilings or walls near a chimney, don't wait for a full replacement; address the flashing and cricket first to prevent progression.
Skylights are a local specialty, and failures often trace to curb details that no longer accommodate shifting masonry and repeated freeze-thaw movement. Start by confirming the curb flashing sits flat against the roof deck and that sealant joints have not dried out or cracked. Modern skylights benefit from continuous flashing that bridges the curb to the roof surface, plus a properly pitched top seal to shed heavy rains. If water marks appear around the skylight frame, inspect the perimeter for wind-driven gaps or deteriorated gasket material. In congested roof zones, ensure the skylight's flashing integrates with nearby shingles or tiles and that ice-damming risks are minimized with thoughtful placement and proper insulation beneath the curb.
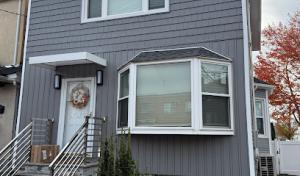
On attached or closely spaced homes, roof edges and sidewall transitions deserve extra attention because runoff, splashback, and maintenance access are tighter than on isolated lots. Inspect eave lines for lifted fascia boards, loose drip edges, and failing underlayment at rake or sidewalls. Ensure gutter systems are clear and that splash zones at transitions direct water away from siding and foundations. When replacing edge materials, choose components that interlock securely with the existing roofing system to prevent wind-driven uplift and to keep lateral movement from compromising seals during storms.
Find contractors experienced in skylight installation, flashing, and leak repairs to bring natural light into your home.
Alb Best Way Construction
(516) 244-0547 roofingalbbestway.com
253-17 Northern Blvd, Flushing, New York
5.0 from 75 reviews

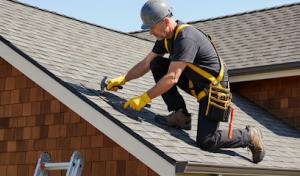
In Flushing, quick response and cleanup matter because dense residential blocks leave little tolerance for prolonged tear-off debris, blocked access, or exposed underlayment. The contractor you pick should demonstrate reliable on-site coordination, fast mobilization, and a plan for keeping sidewalks and driveways clear during work.
Choose a team with proven Queens replacement experience, not just marketing focused on new construction. Local crews understand common attachment methods for tight rowhouse lines, shared parapets, and limited staging space. Look for projects on adjacent blocks, and ask for neighborhood references who can speak to finish quality and long-term performance.
Plan for a realistic schedule that respects narrow lots and pedestrian traffic. Expect a clear sequence: protective street-facing barriers, careful material handling, efficient tear-off, and orderly waste containment. A well-organized crew minimizes time with ladders and dumpsters occupying a curb, reducing the chance of street complaints or access issues.
Because NYC permit compliance is part of the job in Flushing, homeowners should ask who handles DOB filings, inspections, and final sign-off rather than treating paperwork as an afterthought. The right contractor documents the project from start to finish, coordinates with inspectors, and ensures a clean, passable underlayment and flashing at transitions around attics, gutters, and parapets.
Look for transparent communication about weather plans, staging areas, and daily progress updates. Local neighbors will appreciate punctual arrivals, tidy job sites, and a practical plan for protecting landscaping, driveways, and entryways. A trusted contractor offers clear escalation steps if issues arise, and keeps you informed without delaying the project.
Finally, verify solid warranties backed by a locally active company. A contractor with a reputation for durable repairs and responsive post-install service can save time and stress when rough winter cycles or wind-driven storms test the new roof.