Last updated: Apr 19, 2026
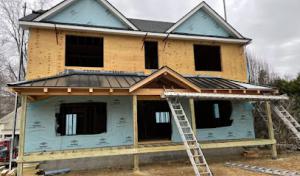
When a storm pushes through Queens with wind-driven rain and hail, the risk to Bayside roofs rises quickly. Damage can appear subtle at first-loose granules, a lifted shingle edge, or a dented flashing-yet those cues often precede a larger failure. The moment you can safely access the attic and exterior roof edges after a storm, conduct a quick walk-around to note any protruding gaps, exposed underlayment, or staining on interior ceilings. Photograph from multiple angles with a clear date stamp, then set aside the evidence in a dedicated storm file. If interior leaks appear, address them promptly with temporary, non-invasive measures to limit water intrusion, and document the mitigation steps you take. This is not a time to rely on memory; precise, dated records make a tangible difference when dealing with an insurer and an adjuster who will review what happened and when.
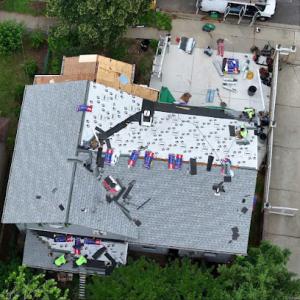
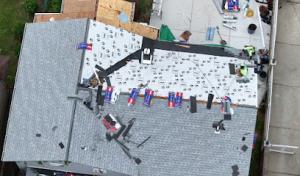
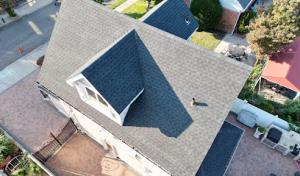
Fall Nor'easters are a meaningful local risk, bringing wind-driven rain and debris that can damage shingles, flashings, and roof edges on Bayside homes. These events create a pattern: roof surface issues emerge at the upper corners, around chimneys and exhaust vents, and along eaves where wind drives rain under the edge. In the weeks following a Nor'easter, you may notice accelerated granule loss, curling shingles, or darker roof patches from moisture intrusion. Because Bayside roofs sit in a windy arc of the harbor-facing exposure, the type and severity of damage can vary dramatically from one home to the next, even within the same block. Treat every gust as a potential trigger for a claim if you observe new leaks, ripples in the roof deck, or peeling metal flashings. The more precise your documentation, the clearer the path becomes for an adjuster to evaluate what needs replacement rather than a patchwork fix.
Claim-driven roof work in Bayside often involves a back-and-forth cadence between the homeowner, the insurer, and a contractor, with the weather window driving urgency. The reality is that even in a storm-driven scenario, you may face scheduling delays as the adjuster documents damage, validates coverage, and coordinates with potential technicians. It's essential to set expectations early: understand that a full replacement decision hinges on documented damage, coverage interpretation, and the availability of skilled labor capable of meeting the project's scope. To avoid gaps between damage acknowledgment and work initiation, provide the insurer with your storm file immediately-photos, dated notes, and any independent estimates you've obtained. If temporary mitigation is advised, follow through promptly and keep receipts. Communicate clearly about any access limitations on your property, neighbor coordination for debris management, and preferred timelines for inspections so there is less back-and-forth once the claim moves into the scheduling phase.
A thorough, Bayside-specific documentation package can shorten cycle times and reduce back-and-forth. Start with a dated log of storm events, including wind speeds if available, then pair it with high-quality, time-stamped photographs of the roof from ground level and from the ladder if it's safe to use. Capture flashing details around chimneys, skylights, and vent stacks, plus any signs of water intrusion in the attic or ceiling lines inside the home. Compile a simple inventory of existing roof components visible from the exterior: shingle type, color, granule condition, and any visible edge damage. Gather prior maintenance records and any previous claim notes that relate to the roof. When you receive an estimate from a contractor, document the scope of work with itemized tasks and materials. Having this organized dossier makes it easier to address questions from the adjuster and supports a smoother translation of observed damage into a replacement plan tailored to Bayside's wind and weather realities.
In Bayside, a leak can flare up quickly when neighboring structures, finished upper floors, and shared side-yard access constrain emergency work. Acknowledge that quick tarping and interior protection are not optional but essential to minimize water intrusion into ceilings, walls, and personal belongings. If water is actively entering, place a sturdy tarp over the affected roof area as soon as it's safe to do so, prioritizing the leak's origin even if it means temporarily shielding interior spaces with plastic sheeting and drop cloths. Move valuable items away from the leak path and cover floors or carpets to reduce secondary damage. If gutters or downspouts are overflowing, clear obvious blockages from ground level only, and avoid climbing on a wet, slippery roof by yourself. Call for a rapid response crew who can deploy tarps and containment within hours, not days, and ensure they bring a portable generator, fans, and dehumidifiers for rapid interior drying.
The local contractor market strongly emphasizes quick response and cleanup, reflecting homeowner demand for immediate tarping and interior protection after storms. Expect crews to prioritize ingress routes that minimize damage to neighboring units and finished spaces. Clear a safe path for access to the roof and attic-this often means coordinating with neighbors to share side-yard access or secure parking for equipment. Acknowledge that Bayside homes frequently feature stepped rooflines and multiple penetrations, which can complicate cleanup. Ask the contractor to stage materials away from foot traffic and clear walkways to avoid creating new hazards in a crowded street or shared drive. Request that protection be extended to interior trim, closets, and ceilings near the leak, and insist on thorough cleanup of any debris, dust, or shingle fragments that could pose slip hazards after a storm.
Chimney-related work is common among Queens roofing contractors, which matters in Bayside because leak tracing often involves step flashing and masonry intersections rather than field shingles alone. Expect the leak to travel along flashing joints, masonry joints, and vent penetrations before showing up at the interior surface. A methodical approach favors tracing the path along known problem areas: chimney-to-roof transitions, dormers, skylights, and the intersections where roof deck meets masonry. Proactively request infrared or moisture meters to pinpoint hidden intrusions behind walls and ceilings. Document all observed joints, flashing conditions, and masonry gaps with notes and photos to support fast insurance responses and a focused repair plan. When a leak is traced to a chimney or step-flashing area, insist on a temporary seal that preserves interior comfort while permanent flashing repairs are scheduled.
Effective documentation accelerates the repair process and reduces back-and-forth with insurers. Take timestamped photos of the exterior roof, attic, and interior damage from multiple angles, noting weather conditions and any temporary protections installed. Record dates of storm events and all containment efforts, including tarp placement and interior drying progress. Collect contact information for the responding crew and any sub-contractors who will handle flashing, masonry sealant, or chimney work. When insurance discussions begin, align the narrative with the observed leakage path and the urgency of immediate containment. The goal is a clear, concise file that demonstrates rapid response, thorough containment, and a professional plan for the leak's permanent remediation, including flashing repairs at masonry intersections and chimney-related details.
Power Roofing Queens NY
(929) 599-2001 powerroofingnyc.com
214-26 41st Ave, Bayside, New York
5.0 from 110 reviews
Power Roofing Queens NY is your licensed & insured, family-owned team for roof repair Queens, flat roof, TPO roof, shingle roof upgrades, and same-day emergency roof leak repair. From smart wood-siding installs to seamless rain gutters replacement, we combine top-grade GAF/CertainTeed materials with rapid turn-around and crystal-clear communication. Homeowners and property managers count on our free on-site roof estimates, clean work, and financing guidance to keep projects on budget. Every job is photo-documented, so you get workmanship that lasts through Nor’easters and NYC heat waves. Call today and protect your roof and property with Power that performs.

Alb Best Way Construction
(516) 244-0547 roofingalbbestway.com
Serving
5.0 from 75 reviews
ALB BEST WAY HOME IMPROVEMENT is fully licensed, insured, and bonded home improvement and roofing contractor. Specializing in roofing, chimneys, gutters repair, gutters install, gutter cleaning, siding, steps, masonry, skylight, sheetrock and more.
Lucky Stars Roofing
(646) 767-6531 www.callluckystars.com
Serving
4.9 from 56 reviews
"Excellence is written in the stars! For over 30 years, Bonardi Construction has been servicing Queens, NY, and the surrounding areas with reliable masonry, asphalt and more. Now, we have this incredible new division to dedicate completely to roofing! Lucky Stars Roofing offers the same longstanding quality, craftsmanship and top-level service. From replacement and repair to installation, you can count on us to leave you starstruck. Our services include: ● Roof replacement & repair ● Waterproofing & leak repair ● Shingle replacement ● Storm-damage repair ● Gutter cleaning, repair & installation ● Skylight repair & sealing ● And more!"
Horse GC
Serving
4.7 from 60 reviews
Horse GC General Construction is fully licensed, insured, and bonded contractor. We’re passionate about delivering exceptional construction work. When you hire us, you’re hiring a team of professionals who are trained and skilled to deliver lasting value to your home.
Supreme Island Roof Repair
(631) 973-6194 supremeislandcorp.com
Serving
4.9 from 36 reviews
With over 25 years of experience serving all of Long Island, we are your local experts when it comes to Roof Repair & Replacement or Installation. Roofing is not our only service we offer to our customers you can count on us for Chimneys, Siding, Gutters and Masonry services too. Get started with your totally Free Estimate by either calling us now or by visiting our website.

Foley & Sons Roofing
(332) 895-1121 foleyroofnewyork.com
Serving
5.0 from 52 reviews
Foley & Sons Roofing has built a reputation for dependable work and genuine care for every home and business we serve. Our family-run team understands how important a solid roof is to your peace of mind, which is why we pay close attention to every detail, from the first inspection to the final cleanup. We handle everything from small repairs to full replacements, always explaining your options and making sure you feel comfortable with each decision. When you choose Foley & Sons Roofing, you get friendly service, skilled workmanship, and a team that treats your property like their own.

HK Builders: Best Roofing Company in Flushing
(718) 479-8888 hkbuilderscorp.com
Serving
4.8 from 119 reviews
HK Builders corporation is well known name in queens for their guaranteed work. We are a top rated in roofing & siding work. From the first nail to the final creative touches our crew will turn your home into a modern, unique, and comfortable place to live. We proudly offer roofing services and siding installation. Give us a call to Schedule appointment. we provide free estimate.
Skyward
(718) 878-6748 www.skywardroofing.com
Serving
5.0 from 82 reviews
Skyward Roofing - Queens is a professional and trusted roofing company catering to the roofing needs of commercial and residential clients. With vast experience, our team of skilled experts offers quality roofing services customized to meet the special needs of every client. From new installations and repairs to inspections and maintenance, we deliver excellent artistry using quality materials and modern techniques. Dedicated to client satisfaction, we ensure timely project completion, moderate pricing, and a commitment to surpassing client expectations. Reliable, trustworthy, and efficient, we are the most sought-after company for roofing needs. Call us or visit our site for more information.
TOOR CONSTRUCTION - Roofing Services in New York
Serving
4.9 from 87 reviews
We do all kind of construction work some of them include brick steps,Gutter installation,gutter repair,roof installation , roof repair,skylight installation/repair,water proofing,exterior painting,interior painting,stucco contractor, reconstruction, repairing of all kind,brick&block work,custom masonry,backyard,front yard,sidewalk,remove sidewalk violation,paving,parking lots,foundations, flooring,driveway,stone masonry,remodeling,kitchen & Bathroom.

Paragon Chimney & Roofing of Queens
(347) 544-9554 paragonchimneyandroofing.com
Serving
5.0 from 482 reviews
Paragon Chimney & Roofing is dedicated to providing top-quality chimney and roofing services. Our team ensures safety, reliability, and customer satisfaction. Serving New York, we pride ourselves on expert craftsmanship and prompt service. Trust Paragon for all your chimney and roofing needs.
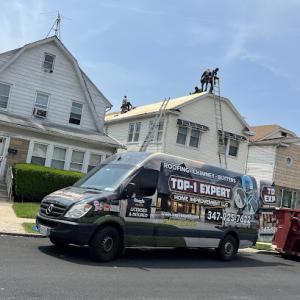
TOP 1 Expert Home Improvement
(347) 925-7622 www.top1expert.com
Serving
5.0 from 348 reviews
With decades of experience in delivering top-quality roofing services, TOP 1 Expert Home Improvement is a family-owned and operated business proudly serving the greater New York and metropolitan area. Our skilled team is committed to offering the highest level of service and craftsmanship in the region.
In this market, flat-roof specialization is highly prevalent among Queens contractors, and that means Bayside property owners should expect a strong focus on low-slope assemblies, drainage detail, and reliable membrane choices. You'll see a mix of built-up roofs, modified bitumen, and single-pply systems common in nearby multifamily buildings and attached homes. The practical takeaway: choose a membrane with good UV resistance, robust seam detailing, and compatibility with the existing insulation and deck structure.
Freeze-thaw cycles in New York City are especially hard on low-slope roof flashings and drainage details. Trapped moisture can creep into edge seams, penetrations, and parapet flashings, then expand during freezing temperatures. Regular winter-time checks matter more here: inspect around penetrations, drains, and curbs after storms, and pay particular attention to any downspout extensions or scuppers that may be blocked by leaves or debris. In Bayside, a frequent moisture cycle means that even small drips or damp spots can worsen fast if left unchecked.
Drainage is the backbone of a durable low-slope roof. Flat roofs rely on gravity to channel water to drains and scuppers, so confirm that the slope remains adequate and that nothing is restricting flow. Look for ripple or ponding near the center or along parapets after a rain. Footing and counterflashing around vents, curbs, and HVAC units should be watertight with integral flashing and compatible sealants. For the best long-term performance, keep a maintenance schedule that includes seasonal cleaning of gutters and confirming that all drainage paths are clear before winter storms.
Coatings, coatings, coatings. Local roofs show a notable mix of coating systems as an option for restoration and maintenance. If a full tear-off isn't immediately necessary, a high-quality reflective or elastomeric coating can extend service life, reduce heat buildup, and slow moisture intrusion. When considering coatings, ensure compatibility with the underlying membrane and confirm that the substrate is dry, clean, and structurally sound before application. Proper surface prep, temperature control during application, and a reliable coating schedule are essential to achieve lasting results.
Seasonal inspections are the practical habit. After storms and wind events, walk the roof edge-to-center to spot signs of edge flashing deformation, lifted detailing, or seam failure. Pay attention to any unusual moisture marks on interior ceilings that align with roofline penetrations. If a leak is suspected, document with photos, note the exact location, and track the timeline of weather events-this helps when coordinating with a contractor and, if needed, with insurers. In this climate, proactive maintenance and targeted repairs keep low-slope assemblies functioning well between larger roof-refresh cycles.
Find specialists in TPO, EPDM, and built-up flat roofing systems for residential and commercial properties.
Power Roofing Queens NY
(929) 599-2001 powerroofingnyc.com
214-26 41st Ave, Bayside, New York
5.0 from 110 reviews

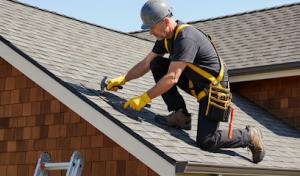
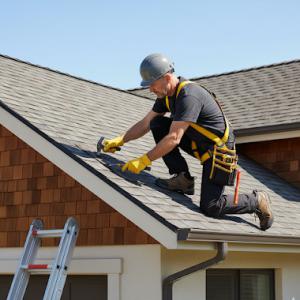
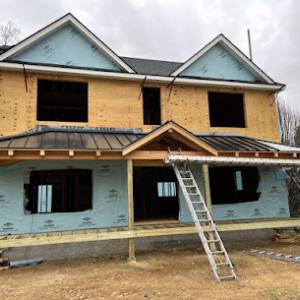
Asphalt shingles remain the dominant practical choice in Bayside, especially for detached homes and many semi-attached configurations. The material's durability for typical NY summers is well understood, but the harsh summer heat can accelerate aging on sun-exposed roof planes. In practice, this means you may notice faster granule loss, color fading, and a higher likelihood of early wear on slopes that face full sun from late morning through late afternoon. When selecting a shingle profile, consider lighter colors to reflect heat and help slow aging on those exposed planes. A confirmable maintenance habit is to keep an eye on loose granules after intense heat waves and to schedule professional inspections after major storms, since heat-related stress can coincide with wind-driven damage.
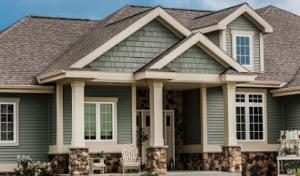
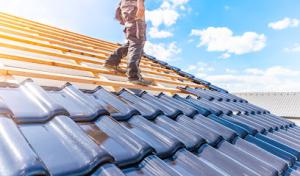
Tile, slate, and fiber cement appear in Bayside's local mix and matter because older Queens homes often feature stylistic emphasis and heavier rooflines. If a replacement is needed on a house with a traditional, architectural profile or a higher-end build, you'll encounter requests to preserve that heavier look. Clay and concrete tiles deliver strong wind resistance and classic curb appeal, but their weight requires structural verification and sometimes reinforcement. Slate offers a premium, long-lived option with a distinguished silhouette, yet it comes with careful installation requirements and potential weight considerations for existing framing. Fiber cement shingles provide a middle ground: they mimic wood or slate aesthetics while staying comparatively lighter and more forgiving to install on a wider range of structures. For homes designed to showcase a more pronounced roofline, choosing a roofing material that harmonizes with the original architectural intent is a practical way to maintain character without sacrificing performance.
Metal roofs are available in the market but are less prevalent than asphalt and flat-roof work, which translates into more selective installer availability and specialized detailing in Bayside. If considering metal, you may encounter longer lead times and a need to verify that an installer has experience with the specific detailing your home requires-especially on two-story, ridge-heavy, or complex eave configurations common to local Victorian-inspired or brick-and-brownstone styles. Metal can offer excellent wind performance and lighter weight, but the success of the installation hinges on precise panel alignment, flashing, and edge detailing to handle Queens wind patterns and occasional storm debris. For residences undergoing a significant structural assessment, ensure the chosen system is compatible with existing fascia, gutters, and ventilation strategy to maintain efficient roof function through the hot months and wet seasons.
For full roof replacements, a building permit is generally required and the work is handled through the New York City Department of Buildings rather than a separate village or town building office. This means the project will follow NYC permitting rules, inspection sequencing, and filing timelines, even though the house sits in a tight Queens street with shared driveways and windy exposures. The permit process anchors the project from day one, so discussing scope, materials, and worksite logistics with your contractor should align with DOB expectations before any shingle tear-off or tile removal begins.
Scheduled inspections occur during and after the roofing project, so contractors commonly coordinate filings, inspection readiness, and lockbox access for DOB visits. Your contractor should provide a clear timeline that marks when the initial inspection is expected, when penetrations and ventilation work are completed, and when final approvals are anticipated. In practice, you will likely see a sequence: an on-site pre-inspection review, mid-project checks for ventilation and edge details, and a final inspection once the roof is complete and all penetrations are sealed. If access is restricted by a busy street or a parked vehicle, arrange a temporary access plan with the contractor and the inspector to avoid delays.
Because it is a Queens location, homeowners should expect city-level paperwork and inspection sequencing to be part of the project timeline, especially on insurance-driven replacements. Insurance carriers often require documentation of the DOB-compliant permit packet, inspection approvals, and documented material specifications before releasing funds or approving a claim. Have your contractor provide complete worksheets, permit numbers, and DOB inspection notes promptly to keep the claim moving. Keeping a neatly organized binder of permit approvals, inspection checklists, and dated photos helps you respond quickly to insurer requests and reduces back-and-forth during storm-damage repairs.
When you're budgeting a replacement, expect per-square costs that reflect Bayside's mix of homes and roof types. Asphalt shingles typically run from about 420 to 900 USD per square, metal from 700 to 1300, clay tile 1100 to 1900, concrete tile 900 to 1600, slate 1600 to 2900, and fiber cement shingles 750 to 1200. These ranges line up with the choices most homeowners here favor, influenced by the long winters, windy springs, and the way older neighborhoods frame roof lines.
Queens-style dense blocks mean crews must work around tight access, driveways that double as staging areas, and shared walkways in some blocks. Material delivery times can stretch during storm season, and subcontractor coordination becomes its own cost. A steep or multi-angle roof common in Bayside can push labor hours higher, even if the raw material price sits near the lower end of the range. Wind-driven damage often means more replacement components and faster job pacing to secure the structure before the next round of weather.
Storms shift demand quickly; after a wind or hail event, many homeowners pursue insurance-backed replacements. That spike can tighten crew availability and push timelines, particularly for full-length replacements or complex tile work. In practice, you'll see pricing and scheduling tighten in the weeks after news of a storm, then normalize as local crews redistribute to maintain steady workloads.
Plan for a staged approach if your attic or decking shows moisture concerns, rather than a single "big fix." Start with an assessment of decking, flashing, and leak spots, then price the full replacement once you've confirmed the extent of damage. This approach helps manage both quality and cost, given Bayside's typical stock and the local weather calendar.
Don't let upfront costs delay a critical repair - these contractors offer payment plans to fit your budget.
Power Roofing Queens NY
(929) 599-2001 powerroofingnyc.com
214-26 41st Ave, Bayside, New York
5.0 from 110 reviews
HK Builders: Best Roofing Company in Flushing
(718) 479-8888 hkbuilderscorp.com
Serving
4.8 from 119 reviews
Skylight work is a common specialty around the Queens market, and that means leak-prone skylight curbs and the surrounding flashing become recurring issues for homeowners here. Even when the main roof covering looks solid, a failed curb seal or improper flashing transitions can channel water inward at joints and corners. In practice, you'll want to inspect skylight fasteners, kerfs, and the return edge where the curb meets the deck. If you notice condensation under the glass or staining along the interior ceiling, treat it as a warning sign, not a one-off drip.
Chimney service is widespread among local roofers, which aligns with the need to inspect masonry intersections and counterflashing on older Queens homes. The brick or stonework often settles differently than the roof deck, creating gaps that loosen over time. Pay attention to any loose mortar, cracked bricks, or rusty flanges where the roof and chimney meet. Counterflashing tucked into the masonry must remain able to shed water downward; if you see dark streaks, efflorescence, or soft spots at the wall, treat it as a priority repair rather than a cosmetic fix.
Winter freeze-thaw cycles in New York City can open up vulnerable flashing points around penetrations even when the main roof covering still appears serviceable. Small cracks around vents, plumbing stacks, and skylight edges can widen with repeated freezes. In Bayside, those micro-cracks become conduits for moisture during thaws, so a cautious eye on seasonal changes is warranted. If you notice peeling paint near penetrations or sudden dampness after a freeze, plan a targeted inspection rather than delaying.
When you suspect flashing or penetration issues, start with a careful moisture map inside the attic: note damp spots, attic condensation, and any musty odors. Document with clear photos and dates for insurance documentation, then arrange a targeted exterior inspection of skylights, chimneys, and all flashing transitions. Prioritize securing vulnerable areas before heavy rain or winter storms return, and choose a contractor skilled in masonry interfaces and flashing detail to prevent leaks from sneaking back in.
Find contractors experienced in skylight installation, flashing, and leak repairs to bring natural light into your home.
Power Roofing Queens NY
(929) 599-2001 powerroofingnyc.com
214-26 41st Ave, Bayside, New York
5.0 from 110 reviews
The Queens insurance environment is active for wind and hail claims, so carriers often expect thorough photo sets, damage notes, and clear project timelines from Bayside homeowners. When you document, aim for a complete before-and-after sense of the roof's condition, including elevations and surrounding drainage. Clear, dated images reduce back-and-forth and help prevent delays caused by missing context. Be prepared to supply notes that connect observed damage to the most affected roof areas and any visible interior signs.
Material choice in Bayside can be influenced by claim scope because adjuster review, permit timing, and replacement approval may all affect what gets installed and when. Communicate realistic timelines tied to the claim status, expected inspection dates, and any weather windows that could impact staging. Understanding that the pace of decision-making can ripple into the project schedule helps prevent gaps where work stalls and leaks return.
Homeowners in Bayside should expect insurance decisions to interact directly with NYC permitting and inspection scheduling rather than treating them as separate steps. Know that an approval or hold on a line item can shift the order of work, the pace of material delivery, and the crew availability. Staying proactive on status updates with your insurer and contractor reduces the risk of misaligned expectations when weather or construction constraints come into play.
When storms threaten, gather a concise damage narrative that pairs observations with dates, locations, and any accompanying interior symptoms like damp ceilings or warped decking. Keep a running file of communications from the insurer, adjuster notes, and contractor contingencies. This organized bundle serves as a single reference point, making it easier to respond quickly if a claim requires revision or supplementary information.
Connect with contractors who help homeowners navigate the claims process from damage assessment to final approval.
Power Roofing Queens NY
(929) 599-2001 powerroofingnyc.com
214-26 41st Ave, Bayside, New York
5.0 from 110 reviews
When a storm hits or a leak starts dripping through, Bayside homeowners look for practical, focused repairs that get a roof back to reliable service fast. The market strongly signals demand for affordable re-roofing with cleanup included, so you'll notice bids that emphasize reliable tear-off, debris removal, and a solid warranty over boutique upgrades.
In this area, quick response is a standout contractor trait. Expect contractors to return calls promptly, schedule surveys within days, and begin work soon after you approve. Long-established, family-owned, licensed, and insured firms are visible in the neighborhood, offering a balance between trusted local presence and the heft of larger re-roofing operators.
Begin with local references and a visible portfolio of Bayside projects. Ask contractors to describe how they handle cleanup, waste containment, and leaf-and-gutter protection for adjacent properties. Look for transparent crew sizing, daily cleanup routines, and a clear plan for protecting landscaping and neighboring homes during a project.
Request a written, itemized scope that covers weatherproofing steps, shingle or tile transitions, flashing replacements, and interior protection. Ensure the proposal includes a clearly defined cleanup protocol and a timetable that minimizes exposure to wind-driven debris, which is a common concern in this market.
You'll find that the most reliable options maintain open lines of communication long after the sale. In contrast, fly-by-night outfits may promise low upfront costs but deliver delays or inaccessible follow-up. Favor firms with established local crews, accessible project managers, and straightforward update practices so you can track progress from debris removal to final inspection. Here in Bayside, practical execution and dependable follow-through outbid niche luxury positioning every time.