Last updated: Apr 19, 2026
Whitestone sits on the northeastern edge of Queens along the East River and Long Island Sound, leaving many homes more exposed to wind-driven rain than interior neighborhoods. The gusty coastal corridors push spray and spray-driven puffs of rain right up against roof edges, flashing, and chimney transitions. That constant exposure means small weaknesses can become leaks quickly after a windy storm or a rapid thaw. In this part of the city, the weather doesn't just test a roof for a minute-it tests it through multiple seasonal cycles, year after year.
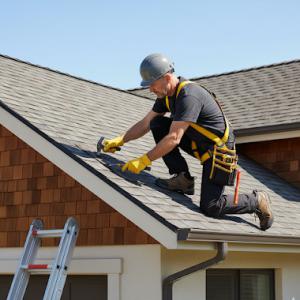
Neighborhood housing stock here includes many detached and semi-detached one- and two-family homes, with roof edges, flashing transitions, and chimney intersections as the most common leak points. These areas see the most movement in wind and temperature, and thus are where cracks open, seams separate, and nails loosen first. Flat or low-slope transitions, vent boots that have aged, and step flashing along dormers or chimneys can fail under salt-tinged winds and freeze-thaw cycles. If you've noticed wind-driven raindrops along eaves, damp spots at the attic hatch, or staining near a chimney, the issue is almost never isolated-these are signs of a larger, border-area exposure problem.
Winter freeze-thaw conditions in this part of New York City can reopen small flashing and shingle defects that first appear after windy coastal storms. Water lurks at the seam, then expands as it freezes, prying apart sealant and shingles just enough to let a trickle become a trickle with every gust. In Whitestone, that means a leakage pattern that may appear after a harsh wind event and then worsen during the freeze-thaw cycles, even without a fresh roof-tossing storm. The result is a delayed but steady decline in the roof's ability to shed water, especially at the roof-to-wall junctions, around chimneys, and over vent flashing.
Watch for damp patches on ceilings after windy days, sudden frost staining along cornices, and moisture around attic access hatches or wood-and-metal flashing. Birds and wind-blown debris can wedge into flashing, creating micro-gaps that widen with movement. A roof that looks solid from the street can still be failing at the flashing and edge details, where the wind does most of its work. Listen for hammering sounds or water-squish noises during rain; these are telltale indicators that water is finding its way through a compromised edge system.
You're balancing a coastal exposure with aging materials and common local configurations. A roof that performs well in sheltered neighborhoods can show its fatigue sooner here, especially at edges and transitions. The most resilient approach combines targeted edge protection, timely repairs of flashing and shingles, and a re-roof plan that aligns with the pace of local weather-before the next windy season reopens even minor defects. In Whitestone, staying ahead of wind-driven leaks is not a luxury; it's a maintenance imperative for preserving structural integrity and indoor comfort through the full rhythm of the year.
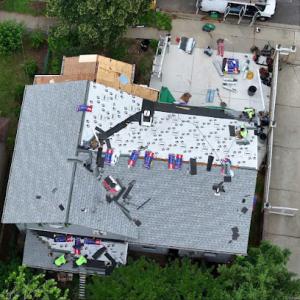
Whitestone's residential mix features pitched roofs on detached homes alongside low-slope sections over porches, extensions, and multifamily or mixed-use buildings. This variety means more boundary points where water can seed leaks: hips and valleys meeting a low-slope porch roof, transitions from shingle runs to membrane overhangs, and chimney footprints joining the roofline. The typical layout requires planning for both traditional shingles and flatter, more drainage-conscious details. The result is a neighborhood where every elevation tells a slightly different water management story, but the pattern is consistent: wind comes off the water and tests every seam, edge, and flash.
A notably active flat- and low-slope market shows up in Whitestone's housing stock, especially on porches and extensions. These areas collect wind-driven spray, splash back from street runoff, and freeze-thaw cycles that stress seams and flashing. If a low-slope roof exists over a porch or utility area, expect more frequent membrane inspections, edge detailing, and drip-edge alignment checks than on a strictly pitched main roof. Practical checks include verifying that the membrane laps are fully adhered, that termination bars are secure, and that any standing water routes toward a defined drainage path rather than pooling near transitions.
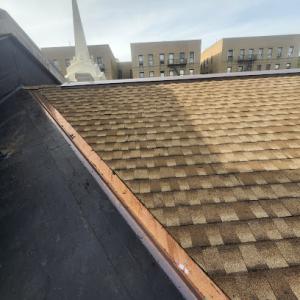
Chimneys are a common site for corroded flashing and compromised joints in this market. As aging masonry projects meet roof planes, flashing around brickwork can fail where bricks absorb moisture and shift over time. Look for cracked or missing mortar between chimney and roof deck, gaps along counter-flashing, and corrosion at metal boots. A proactive approach targets the sealant line between chimney headwall and the roof deck, ensuring counter-flashing overlaps are continuous and that step flashing steps are kept tight to prevent wind-driven air from pushing under shingles.
Pitched roofs predominate, but the edge conditions where shingles end against parapets, skylights, or dormers require careful detailing. In Whitestone, wind can drive moisture into the veneer at eaves and rake lines if underlayment and starter courses are not correctly aligned. When inspecting, confirm that the first row of shingles is secure and that the wind-borne edge is protected with proper drip caps and protective underlayment transitions. For homes with both shingle runs and low-slope portions, ensure that transitions use compatible materials that maintain a continuous water barrier without gaps.
Maintaining Whitestone roofs means treating wind-driven leaks as a routine concern, not an annual surprise. Schedule semiannual inspections that focus on chimney flashings, low-slope membrane edges, and the integrity of transitions between roof types. Keep an eye on widespread aging materials, and plan targeted repairs before small failures become widespread water intrusion through the attic or ceiling. In practice, this means documenting flashing conditions, testing drainage at every change in slope, and staying ahead of wear at vulnerable eave and rake zones.
Find specialists in TPO, EPDM, and built-up flat roofing systems for residential and commercial properties.
Skyward Roofing Contractor - Bronx
(718) 736-2553 www.skywardroofing.com
Serving
4.9 from 69 reviews
Lucky Stars Roofing
(646) 767-6531 www.callluckystars.com
150-51B 14th Ave, Whitestone, New York
4.9 from 56 reviews
"Excellence is written in the stars! For over 30 years, Bonardi Construction has been servicing Queens, NY, and the surrounding areas with reliable masonry, asphalt and more. Now, we have this incredible new division to dedicate completely to roofing! Lucky Stars Roofing offers the same longstanding quality, craftsmanship and top-level service. From replacement and repair to installation, you can count on us to leave you starstruck. Our services include: ● Roof replacement & repair ● Waterproofing & leak repair ● Shingle replacement ● Storm-damage repair ● Gutter cleaning, repair & installation ● Skylight repair & sealing ● And more!"
Horse GC
14-64 Clintonville St, Whitestone, New York
4.7 from 60 reviews
Horse GC General Construction is fully licensed, insured, and bonded contractor. We’re passionate about delivering exceptional construction work. When you hire us, you’re hiring a team of professionals who are trained and skilled to deliver lasting value to your home.
TOOR CONSTRUCTION - Roofing Services in New York
Serving
4.9 from 87 reviews
We do all kind of construction work some of them include brick steps,Gutter installation,gutter repair,roof installation , roof repair,skylight installation/repair,water proofing,exterior painting,interior painting,stucco contractor, reconstruction, repairing of all kind,brick&block work,custom masonry,backyard,front yard,sidewalk,remove sidewalk violation,paving,parking lots,foundations, flooring,driveway,stone masonry,remodeling,kitchen & Bathroom.
TOP 1 Expert Home Improvement
(347) 925-7622 www.top1expert.com
Serving
5.0 from 348 reviews
With decades of experience in delivering top-quality roofing services, TOP 1 Expert Home Improvement is a family-owned and operated business proudly serving the greater New York and metropolitan area. Our skilled team is committed to offering the highest level of service and craftsmanship in the region.
Power Roofing Queens NY
(929) 599-2001 powerroofingnyc.com
Serving
5.0 from 110 reviews
Power Roofing Queens NY is your licensed & insured, family-owned team for roof repair Queens, flat roof, TPO roof, shingle roof upgrades, and same-day emergency roof leak repair. From smart wood-siding installs to seamless rain gutters replacement, we combine top-grade GAF/CertainTeed materials with rapid turn-around and crystal-clear communication. Homeowners and property managers count on our free on-site roof estimates, clean work, and financing guidance to keep projects on budget. Every job is photo-documented, so you get workmanship that lasts through Nor’easters and NYC heat waves. Call today and protect your roof and property with Power that performs.
Skyward Roofing Contractor - Bronx
(718) 736-2553 www.skywardroofing.com
Serving
4.9 from 69 reviews
Skyward Roofing Contractor is a premier roofing company that has been providing outstanding services to customers for years. Our skilled roofers are devoted to providing high-quality solutions for all types of roofing needs. From installation to maintenance, we're capable of handling it all effectively and efficiently. We specialize in various roofing materials, including shingle, metal, tile, and flat roofs, ensuring that we can meet the needs of each of our customers. We are committed to using only the best materials in order to guarantee the longevity and durability of your roof. At Skyward Roofing Contractor, we pride ourselves on our professionalism, reliability, and exceptional workmanship.
Crystal Real Construction
(718) 427-6067 www.cr-constructions.com
Serving
5.0 from 43 reviews
Understand why our trusted general contractor in Bronx, NY, is highly rated. At Crystal Real Construction, we can meet all your needs. Our expertise also covers concrete brick installation and gutter installation near you. We excel in home remodeling, providing top services for any project. Our waterproofing services, roof siding, and tile roofing services ensure your home is protected and looks great. As a leading roofing contractor in Bronx, NY, we offer trusted services including roof maintenance services, new roof installation near you, and roof leak repair services. For reliable roofing and remodeling services in your area, trust Crystal Real Construction Contact us today to experience top service.
Ak Gatsios
(646) 302-5175 akgatsiosinc.com
Serving
5.0 from 316 reviews
At A K GATSIOS INC, we bring dreams to life by shaping the built environment one project at a time. We are a construction company dedicated to transforming ideas into structures, with a strong commitment to excellence, creativity, and the highest standards. With a focus on quality craftsmanship and attention to detail, we deliver exceptional results that leave a lasting impact.

HK Builders: Best Roofing Company in Flushing
(718) 479-8888 hkbuilderscorp.com
Serving
4.8 from 119 reviews
HK Builders corporation is well known name in queens for their guaranteed work. We are a top rated in roofing & siding work. From the first nail to the final creative touches our crew will turn your home into a modern, unique, and comfortable place to live. We proudly offer roofing services and siding installation. Give us a call to Schedule appointment. we provide free estimate.
Alb Best Way Construction
(516) 244-0547 roofingalbbestway.com
Serving
5.0 from 75 reviews
ALB BEST WAY HOME IMPROVEMENT is fully licensed, insured, and bonded home improvement and roofing contractor. Specializing in roofing, chimneys, gutters repair, gutters install, gutter cleaning, siding, steps, masonry, skylight, sheetrock and more.

Greystone Construction Group
Serving
4.8 from 37 reviews
"Your Premier NYC Roofing, Masonry & Paving Specialists! At Greystone Construction Group, we're dedicated to exceeding your expectations. Our team of experts delivers top-quality roofing solutions, impeccable masonry craftsmanship, and long-lasting paving services. With years of industry experience, we've honed our skills to perfection. Serving the entire NYC area, we take pride in our meticulous attention to detail, unwavering reliability, and a steadfast commitment to customer satisfaction. From roofing repairs and installations to stunning masonry work and resilient paving solutions, we've got you covered. Trust us to enhance your property's beauty and functionality. Contact us today to discuss your project.
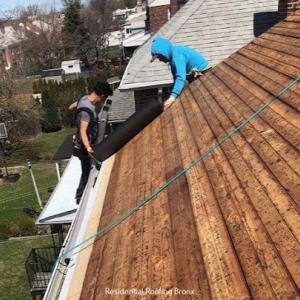
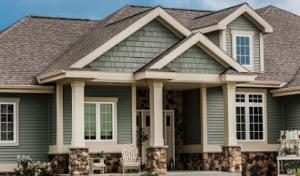
Asphalt shingles remain the most practical fit for the typical Whitestone home, especially the pitched roof types common in the neighborhood. The combination of existing housing stock and the availability of local crews that can handle standard inspections, repairs, and replacements makes asphalt a reliable, serviceable choice. When selecting this material, look for shingles with good granule adhesion and a wind-resistant nail pattern, since the coastal exposure increases the likelihood of wind-driven leaks along eaves and ridges. A robust underlayment and properly sealed edge zones matter just as much as the shingles themselves, given the windy conditions that frequently sweep off the East River.
Metal roofing can appeal on exposed sites because of its wind resistance and snow-shedding properties. In Whitestone, where gusty coastal winds are a regular consideration, metal can reduce lift risk and provide a durable shield against the freeze-thaw cycle. The key, however, is in detailing at the edges, penetrations, and transitions to walls or skylights. Coastal Queens homes often feature rough edges around flashing, vents, and chimneys; if these details aren't executed with precision, water can seek gaps and bypass the metal panel seams. Choose a profiles and coatings rated for coastal salt exposure, and insist on a carefully sealed fascia, drip edge, and airtight flashing around dormers and chimney bases. A qualified local metal roofer should be able to demonstrate a track record with Whitestone homes and show you a maintenance plan for seam care and snow shedding.
Tile options-clay or concrete-along with wood shingles or shakes, do surface well on certain Whitestone homes but remain less dominant locally. These materials often require specialized installation techniques and longer-term maintenance beyond what the average Queens contractor handles routinely. If considering tile or wood, verify installer experience with similar coastal projects, request portfolio images of nearby installations, and ask about long-term edge detailing and wind-rated fastener systems. Synthetic or composite shingles can mimic the look of tile or wood while staying lighter and easier to maintain, yet their performance in wind-driven gusts depends heavily on the installation method and the compatibility of underlayment and flashing. For any of these alternatives, insist on a detailed inspection plan that includes wind uplift considerations and a precise fascia-to-soffit integration.
Along Whitestone's exposed corridors, edge detailing and fastener longevity dominate long-term performance. The combination of salt-spray exposure, freeze-thaw cycles, and wind-driven rain means that flashing, drip edges, and corner trims require periodic checks. Premature failure tends to show up first at rake edges, chimney abutments, and vent penetrations. Maintain a proactive approach: schedule regular inspections after major storms, follow up promptly on any signs of lifted shingles or dark staining along ridges, and choose contractors who prioritize weatherproof edge sealing as part of their standard procedure. In this neighborhood, a roof is only as strong as the last well-sealed seam, so emphasize edge integrity in both material choice and installation detail.
Whitestone homeowners fall under New York City jurisdiction, so full re-roof projects are filed through the NYC Department of Buildings rather than a standalone suburban town building office. That distinction changes the timeline and the sequence of steps you'll experience, especially when wind exposure and freeze-thaw cycles pressure a roof's integrity. In this setting, a completed project isn't just about shingles or tiles; it's about meeting city expectations for safe, wind-resistant coverage, and doing so with proper documentation that survives inspections after the job is done.
Queens roofing work typically requires plan review for full replacements, which can affect scheduling compared with simple repair jobs. Your contractor should anticipate submittal times, structural considerations, and any design adjustments that the DOB requires to account for storm wind zones and the exposed coast. Plan reviews tend to surface questions about venting, underlayment, and flashing details that are critical in this area's gusty conditions. If a project hinges on multiple roof faces or pitches, the review may extend the timeline, so align expectations early with your contractor and the plans they submit.
Inspections occur during and after the work to confirm compliance with permit conditions and city code, making paperwork and closeout more important than in many nearby non-NYC jurisdictions. You should prepare for at least a couple of inspection milestones: a mid-project check-in and a final sign-off. Delays often stem from mismatched details between what was drawn in the plan and what is installed on the roof, or from missing documentation. Timely access for inspectors and a clear line of communication with your contractor help prevent weather-related setbacks and ensure the project meets the city's wind-driven leak prevention standards.
Pricing for a roof replacement in this area reflects NYC labor rates, permit administration, and the challenge of navigating dense Queens streets. When crews maneuver around tight driveways, limited staging space, and multiple adjacent homes, labor hours can exceed simple square-foot estimates. This is common in Whitestone, where detached homes often present irregular rooflines and multiple access points that add to job complexity and cost.
Whitestone homes frequently feature multiple roof planes, dormers, chimneys, and rear additions. Each additional plane or detail can push labor time and material waste into higher brackets. For a typical one-story or two-story home, expect the labor component to climb once crews begin sheet-metal detailing, chimney flashing, or intricate edge work. The overall project tends to run higher than straightforward, single-slope replacements.
Material choice matters in cost planning. Asphalt shingles remain the baseline, with a typical range of 350 to 550 USD per square. Metal roofing runs higher, about 700 to 1,000 USD per square. Clay and concrete tiles, while durable, can push costs to 900-1,500 USD and 800-1,200 USD per square respectively. Wood shingles or shakes sit around 650-1,100 USD per square, and synthetic/composite options generally span 450-800 USD per square. In Whitestone, the price spread often reflects the added labor for complex roof geometries and long-term wind performance.
Regional wind and storm events can tighten contractor availability in Queens, affecting both scheduling and price for non-emergency replacements. In Whitestone, demand spikes may lead to shorter notice windows and premium sequencing, especially when crews are juggling multiple high-priority projects on nearby blocks. Planning ahead and securing a window before the busy season can help stabilize both timing and cost.
Expect costs to diverge from simple square-foot math due to multiple roof planes, dormers, and rear additions. Build a contingency into the budget for weather-driven delays and the potential need for extra flashing and edge work. In this market, clear scope from the outset and a staged plan with your contractor can prevent surprises when the first wind shifts return.
Get a clear picture of your project costs upfront - no commitment required.
Whitestone homeowners facing wind-driven rain, lifted shingles, and flashing failures should document damage immediately. New York insurers commonly require photos, inspection notes, and timely reporting. If a storm hits overnight, photograph missing shingles from several angles, show water stain progress inside attic or ceilings, and map any pooling near valleys or low-slope transitions. Keep a dated log of when you first noticed issues and when you contacted the insurer. Quick, clear documentation can prevent disputes and help you secure a fair adjustment before wear compounds the problem.
Because many homes in the area are older, adjusters scrutinize whether leaks come from sudden storm damage or long-term deterioration at chimneys, valleys, and low-slope transitions. Look for fresh shingle lifting, tar seals that have peeled away, or flashing gaps that align with recent high winds rather than steady, gradual decay. If water marks appear around a chimney chase after a storm, note whether the surrounding masonry shows signs of aging or prior repairs. Providing a timeline that ties the leak to the storm event can support a claim for repair rather than a broader, age-related replacement.
Queens homeowners often need contractor documentation that clearly separates repairable storm damage from full-system age-related deterioration. Have your roofer prepare two records: one detailing immediate storm-related fixes (panel gaps, flashing reseal, vent boot replacements) and another outlining where existing wear would have required attention regardless of the storm. Insurers will appreciate a clean split between the two, especially when addressing areas like chimney flashing, valley abutments, and low-slope transitions. Clear, owner-initiated follow-up notes can reinforce the severity of the recent event and the necessity of targeted repairs.
Connect with contractors who help homeowners navigate the claims process from damage assessment to final approval.
Skyward Roofing Contractor - Bronx
(718) 736-2553 www.skywardroofing.com
Serving
4.9 from 69 reviews
HK Builders: Best Roofing Company in Flushing
(718) 479-8888 hkbuilderscorp.com
Serving
4.8 from 119 reviews
Cold New York winters can delay full replacements and make emergency leak control more common in Whitestone during freeze-thaw periods. Snow and ice buildup, plus gusty coastal winds, stress older roofs and chase gaps around flashing, vent collars, and chimney detailing. When a hail-darkened attic or a frosty morning reveals a damp spot on the ceiling, prioritize prompt temporary measures to channel leaks away from living spaces. In low-slope areas or atop attic-heavy homes, ensure drip edges and proper gutter outlets remain clear so meltwater doesn't pool near seams. Plan for longer timelines if weather windows shrink around heavy snowfall, and avoid high-traffic roofing work in the coldest spells to minimize shingle brittleness or fastener fatigue.
Spring and autumn are often the most practical windows for planned roofing in Queens because summer humidity and winter cold both complicate installation conditions. Wet springs in Whitestone can slow material handling and adhesion, so crews often target dry spells with moderate temperatures. This season is ideal for addressing wind-damaged flashing, re-sealing fasteners, and reestablishing attic ventilation to reduce condensation. A joint assessment with a trusted local contractor helps ensure attic fans, soffit vents, and ridge lines are balanced, so upcoming summer heat doesn't aggressively age a still-ventilated roof.
Summer heat and humidity in coastal New York can accelerate visible aging on older roofs, especially where ventilation is weak in attic-heavy detached homes. High humidity amplifies the effects of sun exposure on asphalt or composite shingles and can push vulnerable sealants to fail sooner. Prioritize inspection of peak-exposed edges, solar heat exposure on dark shingles, and the condition of gutters to handle torrential afternoon showers. Scheduling work for early morning or late afternoon minimizes heat stress on crews and reduces the risk of rapid shingle deterioration from midday sun.
Autumn provides a practical transition, giving you a window to complete vulnerable components before winter. A thorough edge-to-ridge check, sealant refreshes, and reinforcement of flashing around chimneys and vents set the roof up for the harsher months ahead. Whitestone homes benefit from proactive attention to wind-driven gaps that can widen with seasonal shifts; addressing these now helps prevent mid-winter leaks and the need for urgent tarping or temporary fixes.
For homeowners in Whitestone, prioritize contractors who can handle NYC permit filings and Queens inspections, not just general roofing pitches. The right team moves through the paperwork with minimal delays and speaks the language of the town inspectors, which keeps timelines predictable and reduces the risk of costly knockbacks when the job is underway. Look for a crew that can present a complete permit-ready package and demonstrates a track record with similar local projects.
The local market strongly favors crews known for quick response and thorough cleanup, which matters on narrow residential lots where debris control affects neighbors and driveways. Ask for a committed response window and a written plan for daily cleanup, especially during shingle tear-off and material staging. A crew that doors in promptly, parks considerately, and manages waste without leaving bins blocking a curb lane will save you hassles and protect your paved areas and landscaping.
Because chimney work is so common here, homeowners should ask whether the roofer regularly handles flashing at masonry penetrations rather than subcontracting that detail. A dedicated mason-flashing approach reduces the chances of leaks around chimneys, vent stacks, and flue transitions, which are frequent trouble spots after storms or freeze-thaw cycles. If the contractor does not perform this work in-house, insist on clear, written coordination with the mason and a defined scope for flashing fabrication and sealing.
Begin with a site visit to assess roof slope, exposure to wind-driven spray, and any existing masonry penetrations. Request a detailed, itemized scope that covers tear-off, underlayment, flashing, fasteners, and venting. Check references from homes with similar exposure and housing stock, and confirm the crew's equipment for clean, daily removal of debris and tarping of the work area. A reliable contractor should offer a realistic schedule, a predictable sequence, and a plan that minimizes disruption to neighboring driveways and curbs.