Last updated: Apr 19, 2026
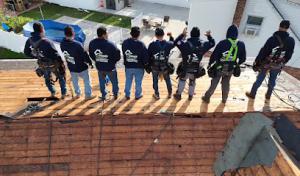
You'll often see attached or tightly spaced homes where a front sloped roof sits above the main living space and a low-slope or flat rear section extends over extensions or porches. This configuration is common in this neighborhood's dense housing stock, where elevations meet parapet edges and step-down transitions. The challenge here is that shingles and low-slope membranes work in concert, and failure in one area can pressure the adjacent section. Expect wind-driven rain to push water toward transition lines, flashing footprints, and roof-to-wall interfaces, especially along the rear additions that sit closer to neighboring properties. Mapping your roof as a single system-front slope, rear low-slope, and all the transitions between them-will help you spot trouble areas before they turn into leaks.
Leak complaints tend to start where shingles meet low-slope membranes. Begin with parapet edges and flashing lines, where old or mismatched materials often fail to shed water cleanly. In these zones, even small gaps can channel moisture into the roof edge and behind wall assemblies. Pay close attention to the interface where the front pitched roof meets the rear low-slope section; misalignment, lifted shingles at the transition, or inadequate step flashing can create a perpetual drip. Another frequent source is the rear addition where the roof plane transitions to a flat or low-slope surface. The caulk lines, sealants, and edge flashing there are under more stress from temperature swings and frequent rain. Check around vent flashings, skylight perimeters if present, and any plumbing stacks that cross the transition. Since this area is often near party walls, water intrusion can travel along a shared boundary and appear on a neighboring wall or ceiling quickly, so early detection is key.
Seasonal inspections should prioritize the transition zones first. After each heavy rain or freeze-thaw cycle, look for small damp spots on ceilings near where the two roof shapes meet, then trace the interior wall and ceiling lines outward to identify the water path. Outside, run a careful eye along the parapet edges, flashing seams, and any step-flashing joints at the front-to-rear ribbons. Inspect shingle edge exposure at the front slope for cupping or curling that might lift in wind, and verify that the low-slope membrane shows no signs of wrinkling, cracking, or missing granules where it overlaps with the shingle line. Clean debris from valley channels and ensure any scuppers or drainage outlets are free-flowing. If you notice moss or algae on shaded sections, address it promptly; organic growth can trap moisture against seams and flashing. Keep an eye on gutters and downspouts as blocked water can back up at the transitions and push moisture toward the roof-wall interface.
If you spot persistent staining on interior walls near the rear addition, or if multiple transition areas show dampness after storms, arrange a professional inspection. A roofer experienced with mixed shapes will evaluate the front pitched section, the rear low-slope area, and all connections between them, including parapet edges and flashing lines. In a dense block, a careful assessment should also consider how water from one unit could affect neighboring party-walls and shared elements, and propose a cohesive plan that protects both your investment and adjacent homes. For a thorough review, request a written analysis that highlights exact leakage sources, recommended repair sequences, and any membrane or flashing replacements needed to restore a weather-tight envelope.

NY's ELITE ROOFING & SIDING
128-04 Rockaway Blvd, South Ozone Park, New York
3.7 from 63 reviews
NY's ELITE ROOFING & SIDING INC. is a family owned and operated Company in NY, USA. We Service ALL Areas off NY, Long Island, Brooklyn, Queens, Bronx, Staten Island, Westchester, Suffolk and Nassau Country and Other Location's within the vicinity. Our Team has been expertly providing Roofing and Siding Installations for Over 25 Years- Making US the TOP CHOICE among ALL the other contractors providing Similar Services in the Area. We are FULLY EQUIPPED and LICENSED & INSURED Roofing and Siding Contractors. Our Team Specializes in ROOF INSTALLS, ROOF REPAIRS, ROOF REPLACEMENTS in Areas of NYC, LONG ISLAND, BROOKLYN, Westchester, Suffolk and Nassau County Plus Many Other AREAS of NY, USA 🇺🇸🇺🇸 2022 The Year of making it HAPPEN

Power Roofing & Stucco Queens
(516) 995-8006 powerroofingnyc.com
Serving
5.0 from 30 reviews
Discover Power Roofing & Stucco Queens, the ultimate destination for your roofing and stucco needs. Based at 111-32 147th St, Jamaica, NY, our team of expert craftsmen are committed to delivering exceptional craftsmanship and customized solutions. With a focus on both roofing and stucco services, we empower homeowners and businesses alike to achieve their desired aesthetic and structural integrity. Trust Power Roofing & Stucco Queens for unparalleled quality and service, promising a safe and stunning exterior for your property.
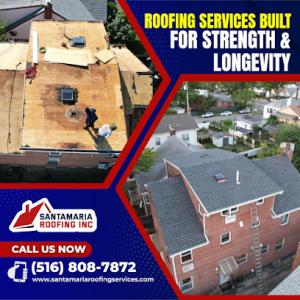
Santamaria Roofing
(516) 808-7872 santamariaroofingservices.com
Serving
5.0 from 34 reviews
We haves the best materials

EA Chimney & Roofing
(718) 480-8350 eachimneyroofing.com
Serving
5.0 from 106 reviews
EA Chimney And Roofing has been safeguarding homes since 2009. Specializing in roofing services, we bring expertise and dedication to every project. Located in Jamaica, NY, we're committed to providing reliable solutions, ensuring the safety and beauty of your home's essential structures. Trust EA Chimney And Roofing to protect what matters most.
Five Star Roofing
(718) 795-6640 fivestarroofingny.net
Serving
4.8 from 443 reviews
Five Star Roofing is a fully licensed and insured commercial and residential roofing company located in Queens, NY. Since 2008, we have provided top-quality roofing services to Queens, Brooklyn, and Long Island homeowners. Our team of experienced and certified roofing professionals specializes in flat, shingle, tile, and metal roofs, as well as urgent repairs. Whether you need roof repairs, replacements, or installations, we have you covered! With a strong emphasis on excellent customer service and premium craftsmanship, we have built a reputation as one of the most trusted roofing companies in the area.
Metro roofing
(347) 748-2500 themetroroofingcompany.com
Serving
4.8 from 52 reviews
Our company strives for quality and reasonable pricing . We pride our selves on our reputation and continue to work up to it
Royal Renovators
(718) 414-6067 www.nycrenovators.com
Serving
4.8 from 262 reviews
Royal Renovators is a trusted roofing contractor in Queens, serving homeowners and businesses throughout Queens, Brooklyn, Manhattan, the Bronx, and Long Island. We specialize in flat roof repairs and roof replacements for both residential and commercial properties. Since 1988, our licensed and insured team is BBB A+ Accredited and GAF Master Elite certified, working with flat and shingle roofing systems built to last. We also provide professional siding, masonry, and gutter services. From Brooklyn’s historic brownstones to Queens residential properties, clients choose us for honest, reliable roofing that withstands New York’s toughest weather. We offer emergency services for urgent leaks and storm damage. Call for Free Estimate today.
Paragon Chimney & Roofing of Queens
(347) 544-9554 paragonchimneyandroofing.com
Serving
5.0 from 482 reviews
Paragon Chimney & Roofing is dedicated to providing top-quality chimney and roofing services. Our team ensures safety, reliability, and customer satisfaction. Serving New York, we pride ourselves on expert craftsmanship and prompt service. Trust Paragon for all your chimney and roofing needs.
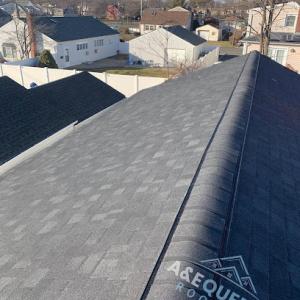
A&E Queens Roofers
(646) 681-3979 aequeensroofing.com
Serving
4.9 from 119 reviews
If you're in Queens and looking for a solid solution to your roofing problem, we are the roofers to call. We specialize in new roof installations and can help you now . Lets get full control of that roofing issue - call us now - we are the top roofers of Queens! We also handle siding, window installation and skylight installation as well!
William & Hugh Roofing
(347) 699-2260 www.queensnyroofingcontractor.com
Serving
4.9 from 53 reviews
If you're looking for a roofer in Queens, NY, the professionals from William & Hugh Roofing is just a phone call away. We're a locally owned and operated business that will work hard to complete your next job according to your timeline and budget.
J C Master Inc Roofing & siding
(347) 400-2611 jcmasterinc.net
Serving
4.0 from 92 reviews
JC Master is a licensed, insured roofing & siding contractor serving New York City—Brooklyn, Queens & Long Island—since 1997. We specialize in roof repairs & full replacements (shingle, flat/TPO/EPDM), gutters, leak detection, storm-damage assessments and insurance-claim support. Most of our work comes from referrals because we show up fast, document the damage, and handle the paperwork with your carrier. Free same-day inspections, clear pricing, and crews you can trust for family homes and multi-family buildings. Call for a visit today.
Reliable Seamless Gutters
(347) 416-0771 reliableguttersroofers.com
Serving
4.9 from 94 reviews
Reliable Seamless Gutters is your trusted partner for professional roofing and gutter services that not only enhance the overall aesthetics of your home but also provide essential protection against the most challenging weather elements. Our team consists of highly trained contractors who take pride in their workmanship and go the extra mile to ensure your satisfaction. We specialize in installing quality gutters and roofing systems tailored to your needs. When you choose us, you can expect a thorough consultation to assess your home and discuss the best options. Our meticulous installation ensures every component fits perfectly for optimal effectiveness and durability. Trust us to provide a reliable roofing and gutter system for years.
South Ozone Park sits in southeast Queens near JFK Airport, an area exposed to open-air wind patterns that can worsen shingle lifting and drive rain under vulnerable flashing details. The mix of pitched shingles with low-slope rear sections creates seams where wind-driven rain can find its way into attic spaces and ceilings after a storm. The edge of the roof often takes the brunt, and a single weak seam or loose fastener can cascade into interior damage that spreads quickly through upper-floor rooms. Don't assume a quick dry-out is possible when a Nor'easter or coastal squall hits-the combination of wind, spray, and temperature swings can push water deep into the roof line in minutes.
After a major wind event, pay close attention to the edges of the roof and around any flashing details where two planes meet. Lifted shingles, visibly torn underlayment, or stained attic ceilings are red flags that need fast action. Photograph all problem areas from ground level and on the roof if safe to access. Those photos will be crucial for assessing damage and planning a repair window before interior staining worsens. If a roof section shows curled edges or missing granules along the eave line, treat it as a warning that the next gust could push water past the deck.
If shingles are visibly loose or there is active wind-driven rain, prioritize temporary tarping to seal the most exposed sections. Secure a tarp firmly over the affected area, ensuring the edges extend well beyond the damaged zone and are weighted down to resist uplift. Check all flashing around chimneys, vent stacks, and roof-to-wall transitions; even small gaps can channel rain into the attic. For the interior, locate ceiling stains and map their progression toward interior walls or corners. Move valuables away from affected closets or ceilings and consider temporary containment measures to slow leakage while a contractor assesses.
Wind patterns in this corridor demand attention to edge securement and flashing integrity. When planning replacements or repairs, prioritize robust edge fasteners, sealed flashing joints, and compatible materials for both pitched and low-slope sections. A careful upgrade can reduce repetitive wind damage and minimize the chance of rapid interior staining after the next Nor'easter. In the wake of a strong coastal wind event, a rapid on-site assessment by a qualified roofer is essential to determine whether a full replacement or targeted patch is needed to restore weather-tightness quickly.
Find local contractors experienced in assessing and restoring roofs after hail, wind, and severe weather events.
A full re-roof in this area is filed through the New York City Department of Buildings rather than any village or town office. That distinction changes how plans are framed and how inspections are scheduled. You must submit plans and a clear scope of work to the NYC DOB, and the project will be inspected at multiple points during the build, with a final inspection required upon completion. The process tends to run longer and can surface issues that wouldn't appear in a suburban filing-all of which adds time and coordination to your project.
Because inspections are integrated into the work sequence, you should plan for the inspector to visit on several key milestones: initial permit card posting, envelope work before covering, and a mid-project check as you install the roof assembly. The final inspection is the anchor event that certifies the job as complete. If anything is out of compliance at any stage, the DOB will require adjustments or even re-inspection, which can stall progress and complicate scheduling with crews and suppliers.
This is New York City, so permit review may involve energy-code compliance and site-safety measures beyond the basics. Expect scrutiny of ventilation, insulation, and moisture-control strategies, as well as fall-protection and material staging-especially on pitched areas with rear, lower-slope sections. Neighborhood conditions in Queens can trigger additional reviews, and extra documentation can be requested for aspects like work-hour restrictions, debris containment, and fire-safety considerations. Planning ahead for these checks helps avoid delays that ripple into weather-sensitive windows.
Communicate early with your contractor about the DOB requirements and the sequence of inspections. Build a realistic timeline that accounts for plan review, any required plan revisions, and the interval between permit issuance and the first site visit. In dense blocks, coordination with neighbors and curbside access becomes part of the daily rhythm on the street. If a review holds up the project, you'll want a clear path to adjust scaffolding and material deliveries without compromising safety or the building's envelope.
In this area, the price of a roof job reflects more than tile choices. NYC labor rates drive labor costs higher than suburban markets, and crews often need careful staging because many lots are narrow with limited driveway access. Tear-off and disposal tend to be more involved when the project sits between closely spaced houses, with curb space and debris handling requiring tighter coordination. If the plan involves a mixed roof with pitched sections and a low-slope rear, expect the crew to spend extra time on flashing, transitions, and edge details to keep wind-driven rain out of the eaves and dormers. These factors push totals beyond what a simple one-plane roof would cost in a less dense neighborhood.
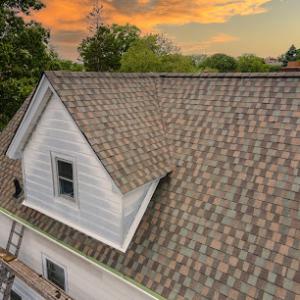
Homes in this ZIP area frequently feature chimneys, skylights, dormers, and low-slope rear sections. Each addition increases the number of flashing details, vent penetrations, and edge treatments that must be carefully integrated with the main roof. The result is more supply orders, more waste handling, and additional labor hours. When you see a price quote, compare the scope: a straight, single-plane roof will usually be at the lower end of the range, while a two- or three-plane layout with multiple transitions climbs toward the higher end. If your project includes partial tear-off on a portion of the roof and a new cap on a dormer or chimney chase, expect incremental cost bumps for scaffolding, tarping, and safety measures.
Short-term budgeting should consider the typical material options used in Queens streetscapes. Asphalt shingles give value for cost-conscious upgrades, while metal roofs rise in price but offer longevity and wind resistance. Clay and concrete tiles command premium prices, especially where the roof geometry requires careful layout to avoid breakage on elaborate curves or skylight framing. Wood shakes offer a distinctive look but come with higher maintenance, and synthetic shingles balance cost with durability. In mixed roof scenarios, the installer's detailing work, rather than the material alone, often ends up being the primary variable in the final bill.
Asphalt shingles remain the go-to for the region's typical pitched residential roofs in Southeast Queens. They are well-suited to the mix of homes where the front is a steeper, lower-maintenance surface and the labor market in NYC often favors quicker installations. Shingles offer a familiar installation pattern, straightforward repairs, and a broad selection of colors to match older homes without overpowering the curb appeal. When selecting asphalt, prioritize higher-quality asphalt Owens Corning/CertainTeed-type products that carry robust warranties, especially for the years when attic heat spikes during hot summers and seasonal temperature swings test the roof's seams.
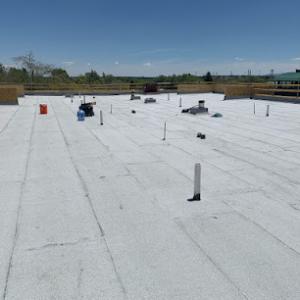
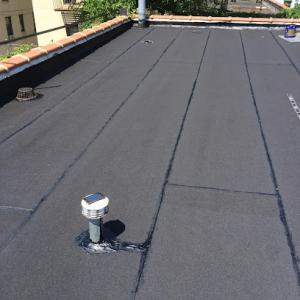
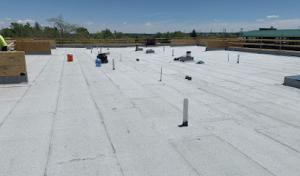
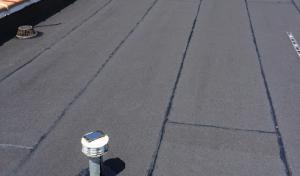
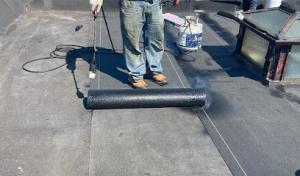
Many neighborhood additions in Queens feature low-slope rear sections that require a different roofing approach than the main shingle roof. The key here is material compatibility and transition flashing. A roof plan that anticipates how the low-slope surface meets the main slope reduces the risk of intermittent leaks at the seam. In practice, consider a coordinated system-choose a membrane or low-slope-compatible cover that works with the existing shingles, and ensure flashing details are integrated, not tacked on as an afterthought. A thoughtful transition reduces the risk of edge laps lifting in seasonal rain and wind.
Hot humid summers push attic temperatures higher and accelerate aging of roofing materials. Ensure the roof system includes adequate ventilation and a proper radiant barrier where feasible. In houses with mixed roof types, attic zoning can create hotspots where heat concentrates near the transition area. A well-vented attic and a sealed penetration plan for vents, furnace flues, and chimneys help slow wear on the roof deck and reduce the risk of condensation-related damage in winter.
Given NYC weather patterns, roof assemblies should emphasize moisture control and wind resistance. Use a reliable underlayment with a stiff, tear-resistant profile and install flashing that ties into the main roof and the low-slope section without gaps. Drip edges along eaves keep wind-driven rain from creeping under the edge, while regular checks for damaged seals around skylights, vents, and chimneys guard against slow leaks that can surge after a heavy rain. In Southeast Queens, the combination of dense housing and exposure to wind makes these details more critical than in more sheltered neighborhoods.
Extend the life of your existing roof with reflective or waterproof coatings that protect against UV and moisture.
Chimneys and later-built rear additions create extra flashing points that are more failure-prone than the field of the roof itself. In dense Queens housing, those joints bear the brunt of wind-driven rain and freeze-thaw cycling. When flashing deteriorates or shifts, water can wick into the seams where masonry meets shingles, or overwhelm the transition into a low-slope section. Expect occasional moss, rust, or bubbling on the boot edges as early warning signs. A neglected chimney chase or poorly sealed transition to a rear addition can become the dominant leak source long before the main roof reveals itself.
Skylights are a meaningful local service category, and in this market they often become leak points when older curb flashing meets aging shingles or low-slope roofing. The curb sits at a stubborn intersection of material types, and aging shingles can lose their ability to shed water evenly as the curb flashing deteriorates. If the skylight sits over a low-slope area, the risk compounds. Regular inspection of the curb, fasteners, and sealant around the frame is essential, especially after heavy rains or cold snaps.
On tightly spaced Queens homes, repairs around chimneys and skylights need careful water management because runoff can quickly track into shared side yards and adjacent walls. Ensure proper headlap and step flashing continuity where roof planes meet vertical surfaces, and maintain a clear drainage path away from neighbors. When planning repairs, consider both the visible leak and the hidden pathways that water might take toward siding, windows, or interior ceilings. A coordinated approach with all penetrations in nearby walls minimizes future surprises.
Find contractors experienced in skylight installation, flashing, and leak repairs to bring natural light into your home.
Paragon Chimney & Roofing of Queens
(347) 544-9554 paragonchimneyandroofing.com
Serving
5.0 from 482 reviews

In this neighborhood, roof claims are most likely after wind-driven storm events rather than the severe hail patterns seen inland. That history shapes every homeowner's expectations when a claim comes due: wind can peel, lift, or loosen shingles and flashings, while older roofs often show wear that complicates the claim decision. The outcome hinges not just on damage, but on how well the event is documented and how clearly causation is explained.
Carriers serving the New York City region commonly expect timestamped photos, contractor estimates, and a clear damage timeline, especially when the roof already shows age-related wear. Photos should show the roof both before and after the event, the interior signs of moisture, and any failed sealants along eaves and penetrations. Written estimates from a qualified roofer need to align with the visible damage and the roof's age, not just a best-case repair quote. A well-kept record helps prevent back-and-forth refusals or diminished coverage.
Because underwriting can tighten after major regional storms, homeowners with older roofs in this part of Queens may face closer scrutiny on renewals and claim causation. If the roof has existing wear, the insurer may question whether the damage is solely due to the recent event or part of gradual deterioration. Having a clear narrative-date of the storm, observed conditions, and how the damage corresponds to existing weaknesses-can support a smoother process.
Document ingress points around vents, chimneys, and edge flashing as soon as safe conditions permit. Schedule a timely, detailed assessment from a licensed roofer who can provide a written scope and timeline. Maintain an organized folder with photos, dates, and correspondence to reference during any claim review. This keeps the process focused and reduces surprises if the policy is evaluated after a storm and during renewal discussions.