Last updated: Apr 19, 2026
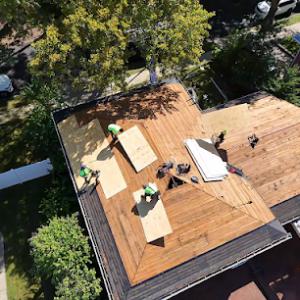
Cold winter storms, followed by thaw cycles, hit the eastern Queens part of the city hard. On older pitched homes with dormers, valleys, and front-facing roof transitions, meltwater tends to collect along eaves and in gutters. Those concentrated melt paths freeze again, forming ice dams that push water back under shingles and into the attic or living spaces. This isn't just a nuisance-it's a real risk to the insulation, decking, and interior ceilings. If your roof has multiple roof planes meeting at dormers or where two sections join near the eave, you're in the high-risk zone, especially during the sharp temperature swings typical of Queens winter storms.
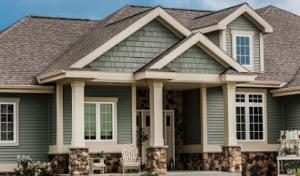
Neighborhood houses commonly feature Cape Cod, Colonial, and Tudor styles, and many were built with dormers and several roof transitions that create narrow channels for water. Valleys-the zones where two roof planes meet-tend to trap snow and meltwater. When those valleys feed into clogged or undersized gutters, the volume of water can overwhelm the flashing and leak below shingles. The more abrupt the transition from a steep main roof to a flatter eave, the more likely meltwater will back up and breach the underlayment. In Queens Village, roofs are frequently aging and have undergone multiple reroof cycles; uneven ventilation and insulation upgrades can leave patches of roof deck warmer than the eaves. That thermal imbalance accelerates ice dam formation, turning a minor freeze-thaw event into a persistent leak risk.
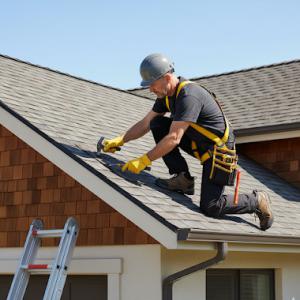
First, address obvious blockages and debris in gutters and downspouts. Clear leaf litter and ensure downspouts drain away from the foundation so meltwater isn't pooling near the walls. If you have a dormer or a front-facing roof transition, inspect the flashing along those joints. Damaged or uplifted flashing is a common entry point for moisture once ice damming starts; replacing or resealing these flashing details can halt the leak before interior damage develops. Pay special attention to valleys. If you notice daylight through the underlayment or see shingles curling in the valley, priorities shift from prevention to repair. In these spots, ice dam pressure can force water into the attic; you want a robust membrane and properly sealed seams in place.
Second, improve ventilation at the attic and roof deck. In homes with older insulation, some sections of the roof deck remain warmer than the eaves during cold snaps, inviting ice formation at the eaves. Ensure baffles or soffit vents are clear and that insulation above the attic floor is continuous and evenly distributed. Adequate airflow reduces the temperature differential that fuels ice damming, helping the eaves stay cooler and less prone to ice buildup. If insulation gaps exist, seal them to minimize warm pockets that melt snow from above and refreeze at the edge.
Third, plan for targeted repairs before the next winter surge. If the roof shows multiple signs of past leaks-staining near dormers, softened decking, or damp insulation-prioritize reinforcing the eave and flashing assemblies. Consider upgrading to more robust edge materials and ensuring drip edges direct water away from the fascia. For homes with narrow valleys or front-facing transitions, dedicated attention to valley flashing and seam sealing can dramatically reduce ongoing leakage risk.
If ice damming is persistent after clearing debris, or if you notice interior staining that travels along the ceiling line away from obvious exterior openings, it's time to involve a local roofing professional. A qualified roofer can verify that the attic ventilation is balanced with insulation, reflash problem areas, and address any damaged decking or interior leaks promptly. Given the seasonal pressure on these roofs, scheduling proactive work in late fall-before the first heavy snows-can prevent costly interior damage and keep the home safer through the winter.
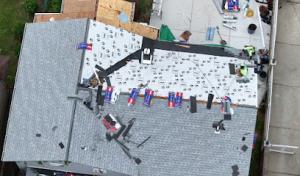
Asphalt shingles fit much of Queens Village's detached and semi-detached housing stock because they work well on the steep-slope roofs common on local one- and two-family homes. They are a practical starting point for a lot of roof replacements, especially when the goal is reliable performance without excessive weight or special installation demands. In winter, ensure that attic insulation is up to par and that ventilation paths are clear; poor insulation and restricted airflow exacerbate ice damming on asphalt shingles by allowing more heat to escape into the attic and melt snow near the eaves. When replacing, look for a shingle with a good nail zone and a proven cold-weather performance rating, and plan for proper underlayment that spans the valley and any dormer intersections. Regular inspection after heavy snows helps catch lifted edges or loose flashing before leaks develop along the overhangs.
Clay and concrete tile appear on some Tudor and Mediterranean-influenced homes in Queens and require attention to structural loading and specialized flashing details during replacement. These materials carry significant weight and demand a roof frame that can support the load, especially in a Northeast climate that sees freeze-thaw cycles. Tile roofs perform well in dry, sunny periods but are prone to cracking from ice or trapped moisture if underlayment or flashing around chimneys, skylights, and dormers is compromised. When considering tile, verify that the existing deck and trusses bear the load and that the replacement plan includes reinforced flashing at all step-ups and transitions. For ice dam prevention, ensure continuous eave ventilation and a robust insulating layer to minimize heat loss into the attic, which can soften mortar joints in older tile installations and invite leaks.
Metal roofing and synthetic/composite shingles are niche but relevant in Queens Village where homeowners want longer service life without the weight and maintenance profile of traditional tile or wood. Metal panels provide excellent resistance to wind-driven snow and can shed ice more predictably, yet some configurations require precision in valleys and ridge venting to avoid ice backups. Synthetic or composite shingles offer a lighter alternative to tile with good insulating behavior and improved wind resistance over traditional organic shingles. When choosing these options, verify that the panel laps or shingle seams are sealed to the eaves and that the system integrates with existing gutter and flashing details. In areas with frequent freeze-thaw cycles, pairing these materials with upgraded underlayment and strategic attic ventilation helps reduce cold-weather leakage, minimizing the chances of ice damming along the fascia and eave line.
In this neighborhood, roofing costs aren't just about the material. NYC-labor rates push prices higher, and permit administration adds time and staging needs. Narrow residential lots with limited driveway space complicate material staging and truck access, so crews often need to shuttle bundles and equipment around tight corners and between homes. The result is a workflow that can extend timelines and raise labor-related charges, even before any material choice is made. When two houses sit shoulder to shoulder, protection and debris containment become more labor-intensive, and that labor shows up on the final invoice.
Attached and closely spaced homes are common in parts of Queens Village, and this layout increases protection, debris handling, and access complexity compared with more open suburban sites. Steep front slopes, dormers, chimneys, and multiple roof planes create extra edge work and more flashing details to seal. Even if the total roof area isn't huge, these features push time on the lift, scaffolding, and roof penetrations, which in turn pushes per-square pricing beyond the base. If the project includes a dormer or a chimney chase, expect additional materials and labor for flashing around those features and for safe debris containment during removal and install.
Asphalt shingles offer the most common balance of price and performance for Queens Village homes, with typical per-square ranges around 420 to 900 USD. Metal roofing runs higher, roughly 700 to 1,800 USD per square, but it can offer longer life and better ice dam resistance in some climes. Clay tile sits at the top end, about 1,200 to 2,900 USD per square, with significant weight and labor implications on pitched roofs. Concrete tile is in the 1,100 to 2,500 USD per square range, while wood shingles or shakes hover around 750 to 1,400 USD per square. Synthetic or composite shingles generally fall between 550 and 1,100 USD per square. For pitched residential roofs with multiple planes, you'll often see the higher end of these ranges due to complexity, fastener choices, and required detailing.
Winter ice damming is a real concern here, so consider how each material behaves in freeze-thaw cycles. Heavier materials like tile or metal may demand additional structural attention and more careful staging in tight lots, while lighter asphalt options can be easier to maneuver but may require more underlayment or ventilation to prevent leaks. The right choice balances upfront cost with expected performance over several winters, especially if dormers, steep front slopes, or multiple roof planes are part of your home. In practice, budgeting for extra edge detailing, improved gutter interfaces, and robust insulation/ventilation will pay off when spring leaks season hits.
Don't let upfront costs delay a critical repair - these contractors offer payment plans to fit your budget.
HK Builders: Best Roofing Company in Flushing
(718) 479-8888 hkbuilderscorp.com
Serving
4.8 from 119 reviews
Reliable Seamless Gutters
(347) 416-0771 reliableguttersroofers.com
209-55 111th Rd, Queens Village, New York
4.9 from 94 reviews
Reliable Seamless Gutters is your trusted partner for professional roofing and gutter services that not only enhance the overall aesthetics of your home but also provide essential protection against the most challenging weather elements. Our team consists of highly trained contractors who take pride in their workmanship and go the extra mile to ensure your satisfaction. We specialize in installing quality gutters and roofing systems tailored to your needs. When you choose us, you can expect a thorough consultation to assess your home and discuss the best options. Our meticulous installation ensures every component fits perfectly for optimal effectiveness and durability. Trust us to provide a reliable roofing and gutter system for years.
Power Roofing & Siding Queens NY
(718) 908-8851 powerroofingnyc.com
Serving
5.0 from 20 reviews
Power Roofing & Siding Queens NY delivers top-quality roofing and siding solutions to homeowners throughout the Queens region. We handle everything from minor repairs to complete roof replacements and siding installations, ensuring lasting protection and curb appeal. Choose us for our commitment to reliable service, transparent pricing, and exceptional workmanship backed by years of experience. What sets us apart is our dedication to exceeding customer expectations and using only premium materials for durable, long-lasting results. Contact us today for a free quote and let us enhance your home's safety and value.

HK Builders: Best Roofing Company in Flushing
(718) 479-8888 hkbuilderscorp.com
Serving
4.8 from 119 reviews
HK Builders corporation is well known name in queens for their guaranteed work. We are a top rated in roofing & siding work. From the first nail to the final creative touches our crew will turn your home into a modern, unique, and comfortable place to live. We proudly offer roofing services and siding installation. Give us a call to Schedule appointment. we provide free estimate.
Paragon Chimney & Roofing of Queens
(347) 544-9554 paragonchimneyandroofing.com
Serving
5.0 from 482 reviews
Paragon Chimney & Roofing is dedicated to providing top-quality chimney and roofing services. Our team ensures safety, reliability, and customer satisfaction. Serving New York, we pride ourselves on expert craftsmanship and prompt service. Trust Paragon for all your chimney and roofing needs.

EA Chimney & Roofing
(718) 480-8350 eachimneyroofing.com
Serving
5.0 from 106 reviews
EA Chimney And Roofing has been safeguarding homes since 2009. Specializing in roofing services, we bring expertise and dedication to every project. Located in Jamaica, NY, we're committed to providing reliable solutions, ensuring the safety and beauty of your home's essential structures. Trust EA Chimney And Roofing to protect what matters most.
Alb Best Way Construction
(516) 244-0547 roofingalbbestway.com
Serving
5.0 from 75 reviews
ALB BEST WAY HOME IMPROVEMENT is fully licensed, insured, and bonded home improvement and roofing contractor. Specializing in roofing, chimneys, gutters repair, gutters install, gutter cleaning, siding, steps, masonry, skylight, sheetrock and more.
Skyward
(718) 878-6748 www.skywardroofing.com
Serving
5.0 from 82 reviews
Skyward Roofing - Queens is a professional and trusted roofing company catering to the roofing needs of commercial and residential clients. With vast experience, our team of skilled experts offers quality roofing services customized to meet the special needs of every client. From new installations and repairs to inspections and maintenance, we deliver excellent artistry using quality materials and modern techniques. Dedicated to client satisfaction, we ensure timely project completion, moderate pricing, and a commitment to surpassing client expectations. Reliable, trustworthy, and efficient, we are the most sought-after company for roofing needs. Call us or visit our site for more information.
Santamaria Roofing
(516) 808-7872 santamariaroofingservices.com
Serving
5.0 from 34 reviews
We haves the best materials
Prodigy Contracting
(516) 318-0105 www.prodigycontracting.net
Serving
4.9 from 38 reviews
Prodigy Contracting is a Veteran owned business servicing Long Island, New York since 2005. As a GAF Presidential Master Elite Roofer, we offer our clients exceptional quality and a lifetime warranty. Our siding designs feature innovative looks, with rustic contemporary touches and attention to detail service. We use Drone Technology to provide a 360 degree rendering of your project before and highlight your beautiful results after. We look forward to meeting you. Let us transform your home into you Dream Home
Preferred Exterior
(516) 354-7252 www.preferredexterior.com
Serving
5.0 from 50 reviews
We are a family owned and operated establishment specializing in commercial, industrial and residential roofing and siding. We are certified installers of all major manufacturers. We are fully licensed and insured. Our reputation is built on knowledge, craftsmanship and integrity.
Master Roofing
(718) 957-0313 www.master-roofers.com
Serving
4.5 from 55 reviews
Looking for a reliable roofing company in NYC? Look no further than Master Roofing With years of experience, we offer high-quality roofing services for residential, commercial, and industrial properties. Our team of skilled roofers uses top-quality materials and the latest techniques to ensure your roof is strong and durable. We provide personalized service and attention to every client, ensuring that your unique needs and budget are met. Contact us today for competitive pricing and efficient service. Our Services: Roof installation, Roof repair, Roof maintenance, Gutter installation, Gutter repair, Roof insulation installation, Roof cleaning, Emergency roof repair services, Roofing inspections, Roof replacement & more
Royal Renovators
(718) 414-6067 www.nycrenovators.com
Serving
4.8 from 262 reviews
Royal Renovators is a trusted roofing contractor in Queens, serving homeowners and businesses throughout Queens, Brooklyn, Manhattan, the Bronx, and Long Island. We specialize in flat roof repairs and roof replacements for both residential and commercial properties. Since 1988, our licensed and insured team is BBB A+ Accredited and GAF Master Elite certified, working with flat and shingle roofing systems built to last. We also provide professional siding, masonry, and gutter services. From Brooklyn’s historic brownstones to Queens residential properties, clients choose us for honest, reliable roofing that withstands New York’s toughest weather. We offer emergency services for urgent leaks and storm damage. Call for Free Estimate today.
A residential re-roof in this area follows NYC procedures, since Queens Village falls under the New York City Department of Buildings rather than a separate village or town building office. The permit process is not a one-and-done ticket; inspections may occur during the work and again after completion. If a contractor tries to skip steps or rush a job, the Department of Buildings can halt work or require rework, which can drag out the project and create uncertainty for weeks. Expect a clear schedule for filings, plan reviews, and staged inspections, and be prepared for potential follow-up notices that require corrective action.
NYC enforcement is stricter and more formalized than in many surrounding suburbs, and that reality reaches Queens Village job sites in practical ways. Scaffold setups, sidewalk protection, and pedestrian safety measures are not optional add-ons-they are part of the job scope. If the sidewalk must be closed or partially blocked, temporary protection and safe egress paths are often mandated. Your crew should have a compliant scaffold plan, proper guardrails, and approved tarps or containment to prevent debris from entering adjacent properties or the street. Expect frequent coordinator contact from inspectors who will want to see compliance signage and daily site logs.
Inspections during a re-roof typically focus on structural integrity and fire safety, venting, and proper nailing patterns for the new roofing system. After the roof is completed, a final DOB inspection confirms everything was installed per code. In some cases, a mechanical or energy-efficiency check accompanies the final review. Delays can arise if a small flashing detail or vent boot does not meet the exacting NYC standards, so plan for a potential tweak phase even after the visible shingles are laid.
Coordinate with the contractor to align on permit submission timelines and expected inspection windows. Keep a visible calendar of DOB milestones and ensure the crew maintains a clean, clearly marked work area at all times. Having essential documents ready-permits, plan approvals, and inspection approvals-can prevent last-minute pauses that extend disruption to neighboring attached homes and dormer-equipped roofs typical in the neighborhood.
Storm-driven rain in this area arrives with real force, riding on strong spring and autumn winds and slapping against pitched roofs with dormers and tight sidewalls. The inland exposure means shingles may lift where flashing is already marginal, and small gaps that mattered little in calm weather suddenly become leak paths. The blocks are tree-lined, so during a storm branches can strike the roof, gutters clog, and localized damage accumulate without immediate notice. After a heavy rain, leaks often reveal themselves along chimneys, valleys, and dormer sidewalls rather than as obvious field-shingle failures, so vigilance matters.
Cold months bring freeze-thaw cycles that stress flashing, vent boots, and step/valley flashings. Snowmelt that sits on a low-slope run or drips behind gutters can refreeze, prying seals loose and pushing water into attic to living spaces below. Dormers, which extend through the roof deck, are frequent weak spots where ice damming concentrates, widening small gaps into steady leaks. Because these roofs are common in the local housing stock, the first sign of trouble often appears at the chimneys or along tying valleys where two roof planes meet.
Begin with a focused inspection after storms: look at the chimney base, the valleys, and the dormer walls for loose flashing, cracked sealant, or missing shingle tabs. Clear gutters and downspouts of leaves and twigs, and test that water is shedding away from the chimney and dormer sides rather than backing up. If a leak shows up, document the exact location and paint a simple map on a notepad or phone photo, then call a roofer familiar with pitched, urban homes. Schedule a proactive check before the next freeze-address small flashing laps, re-seal joints, and replace damaged shingles before a cold snap compounds the damage.
Find local contractors experienced in assessing and restoring roofs after hail, wind, and severe weather events.
Paragon Chimney & Roofing of Queens
(347) 544-9554 paragonchimneyandroofing.com
Serving
5.0 from 482 reviews
In this neighborhood, many homes wear their age on the roof. When a storm hits, insurers want a clear line between existing wear and new damage. That separation matters a lot in Queens Village where layered repairs are common and a single claim can hinge on what was already there versus what the latest weather event brought down. Gather everything you have: photos taken before the storm, notes on previous fixes, and written reports from any past inspections. A clean timeline keeps the adjuster focused on the real trigger rather than a patchwork history.
Expect the process to feel meticulous. Insurance in this area tends to emphasize precise scope and supporting records. You should be prepared for requests for visual proof: detailed photos of flashing, gutters, and problem angles, plus copies of repair receipts or contractor statements. Having a written list tying each failed component to a date or event helps avoid arguments about causation. If a chimney crown, skylight, or vent is involved, capture close-ups and show how the leaks align with those fixtures.
Leaks that show up as interior staining or dripping after several storms are common here and can complicate claims. A single afternoon's rain might not tell the full story; the damage could be cumulative. Document interior effects with timestamps if possible, and keep notes of when stains first appeared versus when repairs were made. Clear, cross-referenced documentation helps prevent disputes about whether damage originated from a specific incident or a pattern over time.
Connect with contractors who help homeowners navigate the claims process from damage assessment to final approval.
HK Builders: Best Roofing Company in Flushing
(718) 479-8888 hkbuilderscorp.com
Serving
4.8 from 119 reviews
Even though many primary homes have pitched roofs, low-slope sections are common on rear extensions, porches, bays, and detached garages. These smaller flat roof areas often fail at transitions where low-slope membranes meet siding, parapet edges, or the main shingle roof. Because these sections are easy to overlook from the street, homeowners may not notice ponding or seam deterioration until leaks appear inside an addition or back room.
Focus on the edges where the flat roof meets siding or a parapet. Inspect under the drip edge and along any flashing that runs up into a wall parapet or into siding. In Queens Village's freeze-thaw cycle,细 small seams can crack and membranes can separate, allowing water to creep into the edge details. Look for signs of blisters, ridges, or loose sealant at the terminations. If a parapet wall is present, ensure there is proper counterflashing and a continuous water-tight surface over the top edge.
During warming spells after a cold snap, clear debris from the roof surface and ensure scuppers or edge drains aren't blocked. After heavy snows, carefully remove excess snow from the flat sections, avoiding damage to membrane seams. When you notice standing water after rainfall, mark the area and plan a closer inspection, as ponding can indicate a failed or undersized drainage plan.
For small edge leaks, reseal exposed seams with a compatible, high-quality roof sealant following manufacturer directions. If flashing at transitions looks aged or torn, consider professional relamination or replacement of the flashing membrane at the affected corner. Regularly recheck these flat sections after winter to catch failures early and prevent interior damage in an added space.
Find specialists in TPO, EPDM, and built-up flat roofing systems for residential and commercial properties.
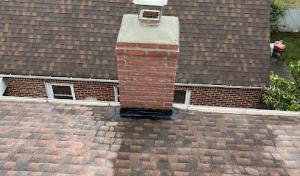
In this neighborhood, many homes pair dormers with masonry chimneys on tight roof footprints, which creates a dense pattern of flashing intersections. Each intersection-where dormer cheeks meet the main roof, where the chimney cricket meets the vent stack, and where cap flashing transitions to step flashing-becomes a potential leak point after a freeze-thaw cycle. The key is to inspect these areas as a system, not in isolation. Pay particular attention to the transition zones where metal flashing laps over masonry and where shingles near a dormer cheek wall butt up against vertical surfaces. Regular, proactive resealing and proper integration of flashing with both the dormer and the chimney crown can forestall creeping water paths before they shoulder interior ceilings with damp spots.
Water can enter near a dormer cheek wall or a chimney cricket and travel along rafters or under shingle laps before a stain reveals itself. On older homes, even a small hairline crease in flashing can hide behind a dormer's shadow line, only to emerge after a heavy thaw. When troubleshooting, start at the attic and look for signs of moisture or elevated humidity around shared collars and mushroom vents that sit close to dormers or chimneys. Trace leaks by following the likely pathways: from the dormer's base and cheek wall, along the chimney cricket, then across dedicated drip edges where metal meets masonry. Remember that water can migrate a surprising distance from its origin, so a surface stain might point to a distant flashing failure.
Skylight repairs on older homes often go beyond resealing the pane. If a curb is involved, ensure the curb is properly flashed to the surrounding roof deck and that the counterflashing seats tight against the skylight frame. The surrounding shingles need to be carefully cut and integrated so that their seals align with the skylight's flashing. In tight roof areas, ensure the shingles adjacent to the skylight are not compromised by over-tight nailing or gaps that invite capillary action. After a repair, recheck the seam lines around the curb and confirm that the drip edge directs water away from the skylight surface. When in doubt, replace compromised shingles in the immediate surrounding area to maintain a continuous, weather-tight seal.
Find contractors experienced in skylight installation, flashing, and leak repairs to bring natural light into your home.
Paragon Chimney & Roofing of Queens
(347) 544-9554 paragonchimneyandroofing.com
Serving
5.0 from 482 reviews
In this market, you'll encounter a broad pool of contractors that advertise fast response and quick re-roofs. Approach scheduling with a realistic window tied to Northeast winter conditions. Ask for three recent job sites you can visit or call to confirm workmanship and on-site conduct. Seek a crew lead who can discuss material choices, attic ventilation, and measures to minimize disruption on tight block layouts where neighboring homes share walls and eaves.
Because cleanup and residential work are common in this area, verify who handles debris removal, neighbor protection, and daily site control. Confirm at the outset whether the contractor brings tarps, waste containers, and a broom crew for sweep-ups at day's end. On narrow streets, ensure they have a plan to shield adjacent homes and cars from falling litter or incidental damage, and that daily cleanups occur before the crew leaves.
Long-established and family-owned firms are notably present, and that matters when it comes to warranty follow-through and navigating NYC paperwork after the crew leaves. Look for a clearly written warranty that covers workmanship for several seasons, and check how the company handles service calls if a leak or shingle issue appears after a storm. Ask for a local reference list you can contact without traveling far.
Ask for written correspondence that outlines project scope, who will serve as the on-site supervisor, and a daily checklist the crew will complete. After work finishes, request a concise handoff packet-material types, color choices, and any maintenance notes-so you have a clear skeleton for future inspections and potential repairs.