Last updated: Apr 19, 2026
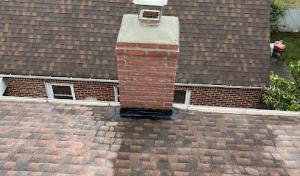
Hollis homes commonly combine a main sloped roof with low-slope porch, dormer, bay, or rear-extension sections, creating transition flashings that are frequent leak points. In these blocks of attached houses, those transition lines sit at odd angles where water finds seams, and where flashing sits against siding and different substrates. After a hard winter, frozen ice can push on metal and asphalt flashings, then spring heat expands joints and gaps. The result is a slow, quiet creep of moisture that often travels along deck edges, into soffits, or under shingles long before a visible drip appears in the living room. In these neighborhoods, a patch here and a patch there can disguise deck damage from years of overlay work, leaving attic spaces and upper rooms vulnerable once a leak finally breaks through. The climate pairing-cold snaps followed by humid summers-drives movement in sealants and metal counter-flashes, so the risk isn't just a single leak point; it's a network of hidden vulnerabilities along every transition.
Look closely at the transition zones where the main roof meets a low-slope addition. Those are the most active leak points in this stock. Decks, porches, and rear extensions often use less-substantial flashing details or rely on sealants that degrade with seasonal cycling. Dormers and bays introduce several planes in one area, which means multiple flashing stacks butt up against one another. If any one layer is compromised-missing fasteners, lifted shingles, or granule loss around a step flash-the water can back up and pool into a hidden corner. The result is symptoms that seem to jump from one room to another: attic condensation, dark stains on ceilings under a dormer, or a stubborn damp smell near the bay window. Repeated overlay work may have temporarily sealed the surface, but it can bury deck damage beneath new shingles, delaying the moment when a leak becomes obvious. In other words, the more transitions and overlays, the more potential weak points you're carrying into spring rains.
Start with a targeted inspection focusing on transition flashings and low-slope ties. Check along the main roof edge where it meets any porch or rear-extension roof for lifted metal, loose screws, or corrosion. Lift each shingle at the transition point off to the side enough to confirm the underlying flashing isn't cracked or layered improperly and that sealant has not turned to chalk. Pay attention to areas where plywood or deck boards show signs of moisture-soft spots or mold growth indicate a leak has already been present, even if the ceiling below looks dry. Inspect the underside of attic spaces for staining, especially near dormers, bays, or where a low-slope section ties into the main roof. If you see any dampness, address it promptly: reseal joints with a high-quality, compatible sealant, install proper counter-flashing at the step-flash junctions, and ensure proper slope toward drainage. If images or a quick hands-on check reveal compromised flashing or active pooling on the low-slope segments, it's time to call a local roofer who understands Hollis's mixed-roof dynamics and the way these systems age together. Do not delay, because a small, quiet leak can escalate into significant interior damage in a single storm.
In this neighborhood, roofs face a relentless sequence of winter and storm stress that can turn small leaks into big problems fast. Nor'easter snow loads press down on pitched surfaces, while freeze-thaw cycles crack and spall materials that seem sturdy at first glance. When spring winds rise, loose shingles and failed flashings become the on-ramp for water intrusion. This is not theoretical-every season in Hollis tests roof edge details, parapets, and the integrity of gutters and downspouts. You need a plan that treats leakage as a structural warning, not a cosmetic fix.
Winter weather starts the chain reaction. Snow accumulates and sits on edges where different roof types meet-porches, extensions, and attached garages-creating heavy load concentrations that can bend underlayment and sag flashing. Ice damming forms where heat loss is uneven, backing water up at eaves and overspilling onto exterior walls. When spring arrives, wind events can propel rain horizontally against the side walls, chasing water under shingles, along edge metal, and into vulnerable seams. In this climate, the vulnerability isn't a single failure but a compromise that unfolds across multiple interfaces: shingles to underlayment, flashing to masonry, and gutters to fascia.
Older homes in this area often blend roof types-sloped sections for main roofs and low-slope or shed sections for porches or extensions. That mix creates unique failure modes: a shingle- or tile-covered main roof can shed water toward a low-slope add-on where ice and debris back up more easily, or a narrow drainage path can trap moisture along the eave line. Tree-lined blocks compound the risk: branches can strike shingles, leaves clog gutters, and moisture lingers along roof edges through fall and into winter. Because many homes sit closely together, wind-driven rain easily bypasses less conspicuous gaps. Side-wall flashing, parapet edges, and tight eaves can be the least visible routes for water to creep inside, yet they are often the easiest to overlook during routine attic checks.
Start with a targeted inspection of transition zones where roof types meet. Look for loose or curling shingles, lifted flashing laps, and any gaps along parapets or chimney abutments. Pay special attention to eaves and downspout outlets-these are common entry points when debris has blocked a drain path. Clear gutters and downspouts of leaves before storms, but avoid forcing water behind flashing; instead, ensure water exits cleanly at the ground. Inspect attic ventilation and insulation, since poor venting makes ice dams more likely and worsens interior condensation. If you notice damp spots near exterior walls after a storm, treat those areas as urgent leaks waiting to happen and address them without delay.
Develop a routine: after every major storm, recheck flashing laps and edge metal for movement or corrosion, then re-tighten or reseal where needed. After heavy snows, if safe access is possible, survey shingles from a ladder without leaning on the roof itself; even a small displacement can become a channel for water in the next warm spell. For homeowners facing recurring issues on mixed roofs, focus on reinforcing critical edges-the eaves, the rakes, and the transitions between materials-so that when wind and water converge, your roof doesn't yield at the most vulnerable seam. A proactive stance today reduces the risk of a winter surprise turning into a costly repair tomorrow.
Find local contractors experienced in assessing and restoring roofs after hail, wind, and severe weather events.
Paragon Chimney & Roofing of Queens
(347) 544-9554 paragonchimneyandroofing.com
Serving
5.0 from 482 reviews

Reliable Seamless Gutters
(347) 416-0771 reliableguttersroofers.com
Serving
4.9 from 94 reviews
Reliable Seamless Gutters is your trusted partner for professional roofing and gutter services that not only enhance the overall aesthetics of your home but also provide essential protection against the most challenging weather elements. Our team consists of highly trained contractors who take pride in their workmanship and go the extra mile to ensure your satisfaction. We specialize in installing quality gutters and roofing systems tailored to your needs. When you choose us, you can expect a thorough consultation to assess your home and discuss the best options. Our meticulous installation ensures every component fits perfectly for optimal effectiveness and durability. Trust us to provide a reliable roofing and gutter system for years.
Power Roofing & Siding Queens NY
(718) 908-8851 powerroofingnyc.com
Serving
5.0 from 20 reviews
Power Roofing & Siding Queens NY delivers top-quality roofing and siding solutions to homeowners throughout the Queens region. We handle everything from minor repairs to complete roof replacements and siding installations, ensuring lasting protection and curb appeal. Choose us for our commitment to reliable service, transparent pricing, and exceptional workmanship backed by years of experience. What sets us apart is our dedication to exceeding customer expectations and using only premium materials for durable, long-lasting results. Contact us today for a free quote and let us enhance your home's safety and value.

EA Chimney & Roofing
(718) 480-8350 eachimneyroofing.com
Serving
5.0 from 106 reviews
EA Chimney And Roofing has been safeguarding homes since 2009. Specializing in roofing services, we bring expertise and dedication to every project. Located in Jamaica, NY, we're committed to providing reliable solutions, ensuring the safety and beauty of your home's essential structures. Trust EA Chimney And Roofing to protect what matters most.
Paragon Chimney & Roofing of Queens
(347) 544-9554 paragonchimneyandroofing.com
Serving
5.0 from 482 reviews
Paragon Chimney & Roofing is dedicated to providing top-quality chimney and roofing services. Our team ensures safety, reliability, and customer satisfaction. Serving New York, we pride ourselves on expert craftsmanship and prompt service. Trust Paragon for all your chimney and roofing needs.
Santamaria Roofing
(516) 808-7872 santamariaroofingservices.com
Serving
5.0 from 34 reviews
We haves the best materials

HK Builders: Best Roofing Company in Flushing
(718) 479-8888 hkbuilderscorp.com
Serving
4.8 from 119 reviews
HK Builders corporation is well known name in queens for their guaranteed work. We are a top rated in roofing & siding work. From the first nail to the final creative touches our crew will turn your home into a modern, unique, and comfortable place to live. We proudly offer roofing services and siding installation. Give us a call to Schedule appointment. we provide free estimate.
Skyward
(718) 878-6748 www.skywardroofing.com
Serving
5.0 from 82 reviews
Skyward Roofing - Queens is a professional and trusted roofing company catering to the roofing needs of commercial and residential clients. With vast experience, our team of skilled experts offers quality roofing services customized to meet the special needs of every client. From new installations and repairs to inspections and maintenance, we deliver excellent artistry using quality materials and modern techniques. Dedicated to client satisfaction, we ensure timely project completion, moderate pricing, and a commitment to surpassing client expectations. Reliable, trustworthy, and efficient, we are the most sought-after company for roofing needs. Call us or visit our site for more information.
Master Roofing
(718) 957-0313 www.master-roofers.com
Serving
4.5 from 55 reviews
Looking for a reliable roofing company in NYC? Look no further than Master Roofing With years of experience, we offer high-quality roofing services for residential, commercial, and industrial properties. Our team of skilled roofers uses top-quality materials and the latest techniques to ensure your roof is strong and durable. We provide personalized service and attention to every client, ensuring that your unique needs and budget are met. Contact us today for competitive pricing and efficient service. Our Services: Roof installation, Roof repair, Roof maintenance, Gutter installation, Gutter repair, Roof insulation installation, Roof cleaning, Emergency roof repair services, Roofing inspections, Roof replacement & more
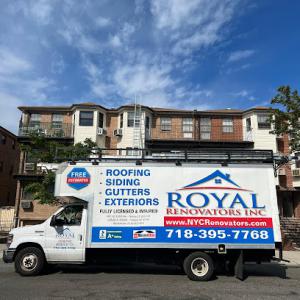
Royal Renovators
(718) 414-6067 www.nycrenovators.com
Serving
4.8 from 262 reviews
Royal Renovators is a trusted roofing contractor in Queens, serving homeowners and businesses throughout Queens, Brooklyn, Manhattan, the Bronx, and Long Island. We specialize in flat roof repairs and roof replacements for both residential and commercial properties. Since 1988, our licensed and insured team is BBB A+ Accredited and GAF Master Elite certified, working with flat and shingle roofing systems built to last. We also provide professional siding, masonry, and gutter services. From Brooklyn’s historic brownstones to Queens residential properties, clients choose us for honest, reliable roofing that withstands New York’s toughest weather. We offer emergency services for urgent leaks and storm damage. Call for Free Estimate today.
Alb Best Way Construction
(516) 244-0547 roofingalbbestway.com
Serving
5.0 from 75 reviews
ALB BEST WAY HOME IMPROVEMENT is fully licensed, insured, and bonded home improvement and roofing contractor. Specializing in roofing, chimneys, gutters repair, gutters install, gutter cleaning, siding, steps, masonry, skylight, sheetrock and more.
Prodigy Contracting
(516) 318-0105 www.prodigycontracting.net
Serving
4.9 from 38 reviews
Prodigy Contracting is a Veteran owned business servicing Long Island, New York since 2005. As a GAF Presidential Master Elite Roofer, we offer our clients exceptional quality and a lifetime warranty. Our siding designs feature innovative looks, with rustic contemporary touches and attention to detail service. We use Drone Technology to provide a 360 degree rendering of your project before and highlight your beautiful results after. We look forward to meeting you. Let us transform your home into you Dream Home
Five Star Roofing
(718) 795-6640 fivestarroofingny.net
Serving
4.8 from 443 reviews
Five Star Roofing is a fully licensed and insured commercial and residential roofing company located in Queens, NY. Since 2008, we have provided top-quality roofing services to Queens, Brooklyn, and Long Island homeowners. Our team of experienced and certified roofing professionals specializes in flat, shingle, tile, and metal roofs, as well as urgent repairs. Whether you need roof repairs, replacements, or installations, we have you covered! With a strong emphasis on excellent customer service and premium craftsmanship, we have built a reputation as one of the most trusted roofing companies in the area.
In Hollis, you frequently see a mix of pitched, older homes with modest slopes and a few low-slope additions that shelter porches or extensions. Asphalt shingles are a dependable first choice for this neighborhood because they handle the common moderate pitches you'll encounter and are easier to stage on tight Queens lots. They also pair well with the asphalt-based flashing that crews use around chimneys and dormers, which helps keep edges sealed in the face of winter melt and spring storms. For homes with more complex rooflines or tighter lot confines, asphalt shingles reduce the need for large scaffold footprints and give you reliable, repeatable workmanship on small or irregular roof sections.
Clay tile, concrete tile, slate, and copper appear on select older or higher-end New York-area homes, but their weight and detailing demands matter more in Hollis where many structures predate modern framing expectations. If a structure already has solid attic ventilation and a robust supporting deck, these materials can deliver long-term beauty and a distinctive profile. However, the added weight means you must verify framing, deck strength, and load transfer at junctions with parapets, chimneys, and skylights. Roofing teams should carefully plan for attic clearances, proper underlayment, and secure, continuous edge detailing to prevent holiday leaks where roof meets wall through fastener penetrations. For copper, consider continuity of details at valleys and seam transitions, and anticipate the need for professional patination and flashing care in the harsh winter-to-spring transition typical here.
Fiber cement shingles can suit older-home aesthetics in Queens, especially where owners want a more traditional look than standard asphalt without moving to the cost and structural demands of slate. They're a practical middle ground for a home with a visible street face or archival trim work, allowing bolder shadow lines and texture without the heavy retrofit required by natural stone or clay tiles. When choosing fiber cement, focus on color and edge detail that complement brick or clapboard exteriors common to the area, and ensure the profile aligns with surrounding streetscape so the roof reads as a cohesive element rather than a jarring upgrade.
Start with a thorough inspection of existing penetrations where older flashing may have softened or lifted, such as around chimneys, vents, and skylights. On mixed roofs, prioritize a continuous ice and water shield along eaves and above flashings to prevent ice dam issues that are prevalent after long winters. For heavier materials like clay or slate at select spots, verify that the deck framing and underlayment can handle the added load and that fasteners extend into solid framing rather than just sheathing. In areas with tight parapets or delicate trim, specify compatible sealing solutions that resist weathering without cracking the surrounding material. Finally, ensure proper ventilation in the attic to maintain an even moisture balance, since insufficient ventilation accelerates leaks by enabling condensation to migrate along roof joints and into insulation. Keep in mind that the most durable result comes from coordinating material choice with the home's character, structural capacity, and the efficient ducting of moisture away from living spaces.
Costs in Hollis are pushed by New York City labor rates, limited driveway and staging space on dense residential blocks, and extra time for debris handling and site protection. That combination tends to slow crews and require more careful logistics, which shows up as higher labor and protection line items on the bill. When a roof is hidden behind a row of attached homes or tucked between neighbors, even small delays can add up. Expect a baseline above suburban quotes for most common materials, driven by the challenge of maneuvering materials onto tight lots and safeguarding neighboring properties.
For asphalt shingles, expect roughly 450 to 800 per square installed in this market, with the same shingle profile often used on gable sections, dormers, or porch roofs. Clay and concrete tiles are heavier and help the long-term look, but they push the price toward the higher end, especially where structural reinforcement or crane access is needed; clay tiles run around 1,000 to 1,800 per square, and concrete about 900 to 1,600. Slate and copper, while less common on Hollis frame houses, can escalate quickly to 1,400-2,600 for slate and 2,500-5,000 for copper, due to extra handling, flashing detail, and careful material delivery on tight city lots. Fiber cement shingles provide a midrange, roughly 700 to 900 per square, with easier handling than heavier options.
Queens homes with dormers, chimneys, porches, and rear additions often have more cuts, flashing details, and separate roof planes than a simple suburban gable, increasing labor even when square count looks modest. If a roof includes multiple planes, expect additional waste hauling, more precisely-timed flashing installs, and extra inspections of joints where different sections meet. These features demand careful walkthroughs and phased work plans to avoid leaks during construction.
Heavier materials can raise costs further when structural review, specialized crews, and more careful material delivery are needed on tight city lots. If planning a replacement with long-term durability in mind, balance upfront material cost against the complexity of the roof geometry and the protection required to protect adjacent properties during construction.
Get a clear picture of your project costs upfront - no commitment required.

HK Builders: Best Roofing Company in Flushing
(718) 479-8888 hkbuilderscorp.com
Serving
4.8 from 119 reviews
Hollis falls under New York City permitting rather than a standalone village or town building office, so full roof replacements are handled through the city building system used across Queens. The process isn't a hurdle to endure for its own sake, but it does require timelines and paper trails to stay clear. When a contractor files the permit application, you should expect the plan to reflect the actual roof type, ventilation specifics, and any ice-barrier details that tie into local code expectations. Delays or back-and-forth questions can surface if the plan doesn't map cleanly to the actual installation, especially on older homes with mixed roof types that blend pitched sections with low-slope porches or extensions. In Hollis, a properly closed permit matters not just for compliance but for future proofing the home against insurer questions and buyer due diligence later on.
Inspection attention in this market commonly centers on ventilation, ice-and-water protection, and whether unusual materials or assemblies need additional plan detail before approval. Ventilation is not a vanity item; it keeps attics dry and reduces ice dam risk when winters are harsh. Ice-barrier placement near eaves and in valleys is scrutinized to ensure the membrane is continuous and adequately anchored to withstand freezing cycles. If a roof uses nonstandard assemblies-such as a mix of shingles with tiles or a specialty metal section-inspectors may request supplemental drawings or a brief narrative justifying the interfaces. Expect questions about how soffit vents, ridge vents, and attic spaces interconnect with the rest of the building's envelope, because a weak link here can trigger water intrusion despite a seemingly solid outer layer.
Before filing, coordinate with the contractor to align the permit details with the actual roof layout, especially where older stock merges different roof styles. After work finishes, ensure the final sign-off is obtained and stored, since insurers and future buyers will want proof the job was properly closed out. If a reviewer flags plan gaps, address them promptly with clear updates and, if needed, additional plan details that delineate ventilation routes and ice-barrier continuity. In Hollis, keeping the narrative of the project tight with the permit file helps prevent delays that can complicate a already complex replacement on a mixed roof system.
In Hollis, claim success often hinges on making a clear distinction between wear that existed before a storm and fresh damage caused by a sharp weather event. Older roofs with multiple prior repairs can blur that line, so you should focus on documenting the roof's condition before the incident and on gaps or failures that directly followed the weather. A history of patch jobs, mismatched materials, or sagging sections should be noted alongside any new leaks or damaged flashing.
New York insurers commonly expect detailed photo sets, contractor estimates, and permit or inspection records, which is especially important in Queens where replacement scope can involve several roof sections and accessory flashings. You want close-up shots of each questionable area, wide shots of the entire roof, and timestamped images that show conditions before and after the event. Keep a file of every estimate and any inspection notes that relate to the damage, especially for areas where multiple roof lines meet.
Weather-related claims can slow after regional storm events affecting the wider New York City area, so homeowners in Hollis benefit from immediate photo documentation and temporary dry-in records. Take pictures of interior water intrusion, ceiling stains, and attic conditions as soon as it's safe. If possible, capture daytime and dusk shots to illustrate moisture movement and any ice-damming signs on lower sections. A brief video walking the roof edge can also help convey the scope to an adjuster.
Time is a critical factor. Start compiling evidence the moment you notice damage and organize it in a chronological trail: pre-storm photos, storm-time observations, and post-storm updates. Keep a simple log noting dates, weather conditions, and any temporary measures you've taken, such as tarping or dehumidification, to show active mitigation.
Connect with contractors who help homeowners navigate the claims process from damage assessment to final approval.
HK Builders: Best Roofing Company in Flushing
(718) 479-8888 hkbuilderscorp.com
Serving
4.8 from 119 reviews
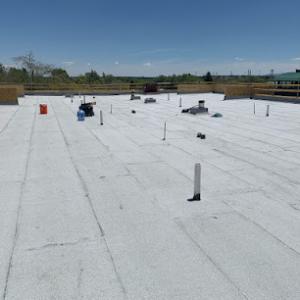
In this part of Queens, even when the main house roof is pitched, you often have low-slope porch covers, dormer tops, garages, or rear additions that age differently and need separate maintenance planning. These smaller low-slope sections are vulnerable to standing water, membrane seam fatigue, and drainage blockage from leaves, especially where neighboring trees overhang the roofline. Homeowners in Queens often discover leaks at the junction between the main roof and a later-built extension, where flashing quality varies from one renovation era to another. Treat these areas as distinct roof systems with their own drainage and flashing needs.
Start with a yearly walk of every flat or low-slope surface around the house, including porch roofs and rear extensions. Look for pooled water after rain, sags in the membrane, or debris buildup near drains and edge channels. Pay attention to the seam lines where different materials meet, and to any signs of moisture staining along the wall intersections. In Hollis, trees overhangs mean more leaf and needle debris; clean gutters and downspouts, and clear any blocked scuppers promptly. Inspect flashing at all transition points-where a porch roof meets the main roof, where a dormer edges a low-slope section, and where extensions tie into the housewall.
Focus on the quality of flashing at junctions created by later renovations. Even if the main roof has solid flashing, a later-built extension may rely on older methods or different materials. Confirm that flashing steps, counters, and sealant joints are continuous across the transition lines. Repoint or reseal any areas where flashing sits on a porous substrate or where the membrane meets brick, siding, or stucco. For any observed seam fatigue, plan timely resealing or replacement before a leak develops.
Ensure every low-slope surface has a clear drainage path. Test drainage by pouring water along the edge lines and verifying it exits through the intended outlets. Keep leaves, pine needles, and roof scoria away from drains and scuppers. If drainage is sluggish, lift and inspect the membrane edge for debris buildup or edge fastener loosening. Regularly reseal damaged edge terms to maintain a watertight perimeter across all attached sections.
Find specialists in TPO, EPDM, and built-up flat roofing systems for residential and commercial properties.

In Hollis, you will encounter a dense mix of older pitched roofs and low-slope additions, all competing in a busy Queens contractor market. When you start shopping, ask specifically who will do cleanup, who handles flashing work, and who completes the final permit closeout. Clean site discipline and a clear handoff on each of those steps save headaches after a storm or a weekend repair.
Shortlisting firms means looking beyond eye-catching ads. Quick response is a major local hiring factor, but on older Queens homes it is essential to confirm experience with chimneys, dormers, and mixed roof geometries rather than just basic shingle tear-offs. Ask for project references that match your roof style and layout, and request photos of comparable installations where water infiltration was a concern.
Because the market favors speed, you want to see a project plan that slows down long enough to address ice-damming risk, chimney flashing, and any penetrations common to Hollis homes. A roofer should outline how they inspect old flashing, how they integrate new drip edge and underlayment, and how they coordinate with nearby soffits and vents to maintain proper attic ventilation. If the firm treats these details as an afterthought, consider alternatives with proven attention to the nuances of older Queens structures.
Family-owned establishments with current licenses and insured coverage tend to balance affordability with reliability. This neighborhood trust does not come from a brochure; it shows in a long track record, transparent scheduling, and a willingness to walk you through permit-closeout expectations. When you interview, request a concise project timeline, a defined sequence for teardown, flashing, and resealing, and a point of contact who will be accountable through the final inspection.
Get a clear picture of your project costs upfront - no commitment required.
HK Builders: Best Roofing Company in Flushing
(718) 479-8888 hkbuilderscorp.com
Serving
4.8 from 119 reviews