Last updated: Apr 19, 2026
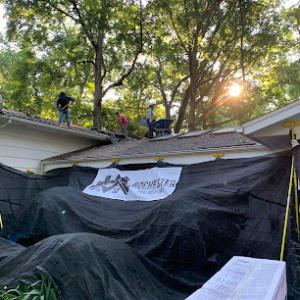
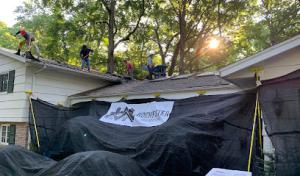
Rochester winters bring repeated freeze-thaw cycling that can lift shingle edges, back water up at eaves, and stress flashing around older roof penetrations. This isn't a single storm story; it's the slow, stubborn damage that accumulates as snow sits, then melts, then refreezes. Shingle tabs can peel back at the edges, exposing underlayment to moisture, while worn flashing around vents, chimneys, and skylights becomes a leakage hotspot. The result is brittle edges, saturated decking, and a cascade of tiny leaks that show up long after a thaw has passed.
Lake Ontario influence contributes to prolonged snow cover and roof-edge ice buildup, especially on older city homes with uneven attic insulation and ventilation. When attic warmth escapes unevenly, heat pockets melt the snow near the eaves, creating ice dams that back up water under shingles. On homes with limited soffit intake or poor baffle setup, the problem compounds, forcing water to seek weaker paths and often finding its way through nail heads, seam gaps, or compromised sealants. In practice, this means that even a relatively modest mid-winter warm spell can unleash a wave of leaks once the thaw ends and the freeze returns.
Abrupt changes after a thaw are a core Rochester cue. Look for soft or curling shingle tabs along the roof edges, a dark line of moisture staining on interior ceilings near exterior walls, and small pools of meltwater at interior ceiling joints after a warm spell. Ice forming at the gutters and along the eaves is another telltale sign that meltwater is trying to move and is getting trapped. If flashing around a vent pipe or chimney shows lifting or corrosion, that is a vulnerability that can turn into a leak with the next freeze.
Take a proactive approach by addressing attic balance first. Ensure insulation is continuous to keep heat from escaping into the roof plane, and verify that soffit vents and attic baffles provide clear pathways for cold air to keep the roof cold where it should be. In Rochester's climate, a colder attic helps the roof shed snow rather than melt it toward the interior. Seal gaps around penetrations with appropriate flashing and sealants, and consider upgrading vent boots and step flashing where they've aged. If gutters and downspouts are clogged, meltwater will back up onto the roof edge, where ice dams begin to form; clear the debris and ensure proper downspout drainage away from the foundation.
Older roofs, especially with uneven attic insulation, often fail at the edges first. Loose or corroded step flashing around chimneys and vents is a frequent failure point, allowing water to travel behind shingles. Reinforcing these edges with fresh, properly integrated flashing, counter-flashing, and a continuous seal along the rake and eave lines can arrest further intrusion. If the roof deck shows reveals or delamination from moisture, a targeted repair or full edge re-seal may be necessary to prevent recurring leaks during thaw cycles.
Emergency leak calls in Rochester often follow thaw periods after snow accumulation rather than a single severe storm event. If interior water is actively dripping, prioritize stopping the source by carefully removing standing snow from the affected area and protecting furnishings. Seek quick, targeted roof access to mitigate further damage, then arrange a detailed assessment to address the underlying ice dam and flashing failures. Delaying comprehensive edge repairs after a thaw can allow ice and water to intrude deeper, aggravating insulation and decking damage.
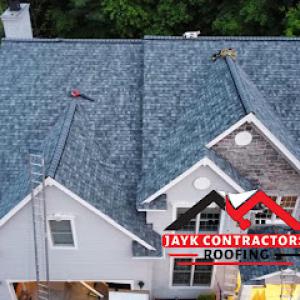
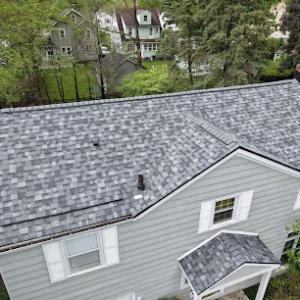
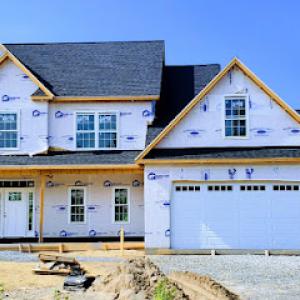
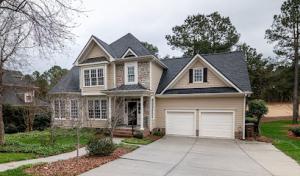
Asphalt shingles are the most common choice on Rochester homes because they fit the city's older housing stock and broad price sensitivity. In practice, you'll find them widely used on 2- to 2.5-story homes with less-than-perfect roof geometry and a variety of roof pitches. The local climate pushes them to handle winter freeze-thaw cycles with a reasonable service life when installed with a proper attic ventilation balance and an effective ice dam strategy. The key local concern is winter brittleness and granule wear, which means you should prioritize a product with good granule retention and a shingle with proven performance in cold temperatures. If your roof already has asphalt, keep an eye on granule loss in the fall and plan a replacement strategy that aligns with the neighborhood's typical roof heights and run lengths. When choosing, prioritize a shingle that explicitly addresses cold-weather performance and has a solid warranty backed by a manufacturer familiar with northern climates.
Metal roofing is a meaningful local upgrade option because snow shedding and freeze-thaw durability appeal to homeowners planning for long service life. In practice, metal responds well to Rochester winters: snow tends to shed more predictably, and the surface resists the repeated freeze-thaw damage that can strain other materials. Metal can be a smart choice if you're replacing an aging roof with a long-term view and you want reduced risk of ice dam buildup along the eaves. Pay attention to panel profiles and the underlayment strategy, because improper sealing or ventilation mismatches can blunt the benefits. If you're weighing metal, consider how the roof line and attic space will accommodate the panels and fasteners, and ensure the installation crew has frost-season experience. A properly installed metal roof can nearly eliminate some common winter maintenance tasks that crop up after a heavy snowfall.
Clay and concrete tile exist in the market but are far less common fits for Rochester's typical residential roofscape than asphalt and metal. Tiles can offer durability and a distinctive look, but they introduce weight considerations and require careful structural assessment. In older homes, roof decks and rafters may not be ready to carry tile loads without reinforcement. You'll also encounter steeper roof requirements to shed snow effectively, and installation details must address freeze-thaw movement through properly designed clips and backer materials. If tile shows up as an option, approach it with a plan for roof structure, potential retrofits, and a clear understanding of how winter conditions could affect expansion and contraction. For most houses in the typical neighborhood mix, asphalt or metal remains the more predictable path.
In practice, match material choice to your home's age, roof geometry, and long-term maintenance expectations. For asphalt, insist on a cold-weather-tested shingle with strong granule adhesion and a ventilation strategy that prevents ice dam formation. For metal, ensure the installer coordinates insulation, underlayment, and flashing to maximize snow-shedding benefits without creating cold spots at eaves and valleys. If tile is under serious consideration, bring in a structural assessment early and verify the roof deck can support the additional weight. In all cases, plan for an approach that minimizes ice dam risk and stabilizes the roof against repeated freeze-thaw cycles through proper ventilation, sealing, and attention to edge details.
Rochester pricing is shaped by the short prime installation window from late spring into early fall, when demand concentrates around drier weather. That means you'll often see higher bids or tighter schedules if you wait until the heart of summer or after early fall storms. Planning ahead for a spring or early-summer project can help you lock in favorable labor, staging, and material availability. The timing also influences lead times for asphalt shingles and metal options, so confirm start dates and contingency plans early to avoid weather-induced delays that push costs up with overtime or expedited material shipments.
Asphalt shingles stay the most common, with a practical spread around 350 to 650 USD per square here, depending on underlayment, venting upgrades, and the roof's complexity. Metal roofing runs higher, typically 700 to 1100 USD per square, but can pay back with longer life and better ice dam resistance in severe winters. For the historic feel Rochester homeowners sometimes seek, concrete or clay tiles start higher-concrete tiles from 800 to 1500 USD per square, clay tiles from 900 to 1800 USD per square-often paired with precise underlayment and flashing work to endure freeze-thaw cycles. Wood shingles or shakes sit around 600 to 1100 USD per square, offering a distinctive look but higher maintenance in heavy snow regions. Synthetic or composite shingles provide a middle ground, roughly 450 to 800 USD per square, with added longevity and improved wind resistance.
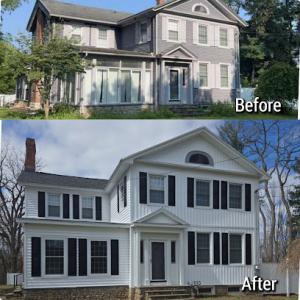
Older Rochester homes can raise costs when decking repairs, ventilation corrections, chimney flashing work, or full tear-offs are needed after years of winter moisture exposure. Ice dam damage often reveals hidden rot or delamination that demands partial or full deck replacement. Ventilation balance matters for attic heat and moisture control; improper setup can undermine roof performance during freeze-thaw cycles. Chimney flashing is a common leak point after heavy snows, and misaligned flashing costs can cascade into costly labor if left unaddressed during the main replacement. If a full tear-off is required to restore a clean slate, expect the high end of the project's range, plus debris containment and cleanup time that's heavier on steeper houses.
Steeper traditional rooflines and detached-house layouts common across neighborhoods can affect labor, staging, and cleanup time. More complex slopes require longer rigging, extra safety measures, and careful waste management, which translates to higher per-square prices or added line items in the contract. Builders often note that a straightforward, single-pace install on a ranch-style home moves faster than a multi-gable, steep- pitch roof with a detached garage and chimney chase. Anticipate a plan that allocates sufficient time for material handling, ladder safety, and final inspection to ensure shelter from the remaining Rochester snowpack.

Capital City Contractor
(585) 228-7663 capitalcitycontrac.com
639 Ave D, Rochester, New York
5.0 from 124 reviews
At Capital City Contractor, we specialize in roofing and general construction services for both residential and commercial properties across the Rochester, NY area. With over 8 years of experience, our licensed and insured team delivers roof repair, replacement, metal roofing, TPO, PVC, rubber roofing, and asphalt shingle installation with top-quality workmanship and honest pricing. We take pride in our excellent customer service, fast response, and long-lasting results. Whether you need a new roof, emergency leak repair, or full commercial roofing project, Capital City Contractor is your trusted local contractor. As a locally owned company, we value our community and aim to make a lasting impact through reliable, high-quality.
JAYK Contractor Roofing
(585) 512-6082 jaykroofing.com
900 N Greece Rd, Rochester, New York
5.0 from 104 reviews
We are a local roofing company whose top priority is great value and customer service. We specialize in asphalt shingle roof replacement & siding replacement. We serve In the areas of Rochester, Albany & Vermont. Call us to schedule a FREE roofing estimate today!
Morreall & Company
(585) 204-2005 www.morreallandcompany.com
Second Floor, 485 Titus Ave Suite F2, Rochester, New York
4.9 from 238 reviews
Morreall and Company is a exterior company based out of Rochester, New York. We provide services in the following areas: roofing, siding, gutters, leaf guards, and more! We are in the business of quality and customer satisfaction. Your happiness is our pleasure! We offer free inspections and honest opinions. Get a personal experience and allow us to help you through the process from start to finish. We can handle all jobs big or small. We also have financing options available to help with your investment needs. With over 20 years of experience you'll be happy you called the pros at Morreall Contact us now for a free consultation!
Long Construction NY
(585) 433-5664 longconstructionny.com
2075 Dewey Ave, Rochester, New York
4.9 from 562 reviews
Maintaining the roofing of any structure is no easy job. But with Long Construction, you can be assured any problems will be fixed with attention to detail, and they will be promptly resolved to keep the residents and occupants of the building worry-free. If you are in need of a residential or commercial roofer, our company would definitely be a perfect choice. Equipped with a proven track record, excellent reviews, and reliable workmanship, our company can guarantee you a professional and efficient service that would be difficult to find. 24/7 Emergency Services available!
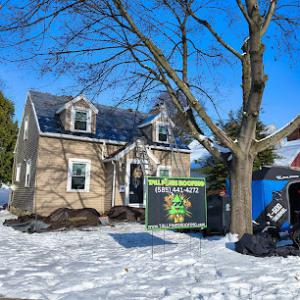
Tall Pines Roofing
(585) 441-4272 tallpinesroofing.com
1742 Long Pond Rd Suite 2, Rochester, New York
5.0 from 82 reviews
At Tall Pines Roofing, exceptional customer service is at the core of our philosophy. We proudly serve as your go-to roofing contractor in Rochester, NY and surrounding areas, specializing in roof repairs, metal and shingle roof replacements, skylight and sun tunnel installations, gutter cleaning and guard installations, fascia and soffit repairs, and siding installation services. Our highly skilled and certified professionals go above and beyond to meet the unique needs of each client, delivering flawless craftsmanship that will enhance the beauty and integrity of your property. Experience the elevated standard in roofing with Tall Pines Roofing
Rochester Pro Roofing
(585) 505-8000 rochesterproroofing.com
40 Edwards Deming Dr, Rochester, New York
4.9 from 125 reviews
Since 2015, Rochester Pro Roofing has been a trusted family owned roofing company, proudly serving the Rochester community with expert roof installation, roof replacement, roof repair, roof inspection, and roof maintenance services. Their experienced roofing contractors specialize in asphalt shingle roofing, metal roofing, flat roofing, and commercial roofing systems, as well as gutters, siding, and skylight installation. The team’s commitment to exceptional craftsmanship, quality materials, and meticulous attention to detail ensures every project is completed to the highest standards. Whether you need a new roof, a leak repair, or routine upkeep, Rochester Pro Roofing delivers durable, weather resistant, roofing solutions.
Giordano Roof Replacement & Roof Restoration
(585) 467-6767 www.bestroofingcompanyofrochester.com
115 Fairfax Rd, Rochester, New York
4.9 from 311 reviews
At Giordano Roof Replacement & Roof Restoration, our experienced roofing contractors in Rochester NY can handle your roofing needs. Whether you need a roof replacement, repairs, insulation, ventilation, emergency roof repairs, metal roofing or gutter installation, we have got you covered! From Slate, Clay, Terracotta, Concrete Tile to Metal Roofs we can repair all types of roof your home has. Serving in Rochester, Victor, Pittsford, Mendon NY.

Highland Contractors
(585) 507-3658 highlandcontractors.com
620 S Clinton Ave, Rochester, New York
4.8 from 691 reviews
Since opening in 2008, we have become masters of our craft. Our commitment to quality products, exceptional services, and incomparable customer care keep our community coming back again and again. We never stop improving and are continuing to expand our offerings based on how we can best serve the Rochester area. Call us today!
Exceptional Exteriors Roofing & Siding
(585) 284-2800 exceptionalexteriorsinc.com
68 N Union St, Rochester, New York
4.8 from 235 reviews
With over 30 years of experience, Daryl Sadwick founded Exceptional Exteriors to serve the home improvement needs of residential customers in Rochester, NY and we are your residential and commercial roofing experts. Daryl has a knack for building and developing specialized teams for specific projects. As a result, Exceptional Exteriors consists of multiple crews with an expertise in home solutions such as roofing, siding, and decks (to name a few). These crews are able to concentrate on their craft and provide homeowners with the absolute best results for their residential projects.
Summit Roofing
(585) 455-7160 summitexteriors.org
333 Metro Park, Rochester, New York
4.9 from 259 reviews
Summit Exteriors, based in Rochester NY, is a top-rated and trusted roofing contractor serving homeowners across Upstate NY. As one of the leading roofing companies in Rochester NY, we specialize in roof replacements, storm damage restoration, siding, gutters, windows, and doors. We offer 24/7 emergency service, free inspections, same-day estimates, and full insurance claim support. With zero down and low monthly payments, we make exterior projects stress-free and affordable. Experience the difference with a company that puts customer satisfaction first—your reliable choice for expert roofers in Rochester NY.
Adonis Roofing
(585) 953-9713 www.adonisroofing.com
25 Lianne Dr, Rochester, New York
4.8 from 168 reviews
We provide free estimates. We are fully insured with general liability and workers comp insurance
Fine Line Improvements
(585) 269-9069 finelineimprovements.com
74 Long Meadow Dr, Rochester, New York
4.8 from 131 reviews
Family-owned roofing and siding business specializing in asphalt roof repair & replacement, standing seam metal roofs, silicone roof coatings and siding replacement & repair.
A full roof replacement typically requires a building permit through the City of Rochester Building Department. Before any shingles come off, verify that the project has the correct permit path and that the permit covers not just the material change but the scope of the actual construction work. The permit process protects both you and neighboring properties, especially in a city where snow loads, ice dams, and venting balance play a big role in roof performance. Expect the permit to need official project details, including the proposed roof type, underlayment, and any structural changes that may affect the attic or ceiling assemblies. Plan to submit forms well in advance of start date to avoid delays that linger into the harsh winter window Rochester homes already contend with.
In this market, Rochester may require plan review when the project changes structure or ventilation rather than simply replacing the existing roof covering. If the replacement involves altering vent locations, ridge vents, soffit intake, or attic insulation strategy, the plan review becomes a meaningful checkpoint. The city wants to see that ventilation remains balanced to cut ice dam risk and to prevent freeze-thaw damage in the roof deck and attic space. If the project adjusts attic height, adds a window or dormer, or changes how the roof ties into exterior walls, anticipate a more formal review process. Expect additional questions or requested revisions that specifically address airflow, baffle placement, and moisture control details.
Historic or special district conditions in parts of town can add review quirks beyond a standard reroof permit workflow. In neighborhoods with preserved facades or strict architectural guidelines, the Building Department may route the plan through a design review committee or require materials and details to match historic criteria. Even if the replacement is functionally identical to the existing roof, a few cosmetic or proportional adjustments can trigger extra steps. If your home sits in a designated historic district, contact the planning or architectural review office early, and have color samples, shingle profiles, and venting strategies ready for review. Timelines can extend if historic compliance requires preservation-minded replacements or specific detailing to maintain the building's historical character.
Start by confirming the permit type and the need for plan review with the Building Department before ordering materials. Gather a clear scope of work with measurements, ventilation plan, attic insulation details, and underlayment specifications. When plans are approved, schedule inspections in a timely manner-rough-in, decking, and final-so that weather windows do not complicate your timeline. Keep a copy of the permit and any approved plans on site during work, and be prepared to show accessibility for inspectors to verify attic ventilation and roof-to-wall connections. Clear communication with the contractor about inspection expectations helps avoid delays that can be troublesome during Rochester's ice-dam season.
Late winter and early spring storms can unveil weak spots that were covered by snow and ice all winter. In this city, the lingering moisture from lakeside winds and heavy rainfall can seep into gaps, flashing, and eaves, revealing leaks well before replacement season fully opens. Those hidden problems can escalate quickly once the ground dries enough for crews to work, forcing last-minute shingle or underlayment fixes that disrupt plans and push schedules. If a roof shows soft spots after a May thunderstorm, treat it as a red flag: the underlying decking may have absorbed more damage than it appears, and a rushed fix this season can invite another round of ice dam stress come next winter. The key is to identify and address compromised areas while the weather still has enough consistent warmth to dry surfaces safely, not after a downpour has saturated interior framing.
Fall in this climate brings stiff winds and a roaring pile of leaf debris that can clog gutters, valleys, and roof penetrations. Those conditions complicate installation logistics and can slow progress as crews chase debris, reseal flashings, and protect vulnerable chimney and vent terms. Late-season completion becomes critical before winter sets in, when temperatures drop and surface adhesion becomes unreliable. Consider a plan that accommodates shorter work windows and contingency days for weather delays. A well-timed fall schedule reduces the chance of weekend reworks caused by gusts that peel back edge controls or force shingle layoffs as they dry out.
Late spring through early fall is generally the preferred replacement window because surfaces are drier and crews can avoid winter adhesion and safety problems. If a project slides into late fall, ensure there is a clear pathway to finishing before next freeze, with an early start on critical details like roof-to-wall penetrations and attic vent balance. In Rochester, the weather can flip quickly, so patience with sequencing-deals, material delivery, and access-pays off in the long run and minimizes the risk of future repairs from hurried fall work.
Find local contractors experienced in assessing and restoring roofs after hail, wind, and severe weather events.

Capital City Contractor
(585) 228-7663 capitalcitycontrac.com
639 Ave D, Rochester, New York
5.0 from 124 reviews
Tall Pines Roofing
(585) 441-4272 tallpinesroofing.com
1742 Long Pond Rd Suite 2, Rochester, New York
5.0 from 82 reviews
Giordano Roof Replacement & Roof Restoration
(585) 467-6767 www.bestroofingcompanyofrochester.com
115 Fairfax Rd, Rochester, New York
4.9 from 311 reviews
When a claim is on the table, expect New York carriers serving this area to want age records, photos, and a contractor estimate before approving major roof-related claims. Start gathering items before the weather turns again: recent invoices, a dated set of roof photos from different angles, and a written assessment from a reputable local contractor. Keep a simple timeline that ties each photo to a date or weather event-leaks after a heavy snowstorm, wind uplift during a nor'easter, or a visible ice dam along an eave. Store these in a single folder you can share quickly with the adjuster. If the roof has a known age or prior repairs, include those records so the insurer can see the roof's history and any ongoing vulnerability.
In Rochester, claim review often hinges on whether damage came from a recent weather event or is the product of long-term wear accelerated by winter freeze-thaw cycles. Document how the condition changed after a specific storm, and note temperature swings that followed. Take close-ups of ice dam formations, fascia, underlayment exposure, and any sagging or missing shingles. If sheets of granules are missing or flashing is bent after a wind event, photograph those specifics with context. When possible, arrange a same-day contractor visit to translate observed damage into a professional opinion that clearly links the loss to a recent event rather than slow decay.
Older roofs may face depreciation considerations that affect settlement timing and scope. Prompt documentation after leaks, wind events, or snow-related damage is essential to persuade the insurer that current damage is not simply pre-existing wear. Have the contractor's estimate itemized to show the scope of necessary repairs or replacement and how the findings relate to the observed conditions. Clear ties between weather-driven incidents and the damage observed will streamline the claim review and reduce back-and-forth.
Connect with contractors who help homeowners navigate the claims process from damage assessment to final approval.
Tall Pines Roofing
(585) 441-4272 tallpinesroofing.com
1742 Long Pond Rd Suite 2, Rochester, New York
5.0 from 82 reviews
Summit Roofing
(585) 455-7160 summitexteriors.org
333 Metro Park, Rochester, New York
4.9 from 259 reviews
Rochester Premier Roofing
(585) 233-4576 www.rochester-premier.com
1385 Empire Blvd Suite 245, Rochester, New York
4.9 from 57 reviews
Chimneys are a frequent trouble spot on older homes with masonry flues and roofs that shoulder long Rochester winters. The flashing where the chimney meets the roof is a common liability after years of freeze-thaw cycles, and ice dams make the problem worse by trapping meltwater against the flashing and letting moisture work inward. If you notice peeling shingles near the chimney, staining along the exterior brick, or damp rafters in the attic, treat flashing as the first line of defense rather than a cosmetic patch. A careful inspection during a thaw, when ice is loosening, often reveals loose counter-flashing, lifted shingles, or gaps where mortar has cracked.
Skylights become higher-risk entry points when snow and ice linger around curbs and flashing during winter thaw cycles. In Rochester, prolonged cold snaps followed by rapid warming cause water to push under flashing and sealant, especially where the curb is set tight against the roof plane. Leaks may manifest as staining along interior ceilings or sudden condensation on the skylight glass during sunny days after a thaw. When inspecting, look for degraded silicone, missing shims, or deteriorated roofing cement around the curb-areas that can fail once moisture cycles freeze and thaw repeatedly.
On aging homes, penetrations such as vent pipes, vents for bathrooms or furnaces, and satellite or chimney-looking fixtures often need attention during reroofing. Winter moisture can exploit old sealants and step flashing, driving water under shingles and into the roof deck. If penetrations show rusted flashing, lifting nails, or worn boot flanges, plan to refresh flashing and reseal paths during any roof work. In Rochester, ensuring a continuous, clean barrier around every penetration helps resist the next freeze-thaw cycle rather than chasing recurring leaks after a storm.
During inspections, prioritize the flashing around chimneys, skylights, and all roof penetrations. Keep an eye on sealants around curbs and verify that step flashing remains tightly interlocked with the shingle courses. In winter, remove heavy snow from around flashing where safe to do so, and watch for damp or dark spots on ceilings after warm days. A proactive approach-addressing compromised flashing, resealing old joints, and re-seating nails-reduces the chance that moisture one winter will find its way into the attic the next.
Find contractors experienced in skylight installation, flashing, and leak repairs to bring natural light into your home.
JAYK Contractor Roofing
(585) 512-6082 jaykroofing.com
900 N Greece Rd, Rochester, New York
5.0 from 104 reviews
Morreall & Company
(585) 204-2005 www.morreallandcompany.com
Second Floor, 485 Titus Ave Suite F2, Rochester, New York
4.9 from 238 reviews
Tall Pines Roofing
(585) 441-4272 tallpinesroofing.com
1742 Long Pond Rd Suite 2, Rochester, New York
5.0 from 82 reviews
On flat-roof sections, ponding water is not just a nuisance-it's a signal. When spring rain hits a layer of ice underneath a frozen edge, membranes and flashing take repeated freezes and thaws. The result is faster aging, more seams opening, and higher risk of leaks around penetrations. Mixed roof systems are common: the rear addition may be low-slope while the main house keeps its shingles. That means you'll want a contractor who understands both systems and can plan detailing at the transitions.
Start with a thorough debris and snow removal plan in winter. Clear the edges and scuppers after heavy snowfall, but avoid aggressive ice-chopping that tears membranes. After thaw cycles, inspect for membrane blistering, seam lifts, and flashing around vents and skylights. Look closely where the low-slope section ties into the steep-slope main roof; misalignment here is the most frequent failure point in winters. Schedule a mid-winter check if you have known ice dam risk, and after the spring rains, for signs of ponding-accelerated leaks. Keep a careful eye on edge enclosures and any temporary weatherproofing used during construction.
If a home has both main-house shingles and rear low-slope, ask for a single contractor who can engineer the whole envelope. They should sequence drainage improvements, ensure uniform flashing height, and specify compatible membranes and termination details at transitions. A unified plan reduces the chance of a patchwork failure that becomes visible only after a heavy thaw.
Rochester's mix of porches and additions often creates subtle slope changes. Document existing roof conditions and expect that future upgrades may reuse or retrofit portions rather than a full tear-off every time. A clear handoff plan helps avoid surprises.
Find specialists in TPO, EPDM, and built-up flat roofing systems for residential and commercial properties.
Capital City Contractor
(585) 228-7663 capitalcitycontrac.com
639 Ave D, Rochester, New York
5.0 from 124 reviews
Rochester Pro Roofing
(585) 505-8000 rochesterproroofing.com
40 Edwards Deming Dr, Rochester, New York
4.9 from 125 reviews
Highland Contractors
(585) 507-3658 highlandcontractors.com
620 S Clinton Ave, Rochester, New York
4.8 from 691 reviews
In this market, the contractor landscape shows a strong presence of long-established companies, a factor homeowners should weigh heavily when choosing who handles a winter-driven roof project. A crew with roots in the area is more likely to stay reachable for future service calls after a harsh winter or a late-season freeze. Look for a business that has stood the test of multiple seasons, with a track record of honoring warranties beyond the initial years and a history of responding to snow-related concerns such as ice dam mitigation and venting adjustments. A local reputation for steady service can translate into less stress when a winter hiccup spills into a tear-off or a follow-up repair.
Cleanup is a major local hiring priority, especially on older residential lots where tear-off debris, nails, and landscaping protection matter. Ask prospective crews how they protect gardens, driveways, and walkways during a full tear-off, and what their process is for nail removal and debris hauling. Insist on a thorough cleanup plan that includes magnetic sweeping of the work area and a firm commitment to leave no stray fasteners behind. A crew that documents their cleanup protocol is signaling that winter-driven messes won't become spring cleanups you didn't anticipate.
Because reroofing dominates the Rochester market, homeowners often compare contractors on responsiveness, chimney experience, and whether workmanship support is clearly documented. Ensure the contract spells out workmanship guarantees, scope of work, and clear post-install support for common freeze-thaw issues that stress chimney penetrations, vents, and flashing. Prioritize crews that can present a concrete plan for addressing ice dam risk, proper ventilation balance, and flashing details around chimneys and dormers. A written warranty package paired with a dedicated point of contact makes it easier to navigate snow season follow-ups and potential warranty work years down the line.