Last updated: Apr 19, 2026
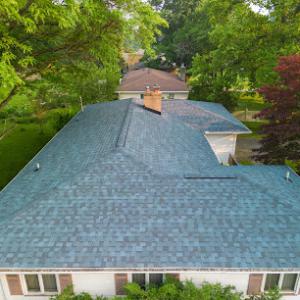
Buffalo's position on Lake Erie produces lake-effect snow bands that can load roofs unevenly across the city and nearby neighborhoods. This isn't a uniform blanket of white-the cloud bands drift and pause, dumping heavy snow on some blocks while neighboring houses stay lighter. That pattern pushes roofs to carry snow where it wants to slide, creating hotspots where the weight concentrates. When the wind shifts or a thaw starts, those hotspots become the first places to see trouble: sagging or splitting sections, misaligned flashing, and the dreaded ice dam forming at the eave as meltwater refreezes.
Winter stress in Buffalo commonly shows up first at eaves, valleys, gutters, and around chimneys where refreezing water backs up under shingles. Ice dams aren't just an inconvenience; they force water to back up under roofing materials, leaking into attic spaces and ceiling lines. When patches of ice cling to eaves, heat escaping through the attic accelerates melt and refreeze cycles right at the roof edge. You may see small icicles grow into thick ice ridges, or notice stained or bubbled interior ceilings near the eaves after a thaw. The pattern is telling: heat loss in the attic is driving the problem, and the edge of the roof is bearing the brunt.
Homes in Buffalo frequently have older attics and ventilation layouts that make heat loss and ice-dam formation a bigger roofing issue than in milder upstate markets. If soffit vents are blocked, insulation is undersized, or ductwork and gaps allow warm air to rise into the attic, the roof edge becomes a consistent ice dam factory. In many older homes, attic access and vent routes weren't designed for today's insulation standards, so heat leaks persist despite exterior cold. The result is a cycle: heat leaks upward, melts roof snow, water travels toward the eave, and refreezes into an ice dam that backs up under shingles, accelerating wear on the underlayment and flashing.
Uneven snow loading isn't just about depth; it's about how wind, sun, and roof geometry interact with the local climate. Steeper roofs shed snow more quickly, but the long, cold Buffalo season means repeated cycles of thaw and freeze. Each cycle weakens the edge and joints, especially where old flashing meets the chimney or at intersections with dormers and valleys. A compromised edge invites water intrusion into the roof deck and attic, and small gaps can become large leaks after a heavy thaw.
Take action before the next deep freeze arrives. Start with a thorough attic assessment: confirm insulation levels meet the climate, seal obvious gaps around penetrations, and verify that soffit and ridge vents are clear of obstruction. Improve attic air sealing without creating moisture traps; this helps minimize heat loss that feeds ice dam formation. If flashing around chimneys, skylines, and valley intersections shows signs of aging, address it promptly-leaks often begin at these vulnerable joints. Regularly clear roof edges and gutters of heavy ice and debris, especially after big snows, to prevent dam formation from the edge inward. For roofs with known ice dam history, consider a professional evaluation of underlayment and potential snow guards or edge heat solutions that reduce edge melt while allowing proper drainage.
If ice dams persist despite basic maintenance, or if attic heat loss problems are suspected, bring in a local roofer experienced with Buffalo winters. A seasoned professional will inspect the eaves, valleys, and chimney flashing for signs of damage, assess insulation and ventilation adequacy, and recommend targeted repairs that curb ongoing ice dam risk. Early intervention saves more extensive damage later and helps protect interior spaces from costly water intrusion as winter storms continue to roll in.
In Buffalo, spring thaw and heavy rains often expose leaks that were created earlier by winter ice backup rather than by a single rain event alone. That means you may see water stains or active drips after a melt that seems modest on the surface. The culprit isn't just rain; it's the meltwater refrozen along eaves, backed up by ice dams that push moisture under shingles. To stay ahead, focus on the cold-season buildup before the thaw hits: remove snow from the roof edge so melting water can shed rather than back up, and check attic spaces for warmth leaks that melt and refreeze into a new dam. If you notice water marks or damp insulation after a thaw, inspect along the eaves and around penetrations-the chimney, vent pipes, and dormers are common failure points in this weather pattern. Action: keep a lightweight roof rake handy to clear the lower 3 to 4 feet of each slope after heavy storms, and seal obvious attic gaps to prevent warm air from melting snow where it should not.
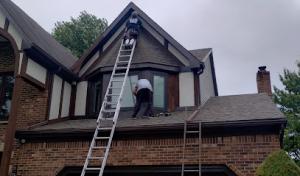
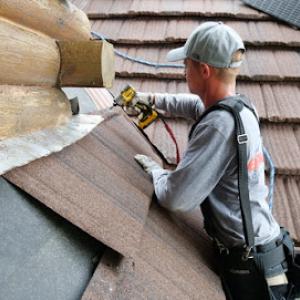
Autumn wind events off the Great Lakes raise the risk of shingle loss and flashing movement before winter arrives. A few shingles loosened by sudden gusts can pave the way for leaks once snow piles up and freezes. Look for lifted tabs, cracked flashing around chimneys or skylights, and any slope edge damage. If you find loose pieces, secure them with proper fasteners and reflash if needed. Do not ignore small gaps around vents and chimneys-those gaps become channels for water during freeze-thaw cycles. Prepare now by resealing edges and making sure ridge cap shingles are snug and intact. The goal is to minimize weak spots before the real freeze-thaw season begins, when even minor damage compounds quickly.
Summer hail and heat matter in Buffalo, but many roof failures are cumulative and tied to repeated seasonal swings rather than one isolated storm. The roof endures cycles of expansion and contraction, plus ultraviolet aging, which can loosen flashing and degrade underlayment over time. A single intense hail shower might not wreck things, but a series of hot, dry days followed by a sudden chill can push vulnerable joints beyond their limits. Inspect the entire roof after peak heat periods and after heavy, shifting thunderstorms. Pay attention to edge eaves, valley protection, and around service penetrations. If you see curling shingles, granule loss, or pale patches that indicate substrate exposure, treat it as a warning sign and address it before the next snow load builds up. Proactive steps now-tightening, resealing, and replacing damaged segments-keep the roof from failing when winter storms arrive.
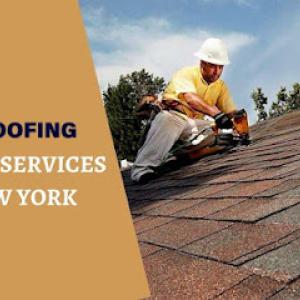
Find local contractors experienced in assessing and restoring roofs after hail, wind, and severe weather events.
Lifetime Siding, Roofing & Construction
(716) 239-6476 www.lifetimesidingandroofing.com
5500 N Bailey Ave, Buffalo, New York
4.9 from 115 reviews
Dynamite Home Repairs
(716) 510-5602 www.dynamitehomerepairsllc.com
265 Hopkins St, Buffalo, New York
4.8 from 50 reviews

King Remodeling Corp roofing contractor
(716) 705-1081 www.kingremodelingcorp.com
48 Kenova St, Buffalo, New York
5.0 from 177 reviews
King Remodeling is a trusted contractor offering residential and commercial roofing, vinyl siding, and gutter services in Buffalo, NY and surrounding areas. We provide expert roof repair, roof replacement, new roof installation, roof inspection, flat roofing, metal roofing, and emergency roof repair. Our siding services include professional vinyl siding installation, siding repair, and full siding replacement. We also offer gutter installation, gutter repair, gutter cleaning, and complete gutter replacement. Proudly serving Buffalo, Amherst, Cheektowaga, Tonawanda, and nearby communities. Searching for roofing companies near me, siding contractors near me, or gutter services near me? Contact King Remodeling today for fast, reliable service
DSS Roofing
(716) 907-7373 www.dssroofing.com
127 Hiler Ave, Buffalo, New York
5.0 from 87 reviews
DSS Roofing is a Buffalo, NY-based authorized roof replacement and installation contractor, DSS Roofing Team has been renowned for its world-class services and professional workmanship in roofing services – replacement and construction, chimney repairs and construction, and emergency roof snow removal services in Buffalo, New York, and across the USA. The team is trusted and known for fast and efficient work and that all too on reasonable pricing. DSS Roofing provides free pre-estimate for its services by that anyone can make and analyse their construction and service budget. For Residential or commercial needs opt-out free quote for roofing services.
OConnor Contracting
(716) 600-7663 www.oconnorroofingbuffalo.com
106 Hubbardston Pl, Buffalo, New York
4.9 from 273 reviews
OConnor Contracting was founded to help the homeowners of Western New York with their roofing and siding needs. The Western New York area experiences four distinct seasons, with cold and snowy winters, rainy spring weather, hot summers, and unpredictable autumns. Changes in temperature and wet weather can create difficulties for residential roofing in particular. Your roof is a strong and weathertight guardian against the outside world, including wind, rain, and even pests. However, it can be vulnerable to storms and severe weather; In addition, every component needs to work seamlessly together to prevent damage. Even the smallest problem in your roof can cause moisture damage, which in turn creates a snowball effect.
Five Star Roofing Consultants & Services
(716) 828-6279 www.fivestarserviceswny.com
1320 Military Rd, Buffalo, New York
4.9 from 121 reviews
Five Star is known for its roofing and home improvement; we offer a wide variety of services including siding, custom trim, window & door replacements, kitchen & bath remodels, and additions. Each is performed with an emphasis on customer service and honest work.
Lifetime Siding, Roofing & Construction
(716) 239-6476 www.lifetimesidingandroofing.com
5500 N Bailey Ave, Buffalo, New York
4.9 from 115 reviews
We are a team of professional roofing contractors that service Buffalo, NY as well as Cheektowaga and Niagara Falls. Our services include new roof installations, roof trimming, roof repairs, chimney services foundation works, or decks and porches. We are here to make sure your family and your homes are protected from the harsh weather seasons in WNY during the most unexpected time of the year. Get your FREE quote today!
Dalex Roofing
(716) 609-2918 www.dalexroofing.com
1974 Eggert Rd, Buffalo, New York
4.8 from 250 reviews
Since 2004 the Dedovets brothers have strived to provide quality materials and the best roof installation practices. As a locally owned and operated business, Dalex has built a reputation as a leading roofing contractor in the Western New York area, continually advancing and evolving our practices to the latest roofing materials and technology. Thousands of pleased customers have depended on Dalex Construction for their roofing needs.
Stellar Roofing - Buffalo
(716) 320-7663 www.stellarroofing.com
25 John Glenn Dr, Buffalo, New York
4.7 from 446 reviews
Stellar Roofing is the leading Roofer in Buffalo, NY & the surrounding areas. We proudly offer Roof Repair & Replacement in Buffalo, NY! Get in touch with us if you need Gutter Installation. Here at Stellar Roofing, we operate by the golden rule. We treat your home as we would treat our own. With our combined experience of over 50 years, we know what works and what doesn’t. We have spent years researching the market for the absolute best products for your home. If you are going to replace your roofing system you only want to do it once and you want it done right. You also want the best products and workmanship at a fair price. That’s what we offer here at Stellar Roofing. Contact us if you looking for "Commercial Roofing near me".
Lee Weston Roofing
(716) 341-2561 www.leewestonroofing.com
Buffalo, New York
5.0 from 33 reviews
We are a family owned and operated Roofing/Siding business serving Buffalo and the surrounding areas. Call today for a free estimate!
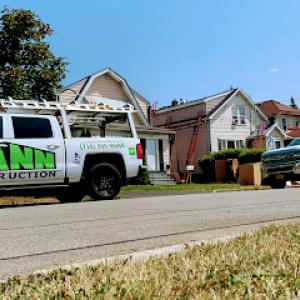
Mann Roofing & Remodeling
(716) 500-6266 www.mannconstruction-wny.com
237 Pratt St, Buffalo, New York
4.8 from 129 reviews
Mann Roofing and Remodeling, located at 237 Pratt St, is your premier roofing contractor specializing in top-notch roofing services. Whether you need roof repair, new roof installation, residential roofing, or emergency roof repair, our skilled team is equipped to handle it all. We also offer efficient roof replacement, precise shingle repair, and expert skylight installation to enhance your home. As a trusted roofing company near you, Mann Roofing and Remodeling is committed to delivering excellence with every project. Choose us for reliable, quality roofing solutions tailored to meet your needs and protect your investment.
Dynamite Home Repairs
(716) 510-5602 www.dynamitehomerepairsllc.com
265 Hopkins St, Buffalo, New York
4.8 from 50 reviews
Dynamite Home Repairs is your trusted Roofing Contractor. Our services include Roofing, Roofing Repairs, Residential Roofing, Shingles, Roofing Installations, Roof Leaks, Roof Inspections, Siding Installation, Gutter Installations, Fascia installations, Soffit installations, & more. Contact Us Today for a Free Estimate, We Blow Our Competition Away!
Erie Home
4950 Genesee St, Buffalo, New York
4.7 from 71 reviews
Since 1976, Erie Home has manufactured, supplied, and installed the best-performing roofing on the market. By providing ironclad warranties and convenient financing, we ensure that every homeowner we work with receives top quality service and value for their homes and properties. Erie Home professionals are the roofing company of choice in the greater Buffalo, NY area. Whether you need roof inspections or roof damage repair services, Erie Home has been the go-to roofing contractor for nearly 50 years because of our attention to detail and dedication to making sure our customers are satisfied with their results. Contact us today for a quote and see why we're the trusted roofing company Buffalo counts on.
Black Rock Roofing
(716) 875-5138 www.blackrockroofingny.com
2064 Niagara St, Buffalo, New York
4.6 from 122 reviews
Since its establishment in 1946, Black Rock Roofing has established a strong reputation as a reliable and trusted provider of roofing services in Western New York. We specialize in handling a wide range of residential and commercial roofing projects, focusing on delivering top-notch new roof installations, meticulous complete tear-offs, and more. Our approach ensures that your property receives a durable, built-to-last roofing solution. Our commitment to quality and customer satisfaction sets us apart as an industry leader, and we take pride in exceeding expectations with every project we undertake.
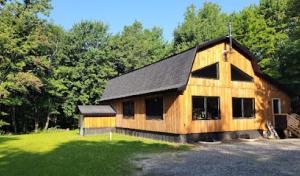
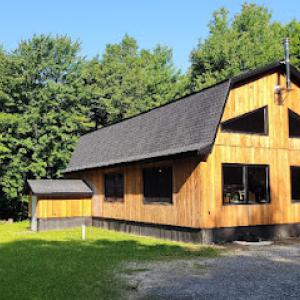
In Buffalo, the housing stock features many older steep-slope homes where asphalt shingles dominate, but flashing complexity around dormers and chimneys becomes a major performance factor after a harsh winter. The typical steep pitch helps shed snow, yet the way dormers, chimneys, and roof intersections meet the main plane often determines where ice damming starts. Even where clay tile, concrete tile, wood shakes, or synthetic products exist in the market, the local climate makes underlayment, fastening, and flashing details the deciding factors for long-term performance. When planning a roof, focus first on how these transitions will behave during freeze-thaw cycles and heavy snow loads, not just the surface look.
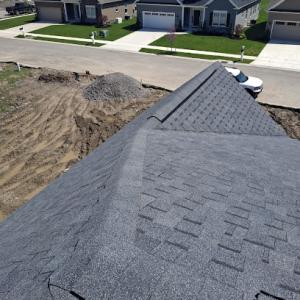
Asphalt shingles are the workhorse for most older, steep-slope homes, so you'll commonly see layered courses around dormers and chimneys. The practical steps are about flashing detail and edge control. Ensure the valley and rake flashings are continuous and properly integrated with step flashing at all wall penetrations. In Buffalo's cold snaps, add a robust underlayment that covers the entire deck with back-up protection at eaves, rakes, and any overhangs. Pay special attention to the transitions where a dormer meets the main roof; this is where ice dams often form if water can't drain cleanly. For roofs with existing mineral granule wear, consider an upgrade to a shingle with better granule adhesion and a proven performance in freeze-thaw conditions, and make sure fasteners penetrate through to solid sheathing with appropriate sealing.
Clay tile, concrete tile, wood shakes, and synthetic products enter the market with varying appearances and weights, but heavier materials demand precision in fastening and flashing to resist uplift and water intrusion when meltwater refreezes at eave lines. Clay and concrete tiles require a carefully designed underlayment and a continuous, well-sealed flashing system at hips, ridges, and around penetrations. Wood shakes and synthetics bring aesthetic variety but can be vulnerable to moisture uptake and splitting if the underlayment isn't continuous or if fasteners aren't sized for the material's expansion. In regions with pronounced freeze-thaw cycles, the edge and valley detail must be done to prevent capillary movement and ice dam development, even if the material itself seems durable.
Flat and low-slope roof sections are common on porches, additions, and some multifamily or mixed-use buildings, creating drainage and membrane transition issues during snowmelt. Treat these areas as separate systems tied into the main roof with carefully managed transitions and adequate slope to direct meltwater toward drains. Use a compatible membrane with ample adhesion and a robust perimeter detailing to avoid seam failures during wind-driven snow shifts. Edge termination and flashing at transitions to steeper planes should be designed to maintain a continuous drainage path and to minimize ice dam potential where cold air can chill a seam. Such attention pays off when the snowpack changes from a thick blanket to a slow melt, reducing both leakage risk and maintenance chores after storms.
Find specialists in TPO, EPDM, and built-up flat roofing systems for residential and commercial properties.
King Remodeling Corp roofing contractor
(716) 705-1081 www.kingremodelingcorp.com
48 Kenova St, Buffalo, New York
5.0 from 177 reviews
OConnor Contracting
(716) 600-7663 www.oconnorroofingbuffalo.com
106 Hubbardston Pl, Buffalo, New York
4.9 from 273 reviews
Late spring through early fall is the main replacement window in Buffalo, so planning during that stretch is crucial. If a contractor's calendar fills up early, price and lead times can creep higher-especially for steep-pitched homes or roofs with many penetrations. When storms push demand after a rough winter, you may see temporary repairs offered at elevated rates to keep a project moving, followed by the full tear-off and replacement later in the season. Expect some fluctuation based on how quickly crews can stage materials and bring in specialty equipment for tall or multi-penetration roofs.
Most local jobs aren't a simple square-count price. Buffalo homes frequently have steep pitches, several vent stacks, chimneys, dormers, valleys, and copper or lead flanges that require careful detailing. Each penetration adds labor beyond the basic area calculation, and chimney work often involves flashing, crown moldings, and joint sealing that can extend timelines and cost. When you're comparing bids, look for a clear breakdown: square footage plus additional charges for penetrations, chimney work, and any required roof edge and gutter integration. This is especially true for asphalt shingles versus metal, where installation labor differs markedly.
Material selection drives the bottom line in a Buffalo replacement. Across the board, asphalt shingles tend to be the most budget-friendly option, with costs roughly ranging from 350 to 550 USD per square. Metal roofing sits higher, typically 700 to 1200 USD per square, and higher-end materials like clay or concrete tile push costs well beyond that. Wood shingles and synthetic options fall in between, but you'll pay a premium for long-term durability in freeze-thaw cycles. In winter, storms can trigger urgency pricing for tear-offs, staging, and quick material delivery, so be prepared for variability if a project is scheduled or delayed by weather.
If you're weighing a replacement during late spring to early fall, lock in a preferred start date early, and confirm crew access for snow-cleared driveways and staging space. Understand that favorable weather can shorten timelines but may also tighten pricing windows as the best crews book early. For a typical project, ensure the bid covers tear-off, disposal, flashing, underlayment, and proper ventilation-plus time for chimney detailing and any required ice and water shield-the elements that keep ice dams and damage at bay in Buffalo winters.
Get a clear picture of your project costs upfront - no commitment required.
Lifetime Siding, Roofing & Construction
(716) 239-6476 www.lifetimesidingandroofing.com
5500 N Bailey Ave, Buffalo, New York
4.9 from 115 reviews
A full roof replacement requires a building permit through the City of Buffalo permits department. The process is designed to ensure that a new roof will perform safely under the region's winter conditions, with attention to load, flashing, and eave detailing. Before work starts, your contractor should file the permit application, provide project details, and schedule any required plan review. Expect a short turnover period between application and approval, and coordinate your timeline with weather windows that minimize exposure of underlayment and decking.
In Buffalo, a permit typically covers the structural and layer-by-layer aspects of the roof, including deck condition, ice dam protection measures, ventilation paths, and skylight or chimney integration if applicable. The goal is to confirm that the installation will resist the freeze-thaw cycle and lake-effect snow loads without compromising the building's envelope. A permit can also simplify future maintenance or repairs, since it creates an official baseline for what was installed.
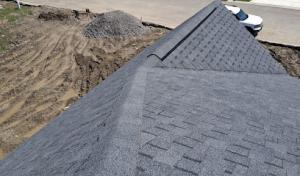
Inspections are generally performed after completion to verify the roof conforms to code and the work matches the permit plans. The inspector will want to see completed flashing details at all penetrations, proper drip edges, and secure adherence of shingles or other roofing materials. In addition, the inspection will check that attic ventilation is adequate and that vented soffits, ridge vents, or gable-end vents align with the attic space and do not create stagnant pockets that could foster ice dams.
If any discrepancies are found, the contractor will need to address them before final acceptance. It's common to have a misalignment between existing structures and new roof lines, so plan for a follow-up inspection if adjustments or repairs are required. Keeping clear access to the attic and to vent openings during inspection helps prevent delays.
Local inspection attention commonly includes flashing integrity around chimneys and dormers, proper installation of ice and water shield at eaves and peaks, and ventilation clearance relative to existing structures. The inspector will assess clearance from soffits to any nearby walls, ensuring that exhaust from appliances or bathrooms doesn't create condensation or backdraft issues that could worsen ice dam formation. Ensure that the contractor accounts for snow-loaded overhangs and the potential for wind-driven snow to stress vents and flashing during storms. Clear documentation of the permit and any changes agreed upon during the job helps smooth the final sign-off and reduces the chance of a re-inspection.
Buffalo-area insurers commonly ask for the roof's age, material, and current condition when evaluating damage or failure claims. Given the region's heavy lake-effect snow, freeze-thaw cycles, and older housing stock with steep roofs and ice-dam-prone eaves, a claim can hinge on how well those facts are conveyed. If a roof has known vulnerabilities-ventilation gaps, sagging decking, or prior ice dam issues-documenting current condition helps establish a credible loss narrative.
Adjusters in this market may request photos of decking and attic space, which matters in Buffalo because winter moisture and ventilation issues often contribute to loss narratives. Take clear shots of exposed plywood or planks, any staining or mold near the attic hatch, and evidence of moisture intrusion around dormers or chimneys. Include attic ventilation pathways, such as intake vents and exhausts, and note any ice dams visible from the attic side. Having a visual record of these details reduces back-and-forth and clarifies the severity of the damage.
Hail and wind claims in Buffalo are evaluated against weather data and local code considerations, so homeowners benefit from documenting damage immediately after storms and thaw-related leak events. Keep a dated log of when damage was first noticed, when storms occurred, and any temperature swings that followed. If you can safely access the attic or decking without causing further harm, take interior photos as soon as you discover moisture or staining. Preserve damaged shingles, gutters, and flashing for potential inspection by the insurer or a weather-data corroborating source.
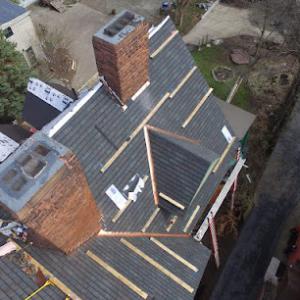
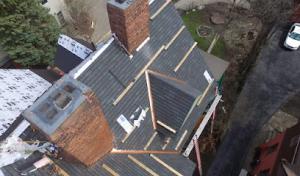
Chimney flashing is a recurring concern in Buffalo because older masonry chimneys are common and are heavily stressed by snow, ice, and freeze-thaw movement. If flashing around the base or along the sides is damaged or improperly sealed, meltwater can follow the chimney into the attic or along interior walls, even when the roofline looks intact. The risk is highest after heavy snows melt in bright sun, then refreeze at night, which pries apart poorly sealed joints. Regular inspection of the metal step flashing, counter-flashing, and roof-penetrating seal around the chimney is essential, especially where the chimney meets a steep roof and ice dams form at the eaves. Look for hairline cracks in mortar and misalignment where flashing meets masonry; both invite moisture intrusion during thaw cycles. A delayed fix now can turn a small leak into costly interior damage and damaged insulation.
Skylights in Buffalo need close attention at curbs and flashing because snow retention and refreezing can hold water at penetrations longer than in warmer climates. The curb flashing should shed water toward the exterior, not toward the interior seam, and the skylight itself must sit squarely without gaps. Freeze-thaw movement can open up gaps around the curb, drawers, and head where the glass meets the flashing. When inspecting, check for sealant deterioration, cracked glazing beads, and signs of condensation pooling on or around the skylight during very cold snaps. If a roof is already dealing with heavy snow loads, ensure that the surrounding roof plane is clear and that debris or ice buildup isn't pinching the skylight frame, which can create new pathways for moisture to get into the attic.
Leak tracing in Buffalo often requires separating roof-cover failure from masonry, flashing, gutter, and attic-condensation problems. Meltwater may travel along the roof deck or inside gutter channels before showing up as a stain far from the actual source. Start by tracing wet paths to the point of entry, not merely to a visible drip location. Inspect the attic for signs of condensation accumulation, right-angle joints, and vent penetrations that can mist up during cold days. Pay special attention to where the chimney, skylights, and exhaust vents intersect the roof, because multiple penetration points concentrate stress from freeze-thaw cycles. A clear diagnosis hinges on examining all potential causes together rather than isolating one component in isolation.
Find contractors experienced in skylight installation, flashing, and leak repairs to bring natural light into your home.
Five Star Roofing Consultants & Services
(716) 828-6279 www.fivestarserviceswny.com
1320 Military Rd, Buffalo, New York
4.9 from 121 reviews
Dalex Roofing
(716) 609-2918 www.dalexroofing.com
1974 Eggert Rd, Buffalo, New York
4.8 from 250 reviews