Last updated: Apr 19, 2026
Winterville sits in Pitt County in eastern North Carolina's coastal plain, where tropical systems can bring prolonged wind-driven rain even when the town is inland rather than directly on the oceanfront. The risk isn't about a single, dramatic hurricane strike; it's the steady battering of wind-driven downpours that can lift shingles, loosen flashing, and drive water into attic spaces. The trees lining yards and streets mean debris and blown branches become common pathways for leaks. Homeowners should be prepared for multiple rounds of wind and rain during hurricane season, with water intrusion that can escalate quickly once a leak starts.
Because Winterville is closely tied to the Greenville area, storm demand can spike across the same contractor pool after regional hurricanes and tropical storms, slowing permanent repairs. Quick-response crews are often devoted to emergency tarping or temporary leak control, which means you might wait longer for full replacement work. This is not a sign of negligence, but a pattern in the local market: urgent, short-term fixes come first, with longer-term restoration following as the storm rush subsides. Plan for a staged approach to remediation and document every part of the process to avoid gaps.
The local signal mix strongly favors emergency repair and storm damage work, indicating homeowners here commonly need tarping, active leak control, and post-storm assessments. If a leak starts, your first move is to halt further interior damage: tarp exposed roofs or vulnerable sections with sturdy plastic sheeting and sturdy straps, creating a conservative cover until a contractor can arrive. Manage heat and moisture by ventilating attic spaces when safe, and place buckets or containment under active drips to reduce interior spread. Photograph damage promptly from multiple angles and keep a dated record to support any later insurance or claim needs.
After the immediate containment, focus on clear documentation: track the timeline of roof breaches, wind events, and any accompanying storm debris. Capture exterior roof condition, flashing integrity, gutter integrity, and visible interior signs of water intrusion on ceilings and walls. Keep copies of any temporary repairs, tarps, and materials applied, along with names and contact information for responders who assisted on scene. When insurance discussions begin, you'll want a concise, date-stamped narrative of when leaks started, what was done to stop them, and what remains exposed.
Recognize that the first priority after a storm is to stop ongoing damage and protect interior spaces, not to achieve a perfect long-term fix. In this market, assessments and temporary stabilization often precede full replacement. Before the next hurricane season, have a targeted comfort plan: confirm access to trusted emergency repair crews, identify a preferred tarp solution, and keep a ready-to-activate set of repair photos and documentation. Proactive communication with a durable storm-season plan helps ensure that when the first gusts return, the roof is already mapped for faster, coordinated restoration rather than scrambling in the aftermath.
Ross Roofing & Vinyl
(252) 355-6877 rossroofing.mybusiness.site
2910 Royce Ln, Winterville, North Carolina
4.7 from 33 reviews
Third Generation Family Owned Business Serving all of Eastern NC We do all types of roofs. Shingles, Standing Seam Metal, Rib Loc Metal, TPO, Rubber and Vinyl siding Call us for all your roofing needs Free Estimates
Roofing Solutions NC
(252) 702-3395 roofingsolutionsnc.com
Serving
4.9 from 344 reviews
Roofing Solutions NC is one of North Carolina’s most trusted and fully insured roofing contractors, proudly serving Greenville and Eastern NC. As a NC Licensed General Contractor, we specialize in residential and commercial roofing, including roof replacements, metal roofing, TPO, EPDM, standing seam, and fortified systems. We also provide gutters, siding, windows, insulation, and preventative maintenance contracts. As an Owens Corning Platinum Contractor, we deliver proven quality. Recently voted Greenville’s Best Roofer, we’re the trusted choice for roofing and storm restoration..

Wells Roofing & Seamless Gutters
(252) 227-8403 wellsroofingandseamlessgutters.com
Serving
5.0 from 382 reviews
Wells Roofing and Seamless Gutters is an award-winning residential exterior home company, proudly offering top-quality roofing services and gutter solutions. We specialize in shingles, metal roofing, and seamless gutters, delivering craftsmanship you can count on. Our selection of gutter profiles is the largest in eastern NC, including 5” K style, 6” K style, 6” 1/2 round, and 6” European box gutters—all fabricated onsite at your residence for a perfect fit. Most of our roofing and gutter installations are completed in just one business day, ensuring a smooth, hassle-free experience. With offices in Greenville, Washington, and Wilmington, we are always close by to serve you. For a job “Wells” done, contact us today!
Advanced Building & Roofing
(252) 717-7176 advancedbuildingroofs.com
Serving
5.0 from 159 reviews
Advanced Building & Roofing, we specialize in repairing storm-damaged roofs commercial & residential. Being a local owned company, we can give the utmost attention to each client and make sure that they are completely satisfied with the quality of our work. 24/7 Emergency Services
Hunter Roofing & Construction
Serving
5.0 from 57 reviews
We specialize in Roofing, Siding, Windows, Exterior Doors & Gutters. Residential, Multi-Family, Commercial & New Construction Licensed & Insured Hunter Roofing & Construction hunterroofingandconstruction@gmail.com
Atwell Exterior Services
(252) 304-6229 atwellextservices.com
Serving
5.0 from 32 reviews
Residential, exterior home improvements.
East Carolina Roofing & Coating
(252) 746-6483 www.eastcarolinaroofingnc.com
3635 Stanley Rd, Winterville, North Carolina
3.3 from 4 reviews
A quality roof will protect your home against the elements for years to come. At East Carolina Roofing & Coating, Inc., our roof replacement company believes in making a roof last as long as possible. With more than 40 years in the industry and the latest in roofing technology, we have done just that for many homeowners in the Goldsboro, Rocky Mount, Kinston, Washington, Greenville, and New Bern, NC areas.
Best Choice Roofing
(252) 648-6246 bestchoiceroofing.com
Serving
4.8 from 363 reviews
Best Choice Roofing is your trusted roofing expert and the Best Choice when it comes to choosing a roofing company with a commitment to impeccable customer service in Greenville, NC. In business since 2009, Best Choice Roofing’s industry-leading contributions to the roofing industry include a customer-first mentality, a dedication to top-quality products and a leadership team focused on the growth of its people. Because of this framework, we have created a loyal base of customers all over the United States.
W.J. Smith Construction Roofers
(252) 304-3115 www.roofersgreenvillenc.com
Serving
5.0 from 12 reviews
At WJ Smith Construction Roofers, we are proud to be the leading roofing company in Greenville, NC, providing top-tier roof repair, installation, and replacement services for both residential and commercial properties. Located at 1035 Director Ct, we specialize in using the highest quality roofing materials like metal and shingles to ensure your roof stands strong against extreme weather, including storms. Whether you need a minor repair or a complete roof replacement, we’re committed to delivering reliable, durable, and long-lasting solutions. Trust WJ Smith Construction Roofers to keep your home or business safe and secure, no matter the condition
Five Star Roofing & Sheet Metal
(252) 286-0670 topbusinessesusa.top
Serving
5.0 from 7 reviews
We install roofing and gutters at high quality for and affordable price. You can call us for any repair or reroof. Text or call 252-286-0670 for a free estimate
Langley Contracting Roof Specialists
(252) 214-7663 langleycontractingllc.com
Serving
4.7 from 101 reviews
Langley Contracting Roof Specialists, based in Greenville, NC and serving all of Eastern North Carolina, is your trusted local roofing contractor for residential and commercial roofing needs. Our experienced, licensed, and insured team provides expert roof repair, metal roofing, shingle roofing, roof replacement, emergency roof repair, and commercial roofing solutions. We proudly serve Greenville, Wilson, Raleigh, Goldsboro, Kinston, Washington, Rocky Mount, Winterville, Jacksonville, Tarboro, Fayetteville, Elizabeth City, Chocowinity, Nash County, Greene County, and all nearby communities. Whether you need a reliable roofing company for storm damage repair, insurance claims, leak repair, or routine maintenance, we deliver fast service.
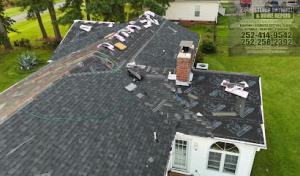
Steven Drywall & Home Repair
(252) 414-9542 stevendrywall.com
Serving
4.9 from 179 reviews
STEVEN DRYWALL & HOME REPAIR IS A TRUSTED FAMILY COMPANY SERVING OUR CUSTOMERS FOR MORE THAN 10 YEARS. WE OFFER ROOFING REPAIR/REPLACEMENT, DRYWALL REPAIR/INSTALLATION, PAINTING, FLOORING (HARDWOOD, LAMINATE AND TILE), ELECTRICAL SERVICES, PLUMBING SERVICES, SEAMLESS GUTTERS, SIDING, AND TEXTURE CEILING. ALWAYS WANT OUR CUSTOMERS' SATISFACTION
After a tropical-storm wind and rain event, damage can be both obvious and hidden. In Winterville, interior staining, lifted shingles, wet decking, and fallen limbs can escalate quickly in the humidity, so act fast. Start with a safe inspection from ground level to note obvious exterior damage: missing shingles, torn underlayment, and obvious leaks around flashing. If ladders are needed, have a partner spot you and keep the area free of debris. Document everything with photos and dates, especially any areas where water is actively entering or where shingles are dislodged. Do not climb onto a wet or damaged roof without proper fall protection and, if in doubt, wait for a trained professional to assess.
In this market, many homeowners pursue insurance claims when both visible exterior damage and hidden intrusion appear. Gather key documents early: your insurance policy number, the storm date, and a written list of damaged areas. Take timestamped photos or short videos of roof edges, gutters, attic spaces with signs of moisture, and any ceiling staining below the attic. Keep a log of intermittent leaks and the rooms affected by moisture. If you hire a contractor or public adjuster, request a written scope of work and an itemized estimate. Store these records digitally and in a backup location. The humidity in the area can compound problems, so delaying documentation often leads to disputes about preexisting conditions.
When filing a claim, provide a clear narrative: the storm type (tropical storm winds and rain), the timeline of events, and the range of damage from exterior shingles to interior water intrusion. Insurers in eastern counties expect timely communication, especially after storms that can cause rapid moisture movement through decking and into ceilings. Be prepared for a field adjuster visit; point out all damaged areas you've documented and share any contractor estimates. If portions of the roof are still actively leaking, request temporary tarping or cover options that prevent further interior damage while the claim is processed. Clear, direct questions to the insurer about what constitutes covered damage helps avoid later coverage disputes.
One frequent issue is conflating cosmetic exterior damage with structural or moisture-related losses. In this area, hidden water intrusion can follow a storm, so emphasize attic and ceiling signs in the claim. Another pitfall is delaying contact with the insurer or not providing sufficient documentation of the sequence of events. If a second storm follows quickly, re-document new damage promptly and reference the prior claim to establish continuity. In a town where storm-related roof losses often involve both visible damage and hidden intrusion, insist on a detailed assessment that separates exterior loss from interior moisture repair needs. Finally, if an adjuster's assessment omits structural concerns, seek a second opinion from a qualified roofing professional who can provide a written report tying exterior findings to interior damage.
After the claim is opened, prioritize temporary protection to minimize further damage. Use sturdy tarps or approved roof protection until a permanent repair plan is in place. When selecting a contractor, look for local experience with humid coastal conditions and a track record of documenting both visible damage and moisture-driven claims. A transparent, well-documented process makes the insurance path smoother and reduces friction during the repair timeline. In regions like this, the blend of wind-driven damage and humidity means a careful, evidence-based approach yields the most reliable claim outcome.
Connect with contractors who help homeowners navigate the claims process from damage assessment to final approval.
Wells Roofing & Seamless Gutters
(252) 227-8403 wellsroofingandseamlessgutters.com
Serving
5.0 from 382 reviews

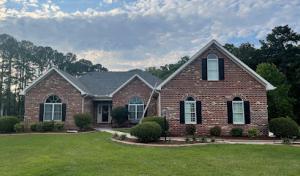
Winterville homes are predominantly low-rise residential structures where moisture control and algae resistance matter more than freeze-thaw cycles. The local humidity promotes attic ventilation needs, dew point management, and quick-drying roof decks after storms. In practice, that means prioritizing roofing systems that shed moisture efficiently, resist persistent dampness, and discourage algae growth on shaded eaves and southern exposures. Materials and assemblies that vent well, use algae-resistant granules or coatings, and maintain a dry underside will stand up better to the year-round moisture load. Look for underlayment and deck protection designed for high humidity, plus properly sealed penetrations around vents, plumbing stacks, and skylights to slow any slow seepage that humidity can encourage.
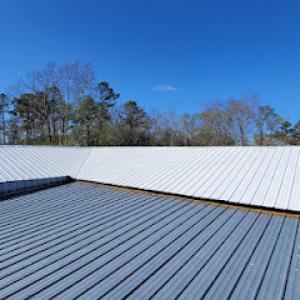
Metal roofing has a strong local contractor presence, suggesting homeowners in this market actively compare metal against standard shingle replacements for wind performance and long service life. In the Pitt County coastal plain, metal can offer notable benefits: rapid shedding of heavy rains, higher resistance to wind-driven debris, and reduced thermal gain through reflective finishes. A metal panel with a proper standing seam or interlocking profile minimizes leakage pathways and can be paired with a vented attic or continuous soffit intake to keep the roof assembly cooler and drier during humid summers. When evaluating metal, pay attention to coating type (polymer or ceramic) for algae resistance and color choices that minimize heat absorption on attic temperatures. Installation quality matters as much as the product itself, given the coastal environment and shifting Carolina winds.
Asphalt shingles are present but not the only story here; the contractor mix shows Winterville is not a one-material market and homeowners are clearly shopping both shingle and metal options. Modern asphalt shingles with algae-resistant granules and upgraded moisture-resistant underlayment can perform well in humid conditions, especially when paired with an integrated attic ventilation plan and a leak-resistant drip edge. Homeowners should consider laminated or architectural shingles for improved wind resistance and a denser profile that helps shed moisture from tree debris and storm-driven rain. Acknowledging the coastal plain setting, choose shingles with high-quality granules and a robust warranty that covers wind uplift in gusty hurricane-season events. Proper installation remains essential to prevent early granule loss and localized failure around vent pipes and chimneys.
Focus on the roof assembly as a system: deck, underlayment, and exterior covering. Confirm that the chosen material aligns with a ventilation plan that keeps the attic dry during hot, humid days and after heavy rains. For algae-prone areas, look for products with proven algae resistance and consider a protective coating or sealant on exposed fascia and rake boards to reduce organic buildup. Also evaluate the service life and maintenance expectations of each option, paying attention to how both shingles and metal respond to occasional tree debris and wind-driven rain common during hurricane season. A balanced approach often yields the best long-term resilience in this climate.
Explore specialists in steel, aluminum, and standing seam metal roofs built to last 50 years or more.
Ross Roofing & Vinyl
(252) 355-6877 rossroofing.mybusiness.site
2910 Royce Ln, Winterville, North Carolina
4.7 from 33 reviews

Wells Roofing & Seamless Gutters
(252) 227-8403 wellsroofingandseamlessgutters.com
Serving
5.0 from 382 reviews
In this area, there isn't a single city-specific average that firms lock in year after year. Pricing shifts with the weather calendar and storm events, especially during hurricane season, when crews swing north from Greenville and throughout Pitt County. After a major rain or high-wind event, you'll see a surge in demand that can stretch crew availability and pricing for a week or two. Your best footing is to plan for market-driven bumps rather than a fixed quote. If a storm just passed, expect estimates to include a premium for rush scheduling, temporary tarping, and expedited material delivery. Non-storm periods tend to quiet the market, but the coastal plain climate keeps the pressure on during busy seasons.
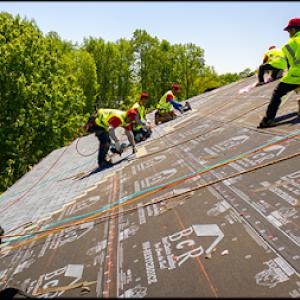
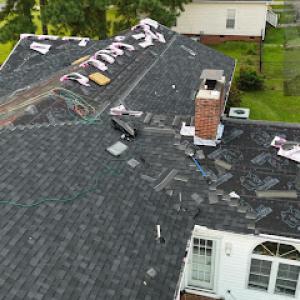
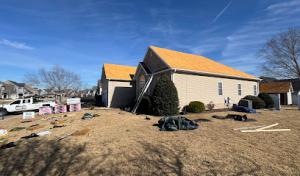
Re-roofing is the backbone of Winterville-area estimates. The typical job you'll see includes tear-off of existing layers, potential decking repair after leaks, and disposal of old material. Each of these items is a real cost driver in practice: removing shingles or metal, inspecting and repairing the decking for rot or soft spots, and paying for a dumpster or load-out from the job site. Leaks often reveal hidden deck damage, which can extend labor time and material needs. Since these jobs come through after weather events, crews often allocate extra hours for temporary protection while repairs are staged, adding to the overall cost. Plan for contingencies in both time and materials, because decking issues aren't always visible from the ground.
Local material selection matters more here than in some inland markets. The presence of meaningful metal-roof activity alongside traditional shingles creates a broader spread in the estimate range. Metal can run higher upfront but may offer longer life and lower maintenance in a coastal plain climate with humidity and wind exposure. Shingle systems remain common and can be cheaper up front, but poor attic ventilation, preexisting leaks, or damaged decking can swing the total cost toward the higher end regardless of the chosen covering. If a contractor recommends metal, expect material and fastening differences that influence delivery timing and installation crew hours. In Winterville, the most practical approach is to compare bids that separately itemize tear-off, decking repairs, disposal, and the specific roof system being proposed, so price pressure from storm surges or supply delays doesn't obscure the real cost drivers.
Get a clear picture of your project costs upfront - no commitment required.
Ross Roofing & Vinyl
(252) 355-6877 rossroofing.mybusiness.site
2910 Royce Ln, Winterville, North Carolina
4.7 from 33 reviews
Winterville sits in Pitt County, and the roofing permit and inspection workflow should be verified through the local building inspections authority serving the town rather than assumed from larger North Carolina cities. Before any shingle pull or roof overlay begins, check with the town's building department to confirm the exact permit pathway, required forms, and any specialty endorsements that might apply to ventilation, insulation, or attic work. Relying on out-of-town templates can lead to delays, rework, or sticker-shock if plans don't match what the local inspector expects. The goal is to establish a clear, documented trail that aligns with Winterville's codes and the inspector's checklist, not a best guess.
Because this market is heavily re-roofing oriented, homeowners need to confirm whether a permit is required for roof replacement versus limited repair before work starts. A full tear-off and replacement often triggers a permit and a reinspection, with attention to proper ventilation, underlayment, and fire-rated details. Minor repairs or patch work might fall into a lighter review, but local interpretations can vary by block or neighborhood. If the contractor suggests that "no permit is needed" due to a quick patch, push for a formal confirmation in writing from the building department. Operating without a required permit can create issues with insurance claims after a storm and can complicate resale or future inspections. If a permit is needed, ensure timelines are understood and that the permit box is checked off before materials arrive on site.
Inspection timing can become more important after regional storms, when local departments and contractors may both be handling elevated repair volume. Weather events favor rapid roof work, but the same period can slow inspections or create backlogs. Plan for a post-storm inspection window and request any interim checks if the project progresses in phases. Communicate a realistic schedule with the local inspector and the contractor-this reduces the chance of rework tied to missed details or non-compliant retrofits. If a temporary cover is used after a storm, ensure it remains secure and up to code until a formal inspection can occur. The combination of verifying the exact local authority, confirming permit necessity for the specific scope, and anticipating post-storm inspection demand helps keep a Winterville roof project from drifting off track.
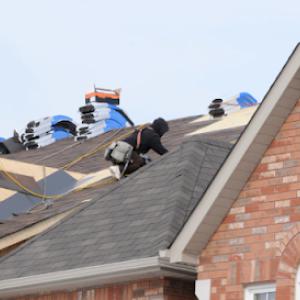
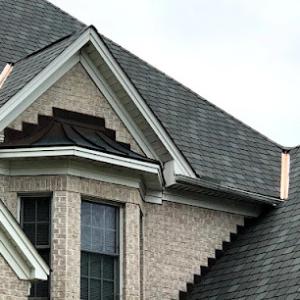
Winterville's contractor signals show recurring work around skylights and chimneys, indicating leak-prone roof penetrations are a real local service category rather than a niche add-on. The coastal plain's humidity and fast-moving tropical downpours stress flashing and sealant joints, so these sites stay on the radar even when the rest of the roof looks sound. If a roof leak seems to originate near a skylight or chimney, treat it as a penetration issue first, not a distant rainstorm symptom.
In eastern North Carolina's heavy-rain environment, flashing failures around penetrations can become interior leak problems quickly, especially during tropical downpours. Start with exterior inspection after a heavy rain: check the metal step and counter-flashing along the skylight base and chimney boot for loose nails, gaps, or lifted edges. Look for rust stains or silicone creases that signal old sealants failing. Inside, trace damp spots to the path of the flashing rather than assuming a roof valley or general deck seepage. In Winterville, water often travels along rafter tails before dripping, so follow the trail to its first penetration point rather than the most obvious drip.
This section should focus on repair details homeowners actually hire for, not just full replacements. For skylights, reseal with a compatible sealant in steps: remove failing sealant, clean thoroughly, reseal the flashing joints, and install a fresh, but compatible, flashing membrane. For chimneys, address step flashing where it meets the chimney, then reseal or replace the counter-flashing as needed, and add a wide, properly integrated cricket if the chimney location diverts runoff toward vulnerable seams. If sleeves or boots are aged, replace them with updated, code-appropriate options and verify the surrounding shingles have clean edges to prevent underlayment exposure. In all cases, ensure the flashing overlaps and ties into the roof's primary waterproofing layer with adequate slope and drainage to minimize pooled water near penetrations.
Find contractors experienced in skylight installation, flashing, and leak repairs to bring natural light into your home.
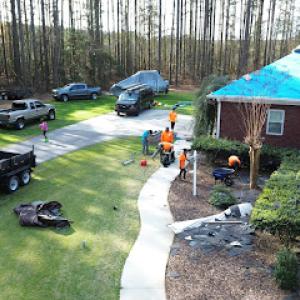
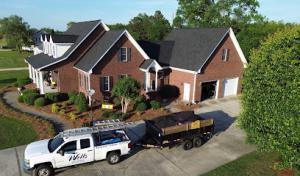
The local market includes long-established, family-owned outfits that emphasize cleanup and getting debris out of the yard quickly, alongside crews that split attention between residential and commercial work. In practice, responsiveness and jobsite handling matter as much as price when a storm-damaged roof needs quick protection. When you call, ask who is actually on the project, who will be on site daily, and how the crew handles occupied-home safety and daily cleanups.
Because many area contractors serve both residential and commercial clients, homeowners should confirm who regularly handles re-roofing when the house is lived in. You want a crew accustomed to working around family routines, with clear plans for minimizing disruption, controlling noise, and protecting interior spaces from rain and wind while the work progresses. If a firm treats a residential job like a vacancy, you may encounter unexpected delays or messy turnovers.
Warranty messaging appears in this market but is not universal. Homeowners should distinguish contractor workmanship promises from manufacturer-backed coverage. A reliable roofer will lay out what they guarantee for workmanship, how long that coverage lasts, and what claim steps look like if issues surface after installation. Remember that manufacturer warranties often require proper installation and specific maintenance, so your understanding of both layers matters when a storm forces a repair decision.
In practice, look for a contractor who provides written timelines, a clear sequence of on-site tasks, and a defined plan for protecting your landscaping and driveway during debris removal and material staging. Ask for recent local references-ideally from occupied-home projects in similar conditions-and verify their insurance and bonding status. In a coastal plain setting with hurricane-season volatility, choosing a crew that communicates openly about weather delays and site safety is as important as any surface-level reputation.
Flat-roof and roof-coating signals exist in Winterville but at low prevalence, making this a niche topic for select homes, additions, porches, and commercial buildings rather than the citywide default. If your project involves a low-slope section, expect a blend of practical, accessible options rather than heavy-duty commercial systems. The typical one-story addition or porch extension may push you into a low-slope configuration, especially when the pitch sits between a near-flat and a gentle incline.
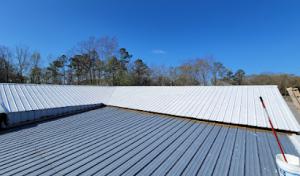
Low-slope setups often present with single-ply membranes, modified bitumen, or coated metal panels rather than traditional steep-slope shingles. In Winterville's humid coastal plain, you'll notice seam lines, edge detailing, and flashing that look different from the standard asphalt shingle layout. You may also see a prior coating with signs of weathering or a recent patch, which can indicate a retrofit rather than a full replacement. In mixed-use properties, commercial-grade drainage accessories and scupper details can appear on portions tied to residential add-ons.
Storm-season damage is the primary driver for attention to low-slope roofs in this area. Because hurricane-season wind and rain can lift or puncture coatings and membranes, rapid leak detection and temporary containment matter more than annual cosmetic fixes. When leaks appear after a storm, prioritize securing penetrations, flashing, and visible seams. Have emergency sealants or temporary patches ready and document any damage with photos for insurance conversations later.
Maintenance for these systems centers on keeping seams sealed and drainage unobstructed. Infrequent but targeted inspections can catch membrane deterioration, coating wear, hail impact, or UV blistering before a leak develops. Focus on edge tabs, parapet terminations, and any transitioning points where different materials meet. Quick, local touch-ups after seasonal storms help extend life between full-scale overhauls.
Because Winterville contractors often serve both residential and commercial properties, some homeowners may encounter low-slope systems even though the broader market is re-roofing driven. When choosing a specialist, verify experience with your specific membrane type, flashings, and coating history. Discuss compatibility with neighboring traditional sections to ensure a cohesive, weather-ready overall roof.
Find specialists in TPO, EPDM, and built-up flat roofing systems for residential and commercial properties.
Ross Roofing & Vinyl
(252) 355-6877 rossroofing.mybusiness.site
2910 Royce Ln, Winterville, North Carolina
4.7 from 33 reviews