Last updated: Apr 19, 2026
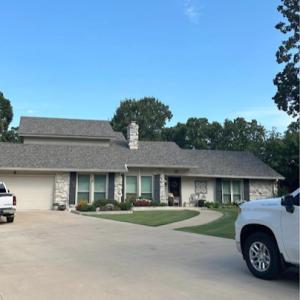
Spring hail and severe storm activity are a fact of life for your neighborhood. When hail comes through, roofs can suffer sudden, localized impacts that aren't obvious from the ground. Damage can escalate quickly with subsequent storms, wind, and heat around the corner. In Sand Springs, the clock starts ticking the moment you spot or suspect hail damage, because insurers in Oklahoma inspect and document hail and wind claims with heightened scrutiny. A late response can complicate the claim, weaken repair options, or derail coverage for underlayment and flashings that show more wear after the first impact. The risk is not merely cosmetic-roofs that aren't promptly assessed may develop hidden leaks, accelerated deterioration, and vent or skylight damage that costs you more down the line. Action is essential, not optional, when spring storms roll through.
Local replacement timing is commonly planned for spring or fall. Sand Springs summers are hot enough to complicate installation conditions and accelerate exposure of torn-off roofs and underlayment. Heat softens roofing materials and can bend or warp adhesives, creating edge cases for proper sealing and warranty adherence. If you wait too late into summer, you risk dramatic temperature swings that hinder proper shingle seating and can extend project timelines. Planning a replacement during milder shoulder seasons reduces weather-related delays and improves the likelihood of a clean, code-compliant installation. For urgent repairs, you still prioritize temporary protection and a clear plan for a full replacement window within the same general seasonal frame to avoid compounding damage and insurance questions.
Oklahoma insurers commonly scrutinize hail and wind claims closely, so Sand Springs owners need dated photos, roof age records, prior repair history, and installation documentation before adjuster review. Gather dated photographs that show hail impacts on shingles, gutters, siding, and vent stacks, plus close-ups of any penetrations or lifted edges. Record the roof's age and any known repairs, including when and how they were done. If a prior contractor worked on the roof, pull invoices or written notes that detail material types, underlayment used, and flashings replaced. Installation documentation matters too: shingle type, mat underlayment, and any ventilation upgrades. Presenting a well-organized file at the time of the adjuster's inspection can speed approvals, reduce back-and-forth, and help protect your coverage for both the damaged sections and any necessary underlayment or flashing work. Without this, an adjuster may request additional proof or challenge the scope of the claim, delaying the repairs you need to prevent leaks during the next storm cycle.
After a hail event, you should perform a careful exterior walkaround with your notes ready. Look for bruising on asphalt shingles, dented metal components, and lifted edges or torn flashing near chimneys and vents. Photograph any suspicious areas from multiple angles, including the overall roof slope and the gutters where shingle granules accumulate. If you must, arrange a temporary tarp to protect vulnerable sections while you schedule a professional assessment. Call in a licensed local roofer who understands Sand Springs' spring storm patterns and the inspection-heavy claim process. Ask for a rapid, documented roof inspection and a written estimate that includes removal and replacement details. Have your documentation prepared so that, when the adjuster arrives, you can present your file and avoid delays caused by incomplete information.
A local roofing pro understands the typical Sand Springs response times and the seasonal scheduling pressures. They can help you assemble the damage inventory, identify what requires immediate temporary protection versus what can wait for a planned spring or fall replacement, and ensure your installation documentation is complete and ready for review. Your contractor should align with your insurance timeline to minimize downtime and ensure you're negotiating from a position of clarity about materials, underlayment, and ventilation. In a climate where spring hail drives both damage and claim volume, having a trusted local partner who can guide you through the documentation-heavy process is not a luxury-it's a necessity to keep your home dry and your claim moving forward.
Right Now Roofing & Solar - Tulsa
3901 Stone Crest Ct, Sand Springs, Oklahoma
4.9 from 94 reviews
Right Now Roofing & Solar – Tulsa, OK Your trusted local experts in residential & commercial roofing and energy-efficient solar solutions in Sand Springs, OK. We Specialize In: - Roof Repairs & Replacements - Asphalt Shingle, Tile, Metal, & Flat Roofing - Solar Panel Installation - Storm Damage Restoration & Insurance Support - Siding & Gutter Installation Whether you need a quick fix, a full roof replacement, or want to power your property with solar, we’re committed to completing every project with care and precision. Our Tulsa team combines top-quality materials with expert craftsmanship to deliver lasting results - backed by manufacturer warranties. Contact Right Now Roofing & Solar today for fast, reliable service you can count on.
Quality Roofing Systems
(918) 704-3577 www.qualityroofingsystems.net
11055 Pond Creek Dr, Sand Springs, Oklahoma
4.8 from 42 reviews
Quality Roofing Systems is your trusted local expert for high-performance residential and commercial roofing. Serving Tulsa, Oklahoma City, and surrounding communities, we specialize in everything from durable asphalt shingles and metal roofing to energy-efficient commercial roof coatings and flat roof systems. Whether you need a roof inspection, emergency leak repairs, or a full replacement, our team combines superior craftsmanship with top-tier materials to protect your investment. We pride ourselves on delivering weather-resistant durability, enhanced curb appeal, and unmatched reliability. Trust the local pros at Quality Roofing Systems to safeguard your home or business. Call today for a professional consultation!
Above It All Roofing & Construction
(918) 398-6595 www.aiaroofing.com
415 E Broadway St, Sand Springs, Oklahoma
4.5 from 57 reviews
Family-owned, local company, that offers professional roofing services for both residential and commercial clients.
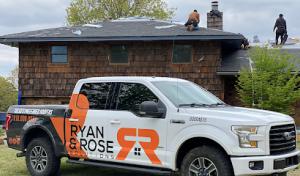
Ryan & Rose Solutions
(918) 808-0861 ryanandrose.solutions
109 N Garfield Ave, Sand Springs, Oklahoma
4.7 from 12 reviews
Ryan and Rose Solutions was found by Sherman Faulkner in February of 2020. The name Ryan and Rose comes from the middle name of his children. He chose this name around the concept of integrity. He wants people to view his company the same way people view his family and children, which is with integrity. Sherman believes individuals should work hard to earn and maintain a highly respected reputation. He would like to be able to pass this business of to his children and his children be proud of the company and reputation that was built.

BOLD Roofworks
(918) 280-9171 boldroofworks.com
Serving
5.0 from 22 reviews
BOLD Roofworks is Tulsa's premier roofing contractor serving the greater Tulsa area with exceptional quality and unmatched expertise. Family-owned and operated since 2014, we specialize in residential roofing solutions, including installations, repairs, and storm damage restoration. Our team of certified professionals ensures every project is completed with precision and care, using only premium materials backed by industry-leading warranties. What sets us apart is our commitment to transparency, reliability, and customer satisfaction—we're not satisfied until you are. From emergency repairs to complete roof replacements, BOLD delivers peace of mind with every shingle. Call us today for a free inspection and experience the BOLD difference!
Native Roofing
(918) 552-0655 nativeroofingok.com
Serving
5.0 from 360 reviews
Native Roofing + Construction is a locally owned roofing company serving Tulsa, Broken Arrow, Bixby, Jenks, Owasso, Sapulpa and nearby communities. We provide residential and commercial roofing services including inspections, leak repairs and full replacements backed by strong warranties and certified workmanship. As a Native American owned business, we value honesty, quality and clear communication. We offer free inspections, help with insurance claims and treat every home with care.

A. Fricker Roofing & Waterproofing
(918) 402-7167 africkerroofing.com
Serving
4.9 from 616 reviews
Our team understands that your roof is the first line of defense against the elements and sudden weather events. Regular wear and tear or storm damage can take a toll on any roof but you do not have to worry about it when you have our team on call! We offer reliable roofing services in Tulsa and surrounding areas to ensure that your property stay protected.
RBE Roofing & Construction
Serving
5.0 from 79 reviews
RBE Roofing and Construction is a locally owned roofing company in Tulsa, OK, proudly serving Tulsa and surrounding areas. We specialize in residential and commercial roofing, seamless guttering, and general construction. As trusted roofing contractors Tulsa homeowners rely on, our expert team provides free inspections and helps with every step of the insurance claim process—from damage assessment to meeting with adjusters and ensuring smooth project completion. We install all types of roofing systems and offer Class-rated shingles that may qualify for discounts. Most projects are completed in one day, with thorough cleanup and customer satisfaction. For reliable roofing companies Tulsa trusts, choose RBE Roofing—your trusted Tulsa roofer.
Red Dirt Roofing & Construction
(918) 804-4094 www.rdroofingok.com
Serving
5.0 from 7 reviews
Red Dirt Roofing & Construction is a locally owned roofing and exterior contractor serving Sapulpa, Tulsa, Glenpool, Sand Springs, Jenks, Bixby, Kellyville, and nearby Oklahoma areas. We specialize in roof repairs, full replacements, storm and hail damage restoration, metal roofing, siding, gutters, soffit, fascia, and emergency leak services. We provide free roof inspections, clear communication, quality materials, and dependable workmanship built for Oklahoma weather. Call today for fast, reliable roofing and exterior service you can trust. Serving Sapulpa, Kellyville, Bristow, Tulsa, Glenpool, Jenks, Bixby, Drumright, Mannford, Sand Springs and Surrounding. 918-804-4094

HCS Roofing & Restoration
(918) 876-3344 www.hcsroofingandrestoration.com
Serving
4.8 from 85 reviews
The premier roofing and restoration solution to your home or business. Our team is ready 24/7 to provide integrity, craftsmanship and results. When you choose HCS, you get a team of experts that go above and beyond to care for your home with integrity, quality workmanship, and unparalleled results. We don’t start our work until we have a solid understanding of your goals and we don’t end our job until you’re 100% satisfied. We proudly serve Tulsa and the surrounding areas as a licensed, insured, bonded roofing and restoration company available 24/7. Whether you’re facing minor damage to your home or total disaster restoration, HCS has you covered from start to finish.
American Patriot Roofing
(918) 402-1605 american-patriotroofing.com
Serving
5.0 from 10 reviews
We are a Tulsa based roofing contractor also offering services in Norman Ok, with 20 plus years’ experience in the roofing industry.we also offer gutters and siding installation, contact Mike Wilson 918-402-1605
Standard Exteriors & Roofing
(844) 766-3918 standardpropertyservices.com
Serving
5.0 from 62 reviews
Standard Roofing & Contracting, located in Tulsa, OK at 1010 E 2nd St S, is your premier choice for all roofing and siding needs. As a leading roofing contractor in Tulsa, we specialize in residential roofing installation, siding repair, and commercial roofing. Our expert team delivers top-notch window installation and siding services, earning us a reputation as trusted Tulsa siding contractors. Whether you need roofing repair or are searching for local roofing services near you, our dedicated professionals are here to ensure excellence and durability. Choose Standard Roofing & Contracting—the roofing and siding company near you for all your contracting needs.
In Sand Springs, storm-driven demand after hail events can tighten scheduling and labor availability, which often pushes pricing and wait times higher than during calmer periods. Homeowners should expect pricing to vary not only by the roof's size and pitch but also by how quickly the crew can secure materials and slot inspections and crews after a hail event. The following ranges reflect typical local pricing and serve as a practical benchmark when planning a storm-related roof project.
Typical local pricing ranges run about $350 to $650 per square for asphalt shingles, $600 to $1100 for metal, $1200 to $2600 for clay tile, $700 to $1200 for concrete tile, $500 to $900 for synthetic or composite shingles, and $1000 to $2500 for slate. These numbers capture the broad spread you'll see in the Sand Springs market, where material selection, roof complexity, and contractor scheduling can tilt the final, out-the-door cost. For a straightforward re-roof on a standard two-story home, asphalt shingles remain the most common and cost-efficient option, with metal offering durability and extended lifespans for homes in high-heat summers. Clay and concrete tiles bring distinct aesthetics and longer lifespans but require additional structural consideration and heavier framing, which affects both cost and installation time. Synthetic or composite shingles provide a balance between cost and performance, while slate represents a premium path with commensurate installation demands.
After hail storms, crews often face a surge in demand that can compress lead times and delay material deliveries. That pressure can elevate both the per-square cost and the overall timeline, especially when a project requires careful damage assessment, moisture mitigation, or staged replacements. If the existing roof has multiple layers or spots where sheathing or ventilation components show wear, the project can pivot from a simple tear-off to a broader repair scope, which nudges the price upward. Expect longer waits for permit-like verifications and inspector availability, along with potential contingencies for weather windows and back-to-back job scheduling.
During a full re-roof, prices can rise when inspections uncover flashing, ventilation, or code-compliance corrections that must be addressed as part of the project. Sand Springs homes commonly require proper flashing integration and venting alignment to ensure moisture control and energy performance, and correcting these elements adds both material and labor time. If a hail event triggers a wider assessment, you may see a broader scope creep from minor fixes to more comprehensive upgrades. To manage this, secure a detailed written scope from the contractor that itemizes materials, labor, potential contingencies, and a realistic schedule, so you're not surprised by mid-project changes or incremental price bumps.
Get a clear picture of your project costs upfront - no commitment required.
Roof Nerds - Commercial Roofing Tulsa
(918) 973-1010 www.okroofnerds.com
Serving
5.0 from 81 reviews

Nichtech Roofing & General Contracting
(918) 283-2001 www.nichtechroofsystems.com
Serving
4.8 from 52 reviews
In this Tulsa-area community, a full re-roof typically requires a building permit through the Sand Springs Building Department, with the contractor or homeowner submitting the application. The permit process is not an afterthought; plans and fees are reviewed before permit issuance, and that review period becomes part of the project schedule. Before any shingles or underlayment come off, confirm who is responsible for the permit submission and who will track the document trail. A clear line of communication with the building department helps prevent unexpected hold-ups when a storm-damaged roof needs rapid attention. Expect the permit packet to include roof design details, venting considerations, and flashing specifications, all of which influence how quickly a crew can start and how smoothly inspections will go.
Sand Springs inspections are typically performed during the project and again after completion to verify installation quality, flashing, ventilation, and code compliance. The inspection cadence is a normal part of the job, not a surprise checkpoint. The first inspection is commonly scheduled after roof sheathing and underlayment are in place but before shingles are installed, giving the inspector a chance to verify proper nailing patterns, roof deck integrity, and attic ventilation setup. The final inspection centers on the completed roof covering, confirming that flashing around chimneys, skylights, vents, and wall transitions is properly integrated, and that ventilation calculations meet code requirements. Because spring hail and hot Oklahoma summers can stress flashing and attic airflow, attention to these elements during inspections helps reduce leak risks and energy loss once the project is finished.
Given the documentation-heavy nature of storm restoration in this area, keep a precise file of all permits, plans, and inspection approvals. Before work starts, confirm who will submit and update the permit dossier, and request a written schedule from the contractor that aligns with the anticipated inspection dates. After each site visit, obtain an inspector's note or stamped approval, and save photographs that show flashing details, ventilation placement, and edge drip-edge installations. When questions arise from the building department or the insurer, having a tight, organized record set makes it easier to respond quickly without delaying the project. If a temporary stoppage occurs for weather or documentation issues, use the lag time to confirm material lists and delivery expectations so crews can resume without stacking delays.
Spring hail events can compress timelines, making permit timing feel like a gatekeeper for restoration work. Build a realistic schedule that accounts for the permit review window and potential weather holdbacks. Keep the contractor in the loop about any clerical requests from the building department, such as revised sketches for vent placement or updated flashings. On the ground, verify that the crew maintains proper protection for surroundings, especially in older or multi-story homes where ventilation runs through attic corridors. By aligning permit milestones with inspection windows and storm-season realities, the project can proceed smoothly from permit approval through final verification.
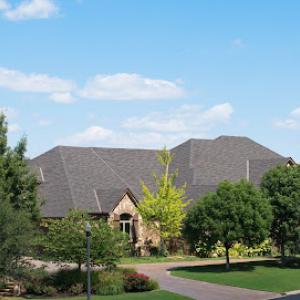
Asphalt shingles dominate the local market, and for good reason: they're familiar, affordable, and easy to repair. In this climate, however, hail exposure makes impact resistance and granule retention key priorities. When evaluating asphalt, look for impact-resistant grades and a stout granule coat to minimize pitting and accelerated aging after spring hail events. Be mindful that granule loss can expose the underlying mat sooner in the hot Tulsa-area sun, so consider a shingle with a durable coating and a stout warranty. Installation quality matters here, as improper nailing or alignment can accelerate leaks after intense hail storms.
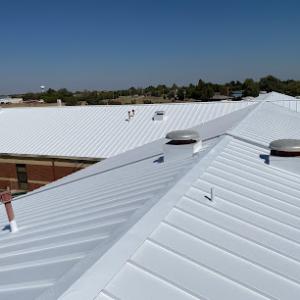
Metal roofing has a meaningful specialist presence locally and is often considered by owners seeking better hail resilience and heat performance during long hot summers. In Sand Springs, a properly installed metal roof can shed hail impacts more effectively and reflect solar heat, reducing cooling loads. Look for panel systems with through-fastened or concealed-fastener designs that have proven Aero- or UL-rated impact resistance. A key practical note: ensure the chosen system and installer can address expansion and contraction in large temperature swings, which helps prevent fastener loosening over time. Metal also tends to move newer, flatter attic spaces toward a cooler, drier result in the peak of summer.
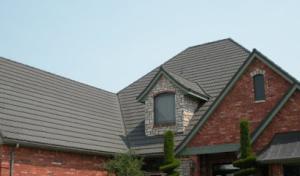
Tile and slate options exist but are far less common locally, so homeowners should weigh repair access, replacement matching, and installer availability before choosing heavier premium systems. Clay and concrete tiles bring durability and distinctive curb appeal, but heavier weight can complicate rafters, underlayment, and access for future repairs. Slate provides elegance and longevity but requires highly specialized crews and can complicate attic ventilation and insulation. If selecting tile or slate, verify the existing structure can bear the weight and confirm local installers with track records in this market. Practical planning for matching replacements after hail damage is essential when choosing these heavier systems.
Hot Sand Springs summers can accelerate aging of shingles and underlayment, making attic heat management and ventilation more consequential for roof longevity. When the attic runs hot, the underlayment and the backside of shingles bear the brunt of heat cycling, which can lead to premature curl, drying, and micro-cracks. This isn't just about a shiny roof; it's about a system that needs airflow from soffits to ridge vents to keep temperatures in check. If attic venting is undersized or obstructed by insulation, heat can bake the roof deck from above and the attic from below, increasing the risk of hidden leaks and accelerated wear after hail storms. In practical terms, ensure soffit openings aren't blocked, confirm a clear airflow path to the ridge, and consider a simple inspection of turbine or ridge vents before the peak heat hits. You'll get a clearer read on roof health when you check the attic on a hot afternoon and notice if the space feels unusually warm or stagnant.
Fall winds and rain in this area can delay tear-off and dry-in schedules, increasing the importance of weather-window planning before winter arrives. When storms sweep through, contractors may face short notice, and a rushed tear-off can leave underlayment exposed to wind-driven rain. The consequence is a longer vulnerability period where water can migrate along roof lines or into already distressed spots. Build a plan that allows a weather buffer-ideally a dry stretch with low wind-so the roof can be stripped, underlayment installed, and a protective barrier secured before the first freeze. If a storm window closes, expect a longer drying-out phase before the new roof can be fully sealed, and that window may sneak up on you in late October or November when days grow shorter and storms become more unpredictable.
Winter freezing conditions reduce safe access and narrow inspection windows, so unresolved leaks from fall storms can linger longer if not addressed promptly. Ice and snow complicate ladder setup, roof traversal, and material handling, turning a quick patch into a slow, high-stakes process. When signs of trouble show up in late fall-water staining, damp attic insulation, or frost-edged ceilings-treat them with urgency. A timely assessment can prevent moisture from penetrating deeper into decks and rafters, which can compromise both the roof structure and indoor comfort as temperatures swing. Prepare for tighter schedules and prioritize leaks that threaten insulation and interior finishes, especially where attic temperatures already run high.
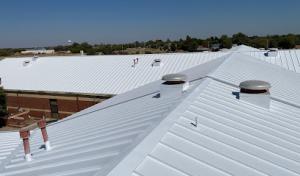
Although steep-slope residential re-roofing dominates locally, Sand Springs also has an active flat-roof specialty segment, indicating recurring leak issues on low-slope sections, porches, additions, and mixed-use properties. These areas can hide drainage and flashing problems that aren't obvious from the ground. Expect more frequent penetrations around skylights, door transitions, and parapet walls where hot Tulsa summers bake sealants and expand/contract joints.
Storm-driven emergency calls often center on leak entry at vulnerable roof transitions rather than only field shingle damage. If a porch roof, flat add-on, or low-slope hallway shows staining, bubbling, or damp spots after a storm, treat it as a red flag. Take clear pictures of existing flashing, transitions, and edge details after each major rain event. Keep a simple log noting date, rainfall, and observed water intrusion to share with a contractor or insurer during repairs.
Mid-project and final inspections in Sand Springs specifically checking flashing and installation quality make penetrations and transition details a local failure point worth addressing before closeout. Pay special attention to how roof decks meet walls, chimney and vent penetrations, and the perimeter flashing at parapets. Look for mismatched sealants, inadequate counter-flashing, and any torn or lifting membranes at joints. For additions, confirm a continuous slope toward drains and gravity-assisted water removal, with proper integration into the main roof system to avoid hidden pockets.
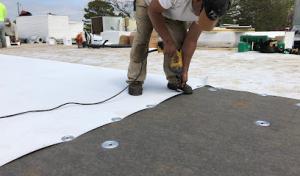
During a storm layup or repair planning, request a dedicated inspection of low-slope interfaces by a roofer experienced with flat-roof systems and/weathered climates. Ask for a written detailing of flashing replacements, edge termination methods, and the method used to seal penetrations. If moisture is present after a repair, insist on a follow-up check focusing on transitions and flashing within the first few weeks of drying weather. A proactive, detail-focused approach reduces recurring leaks and streamlines storm restoration notes for insurance documentation.
Find specialists in TPO, EPDM, and built-up flat roofing systems for residential and commercial properties.

Right Now Roofing & Solar - Tulsa
3901 Stone Crest Ct, Sand Springs, Oklahoma
4.9 from 94 reviews
Quality Roofing Systems
(918) 704-3577 www.qualityroofingsystems.net
11055 Pond Creek Dr, Sand Springs, Oklahoma
4.8 from 42 reviews
In a spring hail and wind environment like this, documentation can mean the difference between a smooth claim and months of back-and-forth. You'll want a clear trail showing pre-storm conditions and the exact scope of the storm restoration. This helps prevent misunderstandings when the adjuster reviews underlayment and installation details, and it gives you a solid baseline if multiple storms have touched the same roof.
Because Oklahoma is a high hail and wind claim environment, Sand Springs homeowners should keep pre-storm roof photos, installation invoices, permit records, and warranty documents ready before filing. If you have older roof work, locate any records that prove the original materials and fastening methods used. Keep these in a single, accessible folder or cloud folder so you can share them quickly when the claim starts. Space in the folder for notes about any pre-existing issues-like prior leaks or repairs-helps keep the file organized and credible.
Adjusters in this market may request closer review of underlayment condition and installation details, so Sand Springs owners benefit from contractor photo reports taken during tear-off and dry-in. Arrange your roofer to take high-resolution images at key stages: pre-tear-off, during removal, after underlayment inspection, and after final installation. Label photos with date and location, and include close-ups of fasteners, nailing patterns, and any visible hail damage on sheathing. These visuals provide a transparent account that supports the narrative of what was replaced versus what survived.
Premium impacts and claim scrutiny in Oklahoma make it especially important in Sand Springs to separate new storm damage from older wear, prior repairs, and deferred maintenance. When documenting, note the age of the roof, any prior leaks, and areas that show wear consistent with past weather but not with the current event. This clarity helps the adjuster evaluate the scope of the storm-related work without conflating it with pre-existing conditions.
Connect with contractors who help homeowners navigate the claims process from damage assessment to final approval.
Right Now Roofing & Solar - Tulsa
3901 Stone Crest Ct, Sand Springs, Oklahoma
4.9 from 94 reviews
Above It All Roofing & Construction
(918) 398-6595 www.aiaroofing.com
415 E Broadway St, Sand Springs, Oklahoma
4.5 from 57 reviews
Ryan & Rose Solutions
(918) 808-0861 ryanandrose.solutions
109 N Garfield Ave, Sand Springs, Oklahoma
4.7 from 12 reviews