Last updated: Apr 19, 2026
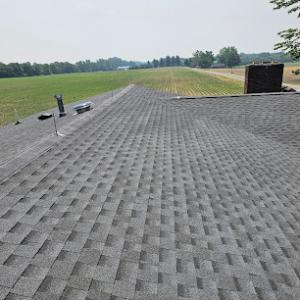
You are living in a place where spring hail and strong winds are recurring roof threats. Impact damage can show up as bruised shingles, dented metal, or granule loss on asphalt shingles. In many homes, the most visible signs appear along the edges and near roof penetrations where wind-driven rain can pry up shingles or loosen flashing. Older pitched roofs here often have valleys and chimneys that act like funnels for wind and hail, increasing the chance of localized damage. When a fast-moving storm passes, you want to inspect the roof promptly for darkened spots, missing granules, or shiny metal where the coating has been compromised. Quick action to address even small hail hits can prevent bigger problems from taking hold.
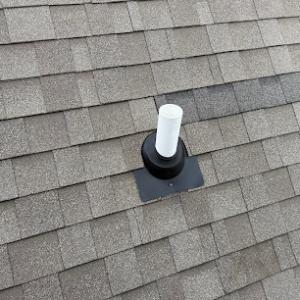
Indiana's freeze-thaw swings are especially hard on flashing, sealants, and roof penetrations after storm seasons. Subtle hail damage can lead to microcracks in sealants that widen with winter freezes, allowing moisture to creep under shingles and into the underlayment. After a harsh storm and again after winter, check around any flashing at valleys, chimney joints, vent pipes, and dormers. If the flashing looks misshapen, lifted, or the sealant shows cracks or gaps, water can bypass shingles and start rot or interior leaks. Perimeter seal areas and boot footprints tend to fail first, so pay particular attention to those spots during a spring sun break or after a thaw.
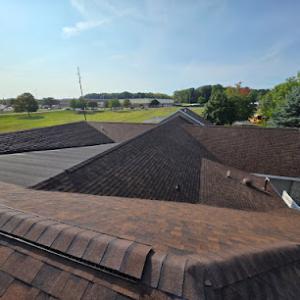
Peru's housing mix includes many older steep-slope homes where wind-driven rain can exploit aging valleys, chimneys, and step flashing rather than only the field shingles. The near-vertical faces and long runs of shingles can mask damage that isn't obvious from ground level. Look for lifted shingle tabs along the rake edges, displaced step flashing at sidewalls, and soft spots in the underlayment near valleys where moisture can accumulate. In churn seasons with repeated hail and gusts, the risk of saturated decking increases if a roof has been neglected or previously repaired with mismatched materials. On these homes, small imperfections rapidly become bigger leaks when winter moisture reappears.
After a storm, you should prioritize a thorough review of the most vulnerable zones: ridge lines, valleys, chimneys, vent boots, and any step-flashed corners. On older steep-slope roofs, inspect the intersections where shingles meet flashing and where two roof planes meet at a valley. If you notice lifted shingles, curled tabs, or any flashing that sits proud of the roof plane, treat it as a red flag. Moisture intrusion can travel along the underlayment and fascia, so don't overlook the eaves and drip edge. If the attic shows any signs of dampness, or you detect a musty odor after a rain, assume hidden damage and call for a professional assessment.
As spring storms approach, perform a targeted maintenance sweep focusing on flashings, sealants, and penetrations. Clean gutters and downspouts to ensure proper drainage; blocked outlets can back up water and force it under roof edges during heavy rain. Tighten loose components around chimneys and vent pipes, and reseal any cracked sealant along valleys. On older roofs, consider reinforcing critical flashings before the next hail season and replace weathered shingles that show signs of brittleness or curling. By prioritizing these checks, you reduce the chance that a minor storm impact escalates into costly water intrusion once winter returns.
K. Graber Construction
(765) 395-7275 www.kgraberco.com
Serving
5.0 from 40 reviews
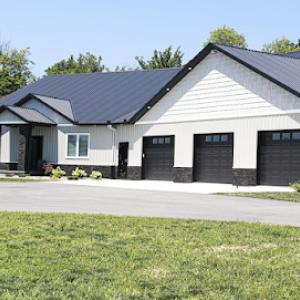
K Graber Construction is a family-owned company that comes from a long line of carpenters - 3 generations with over 30 years of experience. We offer services for metal & shingle roofing, commercial & agricultural pole barns, pole barn homes, steel buildings, new home construction, additions & remodels, concrete contracting, and ICF construction. At K. Graber Construction, our team works hard to cut through the noise and clutter to provide every customer with quality work, excellent customer service, and complete integrity.
Steel Pro
Serving
4.1 from 9 reviews
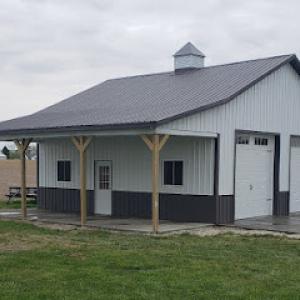
Count on us for quality post-framing at your local business. Stronger Homes and Businesses Start With Us Count on us for post-frame building and roofing in the Bunker Hill, IN area Everybody needs the strongest home or business property possible. That's exactly what Steel Pro, LLC will give you. We're a metal roofing contractor that also provides post-frame building services in Bunker Hill, IN and nearby.
Grand Roofing
(765) 233-7748 www.grandroofinginc.com
Serving
4.9 from 229 reviews
Grand Roofing is committed to bringing the best possible roofing services, and professional install on your roofing projects. With 23 years roofing experience, you can rest assured you're in good hands. We don't focus on just the best install, but also the best quality customer service!
Kingdom Roofing Systems - Kokomo Roofer
(765) 753-4845 kingdomroofingsystems.com
Serving
5.0 from 81 reviews
Serving central Indiana for over a decade, Kingdom Roofing Systems offers residential and commercial roofing services. Our highly trained team consists of low slope and steep slope roofing for homes and commercial flat roofs and exterior wall systems like vinyl siding, James Hardie siding, wood lap siding, and foam back siding. Kingdom Roofing Systems prides itself on being the safest choice for roofing and siding in Indiana. We are among Indiana’s top 1% of contractors awarded Platinum Preferred status by Owens Corning. We look forward to serving you. For more information about Kingdom Roofing Systems, please visit our website.
Richards Roofing & Construction
Serving
4.7 from 35 reviews
We are a local roofing company that serves Logansport, IN and surrounding areas. We can install your roofing needs and exterior needs. Shingles that we install. 30 year warranty architectural shingles. 50 year warranty shingles. Metal roofs that we install. Metal shingle 50 year concealed fastener. Standing seam concealed fastener snap lock 50 year warranty Regular 5 ribbed curragated exposed fastener 40 year paint warranty metal roof Seamless 6 inch gutter. Other colors available besides white. Fascia wrap/soffit that we install. Vinyl soffit, metal soffit, aluminum Fascia wrap. Metal Fascia wrap. Siding that we install. Vinyl siding. Metal siding of board and batten or 5 rib curragated metal panels. We also do window installation.
Lobo Roofing
(574) 721-2471 loboroofingllcin.com
Serving
4.5 from 19 reviews
Our team is passionate about delivering high-quality workmanship and exceptional customer service. When you choose us, you can trust that your roofing project is in good hands. We understand the significance of a well-maintained roof and the impact it has on protecting your property. That's why we strive to prioritize safety, integrity, and transparency in all of our services. When you partner with Lobo Roofing, you can expect professionalism, efficiency, and cost-effective solutions without compromising on quality. We invite you to explore our website and see for yourself the vast array of services we offer, from roof repairs and replacements to regular.
Legacy Roofing & Exteriors
(765) 860-9167 legacyexteriors.info
Serving
5.0 from 10 reviews
As a local, family-owned business, Legacy Roofing & Exteriors delivers expert roofing, siding, gutter and window services with a focus on quality, durability and customer satisfaction.
OCC Roofing
(574) 721-0207 occroofingllc.com
Serving
5.0 from 5 reviews
🏠 OCC Roofing – Logansport, IN "Covering Your Roof Needs with Expert Care and Quality Repair!" 🔨✨ 🛠️ Experience the pinnacle of roofing excellence with OCC Roofing, your trusted local partner for durable, reliable, and beautifully finished roofing solutions. Located at 2021 E Market St, Logansport, IN, our team brings years of experience and a commitment to craftsmanship that sets us apart. 🏗️ We specialize in: ✔️ Residential & Commercial Roofing ✔️ Roof Repairs & Replacements ✔️ Leak Detection & Prevention ✔️ Storm Damage Restoration ✔️ Quality Materials & Expert Installation Whether you're fixing a leak or upgrading your entire roof, we deliver results that protect your home and elevate its value 🏡.

Primos Roofing
(574) 721-2081 www.primosroofingco.com
Serving
5.0 from 18 reviews
With years of experience and a commitment to quality, we strive to provide the best solutions for all your roofing and siding needs. Contact our local roofing company today to schedule an appointment in or around Logansport, IN.

Giant Roofing & Guttering
(765) 233-7455 www.giantroofing.org
Serving
4.5 from 17 reviews
Giant Roofing & Guttering is a trusted roofing service provider in Kokomo, IN, and surrounding areas. With over 20 years of experience, the team delivers expert roof installations, repairs, and replacements for both residential and commercial properties. In addition to roofing, they provide professional gutter installation and cleaning, as well as siding solutions to protect and enhance your property’s exterior. Every project is handled with care, using high-quality materials and attention to detail to ensure lasting results, improved curb appeal, and reliable protection against the elements. Contact us today to schedule a consultation or learn more about our services.
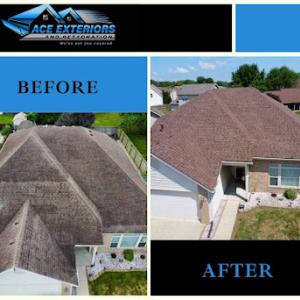
Ace Exteriors & Restoration
(765) 223-1050 aceexteriors.com
Serving
5.0 from 10 reviews
Ace Exteriors and Restoration, your trustworthy roofing and exterior contractor in Kokomo, Indiana and surrounding areas, is dedicated to enhancing the resilience and charm of your property. With a focus on roof replacements, seamless repairs, siding, gutters, and storm damage restoration, our skilled team ensures flawless craftsmanship, ethical service, and protection for your most valuable asset. Expect free inspections, and expert guidance with insurance claims. From routine maintenance to emergency repairs, Ace Exteriors is your go-to partner, proudly serving Kokomo, Greentown, Tipton, Peru, Logansport, Westfield, Carmel, and more.

Complete Commercial Roofing
(765) 457-4848 www.ccrroofing.com
Serving
5.0 from 6 reviews
Complete Commercial Roofing has served Kokomo and the surrounding area since 2003. We specialize in Duro-Last Roofing and other Roofing Systems.
Peru sits along the Wabash River corridor, where humid summers push attic heat and moisture right into the attic space. When ventilation is weak, that moisture can condense on rafters, ice-dampening insulation, and under the shingles. In older roofs, where decking may have settled or gaps exist, that moisture moves more easily into the attic and can create a cycle of heat buildup and faster aging of materials. The result is a roof that feels warmer inside upstairs rooms and more prone to dew on damp mornings. When planning a full replacement, check that the attic is ready to vent properly to prevent trapped heat and moisture from accelerating wear on both surface and underlayment.
Hot, humid Indiana summers accelerate the aging of shingle surfaces and the synthetic or organic underlayment beneath. If air can't circulate freely above and around the decking, heat builds, attic temperatures climb, and moisture can linger where it should dry out. The balance between intake and exhaust becomes critical on older pitched roofs, especially where soffit, ridge, or gable vents may have degraded or blocked. A well-ventilated roof helps keep shingles cooler in summer, which reduces the rate of drying and cracking that sometimes follows hail impacts or wind-driven debris. In Peru, achieving steady attic air exchange is as important as choosing the right surface material for a given roof age and condition.
Many older homes around the Wabash corridor were built with lean ventilation-if any at all. When a replacement is needed, the emphasis should shift from merely covering the old deck to restoring balanced airflow: sufficient intake at soffits or vents low on the eave, and adequate exhaust at the ridge or high vents. Look for signs of sagging fascia, clogged gutters, or blown-in insulation that blocks airflow. In practice, a full replacement should include a plan for resealing and renewing vent pathways, ensuring that damp air can exit and cooler air can enter. This approach helps prevent hot attic air from remodeling the roof's interior and reduces the chance of moisture-driven issues after a hail or wind event.
Start by inspecting the attic hatch and any existing vent openings for obstructions or damage. Clean or replace damaged soffit vents and consider adding continuous soffit intake along longer eave runs to promote steady air flow. If ridge or turbine vents are chosen, confirm they're not shaded by nearby branches and that their placement creates a clear, unobstructed airflow path from soffits to the ridge. For homes with aging decking, plan for a careful sealant or underlayment upgrade that preserves breathability while protecting against moisture ingress. Finally, coordinate ventilation considerations with the chosen roof surface to match climate-driven wear patterns and the specific roof pitch, so that both the attic environment and surface materials endure through multiple seasons of hail and wind.
Asphalt shingles are the most practical fit for many Peru homes because they match the area's common steep-slope residential rooflines and lower replacement budgets. In a town shaped by the Wabash River and repeated hail-wind cycles, these shingles offer a favorable balance of ease of installation, repairability, and ability to withstand seasonal freeze-thaw patterns. When selecting asphalt, prioritize a heavy-weight, impact-resistant (IBR or Class 4 equivalent) option and opt for a longer overlap and reinforced nailing area to better resist shingle blow-off during strong gusts. Regular inspections after hail events help catch granule loss and potential underlying deck issues before they escalate.
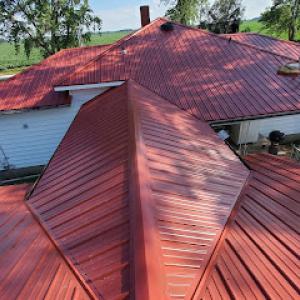
Metal roofing is attractive in Peru for shedding snow and resisting repeated wind-hail cycles, but installation quality around fasteners and flashing is critical in freeze-thaw conditions. If metal is chosen, focus on a well-sealed, fully integrated flashing plan around chimneys, vents, and transitions, plus careful sealing where the roof meets walls. In older homes with mixed framing or retrofits, ensure the sheathing and underlayment are compatible with metal's thermal movement to prevent fastener fatigue or panel oil-canning. A properly vented attic remains essential to minimize condensation and ice dam risk, especially on longer, steeper pitches common to the area.
Clay tile, concrete tile, wood shakes, and slate exist as premium or architectural options, but their weight, brittleness, or maintenance demands can be a poor match for older local framing unless the structure is evaluated first. Clay and concrete tiles demand a robust structural assessment because wagging wind and hail impact can crack or dislodge lighter coverings that sit atop fragile older decks. Wood shakes bring a distinct look but require regular maintenance to prevent rot and insect intrusion, which can be challenging to sustain in a climate with freeze-thaw cycles. Slate offers durability, yet its weight and slope requirements can be prohibitive on many older homes without substantial reinforcement. If a premium option is considered, schedule a structural evaluation to confirm framing, underlayment, and fastener compatibility with the local climate and typical renovations, ensuring the system's long-term performance.
Typical Peru-area pricing ranges by material are about $350-$550 per square for asphalt shingles, $800-$1900 for metal, $1200-$2500 for clay tile, $900-$2000 for concrete tile, $500-$1200 for wood shingles or shakes, and $1800-$4500 for slate. Those numbers reflect the mix of older homes with steeper pitches, more penetrations, and the chance of needing extra decking or flashing work after a long Indiana winter. When you're comparing bids, make sure the estimate itemizes tear-off, disposal, underlayment, flashing, and ventilation components; skimping on any of those can bite you later in the form of leaks or heat-related wear.
Costs in Peru can rise after spring hail or wind events when regional demand spikes across north-central Indiana and contractor schedules tighten. If a storm cluster hits, roof crews might be booked weeks out, and suppliers may experience short-term price bumps on materials and nails, sealants, and underlayment. If you're approaching replacement after a hail season, expect a tighter window to secure a trusted crew and a potential premium for quicker start times. Scheduling some buffer into your plan can help avoid delays that drive labor costs higher.
Older Peru homes can cost more to reroof because steep pitches, multiple penetrations, chimney flashing, and decking repairs are more common than on newer simple roof layouts. The Wabash River area means more freeze-thaw cycles, so decks and fascia often show hidden moisture or soft spots once the old roofing comes off. A careful contractor will pull back a small inspection layer to assess deck integrity, vent pipe flashings, and chimney counter-flashing. Expect a higher baseline price when decking repairs or re-nailing over damaged boards becomes necessary to preserve long-term performance.
Asphalt shingles remain the most budget-conscious route for many Peru homeowners, but the local weather profile keeps an eye on wind uplift and hail impact resistance. Metal roofing, while pricier upfront, can offer better hail survivability and faster installation in some cases, with long-term energy savings to balance the cost. Tile options-clay or concrete-provide excellent durability but demand careful assessment of roof slope and structural support to handle the weight. Wood shingles and shakes deliver a traditional look but may require more maintenance in this climate. Slate delivers longevity but comes with a premium price and structural considerations.
When planning, request a staged estimate that covers tear-off, waste disposal, underlayment, flashing, ventilation, and a deck check. In Peru, the mix of steep pitches and older layouts means you'll benefit from a contractor who can forecast potential extra costs for flashing around chimneys and vent stacks, plus any decking repairs. Align your choices with the local weather pattern, the condition of the existing rafters, and your tolerance for ongoing maintenance over the roof's life.
A full roof replacement in Peru typically requires a permit through the Miami County Building Department rather than being handled informally. The process is usually driven by the contractor, but the homeowner can initiate it if preferred. The permit covers material use, workmanship standards, and safety provisions tied to wind, hail, and freeze-thaw resilience common to the area. Inspections are scheduled during the course of work and again after completion to verify code compliance and installation quality. Reroof projects are treated with heightened attention to ventilation and attic details, so expect multiple review steps rather than a single check.
Ventilation is a local inspection focus on reroof projects, reflecting the region's mix of older stock and exposed attic spaces. When planning scope changes, intake and exhaust vent placement, plus any deck replacement or underlayment adjustments, should be documented before final approval. A change in ventilation strategy can trigger a new inspection item, so keep the approved plan handy and communicate updates to both the inspector and the contractor early in the project.
Begin with choosing a licensed contractor who is familiar with the county's permit expectations and the typical performance concerns of Peru, such as hail impact resistance and proper ventilation sealing. Prepare to submit a permit package that includes a roof plan, a site plan showing access and debris containment, and ventilation details. If the project involves old deck replacement or any significant attic work, include notes explaining how these changes meet local ventilation and moisture control standards. After approval, inspections are scheduled at key milestones: pre-roof inspection for framing and underlayment, in-progress checks for ventilation and flashing, and a final inspection upon completion to confirm code compliance and overall workmanship. The contractor or homeowner should arrange each inspection with the Building Department and ensure access for the inspector. Once the final sign-off is granted, the permit is closed and the project is considered complete. Keep copies of all permit documentation and inspection reports for future reference during potential hail or wind-related repairs.
In Peru, insurance decisions are often driven by hail and wind events rather than coastal storm or wildfire losses. This means a typical claim timeline can hinge on how a single hailstorm or a sequence of wind events aligns with the age and condition of an older pitched roof. Understanding what triggers coverage and how adjusters view weather-driven damage will help you chart a more predictable path through the process.
Indiana carriers commonly cover hail and wind damage, but claim handling varies by insurer, so Peru homeowners should keep date-stamped photos, scope notes, and before-and-after documentation. Take clear, dated photos after every significant storm, and record the exact locations and types of damage seen on the roof, gutters, and flashing. Maintain a simple repair log with dates and brief notes so there is a straightforward trail for the adjuster to follow when damage assessments are mixed with aging wear.
Adjusters may ask for a detailed roofing plan and repair records, which is especially important when storm damage is mixed with older wear on Peru's aging roofs. If a roof has multiple layers or visible wear-soft spots, curling shingles, or granule loss-be prepared to separate new damage from existing deterioration. A clear, current roof plan that outlines materials, layering, and prior repairs can prevent misunderstandings about what needs replacement versus what is maintenance.
Dealing with the adjuster requires calm, organized communication. Present your documentation in a concise package, highlight areas where hail and wind likely caused new damage, and note any pre-existing concerns. Honest, thorough records help avoid disputes and can lead to a more timely, fair settlement that reflects the roof's true condition amid Peru's hail-wind history.
Late spring through early fall is the best replacement window in Peru because winter weather complicates tear-offs and sealing. That means planning the project to start once the ground is dry, the air is warming, and crews can work consistently without sudden cold snaps that stall progress. This window also aligns with ventilation checks and underlayment replacement when shingles are already pulling away from weakened decks.
Spring conditions bring potential late-season rain, but dry weeks can be leveraged for a steady tear-off and re-nailing. In this season, the goal is to complete decking inspection and repair before installing new shingles. Be mindful of lingering moisture from late storms that can affect fasteners and sealants. If ice-melt products were used on nearby sidewalks, ensure those chemicals aren't tracked onto fresh underlayment or newly installed roofing.
During the warm months, crews benefit from longer daylight hours and better sealant curing. This is when ventilation and attic baffles should be checked or upgraded to prevent heat buildup that accelerates shingle wear. In older pitched roofs common to the area, the emphasis should be on ensuring proper nailing patterns and arranging debris containment to avoid hail-related debris from lingering on the roof surface.
Autumn rainstorms in Indiana can delay installation and expose decking to moisture, so Peru projects should avoid compressed schedules late in the season. Schedule buffers for potential weather delays, and prioritize complete leak checks before the first frost. If shingles were damaged by hail earlier in the year, confirm proper flashing and valley detailing to prevent premature failure.
Winter freeze-thaw conditions in Peru make emergency repairs more common but full replacements less predictable for workmanship and inspection timing. Plan for rapid response to wind-driven damage while recognizing that roofing crews may need to pause for safety and material handling during extreme cold.