Last updated: Apr 19, 2026
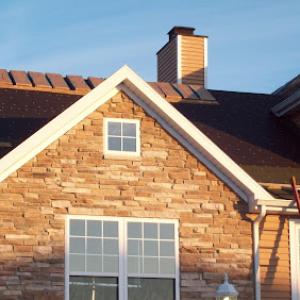
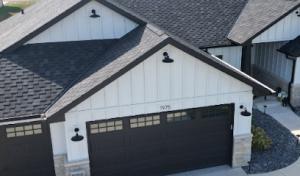
Valparaiso homeowners face a harsh combination that isn't the same as lakefront conditions: winter ice-dam risk paired with spring hail and wind claim activity. The inland Northwest Indiana climate shuttles between freezing nights and warmer days, which drives repeated freeze-thaw cycles. Those cycles can turn minor flashing gaps or a small shingle seam into active leaks after a heavy snow event and a refreeze. The attic may stay dry for weeks, then a sudden temperature swing exposes a compromised roof edge, letting water creep in along eaves and fascia. This isn't a distant threat-the cycle is real and repeatable, especially on homes with older underlayment, worn boot flashing, or insufficient attic ventilation.
Ice dams form when heat in the attic melts snow at the roof's upper slope, which refreezes at the colder eave. Over time, that dam of ice pushes against shingles and penetrates through the exposed nail lines, creating slow, stubborn leaks. In Portage County's winter pattern, even small deficiencies become active leaks after a few storms. Look for stained or softened ceiling spots along exterior walls, dark streaks on interior attic rafters, and sticky or granular evidence at the roof edge. If you see icicles hanging from eaves with damp rafters behind them, you're likely dealing with an ice dam scenario that requires prompt attention before interior damage compounds.
Spring hail and wind activity can rip loose shingles, bend flashing, or loosen vents and gutters. When a storm knocks a tab loose or reveals a lifted shingle edge, wind-driven moisture can ride into the roof deck and tributary walls. Valparaiso homes often have mixed roof ages, so the timing of replacement or repair hinges on visible damage and ongoing leaks rather than a set calendar date. Ice-dam cycles can reappear after mid-winter thaws, so an assessment after a warm spell followed by a cold snap is critical. Delayed repairs magnify sagging risks, interior staining, and deteriorated insulation efficiency.
Begin with a straightforward exterior survey after each thaw transition: check for lifted or missing shingles, cracked sealant around vents and chimneys, and any soft spots along eaves where water may be wicking upward. Inside the attic, inspect for light shining through rafters from roof leaks, damp insulation, and any unusual warmth indicating ongoing moisture. If you notice recurrent dampness or staining near eaves, treat it as a red flag that requires professional assessment. Do not rely on cosmetic fixes; underlying flashing, underlayment, or vent penetrations must be sealed and reinforced to withstand future freeze-thaw cycles.
When storm damage or ice dam indicators appear, request a comprehensive roof evaluation from a local contractor familiar with inland Northwest Indiana conditions. Emphasize ventilation adequacy in the attic, as proper airflow reduces ice dam risk and prolongs roof life during warm months. If water intrusion is evident, prioritize a temporary, protective fix to minimize interior damage while planning a more complete replacement that addresses edge deterioration, flashing integrity, and deck condition. In Valparaiso, proactive identification and timely response to storm damage and ice dam symptoms can prevent escalation into costly, extensive repairs.

DMG Exteriors
(219) 286-7350 www.dmgexteriors.com
314 N 325 E, Valparaiso, Indiana
4.9 from 327 reviews
Here at DMG Exteriors, with offices located in Valparaiso, Hobart and Granger, IN, we understand the value of providing top-notch exterior finishes for your residence and business. Known for our expertise, superior craftsmanship, and extraordinary results, we provide best-in-class services that you can trust for all your exterior home needs. Whether you need roofing, siding, or complete home exterior remodeling—our team of experts has you covered! Get a free, accurate estimate for your next roofing, siding, or home remodeling project in Indiana.
Tri-County Roofing & Gutters
(219) 548-0897 www.tricountycompanies.com
858 Lincolnway, Valparaiso, Indiana
4.8 from 321 reviews
At Tri-County, we all work hard to ensure that our motto, "Done Right," is built into each and every one of our projects. We take pride in offering the best in customer service from the first time you inquire about an estimate to the final clean-up around your house. Our roof technicians have been with us for a long time, and have years of experience in diagnosing, recommending, and installing the most reliable, cost-effective roofing system for your home.
Grimes Exteriors
(219) 242-4250 www.grimesexteriors.net
Valparaiso, Indiana
5.0 from 53 reviews
If you’re looking for a roofer who can provide top-tier quality and excellent customer service, look no further than Grimes Exteriors. We are providing reliable workmanship to homes and businesses in the Valparaiso, IN area. Our company is experienced in all types of roofs: asphalt shingle, tile, slate, metal—you name it. So come to us today and let us show you why we are one of the most trusted and reputable roofers in the area!

Discount Roof
(219) 248-7628 mydiscountroof.com
2801 Bertholet Blvd, Valparaiso, Indiana
4.8 from 247 reviews
Discount Roof is a fully licensed and insured contractor delivering outstanding exterior home remodeling and roofing services. Utilizing top-quality materials and exceptional installation procedures ensuring the ultimate reliability for your project, offering peace of mind and lasting beauty for your property.
My Style Exteriors
(815) 666-2086 www.mystyleext.biz
112 Morgan Blvd, Valparaiso, Indiana
5.0 from 20 reviews
My Style Exteriors sets the standard for both residential and commercial exterior restoration, with over 40 years of proven experience in the industry. As your #1 trusted home improvement company, we specialize in roof replacements, roof repairs, siding installations, siding repairs, gutter replacements, and gutter repairs, offering top-quality solutions to protect and beautify your home or business. Whether you’re facing exterior damage from a storm or simply want to enhance the curb appeal of your property, our expert craftsmanship and personalized service ensure a seamless experience. Call us today for a free, no-obligation inspection or estimate, and discover why “Your Style Starts at Home” with My Style Exteriors.
Universal Restorations
(219) 799-7663 universalrestorationsnwi.com
1555 W Lincolnway #103, Valparaiso, Indiana
5.0 from 12 reviews
At Universal Construction & Restorations, we provide high-quality residential and commercial roofing services across Northwest Indiana. From storm damage inspections and insurance claims to complete roof replacements, our experienced team delivers craftsmanship you can count on. We use only premium materials, back our work with solid warranties, and treat every home as if it were our own. Whether you need a free inspection, urgent repairs, or a brand-new roof, we’re here to protect what matters most — your home and your peace of mind.
RL Roofing
(219) 464-0507 www.rlroofingservice.com
551 Factory St, Valparaiso, Indiana
4.7 from 21 reviews
RL Roofing is your local roofing company with a long history of serving Valparaiso! We are a family owned and operated business who is licensed, bonded and insured. In business since 1985, we offer a great selection of top products in the roofing, siding, and windows industry. At RL Roofing, we take pride in the reputation we have built throughout the years and are committed to continuing in our tradition of excellence in product quality, installation and customer service. We look forward to providing you with a free estimate, showing you how we can eliminate roof problems, increase your your space with a new garage, and help you boost the value and energy efficiency of your home or business with new windows, insulation and siding.
Professional Roofing Solutions & Construction
(574) 551-7663 www.professionalroofingsolutions.com
Valparaiso, IN
5.0 from 2 reviews
Professional Roofing Solutions & Construction has been in the roofing industry for over 12 years. We provide quality workmanship and roofing solutions for the northern Indiana region. We pride ourselves in providing quality roofing services as a premium installer. There is no job to big or to small we do them all. We would be happy to provide you with a free quote for your residential or commercial needs at your convenience.
Taylor Roofing & Siding
(219) 987-3272 taylorroofingandsiding.com
1454 Lincoln Hwy SUITE 2, Valparaiso, Indiana
5.0 from 1 review
Taylor Roofing & Siding has been serving Northwest Indiana with roofing and exterior services for over 20 years. We pride ourselves on providing the best materials in the industry backed by incredible craftsmanship. We are a family owned and operated small company that will make you feel right at home with our amazing customer service. No project is to big nor to small! Consider Taylor Roofing & Siding for any of your exterior remodeling needs. You won't regret it!

Beaver Roofing
(219) 810-6170 thebestdamroof.com
Serving
5.0 from 83 reviews
Beaver Roofing is your local expert roofing contractor, proudly serving Northwest Indiana homeowners. Offering tailored roofing solutions — whether your home needs a roof repair or a full roof replacement. Our 'Dam Right It's Watertight' guarantees your roof will protect your family and home from the elements. Plus, our step-by-step approach makes the process smooth and stress-free. We’re proud to provide 'The Best Dam Roof' backed by quality, craftsmanship, and our word.

Armour Construction
(219) 987-2023 www.armourconstruction.net
Serving
4.8 from 95 reviews
Armour Construction stands among Indiana’s most reliable roofing companies, known for honesty, precision, and five-star results. As a professional roofing contractor, we handle every project with care—from roof installation and roof replacement to repairs and inspections. Our team uses trusted materials and proven techniques built to handle Indiana’s changing weather. Every roof is installed with lasting protection, energy efficiency, and curb appeal in mind. At Armour Construction, you’ll find clear communication, dependable service, and craftsmanship that stands the test of time. Whether you’re upgrading your home or fixing storm damage, we make sure your roof and your experience are built to last.
Roman's Roofing
(219) 838-9111 romansroofing.net
Serving
4.8 from 348 reviews
We are a licensed, bonded, and insured home improvement company in Northwest Indiana, with years of experience in roofing, siding, windows, and other renovation projects. We serve Lake County Indiana and the surrounding towns and areas including; Cedar Lake, Crown Point, Dyer, East Chicago, Gary, Griffith, Hammond, Highland, Hobart, Lake Station, Lowell, Merrillville, Munster, Schererville, St. John and Whiting. We do the job right using quality materials and expert installers at a fair price. Your project will be completed efficiently and to factory specifications. We can help make your home maintenance free, more energy efficient, and the envy of your neighbors.
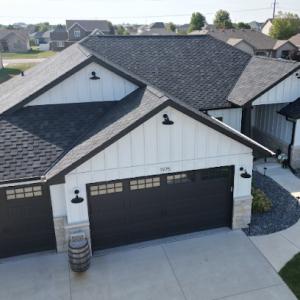
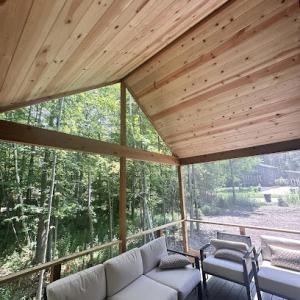
In Valparaiso, asphalt shingles dominate replacements because they fit the steep-slope housing stock and are readily sourced after a storm. They install quickly, repair work is straightforward, and the variety of profiles helps match older homes with modern curb appeal. When you're evaluating a replacement after hail or wind, look for bundles that match your existing roof color and texture, and verify the shingle's asphalt composition can handle freeze-thaw cycles without cracking. Regular inspection after major storms keeps minor leaks from turning into attic issues, and a reputable local installer will coordinate warranty documentation with insurance timelines.
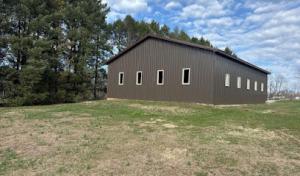
Metal roofing is a solid option for snow shedding and long-term durability in this climate. If you're considering metal, plan for attentive detailing around penetrations, flashing, and roof-to-wall transitions. Humid summers and icy winters can stress sealants, so choose a corrosion-resistant steel or aluminum system and specify stiffening at seams. Ventilation remains critical with metal. Ensure the underlayment and attic vents are sized to maintain a dry roof deck during rapid temperature swings, which helps prevent condensation and ice-related problems in the eaves. A properly vented system reduces the risk of moisture-driven failures in colder months.
Tile and slate are available options, but installation requires closer scrutiny in a climate with Northwest Indiana's freeze-thaw exposure. Tile and slate demand solid deck support and careful alignment to handle temperature-driven expansion and contraction. In homes with older or marginal framing, consider a structural assessment before committing, since improper support can lead to cracked tiles or broken slates after a harsh winter or a severe storm. If choosing tile or slate, insist on a proven installation method that accommodates movement and a readily accessible drainage plan to avoid ice dams forming along the eaves.
Across material types, the ventilation strategy matters as much as the top layer. In this market, a well-ventilated attic reduces the accumulation of heat in summer and minimizes condensation in winter. Pair the roof assembly with moisture- and ice-damming-conscious design: correct eave ventilation, continuous ridge or soffit intake, and a breathable underlayment where appropriate. If a roof replacement is staged over multiple days, ensure temporary protections and proper edge detailing to prevent wind-driven moisture from infiltrating the attic space.
In Valparaiso, storm activity and the freeze-thaw cycle shape not only what fails but when replacement makes financial sense. When hail and wind events lace through Northwest Indiana, demand climbs quickly and local crews tighten schedules. That surge can push pricing higher, especially for full-coverage re-roof projects on steep-slope homes where labor and disposal dominate the bill. The same weather patterns also influence final inspection findings, with moisture-related decking repairs and ventilation corrections more likely to surface on the inspector's checklist.
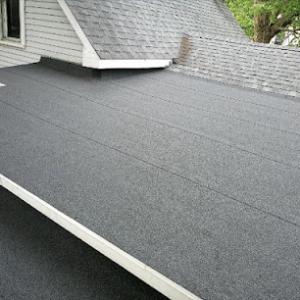
For a steep-slope residential re-roof, the work typically covers labor, tear-off or disposal, and new shingles plus underlayment and basic flashing. In practice, pricing leans toward a full replacement mindset rather than niche flat-roof assemblies. Asphalt shingles remain the most common entry point, with a typical range near 350 to 600 USD per square. Metal roofing sits higher, generally 600 to 1100 USD per square, reflecting faster install times and longer-term performance but greater material cost. If a homeowner considers premium options, clay and concrete tiles push higher still-roughly 900 to 1500 USD per square for clay and 800 to 1300 USD per square for concrete. Synthetic or composite shingles offer a middle ground around 450 to 800 USD per square. Slate, where chosen, follows the premium path at roughly 1000 to 1800 USD per square. These ranges assume full replacement labor, thorough cleanup, and proper disposal.
Costs in Valparaiso are influenced by tear-off scope and decking condition. If moisture exposure has weakened the deck, expect additional repair or reinforcement, which can add to the bottom line. Ventilation corrections are another factor; if the final inspection flags ventilation shortfalls in a full-replacement scenario, you may see extra costs for intake and exhaust balance, ridge vents, or attic soffit work. In practice, this means the total project can drift from a straightforward install into a more comprehensive rebuild of the roof system.
Because storm aftermaths create spikes in demand across Northwest Indiana, you should plan for potential scheduling bottlenecks after hail or severe wind events. If an insurer approves a full-replacement claim, the timing often hinges on availability rather than the contractor's preference. Communicate anticipated inspection timelines early, and build a contingency in the budget for decking repairs or ventilation corrections that may be flagged during the final walkthrough.
Get a clear picture of your project costs upfront - no commitment required.
My Style Exteriors
(815) 666-2086 www.mystyleext.biz
112 Morgan Blvd, Valparaiso, Indiana
5.0 from 20 reviews
A full roof replacement requires a permit through the City of Valparaiso Building Department. The process is straightforward but it helps to start early, especially if a storm or insurance-driven timeline is in play. You'll want to pull the permit in the same window as your contractor's scheduling to avoid delays that can hold up the project, particularly during spring and aftermath of hail events when demand is high. The Building Department can guide you on the exact paperwork needed, including confirmations of venting or attic ventilation plans that are part of a proper installation.
Valparaiso emphasizes inspections during and after the project. While the contractor handles most of the on-site work, a city inspector will visit to verify that materials, nailing patterns, underlayment, and ventilation meet code and the project's scope. Scheduling the mid-project inspection ahead of time helps prevent surprises and allows you to address any minor corrections before the crew moves to complete sections of the roof. If you have a storm-damaged roof, coordinate timing with your insurer and the contractor so the inspection sequence lines up with material delivery and removal of old decking or insulation, if applicable.
The final inspection serves as the official seal that the installation is complete and compliant. A key focus is proper ventilation: the inspector will check that attic vents, ridge lines, soffits, or powered ventilation (if included) are correctly installed and balanced. In homes with complex rooflines or cathedral ceilings, ventilation performance matters a lot for long-term durability, especially in the freeze-thaw cycle that characterizes the area. Expect to demonstrate attic air flow and vent placement to the inspector, and plan for any adjustments if the logbook notes gaps or improper sealants.
Permit fees are generally modest and tied to permit value, and in some cases the roofing permit may be bundled under a general contractor permit. Work with your contractor to determine how the permit is issued and whether the project can be streamlined through a bundled permit. Keep copies of all documentation, including manufacturer specifications for the insulation and ventilation products, so the final inspection can proceed without hold-ups. If weather or scheduling pushes a phase, you can request a re-inspection, keeping communication open with the Building Department and your contractor.
Valparaiso sits in a Northwest Indiana claim environment where hail and wind events regularly trigger roof inspections and insurer adjuster reviews. That means every significant storm has the potential to cascade into a formal review of roofing damage, even when the visible impact seems limited. The result can be a multi-step process that unfolds over weeks, involving field inspections, notes from adjusters, and sometimes third-party engineering input. Being prepared for that layered reality helps you avoid miscommunications and delays when a claim is filed.
Homeowners here should expect carriers to request photo documentation, damage assessments, and replacement estimates before approving major roof work. Photos should capture both the large-scale damage and the smaller, telltale signs-granule loss, curling edges, hail impact marks on metal vents or flashing, and any interior signs of moisture near ceilings or attic insulation. A clear, professional-looking damage assessment from a licensed contractor or an adjuster-certified estimator can streamline the process. If your roof is older or has a mix of materials, prepare to supply documentation that clarifies what is original versus what was added or repaired over time. Insurers often want to see a timeline of events, especially after back-to-back hail or wind seasons.
Coverage remains generally available in this market, but underwriting and pricing can vary noticeably by carrier and prior claims history. That means identical damage can lead to different outcomes depending on the company, the policy language, and whether prior roof work already exists on the property. In practice, you may encounter requests for additional inspections, mitigation steps to prevent further water intrusion, or comparisons between a repair path and a full replacement. Communication with the insurer should be documented-keep notes, response dates, and copies of all correspondence. If an adjuster flags questions about ventilation, flashing integrity, or attic insulation as part of the assessment, address those items promptly, since they can influence both eligibility for replacement and long-term performance.
Storm-related investigations can influence when a major roof replacement gets approved, especially in a market where final inspection and ventilation are points of emphasis. Plan ahead for potential scheduling bottlenecks: the combination of field inspections, engineering input, and contractor availability in peak seasons can stretch timelines. Early, clear documentation and responsive communication reduce the risk of misalignment between what the insurer approves and what a contractor ultimately installs. In the end, understanding this insurance reality helps you protect the roof's function against Valparaiso's freeze-thaw cycles and the harsh local weather patterns.
Connect with contractors who help homeowners navigate the claims process from damage assessment to final approval.
My Style Exteriors
(815) 666-2086 www.mystyleext.biz
112 Morgan Blvd, Valparaiso, Indiana
5.0 from 20 reviews


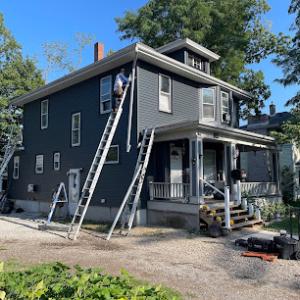
Winter snow and ice can delay full replacements in Valparaiso, making emergency leak control and temporary protection especially important during cold-weather failures. If a leak shows up after a heavy freeze, prioritize short-term tarp or membrane coverage to slow water intrusion while weather allows a proper crew to work. Cold snaps also slow the adhesive and sealant performance, so planning a staging strategy that concentrates critical work during slightly warmer periods helps the project stay on track. If winter storms hit, expect a lull in non-emergency scheduling as local crews shift to urgent repairs and storm response.
Spring storm season can disrupt scheduling because hail and wind events create sudden regional demand spikes for inspections and replacements. After a damaging event, prioritize a rapid roof inspection to assess insulation and deck integrity, then align with an insurer-approved timeline if applicable. If multiple communities are hit in a short window, crews may book out weeks in advance. When possible, secure a firm start date early, and factor in potential delays caused by weather fronts and supply chain hiccups common to the season.
Summer heat and humidity affect underlayment and adhesive-backed products, while autumn temperature swings can narrow ideal installation windows before winter. If a roof is being replaced in the heat of summer, plan for early-morning work to reduce heat exposure and ensure proper sealant cure. Midday pauses can help protect workers and materials, especially on reflective or asphalt products. In late summer, monitor humidity forecasts; heavy humidity can extend drying times and influence shingle installation sequencing to maintain warranty compliance.
Autumn temperature swings can narrow installation windows before winter. Schedule key steps-such as deck inspection, underlayment staging, and ventilation checks-while temperatures remain moderate. This helps avoid last-minute pace changes when colder weather arrives. If a full replacement is planned between seasons, buffer the schedule to accommodate late-season storms and the occasional warm spell that might tempt crews to push faster than advisable.
When you can't wait, these contractors offer fast response times to stop leaks and prevent further damage.
The local market strongly skews toward re-roofing rather than specialty new-construction roofing, so homeowners should compare contractors on tear-off experience and replacement workflow. Look for crews with repeated full-roof replacements, documented tear-off safety practices, and a clearly defined sequence from tear-off through installation and final inspection. A contractor who treats storm-damaged or elevated roof lines with careful staging and controlled debris management tends to deliver fewer surprises once tarping and access are in play.
Cleanup is a major hiring priority in Valparaiso, reflecting how often local homeowners compare crews on property protection and post-job debris removal. Ask for a written plan that covers plywood or membrane protection for landscaping, driveways, and siding, plus a clearly defined debris removal schedule. The best teams seal work areas during the job and sweep up daily debris, returning the site to pre-work condition at day's end. Ensure the agreement includes written expectations for nail and shingle cleanup, dumpster use, and all waste hauled away from the property.
Quick response is a common market expectation here, especially after storms when homeowners need inspections, tarping, and scheduling clarity fast. Confirm response times for emergency tarping, storm assessments, and timely start-dates. Insist on a single point of contact who provides real-time updates during weather-driven delays and after major hail events. A contractor who can stay reachable during peak storm season reduces the chance of miscommunication and helps keep the project on track.
Ask about tear-off experience, crew size, and weather-related workarounds that protect interior spaces. Inquire whether a supervisor will be on site daily, and whether cleanup crews arrive with a dedicated debris container. Request a step-by-step replacement workflow, including removal, underlayment, ventilation considerations, and ridge or hip cap installation specifics tailored to typical local roof lines. Clarify who handles insurance coordination, warranty documentation, and post-install follow-up visits.
Bring a written timeline to the meeting, including anticipated start date, key milestones, and a contingency plan for weather delays. Request a detailed, itemized scope of work that covers tear-off, disposal, underlayment, ventilation, drip edge, flashing, and the chosen roofing material. Confirm three solid local references with recent re-roofing projects similar in size to yours, and verify their on-site practices align with the cleanup and safety standards discussed.
Get a clear picture of your project costs upfront - no commitment required.
My Style Exteriors
(815) 666-2086 www.mystyleext.biz
112 Morgan Blvd, Valparaiso, Indiana
5.0 from 20 reviews