Last updated: Apr 19, 2026
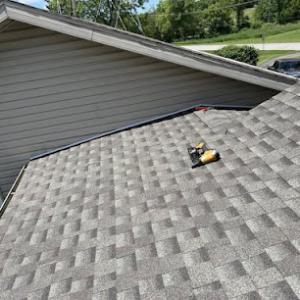
Cold winters bring snow that sits and then refreezes, and this cycle repeats for weeks. In Plymouth, that pattern accelerates shingle edge wear, causes flashing to shift, and can open up slow leaks long before a drip becomes obvious. You'll notice granule loss along the rake and eave lines sooner than you expect, and over time that edge wear weakens the seal around vents, boots, and transitions. The risk isn't just cosmetic-edge and flashing movement can create entry paths for interior moisture, especially after a heavy thaw followed by a quick drop in temperature. If your roof looks like it's losing its bite on edges, or you see small dark stains near joints after a thaw, treat it as a warning sign that cycles of freeze and melt are already at work.
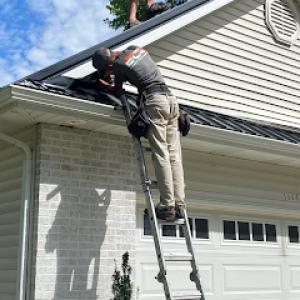
Ice dam risk is a practical concern in this climate because winter roof performance depends heavily on attic insulation, ventilation balance, and eave-area water protection during prolonged cold spells. Inadequate insulation lets heat escape to the roof deck, melting snow near the eaves, which refreezes as an ice dam and backs water up under shingles. The result: active leaks that ride the path of least resistance, often at spot joints or under valley framing. If you notice icicles forming heavily at the gutter line, hear a dripping sound in cold snaps, or see rooftop meltwater seep past fascia, your attic needs a check: your insulation level, the presence of a continuous soffit-to-ridge vent scheme, and the effectiveness of eave protection underneath the first row of shingles. Addressing these components slows dam formation and buys vital time between storms.
Replacement and repair timing in Plymouth is constrained by winter access issues, snow cover, and the need to complete vulnerable roofs before late-fall weather shifts into freezing conditions. A late-arriving crew may be blocked by street snow, driveways, and safety concerns on icy days. If a project lingers into deep winter, frozen surfaces slow work, and material delivery windows tighten. Plan proactive scheduling so roofing crews can access the house during a period with manageable snowfall, clear eaves, and dry conditions. Consider pre-winter inspection to flag flashing lifts, venting gaps, and any prior shingle edge damage, so a targeted repair or full replacement can occur before the most severe cold settles in. When storms loom, you want the roof ready to shed water without forcing a rushed patch that invites later leaks.
In Plymouth, spring storms are a major roofing trigger because hail and heavy rain can damage shingles and delay contractor scheduling at the same time. When those skies open up and the hail starts pounding, your roof can take swift, hidden hits that aren't obvious from the ground. The risk isn't only new divots or loose shingles; it's imperfect resealing allowing moisture to work inward during thaw cycles. That means a claim filed days or weeks after a storm may hinge on timely, accurate documentation and a rapid, targeted action plan. The window between damage discovery and contractor mobilization is tight, so preparing early matters more than ever.
Indiana insurers commonly expect Plymouth homeowners to provide date-stamped photos, storm documentation, and contractor scope details when filing hail or wind claims. Photos should show the affected areas from multiple angles and include close-ups of edges, flashing, and ridge lines where damage often hides. Keep weather reports, wind gusts, hail sizes if reported by local news, and any post-storm notes from neighbors or HOA checks. A detailed contractor scope outlines the proposed repairs or replacements, materials to be used, and a clear sequencing plan. This package helps adjusters see the full picture quickly and reduces back-and-forth that stalls approvals.
After storm activity in the Plymouth area, adjusters may request added evaluation or competing estimates before approving full replacement, which can delay project start dates and affect pricing. That extra layer isn't just paperwork; it's a practical hurdle that can shift the timeline by weeks during busy spring windows. To reduce friction, have a licensed contractor perform a rapid, thorough assessment and provide a written scope with itemized notes on roofing components, underlayment, and critical penetrations around chimneys, vents, and skylights. If a second estimate is requested, coordinate with your primary contractor to ensure the second quote reflects the same scope and materials. Clear, consistent documentation helps prevent duplicative work and keeps the repair plan on track.
Right after a storm, inspect from ground level only for obvious hazards, then call a local contractor who understands the seasonal rush and can document damage with timestamped photos. Schedule a preparedness review of your roof's low-slope areas, valleys, and eaves-these zones often bear the brunt of freeze-thaw cycles in late winter and early spring. Establish a rapid-response contact list and share it with your insurance agent so you're not scrambling when a claim is opened. Keep a simple calendar note of storm dates and any ensuing leaks or moisture spots inside the attic or ceiling-those notes can become the first clues that speed up the claim and protect your home through the volatile spring weather.
A&M Home Services
(574) 318-3326 www.roofsandbasements.com
602 E Jefferson St, Plymouth, Indiana
4.9 from 432 reviews
A&M Home Services: Quality Roofing and Basement Solutions Serving Plymouth and Wayne County, we provide top-notch roofing and basement services with a strong track record of success and customer satisfaction. We've earned a reputation for reliability and excellence through numerous completed projects. Our client-centric approach prioritizes your needs, delivering personalized services for any repair or renovation. We maintain open communication for transparency and no surprises. Our experienced professionals use the latest industry knowledge to tackle any challenge. Your satisfaction is our ultimate goal. Contact us today to learn how we can assist with your next project and experience our commitment to excellence firsthand.
No Limit Roofing Plymouth
(574) 360-0525 nolimitroofingin.com
310 N Michigan St Ste 101, Plymouth, Indiana
4.7 from 14 reviews
At No Limit Roofing, we proudly serve Northern Indiana with expert roof repair, replacement, and installation for both residential and commercial properties. From leaks and storm damage to full roof replacements, our certified team delivers quality workmanship, honest service, and lasting results. We use premium materials from trusted brands like IKO, GAF, Owens Corning, and CertainTeed. Fully licensed and insured, we also offer gutter services, emergency repairs, and free roof inspections. With a reputation for reliability and professionalism, No Limit Roofing is one of Northern Indiana’s top-rated roofing companies. Call today for your free estimate!
MLE Roofing
(574) 341-0303 www.mleroofing.com
2312 W Jefferson St, Plymouth, Indiana
5.0 from 5 reviews
We offer a wide range of services, including 24/7 emergency roof repairs, full replacements, siding and gutter installations, and more. Our goal is to provide prompt estimates and lasting results for residential and commercial customers. Choose MLE Roofing for reliable service and long-lasting results. Your satisfaction is our priority, and we're here to make sure your home stays safe and beautiful.
Diamond Steel Roofing
(574) 930-0058 www.diamondsteelroofing.net
Serving
5.0 from 41 reviews
At Diamond Steel Roofing, LLC, we’re a locally-owned and operated roofing company that combines 25 years of experience to provide quality roofing services services for your home’s exterior. We started the company to bring the same kind of quality, care, and professionalism to your home that we would expect in ours. If you’re ready to get started on your roofing project, give us a call. We’d love to discuss your home’s needs and how we can help you.

Premier Roofing & Construction
(574) 354-1533 premierroofingindiana.com
Serving
4.9 from 24 reviews
Specializing in commercial and residential roofing in northern Indiana, Premier Roofing & Construction has been serving Warsaw, South Bend, and Goshen since 2011. We also manufacture steel roofing and siding for contractors and homeowners
One Way Construction & Roofing
(574) 800-9750 onewayroofing.com
Serving
5.0 from 100 reviews
One Way Construction and Roofing is one of South Bend’s most trusted roof companies, providing expert roof replacement, roof repair, and roof installation services designed to protect your home year-round. Our skilled team delivers quality craftsmanship, honest communication, and lasting results built for Indiana’s weather. Whether you need a minor repair or a full roof replacement, we take pride in every detail to ensure your roof is strong, reliable, and built to last. Locally owned and dedicated to customer satisfaction, we’re the roofing partner South Bend homeowners count on.
Elkhart County Roofing
(260) 502-1313 www.elkhartcountyroofing.com
Serving
5.0 from 46 reviews
Our commitment is to provide you with an exceptional customer experience with the highest quality installations at a fair price.
Horner Roofing & Siding
(574) 318-0316 www.hornerroofingandsiding.com
Serving
4.9 from 274 reviews
As a premier roofing company dedicated to providing warm, compassionate and helpful customer service, it is important for us to deliver unparalleled workmanship on every assignment, whether it be a new roof or siding installation or repairs. We offer a wide range of services to meet your project needs and ensure durable and cost effective workmanship. As a public service for the Northern Indiana area, you can trust Horner Roofing and Siding. Contact us right away through our website or call in and we'd be happy to do our best to help!
Reliable Roofing & Construction
(574) 302-7977 www.reliableroofingonline.com
Serving
4.7 from 116 reviews
Proudly Serving Michiana for Over a Decade! Based in South Bend, Reliable Roofing & Construction is your home’s one-stop shop for all its needs. From full roof replacements, flat and metal roofing, and siding to kitchen remodels, bathrooms, basements, framing, and more—we do it all with precision and care. We also serve commercial clients with expert roofing, remodeling, and siding solutions. As a minority-owned business deeply rooted in the community, we bring over 10 years of trusted service to every residential and commercial project. Count on our team for quality work, clear communication, and results that last.

Asscher Roofing Company
(574) 234-9380 asscherroofing.com
Serving
4.9 from 114 reviews
We are the Diamond Standard of Roofing Contractors who focus on education, equality and efficiency. Our mission is to provide Northern Indiana with the highest quality roofing services. We do that by putting customers first when it comes with honesty, transparency, and rigorous installation standards. The diamond standard of roofing comes from making sure we treat every roof equally, making sure our customers make an informed decision, and by providing high quality efficiency while making sure our skilled laborers are highly trained. We provide roofing, siding, soffit, fascia, and gutter services the Asscher Roofing way. Call us today for the diamond standard of roofing contractors!
Steve’s Roofing
(574) 268-8435 stevesroofingindiana.com
Serving
4.9 from 126 reviews
Steve’s Roofing provides top-quality roofing services across Warsaw, Columbia City, Fort Wayne, Syracuse, and Culver, Indiana. With decades of experience, we specialize in roof repairs, replacements, and new roof installations for both residential and commercial properties. As a trusted Owens Corning Preferred Contractor, we use premium materials to ensure durability and protection. Our expert team also handles storm damage repairs and insurance claims, delivering reliable, high-quality workmanship. When you need a roofing contractor near you, trust Steve’s Roofing for excellence and integrity. Contact us today for a free estimate!

Michiana Restoration
Serving
5.0 from 5 reviews
Residential & Commercial Roofing Contractors helping home-owners find storm damage so their insurance company will assist them in making a claim to replace their pre-existing roof that has storm damage.
Asphalt shingles are a practical fit in Plymouth because they are widely used and are typically the baseline option for handling the city's mix of winter cold, summer humidity, and storm exposure. In this climate, shingles that resist wind uplift and maintain color through freeze-thaw cycles tend to perform reliably. When selecting this option, look for a profile with good granule adhesion and a warranty that covers wind zones common to the region. Proper installation matters as much as the material itself: ensure nails are driven correctly, sealing strips are applied, and the roof deck is clean and dry before shingle laydown. A well-installed asphalt roof can handle the seasonal swings without adding unnecessary weight to the structure or trapping moisture.
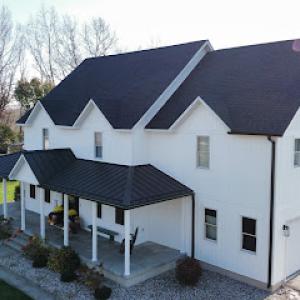
Metal roofing is especially relevant for homeowners prioritizing snow shedding and long-term resistance to freeze-thaw stress. In this market, metal panels that are rated for local wind and impact loads perform best. The key considerations around metal roofs are installation quality around flashing and ventilation. Flashing around chimneys, skylights, and valleys must be continuous and properly sealed to prevent ice dams and leaks as temperatures swing from freezing to thawing. Ventilation becomes critical to prevent condensation under the metal panel and to minimize ice dam formation on colder mornings. If choosing metal, plan for adequate attic venting and ensure the substrate is properly prepared to accept the fasteners and underlayment typical of metal systems. A well-executed metal installation can offer durable protection with a lighter environmental footprint and excellent snow-shedding behavior during heavy storms.
Clay tile, concrete tile, wood shakes, and synthetic/composite products appear in the market, but Plymouth's winter cycling and storm conditions make roof weight, impact resistance, and moisture behavior more important than appearance alone. Clay and concrete tiles bring longevity and a distinctive look, but their substantial weight requires a reinforced structure and careful attention to fastener connections and underlayment. In freeze-thaw conditions, porous tiles can absorb moisture; if they freeze, cracks and spalling may occur if water is driven into the substrate. Wood shakes offer natural aesthetics and decent insulation, yet they can be more vulnerable to moisture and insect exposure without regular maintenance. Synthetic or composite shingles try to blend the best of both worlds-lower weight and decent impact resistance-but performance hinges on the specific resin composition and the quality of the sealant and flashing details. If choosing any of these alternatives, conduct a structural assessment to confirm the existing attic and decking can support the additional weight, and select a product with proven performance in freeze-thaw cycles and storm exposure.
Begin by assessing the roof's current condition, paying attention to signs of prior ice damming, wind uplift damage, or hail impact. Prioritize a system that balances weight, moisture management, and resilience to rapid temperature swings. For homes with limited attic ventilation, focus on improving intake and exhaust ventilation before or alongside any replacement to reduce condensation risk. When choosing materials, consider not only initial fit but long-term behavior under a Plymouth winter-how the roof sheds snow, handles freeze-thaw cycles, and resists moisture intrusion. In all cases, ensure flashing, underlayment, and ventilation are integrated into the design, since these details determine how well any roof type withstands the seasonally harsh conditions. One thing remains constant: the best material choice for the area respects both the weather-driven demands and the house's structural capacity, delivering reliable protection through the region's most punishing months.
Typical Plymouth material ranges are about $350-$600 per square for asphalt shingles, $600-$1200 for metal, $900-$2000 for clay tile, $800-$1600 for concrete tile, $500-$900 for wood shingles or shakes, and $350-$700 for synthetic/composite shingles. These figures reflect what a homeowner can expect when planning a replacement in this area, given the mix of modest two-story homes and small commercial structures common to the city core. Asphalt remains the most common choice due to cost and ease of installation, but the thicker, longer-lasting options like metal or tile come into play if you're addressing long-term maintenance or specific architectural styles.
Costs in Plymouth can rise after hail and wind events because local and regional claim volume increases contractor demand, extends lead times, and puts pressure on labor availability. If a storm wreathes the area, you may see bids come in higher and schedules push later into the season. This isn't just about the price of materials; it's about securing a reliable crew that can manage a proper tear-off, insulation, and ventilation under tighter windows.
Project pricing in Plymouth is also influenced by winter-season scheduling constraints, tear-off complexity after repeated reroof layers, and the need to meet inspection requirements for full replacements. In colder months, you'll notice longer wait times for crews to start and finish, and some materials - like clay and concrete tiles - may be less forgiving in cold temps, affecting both labor efficiency and overall cost. If your roof already has multiple layers, expect higher labor time and potential mortar or flashing refresh needs, which can nudge the total upward.
If time and budget aren't the only concerns, consider how each option handles freeze-thaw cycles and ice dam risk. Metal can shed snow quickly and resist thaw cycles, while heavier tiles offer durability but require a stronger roof deck. Synthetic shingles often strike a middle ground, balancing cost with performance for the Indiana winter climate. Align your choice with the house style, local wind patterns, and the typical Plymouth storm calendar to avoid paying extra for avoidable upgrades.
A full roof replacement in Plymouth typically requires a building permit rather than being treated as informal maintenance. The permit process is designed to ensure that the work aligns with local codes and the area's freeze-thaw realities, so taking a few careful steps up front helps prevent delays. Before your project begins, be ready to submit a clear scope of work and accurate contractor details. Having these elements in place not only smooths the permit review but also supports timely scheduling, especially when storm-related demand or weather windows tighten the calendar.
The Plymouth permit process generally requires a submitted scope of work plus contractor details before work begins. Ensure the scope itemizes the number of squares, the chosen roofing system, underlayment type, attic ventilation plan, and any ancillary work (vent, flashing, or skylight adjustments). Include a brief note on ice dam mitigation strategy for cold snaps and how ventilation will be addressed in the attic to counteract condensation from freeze-thaw cycles. Provide your contractor's license number, contact person, and expected start and completion dates. Keeping this documentation organized reduces back-and-forth with the building department and helps your roofer coordinate material deliveries around weather disruptions.
Inspections in Plymouth are typically conducted at rough-in and final stages, with attention to underlayment, ventilation, flashing, and material installation quality. During rough-in, inspectors will verify that underlayment is properly installed, that eave and soffit venting provides adequate airflow, and that flashing around chimneys, adjoining walls, and vents is correctly integrated. The final inspection will focus on the overall workmanship, roof edge details, shingle or panel alignment, and the integrity of penetrations. Storm season can compress scheduling, so confirm inspection appointments promptly and communicate any delays due to weather or material backlogs. If issues are found, address them quickly to keep your project on track and to avoid reinspection fees.
Keep a dedicated project file with permit numbers, inspector contact details, and progress photos tied to key milestones. If your neighborhood experiences rapid storm activity, coordinate with your contractor to anticipate permitting lead times and to lock in preferred installers ahead of forecasted weather windows. Clear communication about timeline expectations-and timely responses to any permit corrections-will help ensure your Plymouth roof replacement proceeds with as little disruption as possible.
Winter in this area brings stubborn snow loads, freezing temperatures, and slick access that can slow or halt safe tear-off and installation windows. When planning a repair or replacement, expect occasional pauses caused by thaw cycles or drifting snow. If a warm spell briefly exposes a roof edge, take advantage carefully, but never rush onto a slick surface. Ice dam prevention becomes a priority: ensure gutters and downspouts are cleared when safe, and consider temporary measures that reduce ice buildup along eaves. Scheduling windows contract as temperatures dip, so have a flexibility cushion and clear daytime targets for the crew when weather cooperates. In practice, it helps to stage materials for quick, clean moves during a narrow warm spell and to protect unfinished sections with tarps if a cold snap arrives mid-project.
Spring is a high-risk season for Plymouth roofs because hail and heavy rainfall can both damage shingles and interrupt active replacement jobs. After a storm, inspect the typical trouble spots: valleys, eaves, and any previously weakened seals. Plan for potential rework if granules are knocked loose or if flashing shows new signs of wear. Rainy days can push project timelines and complicate interior protection, so crews often lean on quick-dry underlayment and close coordination with interior trades. If a hail event is local, expect a surge in demand that can compress schedules; having a firm start date and contingency plan helps minimize downtime.
Summer heat affects adhesive behavior and crew scheduling in this climate, making early morning starts and shaded staging areas valuable. On metal or composite lofts, allow adhesives and sealants to cure within recommended warm-season tolerances, and keepSpecifically, plan for potential afternoon heat pauses to avoid workmanship that can falter under extreme heat. Clear communication with homeowners about heat-sensitive work, such as torch-down or sealed attic penetrations, keeps surprises to a minimum. Hydration and safety briefings become routine, and do-not-disturb policies on high-UV days help maintain quality.
Autumn brings wind and rain that narrow the finishing window before winter freezes return. As days shorten and storms become less predictable, aim to wrap up critical tasks-like securing openings and completing flashing-early in the season. Prioritize weather-safe sequencing: high-risk penetrations and edge work first, with interior protection prepared in case a late storm interrupts progress. A steady pace with a fixed check-in cadence minimizes the risk of project creep into unsuitable late-fall conditions. Stay mindful of leaf debris that can clog gutters and mask underlying issues during final inspections.
In Plymouth, repeated freeze-thaw movement commonly shows up first at flashing transitions, roof penetrations, and shingle tabs that lose seal integrity. When ice forms at valleys, vent pipes, or chimney flashing, that brittle cycle can pry apart seams and leak into the attic. The result is often slow, creeping water intrusion that damages plywood, insulation, and ceilings. If you notice dark stains along flashing seams or small icicles hanging from joints after a warm spell, treat it as a warning sign. A proper seal and secure counterflashing are essential to resist future cycles.
Ventilation-related moisture problems matter because cold winters and humid summers can both punish poorly balanced attic systems. Poor soffit and ridge vent coordination lets warm indoor air condense on cold roof surfaces, creating damp decks and potential mold growth. In Plymouth, where attic moisture swings are common, look for frost on underside of sheathing in winter or musty smells in summer loft spaces. Your goal is balanced intake and exhaust to maintain an environment where shingle adhesives stay intact and deck fibers stay dry.
Storm-driven damage in Plymouth often creates borderline cases where granule loss, bruising, lifted tabs, and flashing displacement need careful documentation for insurance review. A hail hit may not look dramatic from ground level, yet hidden bruising can weaken a panel. After a storm, inspect for lifted tabs, minor ridge damage, and displaced step or base flashes. Document with photos from multiple angles and keep notes on dates and weather conditions so a claim can be evaluated without ambiguity.
Over time, tab edges loosen and seals degrade under freeze-thaw stress. Damaged shingles allow heat and moisture to infiltrate, accelerating deck deterioration. In climates with cold winters and humid summers, the first signs are curled edges, random curling, or granule shedding along the lower sections of the roof. Regular targeted checks after winter thaws can catch problems before leaks appear.