Last updated: Apr 19, 2026
Riverside has cold winters with snow and repeated freeze-thaw cycles that can crack aging shingles and open pathways for leaks. When shingles crack or lift from the cycle of freezing and thawing, those tiny gaps become channels for water to move into the roof structure. Each season of salt-sprayed air and winter wind adds stress to the decking, nails, and flashing, pushing you closer to a leak downtown during the next storm. In this climate, a seemingly small imperfection today can become a major breach tomorrow if left unchecked. You owe it to the attic and the ceiling below to treat early cracking and lifted edges as a warning sign, not a cosmetic issue.
Spring in this part of New Jersey brings heavy rain and gusty winds, which commonly turn small shingle or flashing defects into active interior leaks. After a hard winter, those defects are magnified: granules wash away, fasteners loosen, and underlayment can sag. A windy squall can peel back a corner of shingles you thought were solid, while a pounding downpour finds any exposed seam or vent boot. The result is not just a damp ceiling-it's rotten sheathing and mold risk if the leak travels unseen through attic spaces. In Riverside, where homes are older borough residences, the storm season highlights the cumulative effect of previous repairs and aging materials. When a roof shows light at the nail line or a flashing seam appears lifted after a pressure storm, act quickly before interior damage compounds.
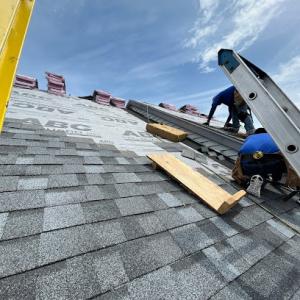
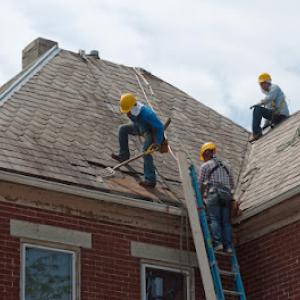
Many Riverside roofs reveal multiple prior repair layers once tear-off begins. Beneath the surface, worn decking edges and aging flashing details often hide just enough weakness to surprise you after a heavy rain or a cold snap. Tear-off work in these neighborhoods is not a simple refresh; it is a careful expose-and-rebuild process. Expect to encounter rotten boards or warped decking, stressed ridge caps, and corroded step flashing at chimneys and dormers. The action you need is decisive-but measured. Surfaces that once held a simple shingle overlay may require removal down to solid decking to ensure a watertight result. Understanding that older borough homes can harbor these hidden issues helps you plan for a repair or replacement that holds up through another winter and another storm season.
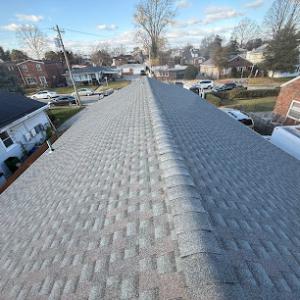
You can start with a focused walk-around of the roof edge and near-hip areas on a calm day, looking for lifted tabs, hairline cracks, and dark staining along seams. Inspect flashing around chimneys, skylights, and vent pipes for gaps or seal failure. In the attic, check for light showing through decking or for moisture staining, which signals a leak path that needs immediate attention. Clean gutters and downspouts so water moves away from the fascia and into proper drainage, especially after winter thaws and spring rains. If any of these signs appear, arrange a professional evaluation promptly to determine whether you're looking at a quick seal, a flashing repair, or a full roof restoration that can endure the next round of freeze-thaw cycles.
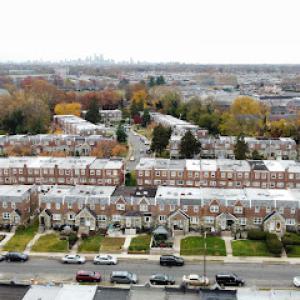
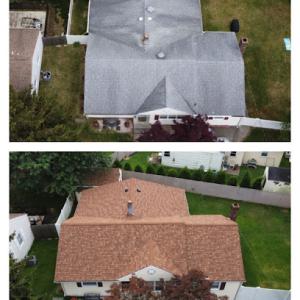
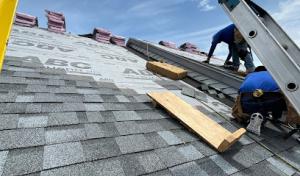
In Riverside, asphalt shingles are the dominant practical choice because they fit the area's common residential roof forms and the local cost range starts lower than metal, tile, or wood options. This means a straightforward install on typical gable or hip roofs commonly found on older borough homes. A practical approach is to pair standard three-tab or architectural shingles with a solid underlayment and a well-sealed drip edge. When choosing, focus on a mid-range to high-quality asphalt product that offers good granule retention and wind resistance to stand up to the South Jersey summer sun and the freeze-thaw cycles that stress framing and flashing. Regular maintenance-especially after winter storms-helps prevent the small leaks that can spring from hairline gaps around vent flashing or chimney margins. If your roof line includes more complex features like dormers or partial flat sections, ensure the shingle profile you pick has enough flexibility to maintain a clean seal around those transitions. For homeowners dealing with aging shingles on an older home, a reinforced underlayment and proper attic ventilation make a noticeable difference in minimizing ice dam risk and interior water intrusion.
Metal roofing is used in the market and can perform well against snow shedding and long-term moisture exposure, but upfront cost is notably higher in Riverside than asphalt. If metal is being considered, the key practical factor is panel type and installation detail. Standing-seam systems tend to shed snow efficiently and resist wind-driven leaks when installed over a solid deck with continuous sealing at penetrations. That said, a meticulous ridge and flashing plan is essential around chimneys and skylights to handle the local freeze-thaw stress and periodical salt exposure near coastal-adjacent neighborhoods. A metal roof can outlast shakes or tiles in this climate, but the newer homeowner often faces higher initial work costs-especially if old framing needs reinforcement to support the weight and ensure a solid fastener schedule. If a metal roof is chosen, budget for precise sealing at parapet edges and ensure substrate inspection to catch any retrofits needed due to age-related framing shifts.
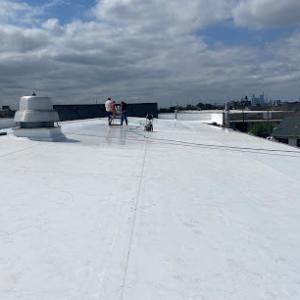
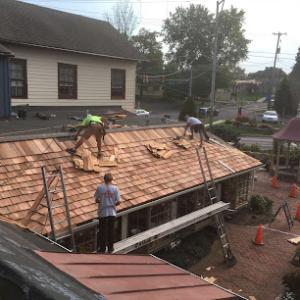
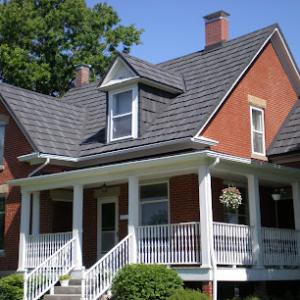
Clay tile, concrete tile, wood shakes, and synthetic products exist in the local market, but their suitability depends heavily on whether an older home's framing can support the system and whether replacement details can be integrated with existing chimneys and flashing. Clay and concrete tiles offer long life and distinctive curb appeal, but their weight is a critical constraint on tighter Riverside framing. Wood shingles or shakes bring period-appropriate character but require careful maintenance to resist decay and moisture intrusion in humid summers and winter damp conditions. Synthetic shingles can be a compromise, providing lighter weight and easier installation, yet they still must be matched to existing flashing spacing and venting to prevent leaks at transitions. In every case, assess the attic structure, ventilation needs, and the compatibility of new roofing with how chimneys and roof-to-wall junctions have been flashed over years of renovations.
Start with compatibility: can the current framing support the chosen material without costly reinforcement? Next, evaluate transitions around chimneys, skylights, and dormers to ensure watertight detailing aligns with the new system. Finally, consider the local climate: freeze-thaw cycles, humidity, and seasonal storms amplify the importance of a robust underlayment and precise installation. For older homes with complex shapes, the homeowners' best path often combines asphalt shingles for cost-effective reliability with targeted upgrades to flashing and ventilation to minimize leak risk.
Typical Riverside pricing runs about $350 to $650 per square for asphalt shingles, $700 to $1100 for metal, $1100 to $1700 for clay tile, $900 to $1500 for concrete tile, $600 to $1000 for wood shingles or shakes, and $450 to $900 for synthetic or composite shingles. For a homeowner facing a standard re-roof on an older South Jersey home, those ranges provide a practical starting point to compare bids and anticipate financing needs. Asphalt remains the most common choice for balancing cost with durability in this climate and housing stock, while metal offers longevity for roofs with heavier wind exposure or the need for a lighter-weight option.
Costs in this area can rise when tear-off reveals damaged sheathing, chimney flashing issues, or moisture-related repairs are common on older South Jersey homes. The freeze-thaw cycle plus seasonal humidity can soften or crack sheathing and flashing through years of freeze-thaw stress, so an estimate that assumptions about pristine decking are rarely accurate. If a contractor uncovers additional repair work while the old roof is opened, be prepared for a step-up in material and labor charges. A tight budget today can become a bigger project tomorrow if moisture pockets or rot are discovered around chimneys, vents, or vent pipes. In practice, most homeowners see the largest delta between a straightforward shingle swap and a job that involves decking replacement, flashing reruns, or structural reinforcement.
Scheduling after regional wind or hail events can tighten contractor availability across Burlington County and nearby South Jersey markets, which can affect lead times and pricing. If your project lands in a post-storm window, expect shorter notice for crews and potential premium charges for urgent or expedited work. In contrast, a calm stretch often yields shorter wait times and more options for material choices. Planning with a few flexible weeks in mind can help lock in a favorable crew and reduce the risk of delays pushing costs higher due to weather-driven scheduling constraints.
Start with a phased approach: obtain at least three written bids, confirm tear-off scope (deck inspection, flashing, chimney detailing), and ask for a clearly itemized breakdown that includes disposal, underlayment, and any necessary repairs. When conversations turn to flashing and moisture repair, request a written plan for moisture management, including ventilation checks and drip edge installation. If a storm event has recently occurred, ask your contractor to document weather-driven findings and provide a staged timeline so you aren't surprised by late-stage price adjustments. A well-documented estimate helps anchor decisions in this market, where aging homes and freeze-thaw stress meet the calendar's seasonal demands.
Farrell’s Roofing
farrellsroofingphiladelphia.com
Serving
5.0 from 74 reviews
We are a family owned and operated business that’s licensed and insured for residential and commercial properties and have been in the roofing business for over 20 years. We specialize in all types of roofing and we stay familiar with roofing material brands so we can provide you with top quality material for your home or business project. We also do siding, capping, skylights, gutters and spouts. We do Re -flashes and Coatings also if you’re just looking to maintain your roof.
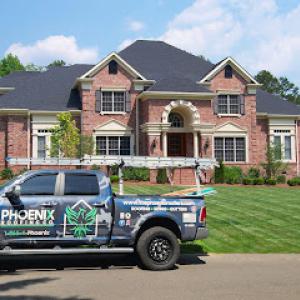
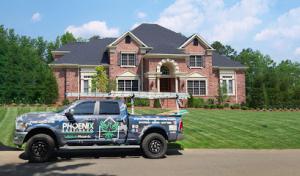
Phoenix Roofing & Siding
(267) 367-7610 thephoenixroofers.com
Serving
4.9 from 83 reviews
Welcome! We are Phoenix Roofing & Siding of Bensalem, PA! We are more than just roofing contractors – we are dedicated professionals committed to delivering excellence in every project. Based in Bucks County, we proudly serve Eastern PA and South NJ (and surrounding areas) providing top-notch residential and commercial roofing services, siding installations, and comprehensive storm damage repairs.
Roof Repair & Replacement
(856) 372-4291 www.roofreplacementandrepair.com
Serving
4.8 from 20 reviews
Given the wide array of choices that you have for roofing repairs in NJ, why should you choose us? For starters, because we're a licensed and bonded company with GAF certification — which means you can trust that our work will be up to code and provided with a satisfaction guarantee. Second, you can also take stock in our competitive prices and exceptional numbers of choices regarding general contractor services in New Jersey .However, the most important aspect is the fact that we're backed by customer reviews and testimonials — all of them satisfied clients who trusted their business with us.
Erie Home
Serving
4.7 from 172 reviews
Since 1976, Erie Home has manufactured, supplied, and installed the best-performing roofing on the market. By providing ironclad warranties and convenient financing, we ensure that every homeowner we work with receives top quality service and value for their homes and properties. Erie Home professionals are the roofing company of choice in the greater Philadelphia, NJ area. Whether you need roof inspections or roof damage repair services, Erie Home has been the go-to roofing contractor for nearly 50 years because of our attention to detail and dedication to making sure our customers are satisfied with their results. Contact us today for a quote and see why we're the trusted roofing company Philadelphia counts on.
Xpert Xterior
(267) 251-4900 www.xpertxterior.com
Serving
5.0 from 41 reviews
Serving the greater Philadelphia, PA area, Xpert Xterior offers residential and commercial roofing solutions, including asphalt shingle and rubber roofing expertise. With siding and gutter installation services, they elevate the exteriors of properties, ensuring resilience against the elements and enhancing aesthetics. Their commitment to delivering a superior customer experience shines through in their quality materials, skilled craftsmanship, and attention to detail at every stage of their clients' projects.
MLM Home Improvement
Serving
4.9 from 856 reviews
MLM Home Improvement is a premier storm restoration company specializing in full replacements for roofing, siding, and gutter systems. We offer free, no-obligation inspections and estimates to assess storm damage and provide transparent recommendations for replacement solutions. Our expert team is dedicated to delivering exceptional quality and service in every project we undertake.

American Construction Roofing, Siding & Windows
(856) 531-1304 amconstruct.com
Serving
5.0 from 29 reviews
American Construction Roofing, Siding and Windows is a family owned and operated business offering the finest quality Moorestown roofing and construction services. We have built a solid reputation based on our commitment to providing the best when it comes to roofing, siding, and windows in the area. At American Construction Roofing, Siding and Windows, you’ll find skilled carpenters and project managers that are trained in the best techniques on the market today. They use materials of the highest quality, and employ respectful and dedicated staff that truly listens to your needs.
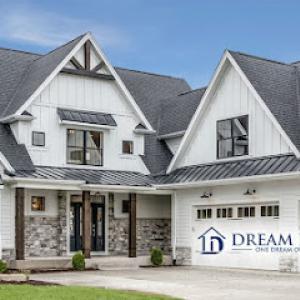
Dream Home Roofers
(856) 565-3859 www.dreamhomeroofers.com
Serving
4.6 from 406 reviews
We are a residential roof replacement company. We replace asphalt shingle roofs and install new gutters and fascia. Give us a call to discuss your roofing needs.
Reiter Roofing
(215) 335-9999 www.reiteroofing.com
Serving
4.8 from 82 reviews
Reiter Roofing offers installation and repair of flat roofs, shingle roofs, slate roofs, siding and gutter systems all around the Philadelphia area. We are Philadelphia's Best Roofing Contractor.

Cover All Exteriors
(215) 839-9335 coverallexteriors.com
Serving
5.0 from 66 reviews
Cover All Exteriors is your one-stop shop for any exterior contracting work needed on your home. Cover All has both roofing and siding specialists who are standing by to assist with storm damage, or to help replace old weathered exteriors. You can rely on the decades of experience the team has at Cover All to provide you peace of mind that the work will be done properly. This is why Cover All also offers extensive warranties so that you know your siding or roofing was built to last. Contact Cover All Exteriors for a free roof or siding inspection today!
Cooper Roofing
(800) 945-2833 www.cooperroofing.com
Serving
4.6 from 60 reviews
Cooper Roofing is a family-owned and operated commercial and industrial roofing contractor with over 30 years of experience. We work with property owners and managers along the entire East Coast, and support our clients by growing with them, and servicing their portfolios nationwide. Our customers trust us as part of their team because we deliver reliable service, fair and reasonable pricing, and quality workmanship. Cooper Roofing operates over 30 fully-licensed and insured crews a day, so we’re always there when our customers need us (24/7). Cooper Roofing is certified for Versico, GAF, and other roofing systems for commercial, industrial and residential clients.
JMC Contractors
(856) 397-6984 jmc-contractorsinc.com
Serving
5.0 from 23 reviews
JMC Contractors is a licensed and insured roofing contractor providing professional roof replacement, roof repairs, storm damage restoration, and exterior services for residential and commercial properties. We specialize in asphalt shingle and flat roofing systems, flashing repairs, gutters, and downspouts. Our team is committed to honest inspections, clear communication, and quality workmanship on every project. Whether you’re dealing with roof leaks, aging materials, or wind and storm damage, we guide you through the process from inspection to completion. We use high-quality materials and follow manufacturer and local code requirements to deliver long-lasting results. Serving Maple Shade and surrounding New Jersey areas
Before lifting the ladder and swinging hammers, you should know that a full roof replacement typically requires a building permit rather than treating the project as ordinary maintenance. This is not just a formality-the permit sets the scope of work, safety standards, and the predictable sequence of repairs needed to withstand Riverside's freeze-thaw cycles and storm-driven leaks. If the project isn't properly permitted, the risk of a formal stop-work order, fines, or later-required rework grows significantly. The permit process also serves as an important record for future resale, showing the roof was installed to code and inspected.
The local building department doesn't issue a pass just because materials arrive on site. They review the scope of work before approving the permit, so your plan should clearly spell out roof type, underlayment, ventilation, and flashing details. Inspections are typically performed during the job and again at final completion. If the inspector notices deviations from the approved plan, you may be required to pause work and correct the issues, which can prolong the project and create added risk during lingering winter weather or late-season storms.
Processing times and required documents can vary by municipality in New Jersey, so Riverside homeowners should confirm current submittal expectations before material delivery or tear-off is scheduled. Common items include a completed permit application, contractor licensing proof, project scope, and sometimes drainage or ventilation drawings. Submittal timing matters: approving the plan too late can clash with the onset of seasonal weather, leaving crews exposed to wind-driven rain or freeze-thaw cycles. Keep a written record of all communications with the building department, including any requested clarifications or added conditions.
Coordinate with your contractor to align the permit timeline with material lead times and weather windows. If a hold is placed for plan clarifications, use the pause to verify attic ventilation and flashing details-these are crucial for mitigating future leaks after a harsh mix of snow, ice, and warmth. Remember, municipal requirements can shift, so recheck the day you're ready to submit, so nothing sneaks past without proper inspection and approval.
After a wind or hail event that touches South Jersey, insurers generally keep standard roofing coverage available, but claim volume tends to spike. Riverside homeowners may find a surge in inquiries and faster triage depending on neighborhood saturation and the extent of the storm. The key risk is that damage from wind-driven debris and hail can look like routine wear on older roofs, which makes timely, accurate reporting essential to avoid denial or coverage disputes later.
Adjusters in this market typically ask for detailed photos, contractor estimates, and documentation that clearly separates storm-related damage from pre-existing wear. Your photos should capture close-ups of lifted shingles, dented flashing, granule loss, and any interior signs of water intrusion near vents and chimneys. Along with images, have contractor estimates ready that itemize the scope, including potential repairs beyond cosmetic fixes. A clear, objective letter explaining how the storm impacted the roof, paired with weather data and arrival times, helps the claim move smoothly and reduces back-and-forth.
Older roofs in the area often show mixed age-related wear and event-driven damage, so keeping thorough records matters. Maintain copies of prior repairs and supplier warranties, with dates and service details. Store dated condition photos from before the event when possible, and after-action photos that document current conditions. If a prior leak or patch exists, note its location and any related repairs. This paper trail helps distinguish what the storm caused from what was already present, reducing arguments over coverage and supporting a more accurate repair plan.
After a storm, inspect the attic and exterior for obvious signs of intrusion, then begin gathering the documentation you'll need. Communicate promptly with your insurer and chosen contractor, ensuring both parties receive the same set of photos and notes. If the damage is localized to newer portions or specific fluing, pointing that out in your submission can clarify scope and timing, guiding a faster, more accurate settlement.
Connect with contractors who help homeowners navigate the claims process from damage assessment to final approval.

Winter brings snow, frequent freeze-thaw cycles, and the risk of ice dams that can drive leaks while active. In practice, that means you should plan for a tighter window for installation and inspections, since cold temps slow adhesive curing and can complicate shingle sealant behavior. If a leak is present, a temporary, weather-resistant repair may bridge the gap, but a full replacement should target days with consistent freezing-and-thaw behavior minimized to reduce rapid material movement or moisture intrusion. When scheduling around a winter roof project, choose a period after a mild spell or a stretch of clear days, and ensure gutters are cleared so meltwater has a predictable path away from the eaves. A quality contractor will stage underlayment and flashing materials in a dry, heated area to keep their performance steady despite outdoor chill.
Hot, humid summer conditions can affect underlayment handling and adhesive performance for many roofing products. In Riverside, that means crews pay close attention to storage practices, bringing bundles indoors or shading them to prevent premature exposure that can compromise moisture barriers. Scheduling during cooler mornings or after heat peaks can help sealants set properly and prevent premature drying that weakens overlaps or fastener bite. Expect longer fastener drives as materials expand with heat, and ensure proper roof ventilation during installation so attic temperatures don't bounce into damaging ranges for the new layers.
Fall rains and wind in South Jersey can delay open-roof work, so booking replacement before late-season weather compresses schedules is beneficial. A stable, dry stretch in late September or early October often yields the most reliable progress, with fewer interruptions from storms or shifting wind patterns. If a leak has been detected, prioritize a temporary fix to protect interior spaces, but align the full replacement with a forecast that promises several consecutive dry days to minimize the risk of rework.
Chimney junctions are a recurring concern in this market, reflecting older housing stock and frequent freeze-thaw cycles. When re-roofing, pay special attention to step flashing where the chimney meets the roof deck. Remove old flashing back to sound metal, replace with continuous aluminum or copper flashing, and seal with a compatible roofing sealant that remains flexible in cold weather. Inspect the counter-flashing and mortar joints for gaps, and re-point if needed. Even a small misfire at this seam can channel moisture straight into the attic, especially after a thaw followed by a sharp freeze.
Skylights are a meaningful specialty in this market, so leak diagnosis often centers on glazing units meeting aging roofing materials. Start with the flashing around the curb, then verify that the skylight's gasket is intact and seated properly. If the curb was cut during replacement, ensure new flashing penetrates the same plane and that fasteners are sealed. Look for micro-cracks in the glazing seal or deterioration where the skylight frame meets the roof deck. In many cases, reinforcing the curb and re-sealing the flashing resolves the most stubborn leaks without enclosing the skylight entirely.
Where roof planes meet walls, along valley edges, and at drop-downs for chimneys or vents, flashing takes the brunt of freeze-thaw stress. Inspect for lifted or damaged metal, loose fasteners, or corrosion. Replace damaged sections with corrosion-resistant flashing and seal with a long-lasting, cold-weather compatible sealant. Re-flashing may be necessary where the old setup was compromised by prior repairs.
During storms, wind-driven rain finds every weak seam first. Prioritize mechanical fasteners that have aged or backed off, and check underlayment for moisture intrusion after heavy rain events. If you notice damp ceilings after a storm, map the interior path of water to identify suspect roof penetrations rather than chasing it room to room.
Local homeowners value fast containment when water enters the home. Keep a clean-up kit handy: towels, a bucket, and plastic sheeting. If a leak is observed, place protection under the affected area and minimize foot traffic to prevent debris from spreading on tight lots. After a storm, inspect the attic for pooled water or condensation and address any drips with temporarily placed, non-penetrating covers while planning a proper repair.
Find contractors experienced in skylight installation, flashing, and leak repairs to bring natural light into your home.
The local market shows a strong prevalence of long-established, family-owned companies that focus on re-roofing and serious tear-off work. In this area, older homes with shallow roof lines, snow and freeze-thaw cycles, and Delaware River exposure benefit from crews with hands-on experience in careful tear-offs and precise patching rather than generic overlay fixes. Look for a contractor who can demonstrate a track record of reliable re-roofing on homes similar to yours and who can explain when a full tear-off is warranted.
Cleanup included is one of the strongest local market signals. When interviewing, ask about debris protection during the job and how magnetic nail cleanup is handled after completion. A responsible Riverside crew will lay down tarps, use magnetized scoops for nails, and remove every piece of old material from the yard and landscaping. If the bid lacks specifics on containment or post-job sweep, that's a red flag worth addressing before work begins.
Manufacturer-certified and warranty-offered signals are present but not universal, so homeowners comparing bids should distinguish between workmanship coverage and product warranty eligibility. Ask each contractor to outline what their own workmanship guarantee covers (seaming, flashing, nail holes, and adherence to roof lines) and how long it lasts. Then verify what the roof system's manufacturer warranty actually covers and any requirements tied to installation practices. In practice, you want clarity on both sides so you aren't surprised if a leak develops years later.
Request recent references tied to homes with similar exposure and age, ask how they protect landscaping and driveways during teardown, and confirm they can provide a detailed, itemized cleanup plan. A nervous or vague response on any of these points is a sign to press for specifics or move on.