Last updated: Apr 19, 2026
In this part of South Jersey, the rhythm of the year drives when roof work fits best. Summers are hot enough to complicate shingle installation, and winters bring ice-dam and snow-load leak risk. Homeowners in Marlton typically plan full replacements in spring or fall to align with more favorable temperatures and workable drying times between wet spells. When planning, think of spring as the window to finish before the heavier mid-year heat, and fall as a capstone after the humidity of summer has eased and before the wet winter pattern fully returns. This timing helps crews avoid repeated heat-related slowdowns and minimizes the chance of weather-induced setbacks during the crucial installation phase.
South Jersey fall wind events and nor'easters are a meaningful local damage pattern. In Marlton, loose shingles, exposed edges, and debris-prone valleys tend to surface after strong seasonal gusts. After a storm, do a targeted roof check from the ground if safe, looking for obvious shingle lift, damaged flashing, and accumulated debris in valleys. If any issues show up, address them promptly to prevent water intrusion during the next round of rain. Persistent autumn moisture also means aging roofs are often exposed to repeated wetting cycles rather than a single dry repair season. Plan replacements or major repairs with this repeated-wetting reality in mind, so crews can install under conditions that avoid rapid cycles of wetting and drying that stress newly installed materials.
Year-round precipitation in Marlton means a proactive maintenance cadence beats waiting for a dry stretch. Start with a mid-season inspection every spring to catch winter-related damage and verify flashing details, vent seams, and drip edges. A fall inspection is equally valuable before winter rains begin, especially after any strong wind events. In both cases, prioritize repairing loose shingles, resealing flashing edges, and clearing debris from valleys and gutters. If a leak trace points toward flashing or valley penetration, avoid delaying the fix long enough to encounter several rounds of wetting; the neck of a problem is often at the edge where slope meets flashing.
For a full roof replacement, aim for a window with several dry days in a row and forecasted moderate temperatures. In Marlton, spring and fall offer the most reliable conditions for a clean, efficient replacement, minimizing the risk of heat distortion on asphalt systems or cold-weather vulnerability on more complex materials. If a replacement must occur in late summer, plan for early-morning or late-evening work when the sun is lower and the roof surface isn't hitting peak temps; otherwise, asphalt-based installations can experience more rapid drying and curing challenges. When fall is chosen, the project should be completed before the heaviest autumn storms, ensuring the new roof can shed leaves, pine needles, and wind-driven debris without compromising a fresh seal.
Storm-driven debris is a recurring concern in Marlton. Even with careful installation, seasonal storms blow branches, pine needles, and shingle fragments into valleys and along eaves. Build in a post-storm debris sweep as part of the project plan, especially after nor'easters. A clean valley and dry edge detail reduce the risk of continued moisture intrusion and help the new roof achieve its designed performance more quickly. If gutters were damaged by a storm, address those issues early to prevent backflow or water pooling behind the drip edge during rainy spells.
Begin with a clear inspection checklist that prioritizes loose shingles, flashing seams, edge metal, and valley conditions. Schedule a pre-storm and post-storm review to document any changes. Coordinate with crews to ensure they bring protective measures for high-sun days and cold snaps, so work can proceed steadily within the optimal window. In Marlton, aligning timing with spring and fall windows while respecting summer heat and winter ice-dam risk creates a practical path to fewer leaks and longer-lasting roof performance.
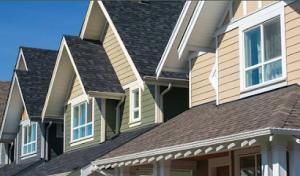
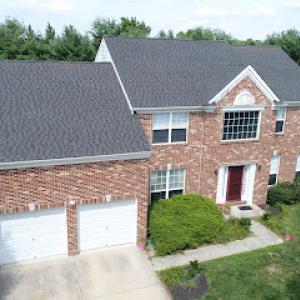
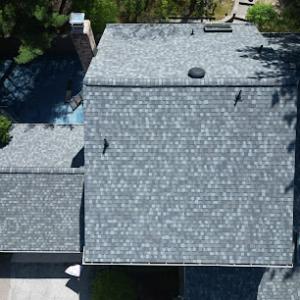
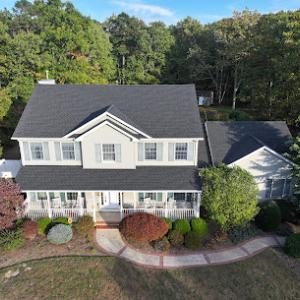
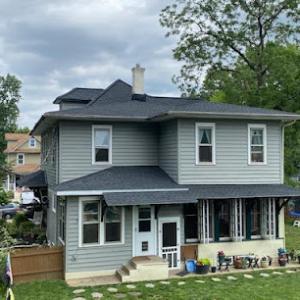
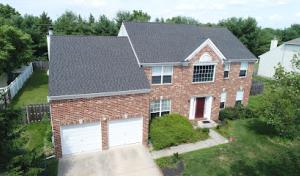
In Marlton, asphalt shingles are the dominant roof covering, and they have adapted to the local climate by improving granule technology and installation methods. Expect typical life in the 20- to 30-year range when a good underlayment, proper attic ventilation, and seasonal maintenance are in place. The hot summers and freeze-thaw cycles across Evesham Township stress shingles differently than drier regions, so look for products with enhanced UV resistance and better seam stability. When you plan replacements, think thermally responsive features: shingles that expand and contract with seasonal shifts while maintaining wind resistance and water shedding. A well-vented attic helps reduce heat buildup under asphalt, which translates to longer shingle life and fewer mid-season leaks during those heavy spring rains.
Metal roofs are increasingly common in higher-end Marlton neighborhoods and bring advantages that pair well with the local climate. Metals handle heat and UV exposure efficiently, and modern panels come with strong wind resistance and excellent moisture shedding. In a town where storm-driven leaks can surface after long dry spells followed by downpours, metal's seamless or tightly mated panel systems reduce vulnerable seams. Consider finishes that resist fading from sun exposure while also offering good thermal movement tolerance. Light-colored metal helps reflect summer heat, which can lessen attic temperatures and improve overall energy performance. For homes with steep slopes or architectural features, metal's flexibility makes it a strong match, provided the installation accounts for expansion gaps and proper fastening to resist Marlton's wind gusts.
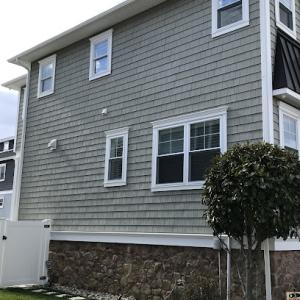
Clay tile and concrete tile offer long-term durability and a distinct aesthetic that suits Marlton's diverse housing stock. Clay tile handles the sun well and can offer excellent longevity, but its weight requires structural assessment and careful installation to manage freeze-thaw stress that Marlton experiences. Concrete tile shares many benefits with clay but tends to be a bit heavier and can be more tolerant of impact. Both tile types are excellent at shedding moisture and performing in wet springs, but they demand precise fastener planning and underlayment to cope with thermal movement. When selecting tile, pay attention to wind performance, especially on exposed ridgelines and taller sections; tile failures often start at edges where wind-driven rain forces moisture into the underlayment. Proper attic ventilation remains essential to prevent condensation issues beneath tile roofs during muggy Marlton summers.
Wood shakes or shingles bring a traditional look that suits certain Marlton neighborhoods, but the climate tests wood differently than synthetics or composites. Wood requires more attention to moisture management and seasonal movement. In areas with heavy summer humidity and winter dryness, choosing pressure-treated or rot-resistant species and applying appropriate sealants helps, but expect more regular maintenance. Proper ventilation, a robust underlayment, and adequate clearance to prevent moisture contact with sheathing become part of the ongoing plan. If wood is chosen, think in terms of replaceable courses or sections to maintain performance without a full roof swap every few decades. Wind resistance depends on nailing patterns and edge securement, so insist on a qualified installation that accounts for Marlton's wind patterns.
Synthetic or composite shingles offer a middle ground between traditional asphalt and higher-end materials, with tailored formulations designed for stability under thermal movement and moisture exposure. These products often provide improved impact resistance and longer warranties while remaining lighter than natural clay or concrete tile. In hot summers and cold winters, the ability of composites to flex with seasonal movement helps reduce cracking and buckling. For roofs with varying slopes or complex geometry, composites can maintain uniform performance under Marlton's mix of weather events, including spring rainstorms and fall Nor'easters. Installation quality matters here as well, because proper nailing and underlayment choices amplify the material's resilience to wind and moisture.
Practical takeaway for Marlton homeowners: match material choice not to appearance alone, but to how the roof will respond to thermal movement, moisture handling, and wind in this particular climate. The right combination respects the local stock mix, supports dependable leak prevention through seasonal transitions, and aligns with the home's structure and slope while balancing long-term performance under Marlton's spring rains, summer heat, and fall storms.
In this market, asphalt shingles are the baseline option, and Marlton homeowners commonly see a range from about $420 to $900 per square for an asphalt replacement. Metal roofs run higher, roughly $700 to $1400 per square, reflecting their longer service life and sealing methods on steeper pitches found around older subdivisions and newer custom builds alike. If clay tile is part of the plan, expect $900 to $1800 per square, while concrete tile sits in the $700 to $1500 per square band. Wood shingles or shakes are usually $700 to $1200 per square, and synthetic or composite shingles fall between $550 and $1100 per square. These figures cover typical installation and material costs, aligned with Marlton's mix of housing stock and climate influences.
Regional storm periods drive cost spikes in Marlton. After Nor'easter activity or intense spring rains, tear-offs, tarping, and rapid crew mobilization can push project invoices higher than the base ranges listed above. Summer heat, while helpful for scheduling, can raise labor rates in some windows when demand for replacement crews peaks, especially in neighborhoods that experienced wind or hail damage. In fall, the combination of damp conditions and tighter schedules around year-end inspections can similarly shift the math. If a roof requires multiple weather-related interventions or staged work to accommodate drying times and safety, expect costs to creep beyond the standard per-square ranges.
A practical Marlton approach is to align replacement timing with typical weather windows: aim for a dry stretch in late spring or early fall to minimize weather-driven delays. Even within the same season, coordinate a sequence that allows for safe tear-off, deck inspection, and full roof installation without extended exposure to rain. When the project involves high-end materials like clay or concrete tile, or when a steep-slope system is chosen, labor and equipment logistics become more complex, which can push costs up by a noticeable margin. If the project is a larger home with multiple elevations, or if an unusual roof pitch demands specialized crews, the per-square price may trend toward the upper end of the ranges for those materials.
Asphalt remains a practical baseline for many Marlton homes, offering predictable costs and solid performance against spring rain and summer heat. For higher durability and a longer service life, metal or concrete tile can justify the higher upfront price, particularly in neighborhoods with premium or modern designs. Clay tile brings distinct aesthetic and longevity, but it brings heavier weight and potential structural considerations. Synthetic or composite shingles offer a middle-ground option, balancing cost with resilience. Weighing the local climate, roof pitch, and the home's resale goals helps lock in a material choice that aligns with Marlton's blend of traditional and contemporary roofing styles.
Duane Mainardi Roofing
101 Marbel Ave, Marlton, New Jersey
5.0 from 151 reviews
Roofing Siding Windows Doors and More
Cambridge Exteriors
(856) 988-3880 www.cambridgeexteriors.com
21 W Main St, Marlton, New Jersey
4.9 from 242 reviews
Cambridge Exteriors is a South Jersey roofing contractor that specializes in a variety of home improvement services, including energy-efficient windows, custom decks, home siding, and more! Our team aims to provide the best services in all of South Jersey using our expertise, knowledge, and skills we’ve acquired over the years. For us, it’s about more than just a transaction. We work hard to build lasting, trusting relationships with each of our clients and provide them with high-quality roofing and home improvement services for years to come. Contact Cambridge Exteriors today for your free estimate in South Jersey!

Panda Exteriors
(856) 343-4146 pandaexteriors.com
1 Holtec Dr Suite 200, Marlton, New Jersey
4.9 from 397 reviews
When you need any kind of exterior renovation services handled, call the roofers at Panda Exteriors. We promise to provide the best quality of work you'll find in the area thanks to the many great qualities we bring to every job we undertake: 100% satisfaction guarantee Free job quotes online or over the phone Plenty of experience in the industry You shouldn't settle for anything less than the best when it comes to your roofing and exterior restoration needs. That's why you should always opt to leave that work in the hands of our experienced roofers. We offer great work at a price you simply can't beat. Give us a call today if you have any questions about our services and prices. We look forward to doing business with you.
AJecks Roofing
(609) 502-7054 ajecksroofing.com
122 Bortons Rd, Marlton, New Jersey
4.9 from 108 reviews
AJecks Roofing is proud to be the leading roofing contractor serving Marlton, NJ and the surrounding region. We specialize in shingle roofing, flat roofing, commercial roofing, repairs, gutters, fascia, soffits, and a full range of exterior home services. With years of proven expertise, our workmanship and results speak for themselves. Customer satisfaction is at the heart of everything we do. Our commitment to quality has earned us the trust and repeat business of nearly every homeowner and business we’ve served. We understand that every roofing project is unique, and we tailor our approach to meet each client’s specific needs—ensuring reliable, long-lasting results on every job.
Family Remodeling Group
(609) 605-1126 familyremodelinggroup.com
1 Eves Dr Suite #111, Marlton, New Jersey
5.0 from 38 reviews
Family Remodeling Group is a fully licensed and insured local contractor providing Comprehensive Exterior Services across Southern New Jersey and Eastern Pennsylvania. We also specialize in storm damage insurance claims along with interior remodeling services.
Elite Exteriors
(856) 446-3100 www.myelitexteriors.net
525 NJ-73 STE 104, Marlton, New Jersey
5.0 from 26 reviews
We are a top-rated, full-service national roofing company and your one-stop for all residential and commercial roofing needs, from complete roof installation, re-roofing, gutter installation to waterproofing and storm damage restoration.

Affordable Restorations
(856) 206-9848 www.arestorations.com
1 Eves Dr Suite #111, Marlton, New Jersey
5.0 from 18 reviews
Residential Home Improvements. Exterior: Roofing / Gutters / Leaf Protection Solar: Installation / Resets Interior: Paint / Drywall Mold and Water Extraction Appraisals / Expert Opinions Insurance Claim Assistance (Fire, Wind, Hail & Water Damage)
Sierra Construction Group
(856) 596-3003 www.sierraroofs.com
300 E Greentree Rd Suite 219, Marlton, New Jersey
4.6 from 17 reviews
Since 1995, we at Sierra Construction Group, Inc. have been a trusted name with homeowners in Marlton and the surrounding area. With over 25 years of experience, we specialize in providing high-quality roofing, siding, exterior solutions, and insurance restoration work that will enhance the durability and curb appeal of your property. We are dedicated to delivering exceptional craftsmanship, using only the best materials from trusted manufactures. Whether you're in need of a new roof installation, siding replacement or repair from storm related damage, we will ensure every job is completed on time, within budget, and done to the highest industry standards.
Under The Sun Roofing & Solar
(609) 534-0339 underthesunrs.com
Serving
5.0 from 55 reviews
Enhance Your Home's Exterior: From roofing to solar, siding, gutters, and beyond, we're your one-stop solution for all exterior needs. With a commitment to quality and sustainability, our expert team delivers tailored services to elevate your home's aesthetic and energy efficiency. Contact us today for a consultation!
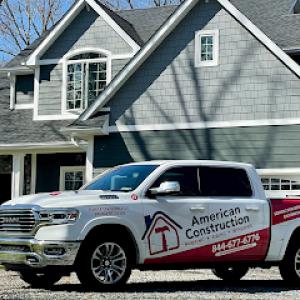
American Construction Roofing, Siding & Windows
(856) 290-8448 amconstruct.com
Serving
5.0 from 185 reviews
American Construction Roofing, Siding and Windows is a family owned and operated business offering the finest quality Cherry Hill roofing and construction services. We have built a solid reputation based on our commitment to providing the best when it comes to roofing, siding, and windows in the area. At American Construction Roofing, Siding and Windows, you’ll find skilled carpenters and project managers that are trained in the best techniques on the market today. They use materials of the highest quality, and employ respectful and dedicated staff that truly listens to your needs.

Home Genius Exteriors
(267) 214-5490 homegeniusexteriors.com
Serving
4.8 from 1089 reviews
Elevate your home with Home Genius Exteriors, setting the standard in Cherry Hill by offering full-service solutions for roofing, siding, windows, doors, gutters and insulation. We support our veterans and communities by supporting local and national charitable organizations through our Home Genius Cares initiative. With an Owens Corning® Platinum Preferred designation, we also offer flexible payment options, industry leading warranties and a wide range of premium products tailored for your home. It’s time for a different experience, entrust your next home project to a genius and schedule your free inspection today!
JV Roofing & Exteriors
(856) 546-4708 www.jvroofingnj.com
Serving
4.9 from 54 reviews
Experience the personalized touch of JV Roofing & Exteriors, a husband-and-wife owned and operated residential roofing company dedicated to delivering exceptional quality and service. As a local, family-run business, we prioritize our customers' needs, providing tailored solutions and unparalleled attention to detail. Our expertise shines in Metal, Slate, Shingle, and Tile roofing, ensuring your home's protection and beauty. Trust us for a roofing experience that puts you first. Contact us today! We proudly serve - Moorestown Township - Haddonfield Borough - Mount Laurel Township - Voorhees Township - Cherry Hill Township - Medford Township - Washington Township -Sewell -Mullica Hill & More!
In Marlton, which is within Evesham Township, a building permit is typically required for a full roof replacement. The local building department does not treat a full replacement as a no-paperwork job; they want to see a clear project scope before issuing the permit. This means you'll need to provide details such as the roofing material, deck condition, ventilation plan, and any accompanying work like fascia, soffit, or attic insulation updates. Entering the process with a precise plan helps prevent delays and keeps the project from grinding to a halt mid-tear-off.
Before you apply, gather evidence of your roof's current condition and the proposed replacement approach. The department will want to know whether you're doing a straight shingle replacement or a full system upgrade that touches vents, flashing, and attic ventilation. Accurate measurements, photos, and a clear description of the ventilation strategy are essential. If you're in a neighborhood with stricter HOA guidelines or unique venting needs, have those requirements ready as well. The goal is to show that the replacement will meet current codes and address moisture risks common to South Jersey springs and falls.
Inspections are commonly scheduled after tear-off and again at project completion. The first inspection confirms that the old roof is removed where required and that the deck and flashing details are ready for the new system. The second inspection focuses on ventilation effectiveness, proper flashing around chimneys and walls, and overall code compliance. Expect the inspector to check that roof penetrations are properly sealed, vents are correctly located to prevent moisture buildup, and attic insulation options align with the ventilation plan. If any adjustments are needed, those corrections should be completed before the final sign-off.
Failing to coordinate access for inspections can delay the permit release or the final approval. Schedule the tear-off and installation windows with enough lead time to accommodate potential inspection rechecks, especially during storm-season transitions when moisture and wind demands shift. Be prepared to demonstrate that venting remains adequate after installation and that materials meet wind-load considerations relevant to the region's Nor'easter exposures. Remember that a well-documented scope aligned with code requirements reduces the risk of costly rework or non-compliance notices after the project is underway.
New Jersey carriers serving Marlton generally expect roof-claim documentation that includes photos, material identification, and condition details rather than accepting a simple leak report. When a storm leaves shingles curled, granules in the gutters, or flashing shows exposed nail heads, take clear, dated pictures from multiple angles. Focus on the roof edge, valleys, and around chimneys or vents. Save any matching samples for the claim file, and note what you observed immediately after the event. A neighborly reminder: good documentation can prevent back-and-forth delays when adjusters review the roof's history in the weeks after a nor'easter or spring rain.
Adjusters commonly evaluate roof age, flashing condition, and ventilation, which matters in Marlton because many replacement decisions are triggered by recurring storm exposure rather than one catastrophic event. If a roof is already near the end of its service life, a single wind nibble or hail hit can push a claim toward replacement rather than repair. Expect questions about prior leaks, prior repairs, and whether attic ventilation is adequate to balance moisture and heat. A well-kept gutter and downspout system that directs water away from the roof edge can also factor into the assessment, since poor drainage compounds wind-driven damage.
While there is no statewide insurer pullback noted here, older roofs in Marlton may face stricter coverage terms or deductibles tied to wind or hail exposure. In practice, that means a claim might be more likely to lead to replacement if recurring exposure has weakened the roof deck or compromised flashing around penetrations. If multiple storms arrive in quick succession-spring rains followed by summer heat and fall nor'easters-prior claims history and current condition often steer the decision. You'll benefit from masking nothing in the file: list all observed issues, provide dates, and align your narrative with the photos and material IDs so the adjuster can see the full picture beyond a single leak report.
Be proactive in coordinating with your roofers to prepare a clear, consolidated claim package. A reputable contractor can help translate observed damage into documented condition notes, including flashing and ventilation checks. In Marlton's climate, the goal is to demonstrate that what began as a leak is part of a broader pattern of wind and moisture exposure that affects the roof's ability to keep water out over multiple seasons. Honest, organized documentation reduces surprises when the adjuster reviews the file.
Connect with contractors who help homeowners navigate the claims process from damage assessment to final approval.
Duane Mainardi Roofing
101 Marbel Ave, Marlton, New Jersey
5.0 from 151 reviews

Panda Exteriors
(856) 343-4146 pandaexteriors.com
1 Holtec Dr Suite 200, Marlton, New Jersey
4.9 from 397 reviews
AJecks Roofing
(609) 502-7054 ajecksroofing.com
122 Bortons Rd, Marlton, New Jersey
4.9 from 108 reviews
Local inspection emphasis centers on flashing around penetrations, especially where skylights and chimneys interrupt otherwise standard shingle roof planes. In Marlton, even small flashing gaps can become leaks after a spring rain or a nor'easter. Focus on the transition from metal or plastic skylight curb to surrounding shingle, and on chimney cricket behavior where water can pool and back up.
Repeated wet weather in this area increases the chance that minor flashing defects around penetrations show up as interior leaks before broad field-shingle failure is obvious. Look for damp spots along ceilings directly under skylight corners or chimney sides after a soaking rain. If active leaks appear during or shortly after storms, suspect flashing joints, caulking failure, or vent boot deterioration rather than the shingles alone.
Skylights concentrate water flow at their edges. Check the perimeter boot for cracks, uplift, or dried-out sealant in Marlton's humid summers. A common failure point is where the skylight curb meets the shingle plane; ensure counter-flashing sits flush and that any screw penetrations are sealed with compatible sealant. If condensation or staining appears along the skylight edge after rain, schedule a targeted inspection before larger issues emerge.
Chimneys require proper step and counter-flashing, especially where a metal cap or flashing meets asphalt. In older homes with layered roofs, worn kickout joints can direct flow toward interior surfaces. After heavy spring rains, inspect for soft plaster around chimney walls, missing mortar joints, and rusty or loose flashing pieces. Prioritize resealing and re-fastening where any gaps are detected to prevent creeping leaks.
Find contractors experienced in skylight installation, flashing, and leak repairs to bring natural light into your home.
Family Remodeling Group
(609) 605-1126 familyremodelinggroup.com
1 Eves Dr Suite #111, Marlton, New Jersey
5.0 from 38 reviews