Last updated: Apr 19, 2026
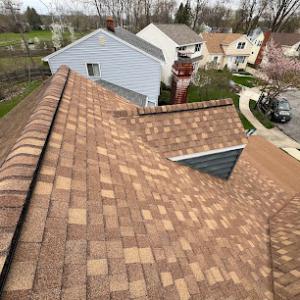
Grand Island sits between branches of the Niagara River in western New York, where lake-effect winter weather contributes to repeated snow accumulation and melt-refreeze cycles on roofs. That pattern creates a predictable rhythm of moisture intrusion and freezing pressure on edges and eaves. When ice builds up along the rake and eave lines, meltwater can be forced under shingles and underlayment, leading to interior leaks, compromised roof decks, and accelerated wear on flashing. The combination of brutal cold, wind-driven snow, and rapidly fluctuating temperatures means an attack plan for ice dams cannot wait until spring.
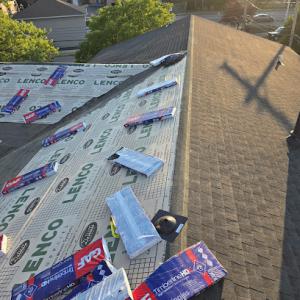
In these conditions, proper underlayment and attic ventilation are non-negotiable. An underlayment that sheds water and stands up to freezing cycles reduces the chance of moisture migrating inward. The attic should have continuous, unobstructed ventilation that balances intake and exhaust to prevent warm, moist air from conditioning the roof deck enough to melt snow from the inside. Look for insulation that stops heat from creeping up to the roof deck; a chilly, well-ventilated attic slows melt-refreeze cycles and makes ice dams less likely. Along the eaves, edge protection matters more than elsewhere. Ensure there is a solid drip edge, properly integrated ice and water shield at the eave, and no gaps where meltwater can back up under shingles. If ice begins to back up under the overhang, it's a signal that ventilation, insulation, or edge protection needs upgrading before the next heavy snow.
This region's cold winters and ice create a local need for attention to underlayment, attic ventilation, and edge protection because eave ice backup is a practical failure pattern here. Ice buildup at the gutter line can back up meltwater into soffits and ceilings, while wind can drive snow onto the roof at guards and laterally push ice into flashing. The roof deck beneath ice dams is often silently compromised until interior staining or peeling paint appears. If you notice icicles forming in mid-winter or visible ice along the eaves well before a major storm, treat it as a warning sign that the roof system is not managing meltwater properly.
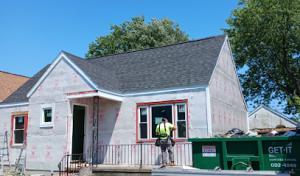
Replacement timing is typically best from late spring to early fall in Grand Island to reduce weather interruptions and avoid winter conditions that complicate tear-off and dry-in. A well-timed replacement gives you a chance to inspect and upgrade underlayment, reinforce soffit and vent pathways, and install robust edge protection before the next season's freeze-thaw cycle. Coordinate with a period when crews can fully seal the roof with dry-in in place, so membranes and flashing aren't exposed to snow or slush. Planning ahead also means you can address any wind-driven or snow-load vulnerabilities in advance of a late-season storm.
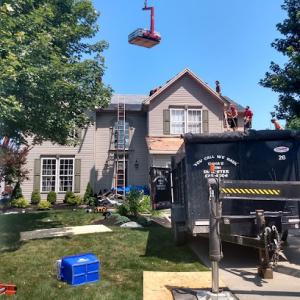
Grand Island homeowners are in the western New York insurance environment, where hail and wind events regularly drive roof claim activity. The Niagara River island setting means storms can arrive with sudden intensity, and roofs bear the brunt of several inches of wet snow, freezing rain, and high gusts in quick succession. When hailstones strike or wind tears at shingles, the first impulse is often to inspect for visible damage and leaks. But in this region, damage can be uneven: fascia, vents, and chimney flashings may suffer long before the main roof shows obvious signs. The consequences of delayed reporting include weather exposure that compounds problems and makes later repairs harder to justify to an adjuster who expects a clean, documented trail of what happened and when.
Carriers in this region may scrutinize storm-related roof claims and often request date-stamped photos, contractor documentation, and repair or replacement quotes. To avoid delays, prepare a straightforward evidence trail: photos taken on the day of discovery, close-ups of hit-and-miss damage, and a roll-forward of what you noticed after each thaw or wind event. Keep a simple log noting dates of storms, wind speeds if available, and any interior signs of moisture. If you hire a contractor for an initial assessment, obtain a written, timestamped report that identifies suspected causes, scope of work, and timelines. This is not about exaggerating damage; it's about presenting a credible, non-ambiguous story that stands up to an adjuster reviewing a storm-driven claim.
Claim timing, adjuster availability, and insurer coordination can vary by season after regional storm events, which affects how quickly Grand Island homeowners can move from damage discovery to approved work. In the immediate aftermath of a storm, insurers may deploy field adjusters in waves, creating peak delays. If the weather holds but your roof shows signs of moisture intrusion, avoid waiting through a second storm to document risk. Proactively initiate contact with the insurer, provide the curated photo set, and request a claim number and a dedicated adjuster contact. Be prepared for seasonal backlog: even a straightforward hail claim may take longer to move through approvals than a homeowner expects.
When a claim is opened, present a clear plan: what is damaged, what needs mitigation to prevent further damage, and what a reasonable repair or replacement package would entail. Obtain a detailed, itemized quote from a remodeling or roofing professional with warranty language and replacement components that match the existing roof profile. If a temporary fix is advisable to hold the line against rain or melting snow, document it with photos and include it in the claim record with a clear explanation of why it's protective and time-limited. This approach helps reviewers see that the project is both necessary and well scoped, reducing back-and-forth and keeping the process on track through the seasonal peaks.
Find local contractors experienced in assessing and restoring roofs after hail, wind, and severe weather events.
Gold Roofing & Construction
(716) 775-5177 www.goldconstructionroofing.com
2495 Grand Island Blvd Suite 2, Grand Island, New York
5.0 from 51 reviews
Gold Roofing & Construction
(716) 775-5177 www.goldconstructionroofing.com
2495 Grand Island Blvd Suite 2, Grand Island, New York
5.0 from 51 reviews
Gold construction is a roofing company specializing in all residential roofs, flat roofs, gutters and siding also we install aluminum trim We specialize in working with your insurance company if you experienced storm damage to your property give us a call for a free estimate
Five Star Roofing Consultants & Services
(716) 828-6279 www.fivestarserviceswny.com
Serving
4.9 from 121 reviews
Five Star is known for its roofing and home improvement; we offer a wide variety of services including siding, custom trim, window & door replacements, kitchen & bath remodels, and additions. Each is performed with an emphasis on customer service and honest work.

MP Roofing & Siding
Serving
4.8 from 64 reviews
MP Roofing and Siding is a family-owned and operated business specializing in roofing and siding. We offer a wide range of services, are fully licensed and insured, use the highest quality materials and offer financing options. We understand every project is different and work with our customers to create a customized plan that meets their specific needs. We are committed to providing the best possible service and are confident we can exceed your expectations.
Beautiful Homes of W.N.Y
(716) 500-1969 beautifulhomesofwny.com
Serving
4.9 from 16 reviews
Roofing Company in Lockport N.Y. serving Niagara and Erie Counties
R & A Roofing
Serving
5.0 from 26 reviews
R & A Roofing Company is a locally family owned and operated company, proudly serving WNY for 10 years. We pride ourselves on top notch quality service. Roofing Siding Trim, Gutters, and More. Call Today for your Free Estimate.
Equity Contracting
(716) 867-8383 www.equitycontractinginc.com
Serving
4.7 from 15 reviews
Roofing, siding, gutters,& chimney contractor in Buffalo, New York. Fully licensed and insured.
Eastern Remodeling
(716) 563-5738 easternremodelingwny.com
Serving
5.0 from 15 reviews
Eastern Remodeling is serving western New York since 2004 on wide ranges of home improvement projects. We offer complete roof replacement, siding, gutter, and trim works.

DSS Roofing
(716) 907-7373 www.dssroofing.com
Serving
5.0 from 87 reviews
DSS Roofing is a Buffalo, NY-based authorized roof replacement and installation contractor, DSS Roofing Team has been renowned for its world-class services and professional workmanship in roofing services – replacement and construction, chimney repairs and construction, and emergency roof snow removal services in Buffalo, New York, and across the USA. The team is trusted and known for fast and efficient work and that all too on reasonable pricing. DSS Roofing provides free pre-estimate for its services by that anyone can make and analyse their construction and service budget. For Residential or commercial needs opt-out free quote for roofing services.
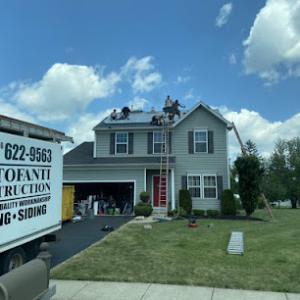
Centofanti Construction
(716) 622-9563 www.centofanticonstruction.com
Serving
4.7 from 53 reviews
Our team of licensed and insured professionals specializes in residential and commercial roof installation and repairs using only top-grade materials that meet local building codes while providing superior protection against the elements. We can also assist you with siding, gutters, custom garages, and EPDM/flat roofs – so no matter your needs, you can count on us to provide reliable services with an unbeatable guarantee. At Centofanti Construction, we understand that each project is unique and requires the utmost attention to detail. That's why our dedicated crew takes the time to discuss your individual needs and budget constraints before recommending the best solutions for your home or business. Plus, all of our estimates are free of ...
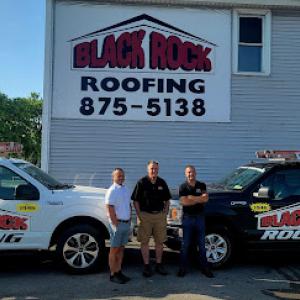
Black Rock Roofing
(716) 875-5138 www.blackrockroofingny.com
Serving
4.6 from 122 reviews
Since its establishment in 1946, Black Rock Roofing has established a strong reputation as a reliable and trusted provider of roofing services in Western New York. We specialize in handling a wide range of residential and commercial roofing projects, focusing on delivering top-notch new roof installations, meticulous complete tear-offs, and more. Our approach ensures that your property receives a durable, built-to-last roofing solution. Our commitment to quality and customer satisfaction sets us apart as an industry leader, and we take pride in exceeding expectations with every project we undertake.
Try-Lock Roofing
(716) 447-1688 www.trylock.com
Serving
5.0 from 18 reviews
Try-Lock Roofing is Western New York's most qualified and experienced commercial flat roofing and residential roofing contractor. We are proud to be a customer driven company that strives to give prompt, quality service for your roof repair and installations. We provide our clients with the most current roofing products available and utilize only time tested roof systems to ensure total customer satisfaction.
Junior Exteriors
(716) 939-9541 juniorexteriors.com
Serving
5.0 from 89 reviews
Call us for your exterior home remodeling needs! Repairs Or Replacements.
In the Niagara River island environment, winter conditions drive how a roof performs from the first snowfall to spring thaw. The dominant materials used in this market are asphalt shingles, metal roofing, clay tile, concrete tile, wood shingles or shakes, and synthetic or composite shingles. Freeze-thaw cycles, wind exposure from nearby storm patterns, and lake-effect snow all influence how your roof sheds snow, drains meltwater, and resists ice dam formation. The roof system you choose should be able to handle repeated moisture exposure at penetrations-think vents, chimneys, and skylights-and along the eaves where meltwater can refreeze overnight.
Asphalt shingles are common for a reason: they balance ease of installation with predictable performance in cold, wet winters. Metal roofing offers excellent snow shedding and wind resistance, which can reduce ice dam risk if the panels are properly lapped and fastened. Clay and concrete tiles bring long life and strong freeze-thaw resilience, but they are heavier and require framing checks; this matters here because heavier systems may trigger closer structural review during planning if changes are being made, especially because local permit review can expand when structural modifications are involved. Wood shingles or shakes provide a traditional appearance but demand careful moisture management and ventilation to prevent splitting in freeze-thaw cycles. Synthetic or composite shingles aim to blend convenience with robust performance in winter conditions, often offering good hail resistance and lighter weight than tiles.
Snow shedding behavior matters more here than in milder climates. Roofs with shallow pitches may accumulate more meltwater at the eave, where it can refreeze and form ice dams that back up under shingles and damage underlayment. If your home sits on a direct pull from prevailing winds, edge detailing and fascia integrity become critical, since wind-driven snow can pile up along rakes and overhangs. Consider roof assemblies that accommodate proper ventilation and an effective underlayment to keep the deck dry during fluctuations above and below freezing. For steeper roofs, ensure that snow guards or snow stops are installed where appropriate to control sliding snow and protect the gutters and edges. In all cases, look for tight seam and fastener performance to prevent water ingress at penetrations during thaw cycles.
Heavier systems such as clay and concrete tile may trigger closer structural review during planning if changes are being made, especially because local permit review can expand when structural modifications are involved. If you're upgrading from a lighter surface or restoring an older roof, have the attic and ceiling joists evaluated for the added weight, and verify that the existing drainage and roof framing can carry the load without compromising rafters or rafters joints. For clay or concrete, confirm that balcony or porch attachments connected to the roof are reinforced, and inspect mounting points for wind-driven pressure. If the home's framing is older or less robust, pairing heavier tiles with a reinforced deck or steel strapping may be needed to maintain long-term performance in winter moisture cycles.
Start with a critical inspection of the eaves, gutters, and downspouts to ensure unobstructed drainage. At least once per season, check for loose or damaged edge materials and reseal penetrations where ice might form. If you're contemplating a roof replacement, plan for a system that prioritizes enhanced edge detailing, robust underlayment, and adequate ventilation to minimize ice dam risks. When installing a new roof, coordinate with the contractor to tailor the choice to the house's shadow lines, wind exposure, and typical snow load, so that the chosen material behaves predictably during Grand Island winters.
Roof replacement permits are handled by the local building department rather than a county-level roofing office. Before any nails go into the first sheet of new material, you need to apply for a permit and align your plan with the department's requirements. In Grand Island, the review often focuses on underlayment choices, proper ventilation in the attic, and whether the selected roofing assembly meets current code for winter moisture management and wind exposure. Expect to provide a basic roof plan, vent locations, and notes on underlayment type and fastener schedule. If the project will alter structural members-think rafter redesign, new roof deck, or added skylights-plan for a potential plan review and structure-related approvals.
Inspections typically occur after work is underway and again for final approval. A first inspection concentrates on framing and underlayment installation, ensuring the roof deck is flat, clean, and ready for weatherproofing. The inspector will verify appropriate underlayment installation, correct venting details, and proper air flow from eaves to ridge, which matters for Grand Island's winter melt-and-freeze cycles. Ventilation must align with the attic space to prevent ice dam risk and freeze-thaw stress on sheathing. If any flashing around chimneys, vents, or valleys is installed, the workmanship and corrosion protection will be checked. Fastener patterns and nail sizes should match the plan as well, since improper nailing can compromise wind resistance and moisture seals during lake-effect snow events. The goal is clear: the assembly should perform as a continuous barrier against snow, ice, and driving wind.
A plan review may be required if the replacement involves structural changes, like reinforcing rafters, adding a heavier roof system, or altering rooflines to improve drainage. In this setting, the review looks at how the new design handles higher ice and wind loads found on the island, as well as how ventilation and insulation integrate with any changes. If a structural upgrade is needed, coordinate closely with the building department and, if applicable, a licensed design professional. Documented calculations may be requested to prove the roof can withstand the stresses typical of Grand Island winters and the nearby lake's wind patterns.
Schedule inspections in advance and ensure access to the roof, attic, and any crawl spaces. Keep the permit card, plan set, and any amendment notices readily available. During the work, maintain clear site access for the inspector and coordinate with your contractor to address any deficiencies promptly. In winter, clearing access points and ensuring safe, dry walkways helps prevent delays. A well-documented inspection trail with dated photos of key milestones-underlayment, venting, flashing, and final finish-can smooth the final approval.
When you're budgeting a roof on this island, the numbers you'll see locally cluster around a clear range. Asphalt shingles typically run about 350 to 700 USD per square, metal from 600 to 1100, clay tile from 900 to 1800, concrete tile 800 to 1400, wood shingles or shakes 600 to 1000, and synthetic or composite shingles 500 to 900. These figures reflect the mix of older houses with varying roof pitches and the weather-driven demand that shows up during the shoulder seasons.
Winter storms and lake-effect snow contribute to a compressed workable window. In practice, that means when a late spring thaw or a busy fall transitions into winter, you'll often see scheduling squeeze and price pressure across crews servicing the Buffalo-Niagara corridor. If your project starts in spring or falls into late autumn, expect some crews to price for urgency or delay risk, which can push costs upward on short notice.
Material choice sets the baseline, but several non-material factors matter in Grand Island. Weather delays, crew travel time to island addresses, and the need for temporary protections during bad spells can add to the final bill. Additionally, long, icy contingencies or a roof with complex angles, multiple penetrations, or skylights will drive labor hours up, even if the material cost sits at the lower end of its range. Plan for a cushion in your budget to accommodate these realities.
Storm activity that ripples from the Buffalo-Niagara area can spike demand for replacement work. In peak times, crews may be committed to multiple jobs, extending timelines and possibly increasing mobilization fees or rush charges. If you're coordinating replacements, anticipate at least a small window of scheduling flexibility and factor in potential cost upticks during high-demand periods.
Before you lock in a contractor, confirm an itemized estimate that separates material cost, labor, and any non-material charges. Verify the chosen product aligns with the house's existing deck, sheathing, and underlayment, especially for tile or metal options. Given the climate realities, discuss suitable underlayment and attic ventilation to reduce future ice dam risk and freeze-thaw stress.
Get a clear picture of your project costs upfront - no commitment required.
Gold Roofing & Construction
(716) 775-5177 www.goldconstructionroofing.com
2495 Grand Island Blvd Suite 2, Grand Island, New York
5.0 from 51 reviews
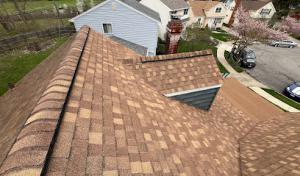
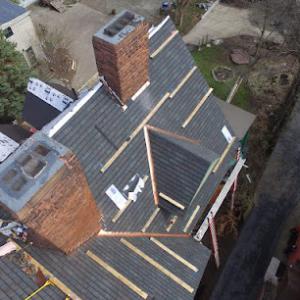
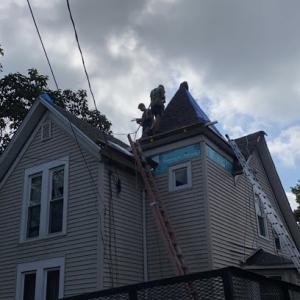
Grand Island's winter moisture conditions make roof penetrations and transitions more vulnerable because snow and ice can linger around skylights, chimneys, and low-slope tie-ins. That lingering meltwater can refreeze, creep under flashing, and find its way into the attic or ceiling if detailing isn't up to the task. This is not a theoretical risk-it's a pattern seen after heavy lake-effect snows, when wind-driven moisture concentrates around edges and transitions.
Skylights draw attention because their curb or flashing becomes a recurring trouble spot when ice builds up along the sides. In practice, failing to fully secure and seal the flashing over the curb can allow slow leaks that show up only after a series of thaw-freeze cycles. When replacing an old skylight, insist on integrated insulation and a continuous, corrosion-resistant flashing system that extends onto solid sheathing. If you already have a skylight, plan a mid-winter inspection to verify that frost lines aren't creeping under the flashing or pooling around the base.
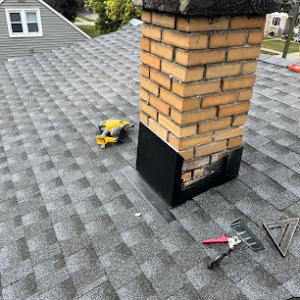
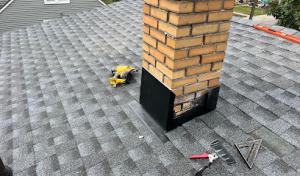
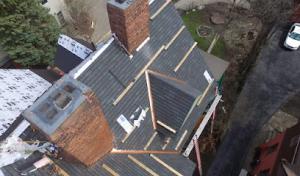
Chimneys and vents are classic leak sources in this climate if the flashing transitions aren't properly integrated with the roof deck and underlayment. Snow can trap moisture near a chimney base, and poor step flashing or valley transitions invite seepage during thaw periods. On replacement, request a flashing detail that overlaps with continuous underlayment, plus proper sealant at all joints that remains flexible in cold temperatures.
Low-slope areas demand meticulous attention because ice dams tend to form where water slows and re-freezes at transitions. Ensure the roof membrane extends up and over fasteners, with secure edge detailing and robust drainage planning. In this climate, a small lapse at these tie-ins often becomes a larger leak pattern through the ceiling, especially after heavy snow loads. Inspect underlayment condition and ventilation around these zones; leaky ceilings often trace back to detailing rather than shingles alone.
Regular checks should focus on underlayment coverage, vent flashing, and the continuity of sealants at penetrations. Look for micro-leaks that travel along rafters, which can hide behind insulation before showing as a stain. In winter, if ice dam risk is high, perform targeted checks after storms when snow has begun to melt but refreezes at night, creating a telltale drip line on interior surfaces.
Find contractors experienced in skylight installation, flashing, and leak repairs to bring natural light into your home.
Gold Roofing & Construction
(716) 775-5177 www.goldconstructionroofing.com
2495 Grand Island Blvd Suite 2, Grand Island, New York
5.0 from 51 reviews
Five Star Roofing Consultants & Services
(716) 828-6279 www.fivestarserviceswny.com
Serving
4.9 from 121 reviews
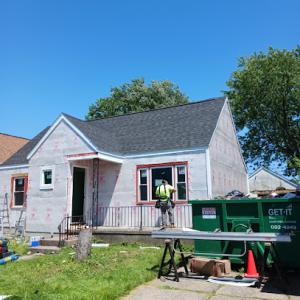
Late spring through early fall is typically the best replacement window for a Grand Island roof. Winter snow and ice, followed by spring thaw conditions, can interrupt tear-off, access, and dry-in. If you're planning a full replacement, aim to start after the ground has thawed and the temperatures have stayed reliably above freezing for a couple of weeks. That steady window helps crews move efficiently and reduces the risk of moisture slipping under new underlayment as snowmelt continues to run off.
Spring rains and thaw periods in this region can slow scheduling and staging even after winter ends. Expect occasional pauses due to wet decks, muddy pathways, or softened soil around drip edges and scaffolding. Have a contingency plan for weather days, and clear the project area in advance so crews can regain traction quickly when skies clear. Coordinating with other neighborhood projects that funnel trucks and equipment through local streets can also smooth the kickoff and wrap-up days.
Summer thunderstorms, heat, and autumn winds in western New York can still affect daily progress and material protection. On hot days, asphalt shingles and some underlayments can heat up quickly, making fasteners and nailing patterns more sensitive to timing. Wind can complicate staging while debris and dust move through the area. To keep momentum, schedule foundation and access work for cooler parts of the day when possible, and ensure crews have shaded breaks and secure, covered storage for sensitive materials between shifts.
Plan with a two-to-three week forecast in mind, allowing for potential rain delays in late spring and early summer. Ensure access routes stay clear of overhanging branches and snowmelt runoff zones. Have a designated area for site storage and a clear path for the dumpster or debris containment. This approach minimizes interruptions and helps your project stay aligned with Grand Island's typical late-spring to early-fall rhythm.
On Grand Island, roofs endure snow, ice, and storm exposure that heightens the chance of leak callbacks once winter thaws. A workmanship warranty is not just a ceremony at the end of a project; it's a promise about how your roof was installed and how skilled installers will address issues that arise from the actual installation, not just from the passage of time. Pay attention to the specifics: scope of coverage, what triggers a claim, and the duration of protection. In snow-prone periods, a robust workmanship warranty should clearly cover repairs needed after freeze-thaw cycles and any water intrusion tied to installation details such as flashing, penetrations, and transitions.
The local market includes contractors advertising warranties, but permit inspections in Grand Island still matter because passing inspection is separate from any private warranty promise. A professional inspection can reveal hidden weaknesses that might not surface immediately after a project, especially in homes with complex rooflines or retrofits. If a storm hits and a leak appears, having a documented baseline from an independent inspection strengthens any warranty claim and helps prevent disputes about cause and scope.
Documentation from installation, inspections, and final approval is especially useful in this western New York claim environment if future storm damage is disputed. Maintain the original contract, supplier invoices for materials, photos of before and after work, and a dated record of any subsequent repairs. When possible, obtain written confirmation from the installer about warranty terms and any required maintenance. This trail supports faster, clearer resolution should ice dam or wind-related issues arise after severe weather.