Last updated: Apr 19, 2026
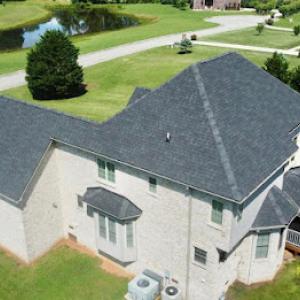
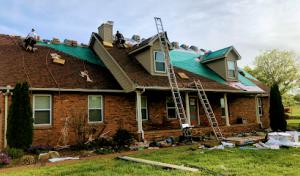
Powell sits in the north Knox County area where spring severe storms and hail are a recurring roofing trigger, making storm-related replacement and repair a leading homeowner concern. After a hail event or a sudden wind gust, you need to act fast to limit interior damage and prevent a small leak from turning into a soaked attic or ceiling. Start with a simple safety check: if shingles are torn, granules are exposed, or metal flashing is visibly bent, treat the roof as compromised. Photograph the damage from multiple angles before any tarping or repairs begin, so you have a clear record for insurance and your contractor. If you notice water intrusion inside sooner rather than later, prioritize securing a storm-rated temporary seal that blocks airflow and water entry while you arrange permanent repair.
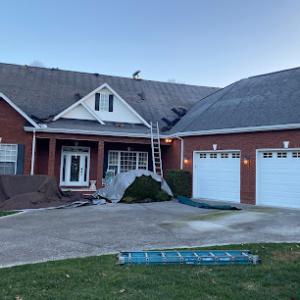
The local contractor signal mix is heavily concentrated in emergency repair, storm damage, and insurance claims, showing that homeowners here commonly need rapid leak control after weather events. When a leak surfaces during a storm, your first move is to contain it. Use heavy-duty tarps anchored with weights or rocks to cover exposed roof sections, valleys, and dormers if safe access is available. Do not climb on a slick, windy roof; use a remote inspection method or hire a licensed pro with fall-protection gear for any on-roof work. If water is actively dripping into living spaces, place buckets under the leak and use towels to limit secondary damage. Document interior damage with timestamps and keep all receipts for emergency supplies to support an insurance claim. A quick, well-documented response buys precious time for a proper dry-in plan and a longer-term repair.
Because replacement projects in Powell are often interrupted by spring storm windows, temporary dry-in planning matters more here than in milder, less storm-active markets. Communicate with your insurer early about roof condition, the expected scope of work, and the timeline for a full replacement versus staged repairs. Your adjuster will want a clear, event-driven narrative: dates of hail impact, observed leaks, and the sequence of temporary protections you installed. A trusted local roofer can help translate storm damage into an insurance-friendly bid package, with written documentation, damage photos, and a realistic repair schedule that anticipates weather windows. If a full shingle or tile replacement is justified, expect to coordinate a plan that prioritizes critical areas first-typically the most exposed valleys, eaves, and chimney flashings-while securing a dry interior in the meantime.
In Powell, temporary dry-in planning matters more than elsewhere because spring storms can reopen after a lull, interruptting longer replacement projects. Build a dry-in plan around emerging weather forecasts and contractor availability. For asphalt or synthetic shingles, ensure any replacements tie into secure flashings and vent boot protections to minimize re-entry risk during the next storm. For clay or concrete tiles, confirm proper underlayment and valley protection to prevent days of leakage if a storm rolls in mid-repair. Coordinate with the contractor to schedule phased work that aligns with favorable weather blocks, ensuring that essential living spaces stay shielded while roof sections are restored.
Garrett Roofing
(865) 454-7531 www.garrettroofingknoxville.com
912 Crown Ridge Ln,, Powell, Tennessee
4.9 from 49 reviews
At Garrett Roofing in Powell, we offer: Roofing, Residential Roofing, Commercial Roofing, Flat Roofs, Rubber Roofs, Single-ply Roofs, TPO Roofs, New Homes, Remodel, Fire Damage, Water Damage, Restoration, Decks, Land Clearing
Falcon Roofing
(865) 455-8322 www.falconroofingtn.com
Serving
4.9 from 183 reviews
Falcon Roofing is a veteran-owned and operated premier roofing contractor that services the Greater Knoxville Area. Our company specializes in new roofing projects and roof repairs, including roof coatings, silicone roof coatings, roof cleaning, and gutters, for both residential and commercial applications. Military and veteran discounts available!
Banner Contracting Group
(865) 776-5804 bannercontractinggroup.com
Serving
5.0 from 32 reviews
Banner Contracting Group is a trusted roofing and gutter contractor serving Knoxville, TN, and surrounding areas including Powell, Seymour, Maryville, and Kingsley Station. Specializing in roof installation, roof repair, and gutter services, they offer comprehensive solutions for both residential and commercial properties. Their team is committed to using high-quality materials and adhering to industry standards, ensuring long-lasting results. Whether you need a roof inspection or gutter cleaning, Banner Contracting Group provides reliable and professional services tailored to meet your specific needs.
Mountain View Exteriors
(865) 465-8056 mountainviewexteriors.com
Serving
5.0 from 159 reviews
Mountain View Exteriors is locally owned and proudly serves the greater East Tennessee area for all your roofing needs. We specialize in both Asphalt and Metal roofing as well as gutters and gutter protection. We have been nationally recognized for winning CertainTeed's Governor's Award which is reserved for the top ranked roofing company for the State of Tennessee! Our attention to detail, professionalism, and always doing what we promise is what makes us unique in this day and age. Please give us a call for a quick hassle free quote and let us earn your business!
Patriot Restoration
(615) 219-9630 gurrbrothersroofing.com
Serving
5.0 from 123 reviews
Top-rated Orlando roofing, offering high-quality roofing services for residential and commercial properties. Call to schedule your free damage assessment with Patriot Restoration!
Exterior Home Solutions Roofing & Siding
(865) 524-5888 exteriorhomesolutions.com
Serving
4.8 from 414 reviews
Exterior Home Solutions, LLC is a trusted roofer serving Knoxville, TN, and the surrounding areas with expert craftsmanship and reliable service. As a dedicated roofing contractor, the company specializes in roof installations, repairs, and replacements, ensuring homes are well-protected against the elements. In addition to roofing, their team excels as a siding contractor, enhancing both the durability and curb appeal of residential properties. With a commitment to quality materials and professional service, Exterior Home Solutions, LLC delivers long-lasting exterior solutions tailored to each homeowner’s needs.
Santos Construction
Powell, TN
5.0 from 1 review
If you need a new roof for your home, know that Santos Construction is committed to completing the work to the highest standard. Our local roofing contractors in Knoxville, TN are committed to providing exceptional workmanship at fair and honest prices. We're a cut above the rest because of the unparalleled services that we provide for our customers. Our accurate knowledge of our trade combined with our remarkable craftsmanship means that we can handle any project that we're faced with. Above all, we are mindful of our customers' interests and take their concerns to heart.
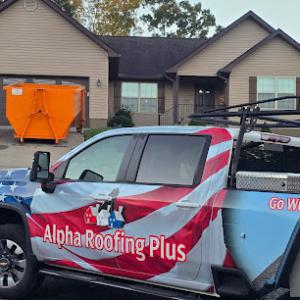
Alpha Roofing Plus
(865) 671-7663 alpharoofingtennessee.com
Serving
5.0 from 7 reviews
Searching where do you need to turn for the best roofing services in Knoxville, TN? Right here! At Alpha Roofing - Knoxville, we specialize in outstanding roofing solutions tailored to your needs. We offer affordable roofing options and exceptional roof cleaning services, along with leaf guard installations and deck repairs. Our team of expert roofing contractors in Knoxville, TN handles everything from roof installations and roof damage repairs to gutter cleaning and gutter installation services. Whether you’re looking for reliable roofers near you or a local home builder in your area, we’re here to deliver superior craftsmanship and customer satisfaction. Call us today to get started on your next roofing project!

Berkeley Roofing
(865) 323-4093 berkeleybuildersroofing.com
Serving
5.0 from 14 reviews
Berkeley Roofing- is Knoxville’s highest rated residential roofing company for the past 10 years. No job is too small. Roof Repairs can be performed on a 24/7 basis. New Roof Installs can be performed within 2 weeks. Berkeley Roofing provides premium roof systems with premium warranties. -Asfault Shingles LIFETIME -Standing Seam -Screw Down Metal Panels -TPO -EPDM Berkeley Roofing cares about their customers and enjoys keeping them in the DRY for the lifetime of the roof systems we provide.
Primetime Roofing
(865) 235-1710 primetimeroofs.com
Serving
5.0 from 70 reviews
𝐏𝐫𝐢𝐦𝐞t𝐢𝐦𝐞 𝐑𝐨𝐨𝐟𝐢𝐧𝐠, based in 𝐊𝐧𝐨𝐱𝐯𝐢𝐥𝐥𝐞, 𝐓𝐍, is your trusted 𝐫𝐨𝐨𝐟𝐢𝐧𝐠 𝐜𝐨𝐧𝐭𝐫𝐚𝐜𝐭𝐨𝐫 for expert 𝐫𝐞𝐬𝐢𝐝𝐞𝐧𝐭𝐢𝐚𝐥 𝐫𝐨𝐨𝐟𝐢𝐧𝐠 and 𝐜𝐨𝐦𝐦𝐞𝐫𝐜𝐢𝐚𝐥 𝐫𝐨𝐨𝐟𝐢𝐧𝐠. As a certified Owens Corning 𝐫𝐨𝐨𝐟𝐢𝐧𝐠 𝐜𝐨𝐦𝐩𝐚𝐧𝐲, we specialize in 𝐫𝐨𝐨𝐟 𝐢𝐧𝐬𝐭𝐚𝐥𝐥𝐚𝐭𝐢𝐨𝐧, 𝐫𝐨𝐨𝐟 𝐫𝐞𝐩𝐥𝐚𝐜𝐞𝐦𝐞𝐧𝐭, and 𝐞𝐦𝐞𝐫𝐠𝐞𝐧𝐜𝐲 𝐫𝐨𝐨𝐟 𝐫𝐞𝐩𝐚𝐢𝐫 with trusted warranties. From 𝐚𝐬𝐩𝐡𝐚𝐥𝐭 𝐬𝐡𝐢𝐧𝐠𝐥𝐞 to 𝐦𝐞𝐭𝐚𝐥 𝐫𝐨𝐨𝐟𝐢𝐧𝐠, we ensure integrity and satisfaction. Serving 𝐎𝐚𝐤 𝐑𝐢𝐝𝐠𝐞, 𝐌𝐚𝐫𝐲𝐯𝐢𝐥𝐥𝐞, and 𝐅𝐚𝐫𝐫𝐚𝐠𝐮𝐭, 𝐓𝐍, we’re one of the most 𝐫𝐞𝐩𝐮𝐭𝐚𝐛𝐥𝐞 𝐥𝐨𝐜𝐚𝐥 𝐫𝐨𝐨𝐟𝐢𝐧𝐠 𝐜𝐨𝐦𝐩𝐚𝐧𝐢𝐞𝐬 you can trust.
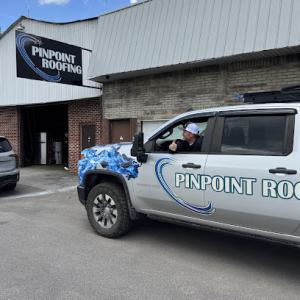
Pinpoint Roofing
(865) 287-6060 pinpointroofing.com
Serving
4.9 from 112 reviews
Pinpoint Roofing is a trusted, family-owned roofing company serving Knoxville, TN and surrounding areas since 1987. We specialize in residential and commercial roofing, chimney repair, custom copper work, and metal fabrication. With over 37 years of hands-on experience, our licensed and certified team delivers high-quality roofing solutions using top brands like GAF, CertainTeed, and DaVinci Roofscapes. From roof inspections and leak repair to full roof replacements and emergency services, we provide fast, honest estimates and satisfaction-guaranteed results. Call today to schedule a free quote—typically delivered within 24–72 hours!
Knox City Roofs
(865) 213-3636 www.knoxcityroofs.com
Serving
5.0 from 171 reviews
Knox City Roofs is a locally owned and operated roofing company that serves the Knoxville area, along with the surrounding counties. We do everything from roof repairs, roof replacements and gutter installations. You will receive outstanding customer service from the first conversation till the job is complete and you are fully satisfied. We are licensed and insured so you and your home will be protected before we even step foot on your property!
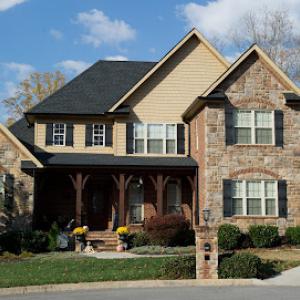
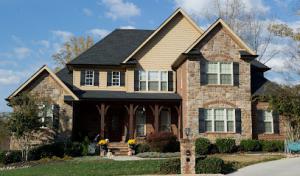
Asphalt shingles are the dominant practical choice in Powell, aligning with the area's suburban housing stock and the strongest material-specific contractor presence in the market. That practical fit isn't just about initial cost; it's about availability of local crews who know how to handle Knoxville-area weather patterns, including spring storm surges and the humid heat of East Tennessee summers. When a roof needs replacement after a storm, having a common, well-supported option on the house means quicker ordering, faster installation, and clearer insurance documentation pathways. The asphalt route also pairs well with typical attic ventilation schemes found under standard truss layouts in the region, making reliable airflow a key practical step before shingle replacement.
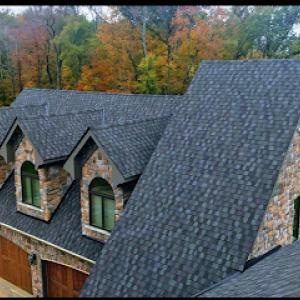
Tile, slate, wood, and synthetic roofs exist in the broader material mix, but their higher weights or specialty installation needs can complicate replacement on homes originally built for lighter systems. In Powell, the structural reality is that many ranch- and split-level homes, along with newer suburban builds, anticipate lighter sheathing and framing. That means switching to heavier products like clay or concrete tile, natural slate, or wood shakes can demand extra framing work, fastener considerations, and sometimes roof deck reinforcement. If a home already carries heavier materials, or if the structure wasn't upgraded to accommodate them, a full replacement with tile or slate can become a longer, more involved project-especially when you aim to meet the demanding drainage and wind-resistance expectations seen after spring storms. Synthetic shingles present a more adaptable middle-ground, but even they require attention to compatibility with existing roof pitch, ventilation, and underlayment choices. In practice, the local market's familiarity with asphalt makes these alternatives a more nuanced, case-by-case decision rather than a default.
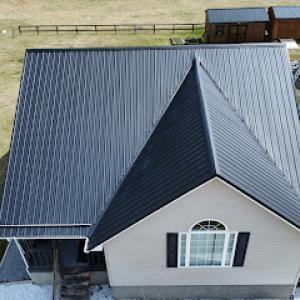
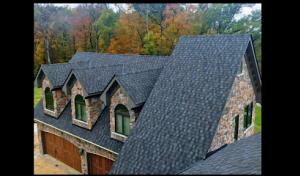
East Tennessee's hot summers, humidity, and storm exposure make ventilation, fastening quality, and impact resistance more important than purely aesthetic material selection. For any material choice, confirm that the attic has adequate soffit and ridge vents to support airflow during the peak humidity months. A well-ventilated attic helps preserve underlayment integrity and reduces heat-related wear on fasteners, which is especially relevant for roofs that see frequent spring storm contact and occasional hail. Fastening quality matters across all materials, but the stakes rise with heavier or more brittle options: tile and slate demand precise nailing patterns and appropriate nailing strips to resist uplift in gusty spring events. Even when asphalt remains the practical default, ensuring the roofing crew uses impact-resistant asphalt shingles can provide a meaningful margin against insurance documentation hurdles after storm damage.
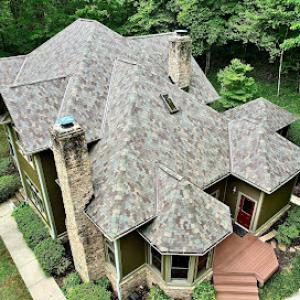
Start with the existing structure: assess whether the deck framing and roof pitch align with heavier materials or if lighter options are a safer, simpler transfer. If you anticipate frequent spring activity, lean toward a material with established local support for rapid repair and solid wind resistance. Verify that the chosen system's underlayment and ventilation plan match the home's attic layout, and require the contractor to specify fastener type and application method that meets local weather demands. Finally, confirm the installation plan accounts for potential storm-season windows, so you can stage inspections and documentation promptly in the event of hail or wind damage. This approach keeps the project steady and iterations straightforward when insurance considerations come into play after a spring storm.
In this market, you'll see different shingle options listed with per-square costs, and you'll want to frame your budget around those ranges. Asphalt shingles sit at the low end and remain the most budget-accessible fit for the local market. Expect a typical range around $350 to $650 per square for asphalt, depending on brand, warranty, and complexity. If you're weighing heavier materials, clay and concrete tiles push costs higher-think roughly $900 to $1,800 per square for clay and $800 to $1,500 per square for concrete. Wood shingles and shakes land in the middle to upper range, often $700 to $1,200 per square. Synthetic or composite shingles run about $400 to $700 per square, while slate sits well above the rest, from about $1,200 to $2,600 per square. When you translate "per square" into a typical home roof, those figures guide the bulk of your decision rather than a one-size-fits-all price. In Powell, asphalt remains the practical first choice for most neighbors replacing a damaged roof after spring storms.
Spring storms bring hail and high winds that can suddenly surge demand for quick, emergency scheduling. In Powell, that pressure creates a practical effect: prices can rise as crews become scarce and timelines shrink. If a hail event hits, you're not just buying shingles-you're buying expedited access to assessment, cleanup, and installation windows. Your contractor may need to stage materials, schedule multiple crews, or extend work into tighter weather pockets, all of which elevates the bottom line beyond the base per-square cost. If you're balancing insurance timelines with replacement needs, expect a short-term bump in job cost and a tighter window for selecting materials and final finishes.
There are times when a Powell roof replacement isn't a clean tear-off and re-roof. If the inspection uncovers structural or ventilation changes, costs climb beyond the standard per-square ranges. In those cases, expect deeper framing work, additional insulation considerations, or more extensive attic ventilation upgrades. Those steps trigger longer review cycles and a more involved scope of work, which translates to higher overall costs and longer project timelines. If your project lands in this category, the price will reflect not just the roof surface but the underlying system improvements necessary for a safe, long-lasting install.
Start with asphalt as the baseline for budgeting, recognizing it as the most economical choice in this market. Gather three written quotes that break down material costs, labor, and any disposal or accessory fees. Ask each contractor to itemize potential contingencies for storm-driven scheduling issues and any anticipated structural or ventilation work. If you've recently experienced a hail event, plan for a brief window where expedited scheduling could push price up modestly but reduce overall project time, which can sometimes offset the higher line item. Keep the insurance timeline in mind and align material selections with both long-term durability and the realistic replacement schedule in Powell.
Get a clear picture of your project costs upfront - no commitment required.


Powell operates under Knox County processes rather than a separate city building department. That means every full roof replacement you plan is handled through county channels, not a stand-alone Powell permit office. The county's approach emphasizes consistency with broader Knox County codes, which helps streamline inspections if you own multiple properties in the area or periodically replace roofing across your home portfolio. When you start planning, expect to submit documents that establish the project scope, materials, and proposed timeline to the county permit office, and be prepared for follow-up requests if the plan reviewer needs additional clarity.
A building permit is typically required in Powell for a full roof replacement. The permit review focuses on ensuring structural integrity and overall code compliance before any work begins. That means the review team will look at how the new roof interacts with existing decking, trusses or rafters, attic ventilation, and drainage. The county's goal is to prevent post-job issues such as poor ventilation, improper drainage, or unsafe modifications that could compromise energy efficiency or storm resilience. Having the permit in place before you lift a single shingle helps avoid delays from stop-work orders and keeps your project aligned with Knox County expectations.
If a Powell project changes ventilation layouts or structural members, plan review may be required in addition to the usual final inspection after completion. Ventilation changes can affect attic airflow, moisture control, and overall roof longevity, so the county may request a schematic or calculation demonstrating adequate intake and exhaust, as well as any changes to roof framing. Structural modifications-such as altering rafter spans, hip or valley configurations, or beam support-trigger a more thorough review to verify that the framing can handle the new load and that fasteners and attachments meet current codes. Plan review timelines vary, so it's wise to coordinate with your contractor and the county early in the project to anticipate any additional documentation or engineering notes.
After the permit is issued and work begins, expect a sequence of inspections: a rough-in check if any structural work is involved, a mid-project review if ventilation or framing changes occurred, and a final inspection upon completion. The final inspection confirms that the roof replacement aligns with approved plans, that installations meet code requirements, and that safety expectations for access and debris containment were maintained during the project. Communicate with the county inspector about any deviations from the original plan so corrective steps can be documented and approved before you close out the permit. This careful, code-focused process helps ensure a durable roof that stands up to Knox County's annual spring storms.
Powell sits in a regular wind-and-hail claim environment, so insurers commonly expect photo sets, contractor estimates, and invoices before settling roof losses. The reality is that every storm year brings similar questions: is the damage recent or ongoing, what's the age of the roof, and what materials were installed? In this climate, a solid file helps prevent delays and reduces the chance of adjustments that hinge on age or type of shingles rather than actual damage.
After a storm, take clear exterior photos from multiple angles, focusing on visibly damaged areas and any soffits or flashing that might reveal concealed leaks. Inside, document active leaks with timestamped photos and note any ceiling stains or patched areas. Gather contractor estimates and invoices for any temporary tarping, leak repair, or other quick fixes, and keep copies of receipts for purchases related to mitigation. If a prior repair exists, include records showing when and what was done, since adjusters often review recent repair history.
Tennessee policies in markets like Powell can adjust coverage based on roof age and material, so pre-loss records are especially valuable when the roof is older. A well-organized folder that tracks each repair step-dates, vendors, and extent of work-helps the adjuster see the full picture rather than relying on memory. If a prior leak repair was performed, note the contractor, method, and outcome. This can play a decisive role in how losses are evaluated and settled.
Insurance timelines in this town often align with storm season peaks, so timely documentation submission matters. Keep a running log of communications with the insurer, including dates and the names of representatives spoken with, and attach updates to the claim file as new documents come in. If the roof is still under warranty or if a material upgrade is planned, preserve warranty papers and product specs to support future discussions with the adjuster and ensure consistency across every submission.
When you plan a roof project, spring and fall bring the most predictable weather for the job. The mild conditions around the wettest months help asphalt shingles lay cleanly and reduce rapid damage from heat. Dawn-to-midday temperatures typically stay comfortable enough to keep fasteners from overtightening or underperforming sealants. In this climate, timing your tear-off and overlay work for the shoulder seasons helps you avoid the peak heat of East Tennessee summers and the humidity that can complicate adhesive performance.
Spring is also the riskiest scheduling season in Powell because severe storms can expose underlayment or delay tear-off completion. If a storm blows through, you may need temporary tarping to protect fresh insulation and interior spaces. A well-coordinated crew will stage access points and keep a clear plan for rapid response if leaks appear during consecutive storm cells. Have a contingency window in mind for potential rescheduling, and keep communication lines open with your roofing contractor so you're not caught in a crunch between rain events.
Winter cold can slow scheduling and create ice-related complications even though the region is not defined by prolonged northern freeze cycles. Freezing temperatures affect sealant cures and crew safety. If cold snaps arrive, expect shorter workdays and potential debris removal delays. A practical approach is to target late winter only when a forecast shows a stretch of consistently above-freezing days and to align expectations for a longer completion horizon if weather windows compress.
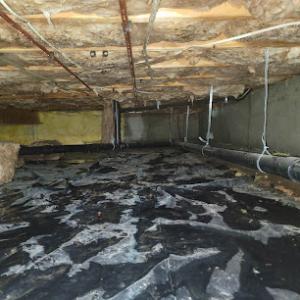
While the local contractor signal set shows meaningful local demand for flat-roof and skylight repair expertise, these tasks are not a sideline here. The suburban housing mix means you're likely to encounter small flat sections on additions, garages, or sunrooms that ride on the same stormy spring season as the rest of the roof. A flat transition point that seems minor can become a persistent leak source after heavy rain, wind-driven spray, or rapid temperature swings. Treat any sign of moisture around skylights or edge details as a signal to inspect beyond the visible seal.
On these homes, the low-slope runs often act as the weak link during heavy spring downpours. The main shingle field can look dry while the junctions-where roof planes meet, or where a low-slope porch roof ties into the main deck-carry water intrusion. The key is to track water behavior along those seams during a controlled, deliberate rain test or after a storm event. Pay close attention to attic signs: damp insulation, stained rafters, or a musty odor near the transition zones. Small lapses in flashing or misaligned edge detailing can cascade into noticeable leaks inside the living space.
Skylight penetrations in this climate demand extra flashing attention because repeated storm cycles and seasonal humidity swings can expose installation weaknesses. Humidity can creep under flashing if the counter-flashing isn't properly integrated with surrounding shingles or siding transitions. In spring, inspect around the skylight perimeter for lift, loose fasteners, or blackened rot-prone areas where moisture tends to pool. If a leak appears at a skylight after rain, the fastest path is often the flashing interface rather than the glass itself. Regular checks after heavy rain and during seasonal transitions help prevent small issues from becoming interior water problems.
Find specialists in TPO, EPDM, and built-up flat roofing systems for residential and commercial properties.
Garrett Roofing
(865) 454-7531 www.garrettroofingknoxville.com
912 Crown Ridge Ln,, Powell, Tennessee
4.9 from 49 reviews
In this market, you will notice that many homeowners hire under leak or storm pressure rather than after long planning cycles. When a crew answers promptly, it often reflects how they handle emergency leaks and moving the project forward with weather windows. Look for crews that can schedule an on-site assessment within 24 to 48 hours after a storm, provide an initial tarp or temporary containment, and commit to a clear next-step timeline.
Powell's re-roofing market leans toward replacement work rather than new construction, so assess crews by how they manage the replacement process from tear-off to finish. A strong crew will protect landscaping, secure work areas, and avoid leaving debris in gutters or driveways. Ask about waste containment, haul-away plans, and dust control during shingle removal. You should expect a thorough cleanup and a final walk-through to confirm all trash and nails are gone.
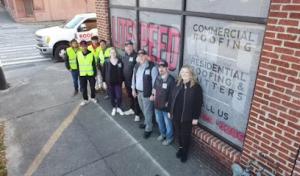
Many contractors in this area market themselves as long-established, locally owned, family-owned, licensed, or insured. When evaluating bids, compare these trust signals alongside price. Request current references from nearby homes with similar roof types, and verify insurance certificates, including general liability and workers' comp. A reputable crew will welcome third-party verification and provide recent project photos showing storm-related replacements handled in a timely fashion.
During the first on-site visit, insist on a detailed scope of work that identifies the roof system, venting considerations, flashing details, and any decking concerns revealed during removal. The crew should offer a transparent plan for dealing with unseen issues, such as rotten sheathing or compromised gutters, and provide a realistic schedule that accounts for weather-related delays typical in spring storms.
Choose a crew that assigns a single point of contact for updates, change orders, and warranty questions. A dependable team will document the project with photos at key stages and confirm post-install inspection steps, warranty coverage, and care instructions before signing.