Last updated: Apr 19, 2026
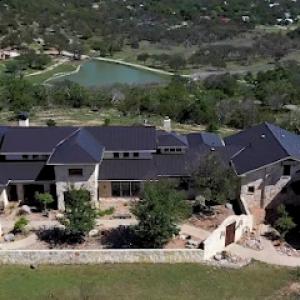
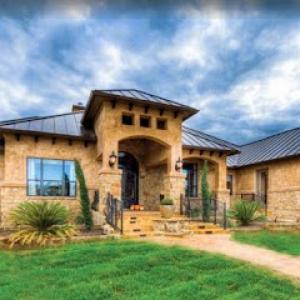
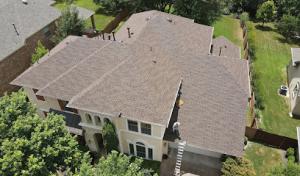
Dripping Springs sits in the Texas Hill Country where spring hail and wind storms are a primary trigger for roof replacements and insurance claims. When a thunderstorm rolls in with bright flashes and heavy gusts, the first sign of trouble often isn't a leak-it's the micro-damage along flashing lines, valleys, and penetrations that show up only after the next round of rain. After hail strikes, a quick, careful inspection becomes essential. Look for lifted shingles, granule loss, dented metal flashing, and hairline cracks at vent pipes or skylights. Those are the spots where water can find its way in when heavy showers arrive. The season's intensity can overwhelm underlayment and sealants that were already stretched from the Texas sun, so treat any new dampness near roof edges as a red flag.
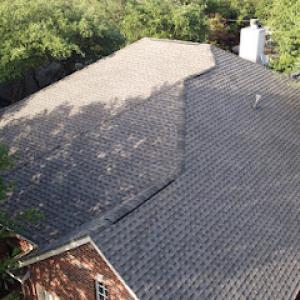
Thunderstorm season brings intense rainfall that quickly exposes weaknesses at flashing, sealants, valleys, and roof penetrations after hail strikes. In this region, the combination of angled sun exposure and frequent temperature swings can age materials unevenly. A tile or slate roof, common on many local homes, may look solid from the curb but harbor micro-fractures in areas where products hinge, eave details meet the wall, or where valleys funnel water. The highest risk areas tend to be kitchen and bathroom vent flashings, chimney surrounds, and transitions from roof to ridge lines. If a storm hits hard, those weaknesses can cascade into broader damage within hours or days, particularly as wind-driven rain infiltrates under shingles or around poor sealants.
Local contractor demand spikes after regional hail events, which can compress scheduling and push homeowners toward emergency dry-in before full replacement. That urgency is real, but a rushed dry-in can leave core vulnerabilities exposed to the next storm. When the first contractors show up, prioritize validated assessments from reputable crews who can document hail impact with photos and notes, and who understand how your specific roof type handles UV exposure, material expansion, and flashing transitions. Demand clarity on what components were inspected, what may need resealing or reseating, and what constitutes acceptable temporary protection versus a longer-term fix. If a full replacement is recommended, insist on a phased plan that addresses attic ventilation, underlayment age, and structural loading-critical factors for the Hill Country climate and common roofing assemblies.
Start with a targeted inspection soon after a hail event, focusing on the most vulnerable zones: valleys, kick-out flashing where walls meet the eave, penetrations such as vent stacks, and the chimney cricket. Use a rain-safe approach: if water is actively entering, prioritize temporary measures that cover the leak while you arrange professional evaluation. Document all observed damage with dated photos and notes, especially any signs of granule loss or metal flashing distortion. If a repair is advised, seek a detailed explanation of how the fix interacts with your roof's material. Slate and clay or concrete tile respond differently to impact and wind, so confirm your contractor's plan aligns with your roof type and the local climate demands. Finally, keep a proactive line of communication with your insurer: route questions through a dedicated adjuster and request a handoff to a roofer who understands how hail events influence the specific roof assembly on your home. Acting quickly protects attic health, preserves the roof's life, and reduces the chance of cascading damage during the next storm surge.
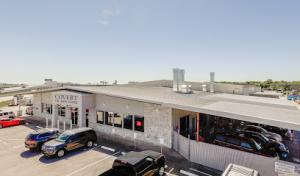
Find local contractors experienced in assessing and restoring roofs after hail, wind, and severe weather events.

Waypoint Roofing & Construction
100 Commons Rd, Dripping Springs, Texas
5.0 from 190 reviews
Texas Roof Repair
(512) 994-4142 www.texasroofrepair.com
31900 Ranch Rd 12 Suite A, Dripping Springs, Texas
4.9 from 145 reviews
Libertas Roofing & Siding
1450 US-290 Suite 31, Dripping Springs, Texas
4.9 from 88 reviews
The Hill Country climate brings sharp hail and strong winds that can dent or misalign tile and slate roofs quickly. In the Dripping Springs market, adjuster site inspections after large storm events are common, and how the claim is documented can swing whether a loss is paid as a repair or a full replacement. The stakes feel personal because many homes share similar roof types and exposure, so the insurer often weighs not only the damage but the roof's overall condition and remaining life. Preparation matters, and weathered assumptions about quick fixes can invite higher out-of-pocket costs later.
When a hail event hits, you are playing catch-up with the storm's aftereffects. Thorough photo documentation is essential: wide-angle shots of the entire roof, close-ups of dented fasteners, granule loss, and any compromised underlayment or flashing. Measurements help establish coverage boundaries for each area, especially around ridges, valleys, and chimney penetrations. Gather contractor estimates that itemize shingle or tile replacement, underlayment, and ventilation considerations. In this market, coverage outcomes can vary significantly by carrier and by wind or hail deductible structure, making precise records a critical advantage rather than a precaution.
Storm losses are common here, so the timing of a claim can influence whether damage is treated as repairable or replacement-worthy. If you delay, moisture intrusion or concealed damage may grow, complicating the adjuster's assessment and potentially reducing payout. On the flip side, filing too early with incomplete documentation can trigger questions about preexisting conditions. The window between event and claim should be used to assess all roof facets-tiles or shingles, structural sheathing, ventilation, and any visible signs of previous repairs. The better you document the roof's state at the outset, the more accurately the claim can reflect the true scope of work.
In this market, adjusters will often perform field inspections after a major storm. Be present if possible to point out issues that may not be obvious from the ground, such as edge damage under overhanging branches or hidden underlayment concerns. Obtain independent contractor estimates that reflect local material choices common to Hill Country homes-whether clay tile, concrete tile, or synthetic options. Ensure estimates account for a matched roof surface, flashing, and ventilation corrections, since these factors frequently influence coverage determinations. Clear communication helps prevent gaps between what exists and what the policy intends to repair or replace.
Hail and wind can create layered issues: cosmetic denting, tile misalignment, and latent leakage paths that surface after the rain starts. Understand that a claim's success hinges on the documentation's quality, the insurer's interpretation of wind- or hail-related damage, and the deductible structure tied to the storm event. In a market where large events recur, building a detailed, organized claim package before the adjuster arrives minimizes surprises and helps you stand on firmer ground when decisions about repair versus replacement are made.
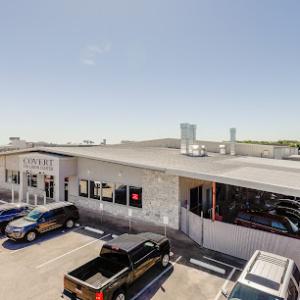
Connect with contractors who help homeowners navigate the claims process from damage assessment to final approval.
Waypoint Roofing & Construction
100 Commons Rd, Dripping Springs, Texas
5.0 from 190 reviews
Texas Roof Repair
(512) 994-4142 www.texasroofrepair.com
31900 Ranch Rd 12 Suite A, Dripping Springs, Texas
4.9 from 145 reviews
Libertas Roofing & Siding
1450 US-290 Suite 31, Dripping Springs, Texas
4.9 from 88 reviews

Waypoint Roofing & Construction
100 Commons Rd, Dripping Springs, Texas
5.0 from 190 reviews
Are you looking for a trusted residential and commercial roofing contractor to provide a honest and transparent roofing service? Waypoint Roofing and Construction is here to give you a trustworthy and stress-free service. We are a fully licensed and insured company that has over 20 years of experience in the construction industry. Additionally, we have technicians who specialize in various areas such as roof repair, roof replacement, roof inspections, storm damage, and gutters. We provide you with a transparent service that facilitates the achievement of customer satisfaction in every project we undertake. Call us today!
Texas Roof Repair
(512) 994-4142 www.texasroofrepair.com
31900 Ranch Rd 12 Suite A, Dripping Springs, Texas
4.9 from 145 reviews
At Texas Roof Repair, we specialize in providing high-quality roof repair and replacement services. Our team is passionate about delivering long-lasting solutions that enhance the beauty, function and value of your property. We pride ourselves on reliable customer service, offering prompt responses and transparent communication throughout the repair process. Whether you're a homeowner, property manager, or real estate agent, trust Texas Roof Repair to deliver durable, effective solutions with integrity and expertise. We respond and deliver!

Libertas Roofing & Siding
1450 US-290 Suite 31, Dripping Springs, Texas
4.9 from 88 reviews
We're a one-stop shop for roofing, siding, exterior painting, and more. Check out our website for more information!
Texas Specialty Roofing
Dripping Springs, Texas
5.0 from 22 reviews
At Texas Specialty Roofing, our dedication to excellence and passion for crafting remarkable roofing systems set us apart. Proudly rooted in Central Texas, our strategically located headquarters in Round Rock, TX, enables us to seamlessly cater to projects across Central Texas and the state. We offer expert repair and replacement solutions for a wide range of materials, including Cedar Shake, Tile, Slate, DaVinci, Composite, Metal, StoneCoated Steel and more.Our team is committed to delivering superior craftsmanship and safe, efficient project execution. Whatever the size or complexity of your roofing needs, we bring artistry and precision to each creation, adhering to the highest standards for an enduring and aesthetically stunning result.

DLV Roofing Austin
2554 US-290, Dripping Springs, Texas
5.0 from 12 reviews
DLV Roofing Austin is the premier roofing company for Austin TX and its surrounding areas including, West Lake Hills, Georgetown, San Marcos, Cedar Park, Pflugerville, Round Rock, Wimberley, Marble Falls, and Dripping Springs. Our President, Pete De La Vega, a third generation roofer, established DLV Roofing in 1999. We are a fully licensed and insured general contractor happily serving both residential and commercial customers out of our Austin office. We use only top-rated, premium, quality products while offering competitive prices and a guarantee on all of the work. Our courteous, professional staff provides superior, dependable service with an attention to detail that sets us apart from industry affiliates.
Battalion Roofing
(512) 810-3600 www.battalionroofing.com
3707 US-290 West, Dripping Springs, Texas
5.0 from 10 reviews
Established in 2010, Battalion Roofing is dedicated to serving our customers with the best possible service, quality and professionalism. We install metal and shingle roofs for residential and commercial properties and continue to offer our clients the attention and respect they deserve. Our founder and owner, is a US Army combat Veteran and proud to offer active military, first responder and Veteran discounts. We are fully insured and an Owens Corning Preferred Contractor
Mitchell Construction
(512) 784-5513 www.mitchellconstruction.us
721 Hart Ln, Dripping Springs, Texas
5.0 from 7 reviews
Welcome to Mitchell Construction, your trusted roofing company in Dripping Springs, Texas. We specialize in providing top-quality roofing services, including roof replacement, roof installation, Residential Roof Replacement and Roof Repairs. Our team of experienced roofing contractors is dedicated to providing exceptional service and ensuring that your roofing needs are met. Located near you, we also serve the surrounding areas of Austin, Blanco, Buda, Canyon Lake, Cedar Park, Driftwood, Fischer, Hye, Johnson City, Kyle, Leander, Liberty Hill, Manchaca, Marble Falls, Martindale, Maxwell, Round Mountain, Round Rock, San Marcos, Spicewood, Wimberley, and all other local areas.
PlusOne Construction
(512) 337-9416 www.plusoneconstructiontx.com
Dripping Springs, Texas
5.0 from 1 review
Welcome to PlusOne Construction. We are a full service exterior remodeling contractor. We specialize in roofing and siding replacement on residential and commercial properties. Serving Austin, San Antonio, and surrounding areas.
Transcendent Roofing Of Dripping Springs
(512) 387-8448 transcendentroofing.com
3998 US-290 Ste A, Dripping Springs, Texas
5.0 from 1 review
Top rated roofing company in Dripping Springs, Tx. We are one of the few licensed roofing contractors and GAF MasterElite Certified Roofing Companies in Central Tx. We provide repair and replacement roofing on shingle, metal, tile, modified bitumen and TPO roofs. Our goal is to provide excellent customer service and roofing systems that will stand up. We have a variety of roofing systems that we install as well as roofing repairs that we can complete in a timely manner. Our roofers are experts at their craft and we are fortunate to have them on board with us. We are conveniently located right here in Dripping Springs. Give us a call or request an estimate on our website today. Thank you for the opportunity to provide quality roofing systems
Educated Roofing Systems
(512) 515-1173 www.educatedroofingsystems.com
Serving
4.8 from 38 reviews
Educated Roofing Systems is a family-owned roofing contractor serving Greater Austin to Greater San Antonio. With over 40 years of combined experience, our licensed and insured team delivers expert installation and repair for metal, tile, shingle, and flat roofs. We also provide hail damage repair, gutters, rainwater collection systems, flashing, and metal siding. Known for our A+ BBB rating and commitment to customer education, we help homeowners and businesses protect their investments with quality workmanship and lasting results.
Orbit Roofing
(512) 957-0155 www.orbitroofs.com
Serving
5.0 from 15 reviews
We are proud to serve our community with dependable service, solid workmanship, and high quality roofing materials. We specialize in replacing your roof quickly and professionally with minimal disruption to your daily life.
Altitude Roofing
(512) 809-3229 www.altituderoofs.com
Serving
5.0 from 160 reviews
Altitude Roofing, LLC is a leading "GAF Master Elite" - Certified family owned roofing contractor in the Austin, TX area, who can serve all your roof installation, roof replacement and repair needs. Our owner and team of fully-certified professionals have over 20 years experience and a deep expertise in roofing and insurance claims. We tackle everything from large complex projects to smaller scale jobs. Fueled by our commitment to excellence, we go the extra mile to make sure our clients are completely satisfied with our work. Our core company values are "Quality, Integrity and Service", and our team is dedicated to providing top-notch services at affordable prices. We always provide a greater value and get the job done right.
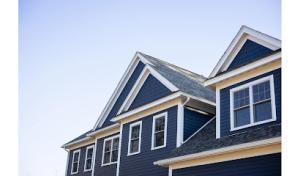
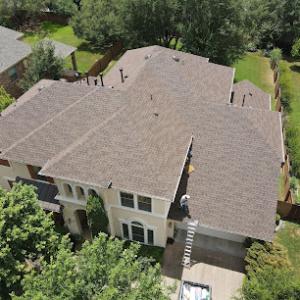
In Dripping Springs, asphalt shingles are a familiar sight on many homes, but the prolonged Central Texas heat and UV exposure accelerate granule loss and shorten appearance life. When planning replacements or upgrades, consider-starting with a higher wind resistance rating and a sturdier underlayment to help the roof weather the Hill Country thunderstorms. If you already have asphalt and know the sun has taken a toll on color and texture, you may benefit from a upgrade to heavier-weight shingles or one with better UV stability to extend the cosmetic life while keeping installation straightforward for a local crew.
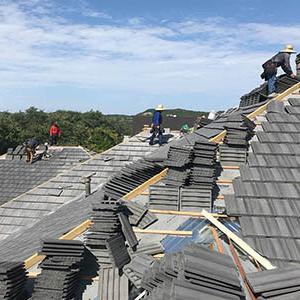
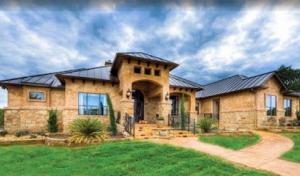
Clay tile, concrete tile, and slate are locally relevant premium options that address durability and the distinctive profile seen on many Hill Country homes. These materials can perform exceptionally well here, but the city review process may raise structural weight considerations during replacement. Before choosing, confirm that the existing framing and rafters can safely carry the added load, especially if the home has older construction or has experienced previous storm-related weakening. If a retrofit is needed, work with a structural engineer or a contractor who understands local roof assemblies and the way these tiles interact with underlayment and ventilation to maintain a balanced roof system.
Wood shingles and shakes show up in the local material mix, offering a natural look that suits certain architectural styles. Yet in a climate that swings from intense sun to storm impact and periodic heavy rain, maintenance becomes a bigger factor. Expect faster wear in exposed eave edges, potential for checking or cupping after hot summers, and vigilance against moisture-related issues. If choosing wood, prioritize treated or naturally durable species, and plan for more frequent inspections, especially after hail events or heavy rains. Ensure the ventilation and flashing are compatible with the wood's expansion and contraction cycle to minimize leaks.
Regardless of material choice, a proactive maintenance plan tailored to the Hill Country climate helps prevent small issues from becoming big problems after a hail or wind event. Schedule semi-annual inspections, paying close attention to underlayment, flashing, and ridge lines. After a severe storm, inspect for granule loss, cracked or displaced tiles or shingles, and any signs of exposed underlayment. In this climate, combining shade-aware maintenance with a solid venting strategy keeps the roof performing well across heat spikes and storm seasons.
Find contractors who specialize in clay and concrete tile roofs, known for their durability and curb appeal.
Transcendent Roofing Of Dripping Springs
(512) 387-8448 transcendentroofing.com
3998 US-290 Ste A, Dripping Springs, Texas
5.0 from 1 review
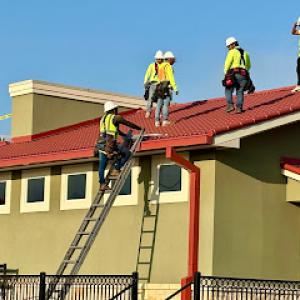
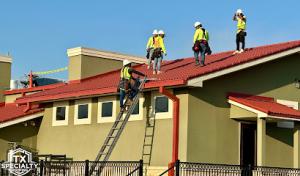
In this county-style roofing climate, full replacements are best scheduled for dry, mild periods. The goal is to minimize weather delays and maximize membrane and underlayment performance. When the calendar cooperates with low humidity and no extreme heat, crews can complete tear-off, inspection, and reinstallation with fewer trips to the roof and less risk of moisture intrusion. Plan for a window that avoids peak summer heat and the wettest parts of winter, aligning with typical shoulder seasons when days are mostly predictable.
Summer installation brings extreme roof-surface heat that can make adhesive and underlayment work harder and slower. If a project must occur in midsummer, start early to finish before the hottest afternoon hours, and ensure crew hydration and decking protection. Spring, while pleasant, can bring hail interruptions and insurance-driven backlog. If spring is chosen, build in buffers for potential weather delays and plan communication with the insurer to keep timing clear. Fall and winter introduce wind events and occasional heavy rains that can disrupt tear-off timing and leave exposed decking at greater risk if sequencing isn't tight. If a fall project begins late, consider weather contingencies for quick re-seal and temporary protection to prevent moisture intrusion during gaps.
A practical approach is to stage work so the roof is either fully protected from a single, uninterrupted tear-off or, if weather threatens, the deck is shielded and ventilation and underlayment installation proceeds promptly. For tile or slate roofs, ensure underlayment and fasteners are set before any wind events if a delay is possible. Coordinate with the crew to prioritize sections most vulnerable to wind-driven moisture and hail exposure, so any gaps in the schedule do not leave vulnerable decking exposed for longer than necessary. Use persistent tarping and rapid cleanup to maintain integrity between phases, especially when approaching the transitional seasons.
A building permit is typically required in Dripping Springs for a full roof replacement rather than being treated as a no-permit maintenance item. Before any tear-off begins, verify the project scope with the local building department and secure the appropriate permit. The permit process helps ensure that the replacement design accounts for Hill Country wind exposure, UV loading, and the area's modest elevations that influence roof performance. Be prepared to submit project plans showing underlayment type, ventilation strategy, fastening patterns, and any changes to roof layout or eave protection. Delays often stem from incomplete submittals, so coordinate timelines with your contractor to minimize weather-related setbacks.
The local building department typically performs rough-in and final inspections, with attention to underlayment, ventilation, fastening patterns, and overall structural compliance. During rough-in, inspectors verify that the roof structure is sound, decking is solid, underlayment is correctly installed, and any penetration flashings are properly integrated. Ventilation details-soffit intake, ridge or mechanical vents, and overall attic airflow-are reviewed to ensure the space stays within design limits and avoids heat and moisture buildup that can accelerate wear. In the final inspection, expect scrutiny of the completed envelope: fastening patterns must align with the chosen product and the local wind loads, penetrations should be sealed, and the overall structural ties must meet code. Having a clearly documented ventilation plan and weather-resistant details on hand helps the process go smoothly.
Tile and slate replacements can draw added scrutiny because of dead-load concerns, and wind-resistance details may also be reviewed during inspection. The department will look for structural reinforcements if a heavier tile or slate is chosen, ensuring the existing framing and supports handle the increased weight without compromising safety. Be prepared to show engineering calculations or manufacturer installation guides that confirm the existing structure can sustain the chosen material, especially if the roof span or attic configurations have changed. Fastening patterns for high-wind exposure-such as staggered nailing or clip systems specified by the manufacturer-should be clearly demonstrated and properly executed. If a reroof involves significant deck replacement or re-sheathing, expect the inspector to verify that the new layers meet the required weather barrier sequence and continuity of the building's envelope.
Coordinate early with the contractor to align the proposed underlayment, ventilation strategy, and fastening patterns with Dripping Springs' climate and the permit review criteria. Schedule pre-inspection walk-throughs to catch issues before the official rough-in check. Keep on-site documentation organized: product data sheets, installation manuals, and any wind-resistance enhancements. If tile or slate is part of the plan, have a structural assessment ready to address dead-load considerations and potential reinforcement needs. Understanding the inspector's focus areas-underlayment, ventilation, fastening, and dead-load compliance-will help ensure a smooth permit-to-completion path.
For asphalt shingles, typical costs run from about 350 to 650 USD per square, reflecting the frequent reroofing cycle on older homes and the demand for quick, durable installs. Clay and concrete tile sit higher in the middle to upper range, with clay tile closer to the 900-1500 USD per square mark and concrete tile often between 750 and 1200 USD per square. Slate is the premium option in this market, commonly 1400-2300 USD per square, particularly on homes with existing tile or slate-compatible structures. Synthetic or composite shingles land in the mid-range, roughly 550 to 900 USD per square. In Hill Country days when hail and wind surge, material choices can shift toward products with better impact resistance or longer warranties, nudging price estimates upward.
Hail events in the Hill Country trigger a regional spike in demand for crews, materials, and emergency dry-in work across the greater Austin area. When a storm rolls through, prices can jump as crews race to secure time slots, deliver faster dry-ins, and coordinate replacements on multiple houses. That surge can push per-square costs higher than the normal ranges noted above, especially for popular options like clay and concrete tile where labor intensity and transport logistics matter more.
Clay tile, concrete tile, and slate roofs add complexity beyond the material itself. Structural upgrades can be necessary to carry heavier loads, and specialized underlayment or ventilation details may be required to meet local expectations for durability under intense summer UV and Hill Country heat. Handling and staging during install become critical for tile and slate, often materializing as higher labor hours or careful payload management, which can materially affect pricing on these roof types.
Get a clear picture of your project costs upfront - no commitment required.
In this market, repeated hail and wind exposure commonly show up first as shingle bruising, lifted tabs, cracked tile, displaced ridge components, and compromised flashing. That pattern is familiar to homes with asphalt shingles or clay and concrete tile under a Hill Country sky. A bruised shingle or a loosened tab may not look catastrophic at first, but it is a signal flare for deeper problems: water can work its way under damaged surface layers, accelerating granule loss and exposing underlying decks or felt. Cracked tile often travels farther than it appears, since cracked pieces can shift in a howling spring storm or heavy wind event, leaving edges vulnerable to moisture intrusion. Pay particular attention to ridge components and any flashing around vented penetrations; once those are displaced, even a light rain can seep into valleys and soffits.
Intense rainfall during thunderstorms tests valleys, pipe boots, chimney flashing, skylight perimeters, and sealant details that may have already been weakened by UV exposure. Valley contours and transitions between roofing planes are common pressure points where accelerated aging shows up after a sequence of warm, dry weeks followed by sudden downpours. Skylight seals and chimney flashing are frequent failure points, because daily sun exposure can dry and crack sealants, leaving less resilience when the next storm arrives. Discolored staining on interior ceilings or persistent damp spots near penetrations should prompt a careful inspection of flashing and sealants before summer storms spike again.
Summer sun in Central Texas can harden and age exposed roofing components, making them more vulnerable when the next spring storm cycle arrives. UV exposure can stiffen underlayment, warp vent boots, and degrade surface granules on shingles, reducing wind uplift resistance and water shedding efficiency. The combination of hardened materials and prior weathering creates brittle edges and micro-cracks that storms can exploit. Regular, targeted inspections after the hottest months help catch small defects before they compound into larger leaks, especially around pipe penetrations, chimney details, and around skylights.
Find contractors experienced in skylight installation, flashing, and leak repairs to bring natural light into your home.
Lakeway Roofing & Water Damage | WDR
(512) 566-5512 lakewayroofingandwaterdamage.com
Serving
5.0 from 190 reviews

In this area, repeated storm cycles can quickly expose installation shortcuts in fastening, flashing, and ventilation. A solid warranty does not just promise a roof for a set period; it reflects the installer's attention to how the system handles hail impact, wind uplift, and underlayment performance. Warranty language often distinguishes between material defects and workmanship issues, with the latter hinging on how the roof was installed and vented. For homeowners, understanding the difference helps set expectations after a severe hail event or a windy season. When the hail risk is high, the durability of the overall system becomes as important as the material itself.
Manufacturer-backed installation standards are especially relevant when homeowners want stronger documentation for future storm-related disputes or warranty questions. Look for products that specify required nailing patterns, fastener types, and flashing treatments, as well as any approved ventilation or underlayment configurations. Documentation that links the chosen materials to a certified installation method can streamline claim handling after a hailstorm or wind event. In practice, this means asking for confirmation that the installation aligns with the manufacturer's documented sequence and the local storm history.
The local contractor market shows a meaningful but not universal presence of manufacturer-certified and warranty-promoting firms, so warranty terms should be compared carefully. Favor contractors who can demonstrate adherence to both material manufacturer standards and a verifiable installation checklist. Clarify who bears responsibility for hail-related workmanship failures, whether the warranty travels with a roof ownership change, and how long coverage remains in effect if maintenance tasks are deferred. A well-matched pairing of product warranty and installation warranty reduces ambiguity after a major storm.
Maintain a centralized record of product serial numbers, installation dates, and inspection notes after every maintenance action. Document storm damage promptly with dated photos and repair receipts. When disputes arise, ensuring that the claim aligns with the installed system's documented standards can make a meaningful difference in resolution and coverage interpretation.
While steep-slope residential reroofing dominates in Dripping Springs, some homes and additions still require attention to low-slope details and drainage transitions during replacement. When a project blends slope types, the edge details matter just as much as the main surface. Pay close attention to step flashing at transitions between low-slope sections and higher profiles, and ensure the edge drip is continuous so wind-driven rain doesn't lift membrane seams. The goal is a clean, continuous drainage path that stays watertight through Hill Country hail events and heavy summer afternoon downpours.
Solar-integrated work exists in this market but is a secondary specialty compared with storm restoration and conventional reroofing. For any mounted equipment or rooftop arrays, verify that the underlying underlayment and flashing are rated for the combined loads and movement of a mixed-slope roof. Ensure racking systems do not create new penetrations in critical edge zones and that sealants around penetrations maintain continuity with the roof membrane. In areas where a low-slope section abuts a steeper seam, confirm that attachment points and flashing align with the anticipated thermal expansion and contraction cycle.
Any roof with mixed slopes, mounted equipment, or specialty penetrations needs careful sequencing because local inspections review underlayment and overall compliance, not just surface finish. Plan penetrations for vents, satellite dishes, and solar inverters in a way that keeps the primary drainage planes intact. Use continuous edge moisture barriers under the transition zones and stagger penetrations to reduce bundled bulk at any one joint. When possible, coordinate replacement of adjacent slopes to avoid stacked seams that could trap water or create wind-driven leakage paths.
Ventilation remains crucial in Hill Country heat, especially where low-slope edge details hold larger ventilation intakes or exhausts. Maintain unobstructed air movement across eave lines and ensure any low-slope area near a ridge or parapet has a clear, coded path for moisture to escape. For slate or tile roofs, treat edge areas with compatible membranes and fasteners to prevent micro-movements from compromising the surface finish during hail season. In practice, plan edge detailing with the same precision as the main roof, because inspections look for overall consistency and performance, not just an attractive surface.
Find specialists in TPO, EPDM, and built-up flat roofing systems for residential and commercial properties.

Mitchell Construction
(512) 784-5513 www.mitchellconstruction.us
721 Hart Ln, Dripping Springs, Texas
5.0 from 7 reviews
Transcendent Roofing Of Dripping Springs
(512) 387-8448 transcendentroofing.com
3998 US-290 Ste A, Dripping Springs, Texas
5.0 from 1 review