Last updated: Apr 19, 2026
Spring hailstorms and heavy rains are a regular rhythm for this part of Central Texas, and they hit roofs hard. In a fast-growing corridor along I-35, storm-driven leaks can appear overnight and force quick, high-stakes decisions on replacements. The risk isn't just cosmetic-undetected damage can undermine structural integrity, lead to interior water intrusion, and drive up total repair costs if ignored. When a storm passes, remember that damage may be more extensive than it looks from the ground. A proactive homeowner routinely checks for soft spots, granule loss, dented shingles, and science-backed signs of moisture intrusion around vents, skylights, and flashing.
Kyle sits in a high-claim market where storm-damage and insurance-claims services arrive in thick swarms after a major event. The contractor ecosystem is heavily storm-oriented, with many outfits sprinting from claim to claim rather than focusing on long-term roof health and proper installation practices. That can mean aggressive, short-term timelines and marketing that sounds urgent but isn't always matched by meticulous, code-conscious workmanship. The key is to separate the storm-driven sales pitch from the solid, inspection-first approach you deserve: a thorough assessment, documented evidence, and a clearly defined path from tarp to total replacement or repair.
Because this area is part of the fast-growing Hays County and I-35 corridor, storm events can create noticeable backlogs. Tarping, inspections, and full replacements may slip behind during peak after-storm weeks. Plan ahead by arranging a temporary tarp early if leaks are present, and set a realistic timeline for a follow-up inspection with a trusted local pro who can defend a precise, step-by-step replacement plan. If a contractor pushes a rushed decision, push back with a written scope, a calendar, and milestone inspections. In tight windows, insist on protective measures like roof-to-wall flashing checks and a controlled, staged project that minimizes interior disruption.
First, document the damage with photos from multiple angles and keep a weather diary of when leaks appear after rain events. Second, secure written estimates from at least two reputable local roofers who specialize in hail and wind damage, not just quick repairs. Third, demand a comprehensive inspection that covers shingles, underlayment, ridge cap, flashing around chimneys and skylights, attic ventilation, and signs of hidden moisture. Fourth, insist on a clear, defensible plan for repair versus replacement, including a material and color-match strategy that fits the home's curb appeal and attic condition. Finally, verify that each contractor's crew has dedicated storm-damage experience, a robust safety plan, and a documented quality-control step to prevent emergency returns or repeat calls for the same issue.
Be wary of contractors who promise "instant" approvals or pressure you into signing before a formal, written assessment is delivered. Ask for a thorough moisture map, a roof diagram, and calibration of any hail impact issues with the right testing tools. Ensure the team plans for proper ventilation and attic integrity; neglecting those details often leads to faster deterioration after a replacement. And when the weather finally clears, stay engaged through the replacement phase-confirm delivery of materials, monitor wrap-up steps, and require a final walk-through to verify every seam, seal, and cap is properly installed. Kyle's storms demand vigilance, not delay.
Salvador Roofing Services
(512) 563-3615 salvadorroofingservicellc.com
1513 Graef Rd Unit B, Kyle, Texas
4.9 from 191 reviews
Salvador Roofing Services has been proudly serving Kyle, TX, and the surrounding areas for over 15 years. Whether you need a roof repair, full replacement, or just a free inspection, our skilled and bilingual team is here to help!
SkyDeck Roofing & Construction
(512) 354-9254 skydeckroofingpros.com
144 Ruidoso Rd, Kyle, Texas
5.0 from 56 reviews
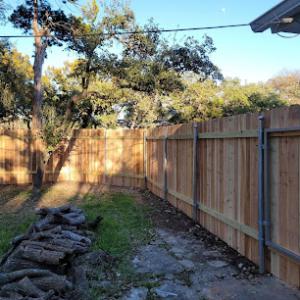
Sky Deck Roofing and Construction is your trusted roofing installation experts proudly serving Kyle, Buda, Austin, Lakeway, West Lake Hills, Manor, San Marcos, Pflugerville, Round Rock, and Dripping Springs. We are fully licensed and insured, delivering premium quality at competitive rates. Expert Roofing Installation and Repairs Seamless Roof Replacements Precision Fencing Installation and Repairs Skillful Decking Installation and Repairs Top-tier New Construction Roofing Solutions We cater to residential clients, ensuring your property gets the attention it deserves. Plus, we offer complimentary roof inspections to keep your investment in top shape. Contact our team for a free estimate!
Rite Roofing
(512) 943-7318 riteroofingtx.com
Kyle, Texas
5.0 from 50 reviews
Keep Your Family Safe Under a Durable Shingle Roof Arrange for roofing services in Kyle, TX or surrounding areas When it comes to roof repairs and reroofing work, no one does a better job than us. Rite Roofing has years of experience providing a wide variety of roofing services to property owners in the Kyle, TX area. Need roof installation or roof repair services? Schedule an on-site consultation with us today.
AWR Roofing
(512) 262-0050 www.allwrar.com
3080 Kyle Crossing #3, Kyle, Texas
4.9 from 66 reviews
Get An Instant Shingle Roof quote Just visit our website click on the instant roof quote tool put your address in and get 3 quotes instantly. It is that simple. No pushy sales people. Pick the product that best serves you and your needs. Lets get you a new roof today!
Granite Bay Roofing Kyle
18940 S I-35 Frontage Rd, Kyle, Texas
5.0 from 34 reviews
Granite Bay Roofing Kyle - Premier roofing contractor serving Kyle, Texas and surrounding Austin metro areas. Expert residential and commercial roof installations, repairs, and replacements throughout Kyle, Buda, San Marcos, and Central Texas. Licensed, insured, and locally trusted for quality craftsmanship. From storm damage restoration to new construction roofing in Kyle TX, we deliver reliable solutions with exceptional service. Free estimates for all Kyle area roofing projects.

Restoration Builders of Texas
(512) 246-8600 restorbuilders.com
3875 Science Hall Lp, Kyle, Texas
3.9 from 15 reviews
Welcome To Restoration Builders of Texas. Restoration Builders of Texas is a residential & commercial contractor operating in the United States. Our Roof, Windows, Siding and Gutter repair and restoration experts provide assistance with everything from roof inspections and minor repairs to comprehensive storm damage rebuilds and just about everything in between. Our mission is to protect, restore and build properties, strengthen families and support our communities. We are committed locally and ready to serve wide scale for disaster response. Contact us for a free inspection: info@restorbuildersTX.com.
AAA Roofing & Construction
(512) 213-6931 www.aaa-roofingandconstruction.com
Kyle, Texas
5.0 from 3 reviews
AAA Roofing & Construction, LLC provides roofing, remodeling, plumbing, electrical, painting, and 24-hour services to the Georgetown, TX area.
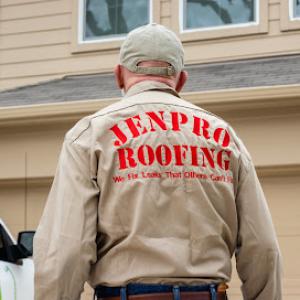
JenPro
(512) 573-0055 jenproroofing.com
Serving
4.9 from 73 reviews
Meet JenPro Roofing & General Contracting, your premier source for top-notch roofing and general contracting services in Kyle, TX! Our team offers complete roofing and general contracting solutions tailored to meet your exact needs. From roof repairs and replacements to remodeling projects and home renovations of all types, we are your trusted partner for all. We specialize in providing expert skylight installation services to brighten and enhance your home or business place. Contact us today for expert roofing solutions that nobody can offer!
Ja-Mar Roofing & Sheet Metal - Buda
(512) 441-8437 jamarroofing.com
Serving
4.8 from 132 reviews
For 50 years Ja-Mar Roofing & Sheet Metal has served the Austin and San Antonio areas and has provided to homeowners quality roof replacement and roof repairs, roofing services and roof maintenance. As a property owner, you understand how important a good roof can be to the value of your property. We provide Expert roofing inspection services - free of charge to all those in the Buda and Austin Metro Area. We pride ourselves in customer loyalty, customer care, great roofing services, competitive pricing, honest advice, and our satisfaction guarantee. We will work with home and businesses who need a new roof due to damage from severe Texas weather. If you have an insurance claim - call us.
Chamberlin Roofing & Waterproofing
(512) 275-1600 www.chamberlinltd.com
Serving
4.1 from 31 reviews
Expect More. Get More. When our clients hire Chamberlin to do a project, they clearly expect more. We know this to be true through detailed marketing studies with clients who have been willing to share their opinions with us. They expect quality work at a competitive price. They expect a team with real-life, hard-won experience that works with a spirit of cooperation. They expect an organizational structure that supports value and personal service. So, every day, on every project, we must go above and beyond to deliver more to our clients by providing them added value to their projects and exceeding their expectations.
Lucky Roofing
(830) 402-0802 www.luckyroofing.net
Serving
4.8 from 39 reviews
Looking for reliable roofing services in New Braunfels, TX or a surrounding area? At Lucky Roofing, we specialize in roof replacements and repairs for both commercial and residential properties. Whether you're dealing with hail damage or routine wear and tear, we are here to help.

AAA Roofing & Gutters
(512) 558-2225 www.aaaroofingandgutters.com
Serving
4.7 from 24 reviews
The Complete Roofing Team of San Marcos, TX. Proudly Serving Our Customers Since 1977. When you have suffered hail and storm damage to your roof, or you are looking to finally complete your exterior construction project, then you need aaa roofing & gutters in san marcos, tx. We provide our customers in san marcos, south austin, and throughout central texas with durable, long-lasting roofing and gutters. We take the time to provide a full evaluation of the project and offer our consultation on the best and most efficient solutions. Call our team today at (512) 558-2225 for a free estimate on your next roofing project. Family-Owned & Operated Roofing Services in San Marcos For Two Generations.
As a homeowner in this fast-growing corridor, you're balancing hot Central Texas sun, seasonal hail, and potent winds. The right roof type for the area means durability in the worst storms, resilience against UV exposure, and a roof system that keeps attic temperatures reasonable without breaking the bank. The choices above reflect common local stock, with practical trade-offs you can use to guide replacement decisions after a hail event or a wind-driven incident.
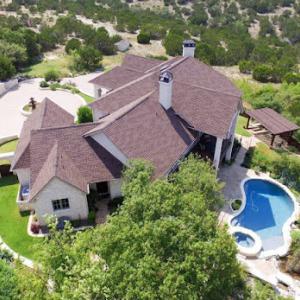
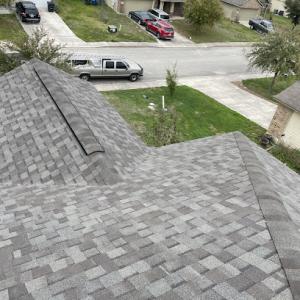
Asphalt shingles are ubiquitous in newer subdivisions because they fit mainstream suburban home construction and lower upfront budgets. In Kyle, the heat accelerates aging for asphalt, so expect the shingle color and the protective granules to show wear sooner than in milder climates. When considering this option, emphasize a heat-resistant, lighter color line and an attic ventilation plan that minimizes heat buildup. Look for architectural/laminated options for better curb appeal and improved wind uplift resistance, and pair any shingle choice with a well-sealed drip edge and robust underlayment. In the event of hail, steel or impact-rated underlayment can help, but the shingles themselves may still require occasional patching or panel replacement. Maintenance focus should be on fast repair after hail strikes and timely replacement when granule loss or curling becomes evident.
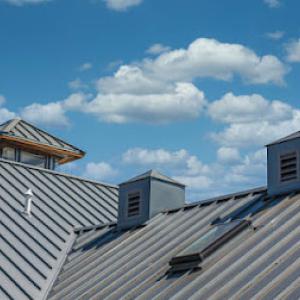
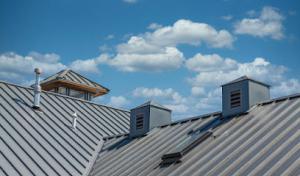
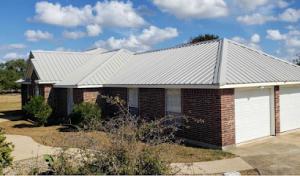
Metal roofing has a meaningful local presence in Kyle and the surrounding Hill Country edge because homeowners value durability against hail, heat, and high-wind events. Standing-seam or corrugated panels are common, with a long service life and strong resistance to weather. The trade-off is a higher upfront install complexity and potential denting if large hail hits directly, though many metal systems resist denting with thicker gauges. Metal shines in sun exposure, reflecting radiant heat and reducing attic heat gain when paired with proper insulation and ventilation. For best results, ensure the underlayment is compatible with metal-often a synthetic or bituminous layer-and check flashing and seals around penetrations carefully to prevent leaks after storms. The weight is not negligible, but the structure typically handles it well with appropriate subframing checks during installation or retrofit.
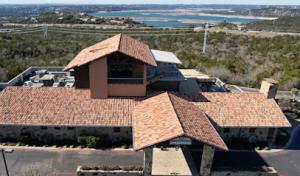
Clay and concrete tile appear in parts of the market tied to Central Texas and Hill Country architectural styles, but their weight and breakage risk make underlayment condition and tile replacement logistics especially important. Tile can excel in heat resistance and a classic look, yet hail can crack or shatter individual tiles, creating a pattern of leaks if the underlayment isn't solid and the roof deck isn't uniformly prepared for heavy loads. If choosing tile, opt for a well-vented attic and a robust, continuous underlayment system. Ensure the roof deck can bear the weight and that fasteners and clips are designed for tile movement with temperature changes. Consider a roof plan that anticipates occasional breakage and has a straightforward path for tile replacement, since isolated tile damage is common after hail events. In high-wind zones, securement and lapping become critical to prevent wind-driven uplift.
When deciding among these options, weigh long-term durability against the likelihood of hail-driven repairs after a storm. In central Texas heat, a roof that keeps heat out and moisture out while staying repair-friendly after hail will save you more in the long run. For homes in this area, the choice often comes down to balancing initial construction fit, anticipated storm forces, and the ability to schedule reliable post-storm service. Local contractors commonly emphasize the compatibility of the chosen roof with existing structures and the ease of replacing damaged components without compromising adjacent materials.
In Kyle, replacement work is commonly planned for spring or fall to avoid the worst summer heat and to reduce disruption during peak storm periods. The neighborhood pattern is to schedule replacements after a long, hot summer when shingles have already endured UV exposure and heat cycles, but before the winter cold and spring storms hit. If a roof shows multiple years of aging and is overdue for a major refresh, lining up a spring or fall project helps ensure crews have moderate temperatures and a clear window before monsoon-like spring storms. Planning around typical activity spikes also keeps the house disruption to a more predictable minimum.
Summer heat in Kyle can accelerate shingle wear and stress sealants, making older roofs more vulnerable after a long hot season. Look for curling, cupping, or brittle edges on asphalt shingles, softened or lifted sealants, and a gradual loss of granules in gutters. Metal roofs may show surface staining or denting after hail, but they typically hold fast when installed correctly; however, fasteners and coatings can degrade with repeated heat cycles. If the roof has visible aging signs combined with higher energy bills from attic heat, a replacement becomes a more practical choice than frequent patching.
Fall storm systems and occasional winter temperature swings in Central Texas can expose roofs that already took hail or UV damage earlier in the year. Pay attention to hail impact patterns on shingles, granule loss, and any sign of moisture intrusion around flashing, chimneys, or vents. If multiple roof areas exhibit damage, or if soft spots and water staining appear in the attic after storms, replacement is often more reliable than piecemeal repairs. In this market, high-claim dynamics mean an insurance-aligned approach can speed up the transition from assessment to installation, reducing the time a compromised roof remains vulnerable.
When deciding to replace, consider the roof's age, observed damage, and the upcoming weather calendar. If a roof has consecutive seasons of costly repairs or shows consistent moisture intrusion after storms, replacement tends to offer longer-term security. Start by getting a professional assessment that includes a clear photo log of hail impact and sun exposure damage, plus an outline of the expected replacement window within the spring or fall target period. Scheduling with a trusted local contractor early helps secure material availability and crew allocation aligned with typical Kyle calendars.
During the window for replacement, plan for disruption mitigation: protect landscaping, secure outdoor items, and coordinate with neighbors for crane access if needed. Contractors in this area often arrange staging to minimize street congestion and dust. Expect a clean-up routine that includes tidying the yard and sealing the structure to reduce wind-driven debris. A well-timed replacement taps into favorable temperatures, reduces energy-related stress on the new roof, and stabilizes the home's exterior for the next decade.
Get a clear picture of your project costs upfront - no commitment required.

SkyDeck Roofing & Construction
(512) 354-9254 skydeckroofingpros.com
144 Ruidoso Rd, Kyle, Texas
5.0 from 56 reviews
When hail or strong winds strike, you'll notice a fast shift from routine re-roof inquiries to storm-driven surges. The window between assessment and project start tightens quickly because labor pools near Austin-area are busy, while the rapid local residential growth keeps crews booked. Expect longer lead times after a hail event, even for full replacements, and prepare for pricing pressure to be less flexible during peak repair seasons. Your plan should assume a longer decision cycle and confirm scheduling as soon as an insurer approves a claim.
Material choice matters sharply in Kyle. Asphalt shingles remain the entry-cost option, but the full replacement price can still be influenced by the roof's size, pitch, and any necessary supporting work. Metal, clay tile, concrete tile, wood shingles or shakes, and synthetic/composite shingles rise quickly in price because installation is more labor-intensive, requires additional underlayment or fasteners, and often involves more complex flashing and ventilation considerations. In a busy market, those added steps translate to longer project timelines and tighter coordination with crews who handle specialty materials.
These ranges reflect current trends in a market where high claim volumes after hail can pull pricing in different directions day to day. If you're weighing options after a hail event, prioritize materials that align with your home's structure and the area's sun exposure, but be aware that premium systems often require more extensive preparation, like upgraded underlayers or reinforced decking, to meet warranty and performance expectations.
1) Get a written scope from your contractor that breaks down underlayment, ventilation, flashing, and any deck repairs into line items. 2) Tie the chosen material to an anticipated install window and confirm contingency plans for supply delays during peak periods. 3) Use the insurance timeline as a driver-obtain an upfront estimate that accounts for potential out-of-pocket costs if adjustments are needed after claim review. 4) Consider staged replacements if scheduling becomes a constraint, prioritizing sections most at risk from sun exposure and wind damage. 5) Keep a clear ledger of material warranties and expected maintenance needs for the life of the roof.
Don't let upfront costs delay a critical repair - these contractors offer payment plans to fit your budget.
A building permit is typically required for a full roof replacement rather than minor patch work. In Kyle, the push from hot Central Texas sun and hail-damaged roofs means many projects involve complete overlays or deck replacements, which triggers permit needs. The local building code expects that a permit is obtained before any substantial roofing work begins, not after the first shingle is pulled. For a homeowner in a high-claim market, this means planning ahead to avoid delays that can complicate insurance timelines or contractor schedules, especially when hail season has contractors busy and inspections tight.
The permit is generally filed with the local building department by the homeowner or roofing contractor before replacement begins. If a contractor handles the permitting, confirm in writing that they will obtain the permit and provide you with a copy of the approved plan and permit number. If you choose to file yourself, contact the county or city building department to obtain the correct application forms and any required documentation, such as a scope of work, contractor licensing, and proof of insurance. In Kyle, where many roofs have complex venting or added attic insulation to improve energy performance after a storm, it helps to submit a concise description of venting plans and any necessary ventilation calculations with the permit packet.
Kyle inspections are typically scheduled during and after the job to verify installation details and proper venting, so homeowners should confirm who is responsible for calling in each inspection. A common pattern is an initial framing or roof deck inspection aligned with the contractor's timeline, followed by a mid-build inspection if rafters or ventilation modifications are involved, and a final inspection after completion. Because post-storm repairs in this area often hinge on exact shingle exposure, underlayment, and venting requirements, the inspector will focus on proper attic ventilation, starter courses, ridge and eave vents, and the placement of vent boots and flashing around chimneys and vents. It is advisable to have the job site accessible for inspection, including clear access to the attic if interior venting or attic insulation changes are part of the project. Ask your contractor to provide a concrete inspection schedule and a checklist that aligns with Kyle's climate-driven concerns, such as ensuring attic ventilation is not restricted by newly installed decking or skylight work. If someone other than the homeowner is licensed to call in inspections, ensure that you receive copies of all inspection approvals and any requested corrections promptly.
In this high-claim market, a detailed pre-inspection walk-through helps catch potential issues before the permit is granted. Verify that the permit covers all major components: underlayment, synthetic or organic shingles, flashing around penetrations, and ventilation additions. If hail claims are involved, ensure the permit notes any required venting upgrades or roof deck repairs tied to the claim, as inspectors will check for compliance with current codes and wind resistance requirements. Keep a clear record of inspection dates, inspector names, and any fix-it items noted by the inspector, so the project can proceed without unnecessary hold-ups.
You homeowners operating in a Texas insurance market with elevated hail and wind claim volume, which makes roof documentation more important than in lower-claim regions. In this fast-growth corridor along the I-35 loop, a single hail event can trigger multiple claims across neighborhoods, so insurers see a crowded field and start weighing every detail more closely.
Texas carriers have tightened underwriting in storm-prone areas, so Kyle homeowners may face stricter claim review, higher scrutiny on roof age and condition, or non-renewal pressure after repeated losses. The combination of frequent events and aggressive adjuster staffing means the clock on a claim can run fast, leaving little room for surprises.
In Kyle, photo documentation immediately after hail or wind events is especially important because insurers increasingly expect date-stamped evidence, repair history, and proof of storm-created damage rather than long-term wear. Take clear, high-resolution images of shingles, flashing, gutters, and any dents or bruising on metal andfasteners. Store them in a trusted cloud folder labeled by date and event.
Track every action after a storm: notes on observed damage, the dates of any temporary fixes, contractor visits, and communications with the insurer. A well-ordered repair history helps distinguish storm damage from preexisting conditions during claim review, reducing the risk of contention or claim delays.
When storms roll through, your neighbors often share the same roofing vulnerabilities. Coordinated, timely documentation and consistent reporting can smooth the process for multiple households, but it also raises expectations for thorough, orderly records. Be prepared to demonstrate a clear link between the event and the damage you're claiming.
In Kyle, the most common failure pattern is cumulative damage: UV-aged shingles or sealants get weakened through long hot summers, then fail visibly after hail or wind events. This means your roof may look fine on the surface while the underlying layers have lost their resilience. When a hail storm or strong gusts arrive, those pre-weakened spots can crack, peel, or lift more easily, allowing moisture to penetrate deeper than it appears. The consequence is not always immediate, but the repairs tend to snowball as additional weather cycles expose aged underlayment, deteriorated flashing, and stressed fasteners.
Heavy spring rains in Kyle can turn small flashing or vent-boot defects into interior moisture intrusion quickly, especially on roofs already stressed by heat. Tiny gaps that might have gone unnoticed become channels for water runoff, seeping into attic spaces, ceilings, or walls. If there is prior heat-related deterioration, shingles may lift more readily along edges or near vents, creating pathways for rain to follow. The result is not just a leak, but potential mold growth and hidden structural damage that compounds the cost and complexity of a repair.
Tile roofs in the Kyle market need careful post-storm inspection because impact damage may be isolated to individual tiles while the underlayment beneath has aged in the Central Texas heat. A single cracked or displaced tile can sit atop an aging underlayment, quietly weakening its barrier until a wind event or another storm compounds the problem. Isolated damage often goes unnoticed until a later rain shows damp spots or lingering odor, making timely inspection after storms essential for preventing larger backups and extended repair timelines.
Find contractors experienced in skylight installation, flashing, and leak repairs to bring natural light into your home.
Kyle's housing stock remains predominantly pitched-roof, but there is a small, steady niche for low-slope and flat-roof projects. If a retrofit or new addition includes a low-slope section, prioritize proven, durable membrane systems and careful drainage planning to avoid ponding. Local weather patterns-hot sun, periodic hail-mean choosing a material with strong hail resistance and reliable seam performance. For existing flat or low-slope sections, insist on precise edge detailing, robust flashing, and a dedicated debris management plan during replacement to keep valleys and penetrations clean and functional through heavy storms.
Solar-integrated options appear in the market, yet they remain secondary to storm-repair and standard replacement work. For a Kyle-related project, treat solar as a complementary upgrade rather than the primary solution. When considering solar shingles or integrated PV, verify compatibility with the roof's pitch, snow or debris shedding behavior (even though snow is rare here, shading from nearby trees can matter), and the long-term serviceability of roof penetrations. If hail or wind damage is a current concern, ensure the selection accommodates rapid inspection access and does not compromise roof drainage or venting. A balanced plan often pairs solar readiness with a solid, hail-resilient substrate.
Roof coatings are not a major mainstream signal in this market, which implies they're best viewed as limited-use options rather than a default fix for aging residential roofs. Coatings can offer short-term protection on certain surfaces or be used as a strategic mitigation after repair work, but they should not replace a full roof replacement when shingle, tile, or metal performance has clearly declined. When considering coatings, assess the underlying roof condition, the coating's compatibility with the existing material, and the local storm exposure. Use coatings as a diagnostic or transitional step only, ensuring that the roof's main structural and weatherproof functions remain intact.
When choosing materials for these specialty paths, prioritize profiles with proven hail and wind resistance and strong warranties. For low-slope sections, consider membranes with robust puncture resistance and reliable seam technology. For solar, plan around roof geometry, potential shading, and service access for both panels and quick repairs after a hail event. For coatings, select products proven to bond well to the existing surface and maintain reflective properties under prolonged sun exposure. In all cases, align choices with the home's overall roof design to maintain a cohesive, durable protection layer against Kyle's hot sun and severe weather.
Find specialists in TPO, EPDM, and built-up flat roofing systems for residential and commercial properties.
In this city, the contractor landscape leans toward fast re-roofs, quick response times, and cleanup-included service. Homeowners prioritize being able to stay in the home during storm work and to have a crew that leaves the yard as clear as possible when the job finishes. That means you'll notice a lot of crews who advertise rapid start times and a one-call commitment to haul away debris and handle the messy stuff after a hail event. Look for firms that clearly show they understand occupied-home replacements and post-storm cleanup as standard practice, not as a bonus.
Established and family-owned firms have a steady footprint around the neighborhood, and that consistency matters when post-insurance questions or warranty issues pop up. A familiar contractor can be more reliable for follow-up visits, warranty callbacks, and seeing a project through from the initial inspection to the final cleanup. When you're choosing, ask about bench strength-who will be on-site for the critical measurements, who handles the paperwork for insurance supplements, and who you can call if an issue arises six months later.
Free inspections are common, and drone-based assessments show up here too. Use that to your advantage, but verify who actually conducts the work-the person who signs the contract should also be the one coordinating the measurement, the debris removal plan, and any supplement documentation. If a firm uses a third party for drone footage, confirm that they will still own the warranty and inspection record and stand behind any post-storm corrections.
Start with two or three local roofers who match the market profile and have visible, stable references. Prioritize those who outline a clear cleanup plan, a reliable post-storm communication line, and a documented method for handling supplements and warranty follow-ups. Schedule on-site reviews, compare the level of detail in their inspection reports, and confirm who will be the point of contact throughout the project.