Last updated: Apr 19, 2026
Spring hailstorms and high winds are not abstract here; they hammer shingles, tiles, flashing, and ridge components with alarming frequency. A roof that looks fine after a storm can hide serious core damage, and in this climate, failures often show up as leaks after the next heavy rain or blazing Texas sun. The steady march of high heat accelerates aging of most roof assemblies, and a single severe event can push an otherwise healthy roof into replacement territory much sooner than you expect. If your roof is older, or if it's a tile or metal system, treat every abnormal dent, crack, or displaced flashing as a warning sign worth acting on immediately.
Texas insurers closely evaluate roof age, material type, photos, estimates, and post-repair verification. After a major storm, documentation becomes the backbone of any repair or replacement decision. You should start gathering evidence the moment shingles curl, tiles fracture, or flashing pulls away. Take clear photos from multiple angles, zoom in on damaged areas, and include the surrounding roofline to show what the system looked like before any temporary fixes. Keep a running log of storm dates, wind speeds if available, and any leaks you've noticed inside the home. If you have prior roof reports or maintenance records, hold onto those as well; they can influence the insurer's determination of wear versus weather-driven damage. After work begins, expect the insurer to request post-repair verification-this means documenting that the roof was restored to a watertight condition and that any affected interior spaces were addressed. In practice, this means timely follow-up with your adjuster and your contractor, because delays in documentation can stall payments or rescind coverage decisions.
Storm-driven surges in local demand can delay inspections, temporary dry-in work, and full replacements across the city after major weather outbreaks. When a big event hits, crews are booked solid, and scheduling can slip days or even weeks. That's a reality you must plan around. If you suspect hidden damage, you cannot rely on a quick, cosmetic fix. A temporary dry-in may keep water out now, but it won't stop wood rot, compromised decking, or ridge-vent damage from creeping in during the next shower. If your home shows shingles buckling, granules lost in sheets, or tiles cracked and displaced, treat it as an urgent claim-don't wait for a chance appointment weeks out. Push for an expedited inspection, but be prepared to provide the documentation insurers demand so the process doesn't stall due to missing photos or prior-year records.
First, document the storm's impact within 24 to 48 hours after it passes. Clean up loose debris from the roof edge only if it's safe to do so, then photograph any new damage you observe from the ground and, if possible, from a ladder vantage that remains stable. Next, contact your insurer with a concise damage summary and a plan for a professional assessment. Request a date for an adjuster inspection and be ready to provide access to attic spaces if leaks are suspected; hidden damage is often discovered only after interior signs appear. While you await inspections, arrange a reputable local contractor who can perform a thorough roof inspection, provide a detailed estimate, and coordinate with the insurer. Ensure the contractor understands your goals: accurate assessment, wind- and hail-resilient materials, and a durable installation that minimizes future claim risk. Finally, keep your eye on the weather window. If a second storm looms, prep your home for possible back-to-back work-protect interior spaces with tarps, secure valuables, and communicate clearly with the contractor about sequencing so rain exposure is minimized during critical phases. This is not the time to delay; decisive action can save you from protracted disputes and more extensive damage down the line.
Safepro Roofing
(210) 900-5793 safeproroofing.com
114 N Ellison Dr #403, San Antonio, Texas
5.0 from 704 reviews
Safepro Roofing proudly stands as the premier roofing company in San Antonio, TX, committed to delivering exceptional services as a roofing contractor. Our dedicated team specializes in a wide range of offerings, including residential roof replacement, commercial roofing, meticulous roof repairs, precise gutters installation, invaluable insurance claims assistance, flexible roof financing, and comprehensive interior restoration. Our mission is rooted in excellence, and we prioritize roof maintenance in San Antonio, ensuring the longevity and durability of your roofing investment. As the leading roof contractor in San Antonio, TX. Choose Safepro Roofing for quality, reliability, and a positive roofing experience
Blues Crews
(830) 445-2583 www.thebluescrews.com
18911 Hardy Oak Blvd Suite 101, San Antonio, Texas
5.0 from 424 reviews
Blues Crews is a leading roofing company in San Antonio, TX, specializing in professional roof replacements and repairs for homes and businesses across the area. With San Antonio’s mix of intense heat, heavy rains, and seasonal storms, maintaining a durable and energy-efficient roof is essential. Our experienced team ensures every project is completed with precision and long-lasting quality, using materials built to handle Texas weather. Known for dependable service and craftsmanship, Blues Crews stands out as trusted roofing contractors dedicated to protecting and enhancing your property’s value and curb appeal.

Cool Roofs - San Antonio
12042 Blanco Rd #220, San Antonio, Texas
5.0 from 227 reviews
Welcome to Cool Roofs, the best roofer in San Antonio for residential and commercial roofing services. As a trusted San Antonio roofer, we handle roof repair, roof replacement, new installations, and emergency roof repair with expert care. If you’re searching for a reliable roofer near me, Cool Roofs delivers quality workmanship and long-lasting results. We proudly serve San Antonio with professional roof replacement San Antonio homeowners and businesses trust. Supporting Veterans and Military, Cool Roofs is your go-to roofing company.
Dolan Roofing & Construction
(210) 361-4924 www.dolanroofing.com
6008 Grissom Rd, San Antonio, Texas
5.0 from 425 reviews
Dolan Roofing & Construction, also known as Dolan Restoration and Construction, is a San Antonio-based roofing contractor offering both residential and commercial roofing services. San Antonio typically sees its fair share of intense weather, from high winds to Class 4 hail, which can cause damage to your home. Roofing in San Antonio is what Dolan Roofing does best. With expert roof repair, installation, constant communication, and over a decade of experience. No matter the type of roof (asphalt, tile, wood shake, synthetic, or low-slope). Dolan Roofing & Construction will guide you through the roof replacement process. We are a family-owned business that backs our work with a labor and materials warranty. Call Dolan Roofing in TX!

Rhino Roofers: San Antonio Roofing Company
(210) 756-2834 rhinoroofers.com
4949 N Loop 1604 W Ste 250, San Antonio, Texas
5.0 from 1322 reviews
The Most Dependable Roofing Experts in San Antonio
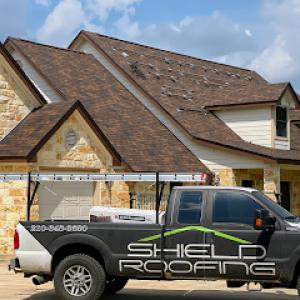
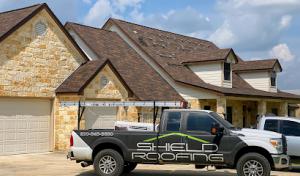
Shield Roofing: San Antonio Roofing Company
(210) 348-3680 shieldroofingonline.com
21750 Hardy Oak Blvd STE 102-110, San Antonio, Texas
5.0 from 322 reviews
Shield Roofing is a trusted roofer serving San Antonio, TX with dependable service and long-lasting results. As one of the leading local roofing companies, we focus on honest guidance, strong communication, and workmanship built to withstand Texas weather. Our team specializes in roof repair and roof replacement, helping homeowners and businesses protect their property with confidence. From storm evaluations to full upgrades, we combine experience, reliability, and customer-focused care to deliver a smooth roofing process from start to finish. San Antonio customers count on us for quality, transparency, and results that stand the test of time.

BH Roofing: San Antonio Roofing Company
(210) 267-9029 bhroofingsa.com
14093 Bulverde Rd, San Antonio, Texas
4.9 from 440 reviews
BH Roofing is a GAF Master Elite® roofing contractor in San Antonio, Texas, a status earned by fewer than 2% of roofing companies in North America. We serve Timberwood Park, Schertz, Cibolo, Live Oak, and surrounding communities with residential and commercial roofing, roof repair, roof replacement, storm damage restoration, gutter installation, and emergency tarping. We're fully licensed, insured, and backed by GAF's Golden Pledge® Limited Warranty, an A+ BBB rating, and a documented 12-hour emergency response. Schedule your free 27-point roof inspection and estimate today.
Results Roofing
(210) 306-4150 resultsroofing.com
7701 Broadway, San Antonio, Texas
5.0 from 364 reviews
Results Roofing provides San Antonio, TX, homeowners and businesses with durable, dependable roofing solutions. Our experts handle all projects efficiently, from repairs and maintenance to new roof installations. We use high-quality materials and the latest techniques for long-lasting results. We're committed to top-notch craftsmanship and excellent customer service, guiding you through every step, including insurance adjuster meetings. Get a free, no-obligation roof inspection to protect your home today!
American Elite Roofing
(210) 741-7663 www.americaneliteroofing.us
14501 Blanco Rd Suite 825, San Antonio, Texas
5.0 from 153 reviews
Insurance company denied your claim? Roofers trying to replace your entire roof for one small leak? Let us help. Hi. We're Will and Val Brackett, founders of American Elite Roofing. We're a general contracting company who handles roof repairs and storm restoration work. We uncover the issues with your roof and give you clear solutions that show you how to fix them. We also make the insurance claims process easy to understand and help put you back in the driver's seat.
Nestled Roofing
(210) 814-9919 nestledroofing.com
6923 W Loop 1604 N Suite 111, San Antonio, Texas
5.0 from 215 reviews
At Nestled Roofing, we're more than just a roofing company. We're family owned and operated, guided by over 55 years of experience and just like our owl mascot we are committed to protecting your home with wisdom, integrity, and craftmanship.

Bondoc Roofing San Antonio
(210) 796-1096 bondocroofing.com
900 Isom Rd Suite 305, San Antonio, Texas
4.9 from 1252 reviews
When you need a San Antonio Roofing Contractor, you can rest easy and know that you are getting the very best when you turn to the experts at Bondoc Roofing. With over 20 years of combined experience, we have earned a strong reputation for providing San Antonio home owners, builders, realtors, and property owners with responsive service, the highest quality workmanship, and finest products. We pride ourselves in our customer service and the high degree of customer satisfaction that accompanies our work. Our roofing company offers roof replacement, roof installation, roof repairs, roof maintenance, hail roof repair, storm roof repair, leak roof repair, siding repair, and much more. Call our San Antonio roofers today!
IRC Roofing
(210) 926-9288 www.ircroofingsa.com
14309 Toepperwein Rd Ste. 203, San Antonio, Texas
5.0 from 120 reviews
People typically set up a free roof inspection. If IRC sees damage or things to fix they will inform the client. IRC will help with insurance claims if applicable, most roofs can be fixed or replaced in a couple of days. IRC also offers financing. IRC will handle all clean up as well, leaving clients yards clean and free of roof debris.
Re-roofing projects tend to run smoother when the weather is milder and drier. In this climate, that means planning for a window when the sun isn't at its harshest and rain is less frequent. Cooled mornings and less intense afternoon heat help crews stay on pace, and the roof deck won't heat up enough to cause excessive fastener back-out or roof-penetrating issues with underlayment. Outside of peak heat, you'll see fewer heat-related delays, cleaner tear-off conditions, and improved material handling from bundle to battens.
Spring hail and windy kicks are common triggers for insurance-driven re-roofs, but they also bring their own pace challenges. When milder, drier months give way to late spring humidity, you can expect humidity swings that affect tearing off and drying times for underlayment and adhesives. In practice, that means a few planning notes: tear-off may slow as crews manage moisture in the attic and on exposed sheathing, and drying times for certain underlayment products or sealants may stretch a bit longer than in a perfectly dry week. Keep a cushion in the schedule for unexpected rain pockets that disrupt exterior work, even on days that look clear on the radar.
Occasional winter cold snaps in South-Central Texas can affect scheduling and some roofing materials even though the city is generally warm. Low temperatures can stiffen some sealants and reduce the speed of certain installation steps, particularly with reflective coatings or specialty shingles. If a cold-front week rolls in, crews often shift to interior or less weather-sensitive tasks and resume outdoor work when temperatures rise. Planning for a stable stretch between cold snaps helps maintain momentum without sacrificing workmanship.
The local mix of materials matters when choosing a season. Tile and metal installations benefit from steady, cooler days to manage heat soak and panel handling, while composite and asphalt shingle crews rely on favorable drying conditions for underlayment and sealant cures. If hail damage is involved, a prompt but careful assessment can prevent unnecessary delays due to material logistics or the need for special orders. In milder months, crews often coordinate the sequence from tear-off to recovery more tightly, reducing the window where weather can interrupt assembly.
Begin with a climate-aware calendar that prioritizes a dry stretch of weeks, but build in a realistic buffer for the first heavy rain event or a short cold period. Confirm with the contractor how they'll adapt if a storm rolls in mid-tear-off or during underlayment installation, and ask about venting and attic heat management strategies for the hottest days. Finally, consider staging tasks so interior finishing or attic insulation work can proceed during any temporary outdoor pause, keeping the project moving even when exterior conditions shift.
Get a clear picture of your project costs upfront - no commitment required.
Blues Crews
(830) 445-2583 www.thebluescrews.com
18911 Hardy Oak Blvd Suite 101, San Antonio, Texas
5.0 from 424 reviews
Shield Roofing: San Antonio Roofing Company
(210) 348-3680 shieldroofingonline.com
21750 Hardy Oak Blvd STE 102-110, San Antonio, Texas
5.0 from 322 reviews

BH Roofing: San Antonio Roofing Company
(210) 267-9029 bhroofingsa.com
14093 Bulverde Rd, San Antonio, Texas
4.9 from 440 reviews
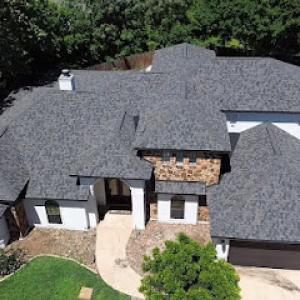
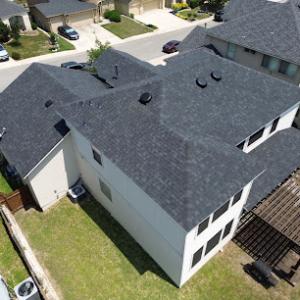
Asphalt shingles are a familiar sight on many San Antonio homes, valued for their straightforward installation and common maintenance paths. In this hot, sunny climate, UV exposure ages asphalt faster, so expect color fading and potential brittleness sooner than in milder regions. A prudent approach is to choose a shingle with UV-resistant granules and a laminate design that offers better wind uplift resistance. Look for a mid-to-high grade shingle with a strong warranty and reinforced edges, since the spring hail and wind storms can nudge edges loose or expose underlayment if the profile sits high against the roof plane. When inspecting a shingle roof after a storm, focus on uniform granule loss, curled edges, and bruising along the slopes that face prevailing gusts. A quick, careful check after a hail event helps prevent moisture intrusion and guides timely repairs before hidden damage compounds.
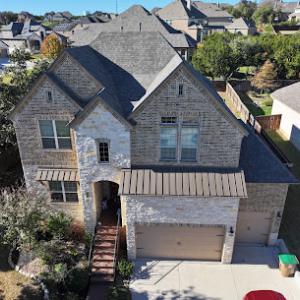
Clay and concrete tiles fit many architectural aesthetics found in the area-from Mission-style and Spanish-inspired homes to modern configurations with clean lines. These tiles perform well in the heat, offering excellent thermal resistance and durability when properly installed. The performance advantage shows up in long life and lower heat gain when the tiles are properly overlapped and vented at the eaves and ridge. However, cracked or displaced tiles after hail and wind are not rare, and tile systems require a roofer who understands tile-specific repair strategies. If a tile splits or shifts, there is a real risk of water intrusion beneath the surface, which can lead to underlying deck damage. Choose installers who carry experience with underlayment compatibility, tile fastening patterns, and ensure that valley and hip details are sealed to resist storm-driven moisture.
Metal roofing is a significant specialty in this market because many homeowners seek both heat durability and weather resilience beyond basic shingle systems. Metal panels resist UV degradation and heat transfer better than many other materials, which can translate to a more comfortable attic and living space on scorching days. When considering metal, focus on panel seams, fastener types, and the coating technology used to fend off corrosion and chalking in a high-sun environment. A properly installed metal roof requires careful attention to attic venting and insulation, because metal's efficiency is amplified by a well-sealed, breathable attic space. After hail events, metal systems usually reveal impact damage through denting, but follow-up inspections are essential to confirm that fasteners and sealants remain watertight. The right installer will verify that flashing around chimneys, skylights, and roof-to-wall interfaces remains intact and that any repair plan preserves the roof's reflective and thermal properties.
In practice, the best roof for the area balances sun exposure, storm resilience, and the home's architectural language. A thorough evaluation considers not only the chosen material's heat tolerance but also the system's ventilation, underlayment, and integration with existing gutters and drainage. Because spring hail, wind events, and insurance-driven replacement timelines shape many search decisions, teamwork with a roofer who communicates clearly about damage assessment, repair versus replacement thresholds, and the practical implications for attic ventilation is essential. In San Antonio, a thoughtful choice often means pairing a durable surface with a robust support package-clear guidance on warranties, maintenance expectations, and after-storm inspection plans. This approach helps protect the home's structure while keeping the living space cooler and more comfortable, even during peak sun and storm seasons. in San Antonio.
In this market, asphalt shingles run roughly from $250 to $600 per square, a broad spread that reflects differing shingle quality and contractor availability after weather events. Metal roofs typically land between $600 and $1400 per square, with the higher end tied to thicker gauges and color-coated finishes that handle the sun and heat well. Clay tile projects commonly range from $900 to $2400 per square, while concrete tile sits around $800 to $1500 per square. Wood shingles or shakes fall in the $700 to $1800 per square range, and synthetic or composite shingles usually run $700 to $1400 per square. These ranges align with common housing stock in the area and the typical labor mix for each material.
Spring hail drives citywide demand for inspections, dry-in crews, and full replacements, so costs often spike after a big event. If your roof is damaged and a full replacement becomes the likely path, you'll see not only material costs but jump in labor and mobilization fees as crews reallocate from other jobs. In practical terms, expect price pressures to widen the spread in the months following a hail season, particularly for clay and metal options that require specialized installers.
Tile projects are notably cost-sensitive here because they demand more specialized labor than a typical shingle tear-off. Metal and concrete tile bring durability against the sun and wind, but both require skilled installation to prevent leaks and ensure long-term performance. If you're choosing asphalt shingles for a budget-conscious route, you'll gain value in the initial price, but plan for potential higher maintenance in this climate if you don't pick a high-performance class. Synthetics provide a balance between cost and longevity, often weathering heat and hail well while keeping installation simpler than tile.
Begin by identifying the likely total square count of your roof, then align your choice with the local price ranges above. Consider hail history and wind exposure when weighing metal or tile versus asphalt, as the upfront material cost is only part of the equation. Schedule inspections promptly after a hail event to catch hidden damage early, which can influence whether a full replacement is necessary and help you avoid cascading damage. Finally, factor in that more intricate materials require experienced crews; build a contingency into your budget for potential scheduling delays during busy spring seasons.
Don't let upfront costs delay a critical repair - these contractors offer payment plans to fit your budget.

Safepro Roofing
(210) 900-5793 safeproroofing.com
114 N Ellison Dr #403, San Antonio, Texas
5.0 from 704 reviews
Dolan Roofing & Construction
(210) 361-4924 www.dolanroofing.com
6008 Grissom Rd, San Antonio, Texas
5.0 from 425 reviews
BH Roofing: San Antonio Roofing Company
(210) 267-9029 bhroofingsa.com
14093 Bulverde Rd, San Antonio, Texas
4.9 from 440 reviews
Most residential full-roof replacements in this market require a building permit from the City of San Antonio Development Services Department. That means a project isn't just about shingles or tiles; it's about paperwork that accompanies the work from start to finish. If a permit isn't pulled, you risk stop-work orders, delays, and potential complications when you try to file for insurance or escrow releases. The city's process keeps replacements aligned with the area's historic roof lines and drainage needs, and skipping it can create stubborn, expensive headaches later.
Plans are reviewed when structural changes or venting upgrades are involved, which matters for homeowners changing roof assemblies during a re-roof. A switch from one roof type to another-think from asphalt to tile, or adding attic vents and turbine vents-often prompts an engineering check or a venting assessment. It's not about over-regulation; it's about ensuring adequate load paths, proper attic ventilation for summer heat, and safe integration with existing fascia and gutters. If you're unsure whether your proposed changes count as "structural," assume they do and ask early.
Contractors must pull permits before work starts, display permit cards on site, and complete a required final inspection after the job is finished. The permit card acts as a visible guarantee that inspectors can track weather-related wear, flashing integrity, and proper shingle or tile installation according to code. On a busy Texas spring or after a hail event, the temptation to speed through a replacement can be high, but a missing permit leaves you exposed to compliance risks and potential rework that isn't inexpensive or quick.
The final inspection is not a bureaucratic obstacle; it's the moment your roof earns its certificate of compliance. Inspectors review flashing around chimneys, roof-to-wall connections, drip edge, ventilation, and the overall workmanship. If the project is delayed by weather or supply shortages, keep the permit active and coordinate a precise inspection window. A clean pass saves you time and prevents a cascade of post-install concerns that could affect warranty validity or future resale.
In this market, permits are a shared responsibility between you and your contractor. Verify permit numbers before work begins, confirm that the final inspection is scheduled promptly after completion, and keep the paperwork organized. This diligence protects your home from hidden code issues and ensures your replacement endures the harsh sun, spring hail, and windy springs that make San Antonio roofs unique.
In San Antonio, the roofing insurance environment carries elevated hail and wind risk year-round, and the way a claim is handled often hinges on the age and material of the roof. A weathered roof can trigger tougher scrutiny, while newer installations may unlock more favorable terms if the material resists future hail impacts. The local climate means that a single severe season can drive big changes in coverage expectations, especially after a storm that leaves visible damage or missing shingles. Understanding how age and material interact with claims helps you anticipate how your file might be reviewed during renewal or after a loss.
Carriers may adjust deductibles or coverage expectations based on roof type, which can influence whether shingles, metal, or tile are chosen at replacement time. In this market, the choice of material is not only about durability and curb appeal but also about long-term claim responsiveness. A metal roof, for instance, can shift an adjuster's assessment of wind resistance and hail impact, potentially affecting depreciation and replacement timelines. Tile options-whether clay or concrete-carry their own implications for weight, structural considerations, and how quickly a claim may be validated if a crew discovers substructure issues during inspection. Homeowners should weigh the insurance consequences alongside performance, especially after a major storm event.
Homeowners should keep date-stamped storm photos, contractor estimates, permit records, and final completion documentation because adjusters often request all of them. Photos taken at the moment of impact and in the days immediately after a hailstorm help establish the extent of damage, while dated estimates communicate scope and pricing. Permit records and final completion documents demonstrate that the project was conducted to code and finished, which can influence both appraisal outcomes and future coverage terms. Have these materials organized and accessible so the claim process moves more smoothly when an adjuster arrives.
Tile and metal are common choices in this market, and they carry different failure modes than asphalt. With tile roofs, isolated breakage after hail or foot traffic can be hard to detect from the ground. A single loose or broken tile may hide behind neighbors or under eaves, and a small crack can spread with sun exposure and wind-driven rain. On metal roofs, hail can ding panels and loosen trims where flashings meet the ridge, flashing, and vent boots. Damaged edges or fasteners may not show up as obvious leaks right away, but they can create slow, creeping water paths that show up later during spring storms. During inspections, look for lifted edges, scuffed surfaces, and mismatched fasteners that hint at movement or recent hail impact.
Skylights in this market frequently become trouble spots when sun-heavy days meet storm-driven rain. Intense sun softens sealants and compounds around the flashing, which can make a small perimeter leak expand into interior water tracking along framing. Flashing movement from wind can also let rain creep under the curb or around the skylight flange. If you notice droplets along ceiling lines far from the skylight, inspect the skylight seal and flashing first, then trace any interior staining back to the roof line. In San Antonio's climate, the fastest relief comes from resealing or replacing aging perimeter sealants and ensuring the curb is properly flashed to shed rain away from the opening.
Spring hail and wind can leave subtle bruises on tile that aren't obvious until you see a pattern of exposed fasteners or loosened edges. For metal roofs, look for small dents at ridge lines and near rooftop penetrations where flashing might already be compromised. After a storm, do a careful walk-around with a ladder, checking for lifted tiles, displaced metal cramps, damaged sealants, and any water stains that appear after a rain. If you find anything that looks off, don't assume it's just cosmetic-perimeter failures or flashing movement can escalate quickly under the next round of sun and wind. A targeted, proactive fix now saves bigger headaches later.
Find contractors experienced in skylight installation, flashing, and leak repairs to bring natural light into your home.
Shield Roofing: San Antonio Roofing Company
(210) 348-3680 shieldroofingonline.com
21750 Hardy Oak Blvd STE 102-110, San Antonio, Texas
5.0 from 322 reviews
Results Roofing
(210) 306-4150 resultsroofing.com
7701 Broadway, San Antonio, Texas
5.0 from 364 reviews

Granado Roofing
(210) 454-8967 www.granadoroofing.com
7543 Grissom Rd Suite 114, San Antonio, Texas
5.0 from 101 reviews
San Antonio homeowners frequently hire based on quick response and re-roofing experience, reflecting the city's storm-driven replacement market. When a spring hail event hits, you'll want a crew that can mobilize fast and assess damage accurately, not one that leaves your project waiting in queue. Look for a company that has a dedicated storm-response plan, including after-hours callbacks during heavy winds or hail swaths. This matters more than glossy ads, because the weather window often drives the timing of your replacement.
Cleanup is a major local hiring priority in San Antonio, where many contractors explicitly market debris removal and jobsite cleanliness after tear-off. Ask how they isolate damaged shingles, metal panels, or tiles, and who handles haul-away and disposal. A clean removal process protects your landscape, irrigation, and gutters from grit and nails, and it reduces the chance of tracks or damage to your driveway. Confirm that the crew will sweep daily, perform final site cleanup, and leave no stray fasteners that could injure kids or pets in a windy afternoon.
The local market includes a mix of long-established, family-owned, and locally owned companies, so homeowners often compare responsiveness and storm-process experience as much as price. Seek references from neighbors with similar roof types-tile, metal, or composite-and ask about how the company handled weather-related delays or supply gaps. A well-balanced crew will balance strong project management with local know-how: how to stage materials for our sun-soaked, high-heat days and how to protect your home during a tear-off in sudden wind.
When you call, press for a concrete timeline: anticipated start date, expected duration, and daily cleanup routines. Request a written plan that covers tarping, debris containment, and protection of landscaping. Verify that the crew assigns a single point of contact for scheduling changes, storm-day contingencies, and post-install inspections. In this market, the best crews prove their reliability with fast, organized communication as much as with a solid warranty.