Last updated: Apr 19, 2026
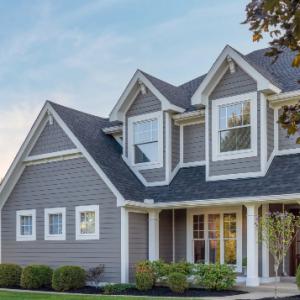
Burke sits in Fairfax County's inland Northern Virginia storm corridor, where spring and fall thunderstorms regularly bring wind-driven shingle damage and the occasional hail claim. In this climate, a roof that looks "okay" after a storm can be hiding accelerated wear from wind scouring granules and exposed fasteners. The summer pattern compounds that risk: heat and humidity quicken aging of sun-exposed asphalt shingles, so roof sections that bore the brunt of last season's storms may fail faster than they would in milder climates. In winter, cold snaps can turn minor flashing or ventilation issues into ice-dam and leak problems, especially once leaves from the mature tree canopy shed and clutter the gutters. Timing around these cycles matters to prevent small problems from turning into widespread interior damage.
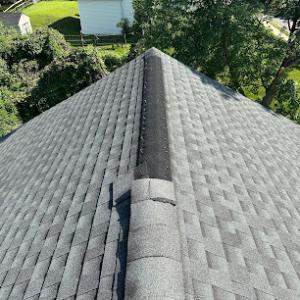
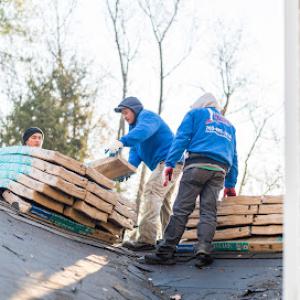
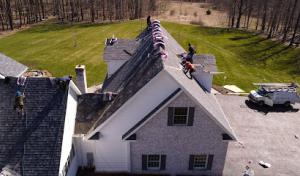
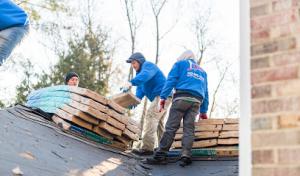
If a storm rends through this area with gusty winds or hail, inspect the roof as soon as it's safe. Look for missing shingles, lifted tabs, and granule gathering in gutters or on the ground-these signal wind-driven damage that can worsen quickly once rain resumes. Document any damage with clear photos from multiple angles, and note the storm date, wind speed if available, and the affected elevations. Because Burke homes often sit under a thick canopy, inspect not only the roof surface but also the flashing around chimneys and vents, where wind can pry loose seals even if shingles look intact. If moisture appears inside the attic or ceiling, treat that as an urgent sign to engage a professional promptly-delays can let fasteners corrode and leaks spread.
Spring and early summer are your best windows for securing, tarping, or repairing damaged sections before the next round of heat intensifies aging. If shingles are damaged but not completely failed, addressing the issues within a few weeks helps mitigate granule loss and preserves the roof's remaining lifespan. Summer heat accelerates aging, so delaying work when you have clear storm-related damage increases the risk of accelerated deterioration and potential interior damage during a sudden afternoon storm. Conversely, after a major storm, waiting through a stagnant stretch of hot, humid weeks can be a mistake-the combination of sun exposure and wind-driven debris can turn a marginal repair into a full replacement scenario down the line.
The mature tree canopy that defines the neighborhood helps with shade but also seeds a tricky rhythm: leaves accumulate in gutters and around vents, creating ice-dam risk in late winter and complicating early spring inspections. Before the first heavy dew of spring, clear clogged gutters so meltwater doesn't back up under shingles or into soffits. If wind or hail has blown debris against the roof edge, remove it with caution because stressed flashing and edge seals may fail if intrusive debris is forced under them. Do not rely on shrubs or hedges to mask damage-the risk is that a small fault becomes a widespread leak during the next storm.
When in doubt, call a local roofer who understands Burke's conditions and is prepared to document damage for insurance purposes. A contractor with experience here will know how to stage emergency protection, perform a rapid assessment, and plan a repair schedule that aligns with the seasonal weather swings. If a claim is warranted, keep meticulous records: photos, storm dates, and any correspondence with the insurer. In this climate, timely, documented action is the best defense against a small wind or hail issue turning into a costly, long-lasting leak.
A full roof replacement in Burke typically requires a building permit through Fairfax County rather than a separate town-level building department process. The county handles the envelope change, venting, drainage, and flashing requirements, so your project will be tied to county-approved plans and inspections rather than a municipal approval path. When planning, a contractor should pull the permit in advance of any shingle tear-off, decking repair, or structural work. Do not rely on a mailed-in or "hands-off" approach-the county will expect formal plans, permit numbers on invoices, and copy documentation of the approved scope.
Roof work is inspected by the county building department at required milestones and again at completion, so scheduling can be affected by county workload and weather interruptions. Typical milestones include footing and framing checks if structural work is involved, deck and installation verification, and a final occupancy-like inspection to confirm the roof system meets code and project notes. In practice, that means your roofer's timetable must accommodate inspection windows, which can shift with heavy spring storms or summer heat, and potential rescheduling after hail events. Plan for a buffer between tear-off, underlayment, and shingle installation to keep materials in good condition for the inspectors.
Because Burke is an unincorporated Fairfax County community, homeowners need to confirm county permit handling even when their mailing address says Burke rather than Fairfax. Some notices and inspections may come from a Fairfax County address rather than a local Burke office, so align your contractor's contact list to the county permit office. Have a project file ready with the permit number, approved plan set, and any amendments. If your mailing address is different from the project site, keep the inspector's notes straight by referencing the site address consistently on every submission.
Before demolition, confirm the scope with your roofer and ensure the plan clearly reflects all components: ventilation, ice-dam mitigation, flashing around chimneys and vents, and proper drainage details. Schedule a pre-inspection walk-through with the contractor to identify potential code gaps early. If spring weather is unsettled, set provisional inspection dates with a tolerance for rain delays and wind-driven projects. Finally, keep rain and wind contingencies in your calendar; a late spring storm can stall framing or decking work and trigger a revisit of permit conditions.
Northern Virginia's recurring wind and hail events create a higher-claim environment where insurers expect date-stamped photos, elevation-by-elevation damage notes, and clear documentation of interior leaks. When a storm hits, grab a rapid sequence of shots from ground level and from the ladder with the camera timestamp visible. Photograph the attic and ceilings where staining or moisture appears, and note when you first notice any seepage. Keep a simple log of dates, weather conditions, and who inspected the roof. This isn't vanity mapping; it's a record that can shape how an adjuster views the claim.
After a regional storm bursts affecting Fairfax County, adjuster response times can lengthen. Early temporary protection matters: tarps secured over vulnerable valleys, boards to cover damaged decking, and clear access to the interior to prevent further damage. If you can, install temporary protection within 24 to 48 hours of noticing damage, especially before anticipated rain. Document the protection steps with photos and keep receipts for any quick-reaction measures. Insurers often track how promptly damage is mitigated, and delayed protection can complicate coverage discussions.
Homes in Burke with older roofs in heavily shaded neighborhoods may face closer insurer scrutiny when storm damage is mixed with age-related wear, algae staining, or deferred maintenance. Shade and moisture can accelerate algae growth and visible aging, which can complicate the claim narrative. Focus on distinguishing new storm-induced delamination or curling from preexisting wear. Keep a separate log of preexisting issues if they exist, and ensure your documentation clearly marks what changed after the storm versus what was already present.
Expect an adjuster to request a visual survey that moves top to bottom, often with recommendations for temporary repairs before a full restoration is approved. Having an organized binder-photos by location, a simple diagram of where leaks occur, and a timeline of storm events-helps the process stay focused. If the claim hinges on interior moisture, prioritize demonstrating the path of water intrusion and the rooms affected, not just the roof surface. The more precise the notes, the less room there is for misinterpretation.
Anchor Remodeling
(571) 457-9821 anchor-remodeling.com
6604 Mainsail Ct, Burke, Virginia
5.0 from 16 reviews
We are a premier exterior remodeler committed to providing top-quality exterior services to our clients. Our team of experienced professionals is dedicated to ensuring that your remodeling needs are met with the highest level of satisfaction. Contact us today to learn more about our services and how we can help you with your home's needs.
CastleStone Homes
(410) 774-9002 www.castlestonehomesllc.com
Serving
4.9 from 143 reviews
CastleStone Homes is the areas’ premier full-service construction company, and since our inception we have been helping homeowners along with improving communities in each and every city we work in. Through our extensive knowledge of the business, network of resources, and years of expertise, we are able to assist homeowners with a wide variety of remodeling and construction challenges. We pride ourselves on our reputation for working one-on-one with each customer to handle their individual situations.
Rock Spring Property Services
(410) 459-7575 rockspringpropertyservices.com
Serving
5.0 from 34 reviews
Rock Spring Property Services is a locally owned Maryland company offering roofing, siding and deck installation with a focus on quality and customer care. Founded by longtime business owner and Maryland native Brian Warfel, the company brings more than 25 years of experience to every project. Known for craftsmanship and attention to detail, Rock Spring delivers customized, dependable solutions that fit each client’s budget, needs and lifestyle. The team offers clients a range of solutions tailored to their needs, style and budget. Whether it's installing a new roof, replacing siding or building a custom deck, Rock Spring works hard to deliver lasting value and a stress-free experience that can be enjoyed by homeowners for years to come.
R Berry Roofing
(443) 741-7483 rberryroofing.com
Serving
5.0 from 33 reviews
Veteran owned and operated roofing company with over 30 years of experience. We install, repair, and replace roofing, gutters, skylights and attic venting in both residential homes and commercial facilities throughout Northern VA, D.C., Maryland and Eastern West Virginia. We specialize in high quality workmanship and materials, as well as a positive experience for our clients. Our commitment to the highest levels of customer service goes beyond what we offer, and through our excellent attention to detail we achieve success at every stage of our projects. From small houses to commercial buildings, we pride ourselves on delivering the absolute best solution for all our clients. Contact us today for a FREE Consultation.
Esteban Contracting
(240) 640-1667 www.estebanrenovations.com
Serving
4.8 from 39 reviews
At ESTEBAN RENOVATIONS we restore and rebuild at customers satisfaction. From general remodeling, painting, decks to slate roofing.
Smart Konnector
(443) 851-1542 www.smartkonnector.com
Serving
5.0 from 18 reviews
Welcome to Smart Konnector, your trusted roofing and restoration partner serving Maryland, DC, and Virginia. Our dedicated team of experts is committed to transforming your home with personalized roofing, siding, and renovation solutions. With years of experience and a tailored approach to meet your unique needs, we deliver high-quality workmanship that turns dreams into reality. Proudly serving the region with exceptional services, Smart Konnector is where dreams meet reality. Contact us today for a consultation or a free quote and experience the Smart Konnector difference!
Ultimate Roofing
(301) 888-6866 ultimateroofingmd.com
Serving
5.0 from 17 reviews
For over 8 years, Ultimate Roofing has been the go-to roofing contractor in Maryland. Their team of skilled professionals has become trusted to tackle any roofing project, big or small. They are committed to providing the best roofing solutions using top-quality materials and innovative techniques, ensuring that your home remains protected and aesthetically pleasing for years to come.
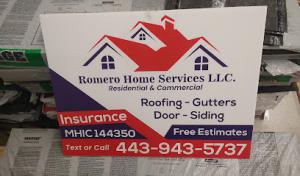
Romero Home Services
Serving
4.9 from 15 reviews
Romero Home Services provides roofing siding gutters services in Essex, MD. Call us now for a free estimate!

Exterior Medics
(703) 782-8309 www.exteriormedics.com
Serving
4.7 from 369 reviews
Exterior Medics is a fully licensed and insured exterior remodeling company serving homeowners and property managers across Northern Virginia and the greater Washington D.C. Metro area. Since 2008, we’ve earned a reputation for professionalism, craftsmanship, and a commitment to service. From roofing and siding updates to full exterior renovations, our team brings clarity, care, and precision to every project. Backed by our 100% Lifetime Service Warranty, Exterior Medics is more than a contractor – we’re a trusted partner protecting what matters most.
American Cowboy Roofing
(703) 999-1916 americancowboyroofing.com
Serving
4.7 from 24 reviews
With over 50 years experience as a roofing contractor, American Cowboy Roofing can help with all of your roofing needs; from residential to commercial, from pitch roofs to flat roofs, from roof repairs to full roof replacements. American Cowboy Roofing serves all of your roofing needs; all with the assurance that can only come with years of experience.
New Sunrise Roofing
Serving
5.0 from 66 reviews
A local family-owned roofing company. Serving satisfaction every job. Over 20+ years of experience on our teams. Proudly owned family business.
A to Z Roofing
(703) 474-3112 www.atozroofingva.com
Serving
4.6 from 21 reviews
Our general contracting company oversees construction and renovation projects in the residential and commercial sectors. Our highly experienced staff has the know-how to ensure our clients are completely satisfied with the end result. We pride ourselves on providing excellent customer service. We are always on hand to offer our support throughout the project, while our automatic updates keep clients informed of the progress made.
Using local average ranges, Burke homeowners can expect about 350 to 700 USD per square for asphalt shingles, 600 to 1100 for metal, 1100 to 2000 for clay tile, 900 to 1600 for concrete tile, 1800 to 3000 for slate, and 2800 to 4500 for copper roofing. These figures reflect the typical options found in residential neighborhoods with mature landscaping and established yards. When evaluating bids, insist on a per-square measurement (100 square feet) and ask for a clear breakdown that ties the price to the exact product grade, warranty, and estimated waste.
Costs in Burke are often pushed up by Northern Virginia labor pricing, permit requirements through Fairfax County, and storm-season demand spikes when many homeowners seek repairs at once. Labor margins here tend to be higher than national averages, especially for more complex installations or when expedited scheduling is needed after a hail event. Storm-season demand can compress crew availability and raise daily rates, so timing your project to avoid peak spring and early summer rushes can help. Material costs also swing with regional supply, and premium options-like high-end metal, clay or slate-see strong local interest in markets with established architectural styles.
Many Burke neighborhoods have mature landscaping, fenced yards, and established suburban lot layouts that can complicate tear-off access, debris handling, and material staging compared with open new-construction sites. Narrow driveways and tight lots can require smaller staging areas, more careful debris containment, and additional equipment handling, which adds to labor time and rental costs. Trees and overhanging branches are common after storms, so included debris haul-away and protection of landscaping should be specified in bids. In the Burke area, selecting a roof system that balances durability with available space for installation equipment can help keep project timelines and costs more predictable during variable spring-to-summer weather swings.
Get a clear picture of your project costs upfront - no commitment required.
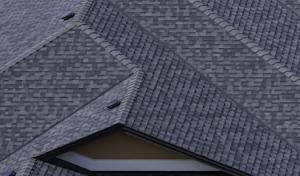
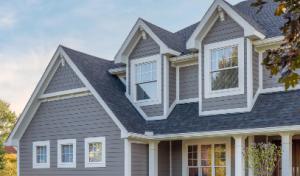
Asphalt shingles remain a practical fit for the suburban rooflines that characterize much of the neighborhood, with a balance of performance and cost that aligns with how Burke handles everyday storms. In shaded roof planes, moisture can linger longer, which accelerates staining and surface wear on these shingles. When choosing asphalt, prioritize a high-quality laminated product with a good algae-resistant coating to keep dark staining at bay on tree-dense streets. Roofs with heavy canopy cover benefit from a shingle layer with robust granule retention to resist wind-driven debris during late-spring storms and the summer monsoon patterns that can arrive suddenly after a dry spell. Consider upgrading underlayment and flashing in areas where branches overhang the ridge line, since dew and shade can magnify ice-dam risk when a late-wall or wind-driven moisture sneaks under the shingles.
Metal can be a strong match for repeated storm exposure, especially when large trees shed branches during wind events. In this climate, metal sheds leaves and pine needles efficiently, reducing surface debris that can trap moisture and promote staining or corrosion starter points if built-up debris stays long. The improved wind performance helps during microbursts and blitzes that sometimes come with sudden spring squalls, and metal's reflective surface can temper attic heat during the peak of summer. However, Burke homeowners often weigh the higher upfront upfront against the area's freeze-thaw cycles and long-term durability goals. A well-installed metal roof with appropriate sealants and snow guards can mitigate ice-slide risks in winter and keep flashing details straightforward in homes that feature complex roof lines or partial rebuilds after storm work.
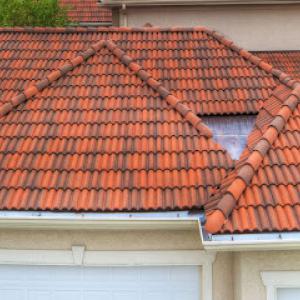
Slate, clay tile, concrete tile, and copper appear on higher-end Northern Virginia homes, and this part of the market tends to gather in neighborhoods with historic charm or newer transitional architecture. In aging Fairfax County housing stock, however, weight, flashing complexity, and repair specialization matter more. Slate and heavier tile demand structural support and precise flashing to handle changing sun exposure and seasonal moisture patterns; clay and concrete tiles bring long service life but can crack under sharp temperature shifts if underlying sheathing and battens aren't tuned for Burke's climate. Copper offers exceptional durability and a distinctive profile but requires meticulous flashing work and professional maintenance to address expansion joints and sealant aging. For homes already carrying additions or partial replacements, plan ahead for integration with existing valleys, parapets, and venting so the roof remains water-tight throughout the spring thaw and the summer thunderstorm cycle. In this tier, a local contractor with experience in Fairfax County detail work delivers the most reliable results, especially when dealing with complex roof geometry and mature tree shelter.
In this area, leak calls often center on roof penetrations-skylights, chimneys, and transitions where wall meets roof-more than on field shingles. Those spots carry the drama after a heavy storm because flashing around them bears the brunt of weather swings. A skylight with aging or improperly sealed flashing can drip despite the rest of the roof looking sound. A chimney chase that's been patched once already may still shed water during a wind-driven rain. You'll notice the telltale signs: small stains that seem to arrive after a storm and a nagging dampness that doesn't track along a straight line with shingles. Treat those penetrations as the first line of defense and the first clue when you suspect a leak.
Heavy spring rain and wind-driven storms in Fairfax County slam against flashing at skylights and valleys first, exposing weaknesses before you see broader shingles fail. If the flashing looks compact but the sealant has crazing or gaps, rain can creep in with little fanfare, especially where the roof plane changes direction or meets a vertical wall. This is not just a seasonal nuisance; it's a warning that the underlying deck and insulation may start to suffer with repeated intrusion. Expect a pattern: rapid onset of damp spots after a storm, followed by a slower bleed that you notice when the sun returns.
Winter freeze-thaw cycles widen small flashing gaps around penetrations, turning intermittent staining into an active cold-season leak. A seemingly minor drip in January can become a persistent water entry by March if the flashing hasn't held up. The risk isn't uniform across every home, but in older configurations with aging seals, the damage compounds. If you catch a steady discoloration near a skylight or along a wall-to-roof transition across successive winters, plan a targeted inspection of those flashing joints before the next thaw.
Find contractors experienced in skylight installation, flashing, and leak repairs to bring natural light into your home.
Anchor Remodeling
(571) 457-9821 anchor-remodeling.com
6604 Mainsail Ct, Burke, Virginia
5.0 from 16 reviews

While Burke is a pitched-roof neighborhood by design, some homes and additions feature low-slope porch, rear, or garage sections that behave differently from the main shingle roof. Look for flatter transitions where the roof line changes or where a decked entry sits over a low-slope membrane. These spots often hide against visible shingles and can be overlooked during a standard yearly inspection.
These low-slope sections in Northern Virginia are especially vulnerable to ponding, membrane seam wear, and leak recurrence after summer storms if they are treated like standard steep-slope repairs. Water sits longer, seams and flashing see more movement under heat and storms, and UV exposure accelerates age on the membrane. A drip from a garage ceiling or a slow seep near a porch corner is a common telltale sign.
Mixed-roof homes in the area often need replacement planning that addresses both the visible main roof and the less obvious low-slope transitions at the same time. When you're evaluating a retrofit or full replacement, coordinate items so the low-slope section has compatible flashing, a weather-tight edge, and matching drainage paths with the main roof. Doing these together reduces the risk of a patchwork fix creating future leaks.
During inspection, check for standing water after a light storm on all low-slope surfaces, inspect membrane seams for signs of wear, and verify that scuppers and drains remain free of debris. Pay particular attention to the transition zones where the low-slope area meets the main roof; these are the most common leak points.
Seasonal cleaning of debris around low-slope flashings, resealing edge metal as needed, and scheduling a mid-cycle inspection after major summer storms helps catch issues before they migrate into the attic. A proactive approach keeps these sections from becoming recurring trouble spots.
Find specialists in TPO, EPDM, and built-up flat roofing systems for residential and commercial properties.
In Fairfax County's competitive roofing market, the actual supervision of the install matters more than what a brochure promises. Look for a project supervisor who will be present for key phases-tear-off, underlayment, and the final punch list. Confirm who signs off on each stage and who handles field adjustments if a shingle alignment or valley issue appears after the first rain. A trustworthy crew is measurable by how many hours of on-site supervision are described in the contract and how quickly the supervisor responds to mid-project questions.
Homeowners in Burke often prioritize fast cleanup, but storm-driven demand can blur who will finish the last details. Verify how cleanup is organized and who will return for a final walk-through within 24 to 72 hours after completion. Make sure the contract specifies a documented punch list with owner sign-off and a defined timeframe for addressing any missed items, such as stray nails, adhesive drips, or flashing gaps exposed by the first spring wind.
Warranty value in this market hinges on correct installation details and documented completion rather than product branding alone. Seek a workmanship warranty that explicitly covers installation errors, flashing integrity, and impact-related vulnerabilities for at least several years. Request a written record of the exact installation steps the crew will perform, including underlayment type, nail spacing, and shingle course alignment, as these details are what will matter if a claim is needed after a severe storm.
With many long-established and manufacturer-certified firms serving Northern Virginia, a strong warranty is only as good as the crew executing it. Ask for three recent local jobs with reach-back references, and insist on a supervisor's direct contact information during the project. Ensure the contract requires the same crew lead to remain consistent throughout the work to minimize variability in workmanship and post-project service.