Last updated: Apr 19, 2026
Springfield sits in the Fairfax County storm corridor where spring wind and hail events regularly trigger roof inspections, tarping requests, and insurance-driven replacements. The pattern here is not a single dramatic blow-out every time, but a pulse of rapid damage that testing the roof's seams, penetrations, and edge details. Homes tucked under mature trees often endure wind-driven debris that tests shingles, vents, and flashing. The risk is real, and the clock starts ticking the moment a hailstone or gust hits your roof.
Virginia insurers commonly expect photo documentation, contractor damage assessments, and clear separation between storm-created damage and age-related wear before approving roof claims. In practice, that means you should narrate what happened, show the material condition before and after, and gather independent observations from a roofing professional. Clear, timestamped photos of lifted shingles, dented gutters, damaged flashing, and interior leaks help avoid back-and-forth delays. A written assessment that connects visible damage to a specific wind or hail event, rather than generic wear, strengthens the claim and speeds review.
In Springfield neighborhoods with mature trees and older suburban lots, wind events often produce a mix of shingle lift, branch impact, gutter damage, and localized leaks rather than uniform whole-roof failure. That means insurers may approve multiple targeted repairs rather than a full replacement, depending on the extent and age of the roof. The approach is practical: document each affected zone, note how long the damage has been present, and distinguish it from pre-storm conditions. This clarity helps the adjuster see where the storm created new vulnerabilities and where existing wear was already present.
If rain is threatening indoors or tarps are requested by the insurer or the carrier, act fast. Cover exposed areas with a sturdy tarp or, if safe, use temporary boards to control further moisture intrusion. Keep the tarp secured and check it daily during storms for displacement. Preserve the scene: avoid trimming or removing damaged components yourself if a claim is active; file the claim, then have the roofer perform a formal wind- and hail-damage assessment. Document ladder placement, access points, and any evidence of animal activity that might complicate the claim. The goal is to create a file that tells a precise, chronological story: storm event, resulting damage, temporary protections, and the professional assessment that ties everything together.
Choose a roofing pro who understands the Fairfax County landscape and the Springfield storm pattern. A local contractor can provide a damage scope that aligns with insurer expectations, including a detailed breakdown of damaged components, suspected wind-driven edge lift, and any gutter or fascia concerns that often accompany storm events in this area. Ask for a written assessment that explicitly separates storm-created damage from aging materials, and ensure the contractor inventories each vulnerable penetration-vents, chimneys, skylights, and transitions to low-slope additions. A credible contractor will accompany you through the claim process with photos, an itemized damage report, and a recommended repair plan that returns your roof to its intended performance while preserving resale value in a mature neighborhood. If the claim involves a partial repair rather than total replacement, document how the repair aligns with the current roof geometry and how it mitigates future wind-driven risk.
Establish a clear line of communication with both the insurer and the chosen contractor. Share the storm date, the areas most affected, and any interior signs of leak progression. Request a copy of the adjuster's report and the contractor's written assessment to compare conclusions side by side. If the claim is challenged or delayed, escalate with documented evidence and a concise summary of the storm's impact on your specific roof layout. In a climate where spring winds and hail are common, preparedness and prompt, accurate documentation are the fastest routes to restoring the roof's integrity and peace of mind.
Find local contractors experienced in assessing and restoring roofs after hail, wind, and severe weather events.
Gutter Ethics
(703) 646-8211 gutterethics.com
7420 Alban Station Blvd suite a-101, Springfield, Virginia
4.9 from 1032 reviews

New Sunrise Roofing
6801 Backlick Rd Suite C, Springfield, Virginia
5.0 from 66 reviews
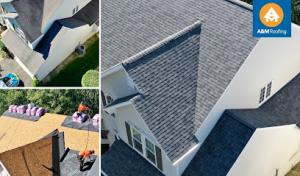
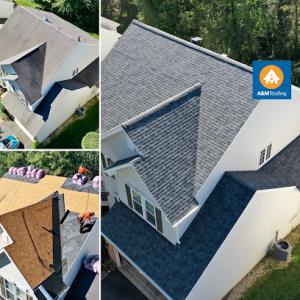
A&M Roofing
(703) 584-5876 www.amroofingva.com
7817 Loisdale Rd Suite H, Springfield, Virginia
4.9 from 100 reviews
Gutter Ethics
(703) 646-8211 gutterethics.com
7420 Alban Station Blvd suite a-101, Springfield, Virginia
4.9 from 1032 reviews
Gutter Ethics is a roofing and gutter company in Springfield, VA. We offer a variety of services including roof replacement, repair and emergency services as well as gutter installation, cleaning, repair and replacement. We are a family-owned company that has been serving the greater Northern Virginia area since 2009. We have built our business on trust and reliability and we are proud to say that we have thousands of satisfied customers who use our services again and again. We provide quality products and services at a fair price while maintaining a friendly atmosphere for both our customers and employees. Call today if you are in need of roofing or gutter services!
New Sunrise Roofing
6801 Backlick Rd Suite C, Springfield, Virginia
5.0 from 66 reviews
A local family-owned roofing company. Serving satisfaction every job. Over 20+ years of experience on our teams. Proudly owned family business.
A&M Roofing
(703) 584-5876 www.amroofingva.com
7817 Loisdale Rd Suite H, Springfield, Virginia
4.9 from 100 reviews
A&M is a locally owned and operated roofing company based in Springfield, VA. We're proud to have been in business serving the Northern Virginia community since 2005. We're fully insured and have a Virginia Class-A Contractor License. Specializing in residential and commercial exterior remodeling, roofing, skylights, gutters, siding, windows, and doors, we strive to achieve high-quality standards without compromising affordability. Our skilled roofers and installers are fully trained and certified. We are experts in asphalt shingle installation and repairs from storm, wind, or hail damage. Some of our accreditations include Owens Corning Platinum Preferred Roofing Contractor, CertainTeed Select ShingleMaster, and Velux Certified Installer.
Cornerstone Exteriors
(703) 596-9978 cornerstoneexterior.com
7401 Fullerton Rd unit e, Springfield, Virginia
5.0 from 39 reviews
Since 2005, Cornerstone Exteriors is your trusted source for roofing, siding, gutter, and storm damage needs. Our experts work with you to ensure maximum quality service with exceptional outcomes.

DreamHome
(703) 688-8938 www.dhremodeling.com
7420 Fullerton Rd #100, Springfield, Virginia
4.7 from 678 reviews
DreamHome, Inc. – Owens Corning Platinum Roofing in Northern Virginia & the DMV For 25 years DreamHome, Inc. Is a BBB-accredited Owens Corning Platinum Preferred Contractor, serving Springfield, Fairfax, Arlington, Alexandria, Woodbridge, Manassas, Reston, Sterling, and the entire DMV. We specialize in roofing, windows, siding, gutters, and doors, all backed by industry-leading warranties. Roofing Experts – Asphalt, Metal & Flat Roofs RoofMaxx Energy-Efficient Windows – Lower Bills & Improve Comfort Durable Siding – Weather-Resistant & Low Maintenance Gutters – Leak-Free & Protective Premium Doors – Secure & Stylish Call now or fill out our online form for a free, no-obligation pricing!!

Exterior Medics
(703) 782-8309 www.exteriormedics.com
7540 Accotink Park Rd, Springfield, Virginia
4.7 from 369 reviews
Exterior Medics is a fully licensed and insured exterior remodeling company serving homeowners and property managers across Northern Virginia and the greater Washington D.C. Metro area. Since 2008, we’ve earned a reputation for professionalism, craftsmanship, and a commitment to service. From roofing and siding updates to full exterior renovations, our team brings clarity, care, and precision to every project. Backed by our 100% Lifetime Service Warranty, Exterior Medics is more than a contractor – we’re a trusted partner protecting what matters most.
R.M. Banning
(703) 455-9418 www.rmbanningco.com
7635-B Fullerton Rd, Springfield, Virginia
4.7 from 95 reviews
Premier Northern Virginia Roofing, Windows and Siding company providing high quality products and exceptional customer service since 1982.
A to Z Roofing
(703) 474-3112 www.atozroofingva.com
8001 Forbes Pl Ste 207, Springfield, Virginia
4.6 from 21 reviews
Our general contracting company oversees construction and renovation projects in the residential and commercial sectors. Our highly experienced staff has the know-how to ensure our clients are completely satisfied with the end result. We pride ourselves on providing excellent customer service. We are always on hand to offer our support throughout the project, while our automatic updates keep clients informed of the progress made.
Davis Roofing
(703) 569-3388 www.davis-roofing.net
8422 Alban Rd, Springfield, Virginia
4.3 from 18 reviews
Welcome to the home of Davis Roofing, Inc. a local Northern VA roofing contractor you can trust. Since we began in 1966, our company has delivered quality commercial property and home improvement solutions to thousands of customers throughout Northern VA and Maryland.
J.R. Roofing & Siding
(703) 569-2028 www.jrroofingandsiding.com
7311 Highland St Unit 8 Building 8, Springfield, Virginia
4.3 from 20 reviews
We are a family-owned and operated business based in Springfield, VA! Our professionals have been assisting commercial and residential since 1977, and up to this day, we still feel the same joy in providing quality services at honest prices. Having been around for more than 45 years makes us your best choice for your projects. Through the years, we have worked on the State Department, the White House, and other government projects. Our professionals have also teamed up with property managers, school principals, homeowners, and more!

Shield Roofing
(571) 551-7663 www.shieldroofing.us
8106 Overton Ct, Springfield, Virginia
5.0 from 4 reviews
Shield Roofing has been serving customers for more than two decades. We’re a family-owned residential and commercial roofing company, dedicated to protecting customer’s homes and businesses from the harmful storms and weather we can experience here in northern Virginia.
Blue Tower Construction
(571) 228-6974 www.bluetowerroofs.com
Serving
5.0 from 83 reviews
Our ultimate goal is to create a long-lasting relationships with our customers by exceeding their expectations and attaining their trust through outstanding service. The foundation of our company starts with integrity, professionalism and superior customer service. By accomplishing these core values, we have the greatest opportunity of creating long-term relationships with our customers. We simply do what we say we will do. We provide Roofing repair & installation, Siding Repair & Installation, & gutters services. We also specialize in insurance claims.
Springfield's postwar and late-20th-century suburban stock commonly uses asphalt shingles, with occasional metal accents and slate on higher-end homes. Wood shakes appear on older custom properties, and you'll find low-slope membranes over porches or additions. The mix means you'll encounter several common failure points in the same block: the straight-ahead asphalt shingle roof, a metal accent band or drip edge, and rare but important low-slope sections where moisture can linger. Understanding what each material does well-and where it tends to struggle-helps you plan maintenance before trouble shows up.
Townhomes and split-level or colonial-style homes in this area often have multiple roof planes, valleys, chimneys, and wall intersections. Those features become leak-prone as flashing ages or shifts with temperature, wind, and nearby tree movement. When you're inspecting after a wind event or heavy rain, focus on the flashing around chimneys and at intersections where two roof planes meet. Look for lifted shingles, loose metal flashing, or caulk that's cracked or sun-worn. If a valley starts to pool or shows dark staining, treat it as a warning sign rather than a quick patch candidate.
A dense tree canopy across many neighborhoods means more shade, more debris loading, and higher moisture retention on roof surfaces. Shingles under heavy shade dry out more slowly, which can shorten their service life relative to open-site houses. Wood shakes and shingles are especially vulnerable to moisture and moss growth in shaded spots. Regular cleaning to remove leaves and small branches, plus targeted inspection in shaded ridges and eaves, will catch issues early. In spring and after storms, pay extra attention to debris-packed gutters and downspouts, as clogged flow accelerates water backing up against flashing details.
Low-slope membranes over porches, additions, or sunrooms require particular care. These areas shed water differently than steep-sloped sections, so keep an eye on seam seals, edge flashing, and transitions where the membrane intersects with higher-porosity shingles or metal. Puddling or damp patches on these sections signal the need for a closer look at the membrane's condition, fasteners, and edge terminations. If you notice consistent dampness near a low-slope area after wind events, it's wise to have a pro check for fastener corrosion or seam failure before a leak develops.
Beginning each spring, walk the edges and ridges for lifted tabs or loose fasteners, especially where fascia meets the roof plane. After heavy storms, inspect for displaced shingles, dings, or granule loss near gutters and downspouts. In late fall, clear leaves from valleys and around penetrations to prevent moisture retention that can accelerate wear. For older custom homes with shakes or slate, monitor for cracked or hollow-sounding tiles, which often indicate progressive settling or underpinning issues that require professional assessment.
Residential re-roof projects in this area fall under Fairfax County rather than a standalone city office. That means you deal with the county building department for the permit itself and for the required inspections. The county's process is familiar to local roofers, but it's not the same as a simple HOA-approved job; you need county approvals just like other major home projects in the suburbs with mature tree cover and complex penetrations.
A full residential re-roof usually requires a permit. Expect inspections to be scheduled during installation (rough-in) and after completion (final). The county expects the roof work to proceed in a way that allows inspectors to verify ventilation, flashing, penetrations, and overall safety before the project is considered finished. Given the mix of older homes with multiple penetrations and occasional low-slope sections near additions, plan on the process catching these details as part of the inspections.
Inspection timing in Fairfax County can vary depending on workload and weather. Rough-in inspections typically occur once roof deck work and underlayment are in place, with the inspector checking ventilation, eave details, and flashing at skylights or chimneys. The final inspection confirms completion to county standards and verifies that any required ventilation and drainage provisions meet code. Storm-driven demand in Northern Virginia can back up contractor schedules, so it helps to align your timeline with your roofer's county-licensed workflow and to have all documentation ready before work begins.
Permits can lapse if work does not begin within the allowed window, which matters when storms produce back-to-back calls and crews are stretched thin. If a project stalls, you may need to renew the permit and potentially restart certain inspections. The county expects timely progress toward the approved scope, so staying in communication with both your contractor and the county plan reviewer during delays is advisable. Missing a window can add days or weeks to your project, especially when your roof has to be re-evaluated after a pause.
Start by confirming your project scope with the county's building department, including any penetrations that require special flashing or ventilation adjustments. Your roofer should help assemble the plan set, including roof layout, underlayment type, and ventilation details, to align with county inspections. Submit the permit application, along with the required forms and any contractor licenses, and schedule the rough-in inspection to occur once the roof deck and underlayment are in place. After installation, schedule the final inspection and ensure all markings, such as attic ventilation and flashing details, are accessible for the inspector. Keep copies of permits, inspection approvals, and any amendments handy in case a storm event prompts a later review or a change in scope.
Springfield pricing is influenced by Northern Virginia labor costs, Fairfax County permit requirements, and surge pricing after regional storm events that tighten contractor availability. When a storm passes through, you may see a short-term uptick in bids that reflects quicker response times and limited crews rather than a dramatic leap in material costs. In practice, you'll notice that the baseline per-square numbers can drift upward for hours or days after a hail or wind event, especially if the project involves multiple trades or access challenges. Understanding this helps you plan for a practical window between deciding on materials and starting work.
The area's common roof geometry-multiple valleys, dormers, chimneys, skylights, and occasional low-slope tie-ins on additions-can push replacement costs above simple per-square estimates. Each valley requires extra flashing, ice and water shield in vulnerable zones, and more detailed shingle layout. Dormers and chimneys add penetrations that demand careful sealing and waste management. Low-slope sections near additions require different underlayment and sometimes extra fasteners or sealants. Expect these features to contribute to higher labor time and materials, even if the overall square footage seems reasonable on paper.
Material choice in Springfield often reflects a balance between asphalt affordability and the longer-term performance of metal, slate, or tile on homes where appearance and lifespan matter. Asphalt shingles remain the most common and cost-efficient option, with typical cost ranges that align with the local market. If the roof plays a prominent visual role or you're prioritizing longevity against the region's storm-driven wear, metal, slate, or clay/concrete tile can be justified, though they bring higher upfront costs. The decision hinges on how much difference you want in curb appeal, resistance to wind-driven damage, and maintenance over two decades.
Start with a realistic base using asphalt shingle pricing as a reference, then add for complex geometry and any premium features you intend to keep or replace. If you're considering metal or tile, expect a higher spread but longer service life in the Northern Virginia climate. Prioritize durable underlayment and robust flashing around valleys, chimneys, and skylights to mitigate future leak risk. In a storm-recovery window, plan for updated documentation and a phased approach if contractor availability tightens, allowing you to secure workmanship without compromising critical timing.
Get a clear picture of your project costs upfront - no commitment required.
New Sunrise Roofing
6801 Backlick Rd Suite C, Springfield, Virginia
5.0 from 66 reviews

DreamHome
(703) 688-8938 www.dhremodeling.com
7420 Fullerton Rd #100, Springfield, Virginia
4.7 from 678 reviews
J.R. Roofing & Siding
(703) 569-2028 www.jrroofingandsiding.com
7311 Highland St Unit 8 Building 8, Springfield, Virginia
4.3 from 20 reviews
Spring and fall are usually the most efficient replacement windows in Springfield because Northern Virginia's summer humidity and winter freezes make installation and scheduling more difficult. The shoulder seasons offer milder temperatures, lower humidity, and less thermal stress on shingles and underlayment. For you, that often translates to fewer heat-related delays, steadier material handling, and a smoother process from start to finish. If you are balancing a busy life with kids, sports, or work-from-home needs, aiming to begin projects in these windows can reduce disruption and help crews stay on a predictable pace.
Springfield homeowners often face spring storm interruptions, summer heat stress on crews and materials, fall leaf accumulation from mature trees, and winter access issues from freeze-thaw conditions. After a heavy storm, the area can experience a rapid influx of projects, which may compress scheduling and elevate wait times for inspections and deliveries. In the heat of summer, roof surfaces heat up quickly, increasing the risk of shingle damage and worker fatigue. Autumn brings leaf litter that can clog gutters and valleys, creating extra cleanup and minor staging delays. Winter weather introduces freeze-thaw cycles that slow skylight and vent penetrations, and can complicate adhesive and sealant cure times. Planning around these fluctuations helps you minimize surprises and keep a project on track.
Because Fairfax County permits and inspections must align with contractor scheduling, the best project timing in Springfield is not just weather-dependent but also tied to county workflow and post-storm backlog. After a damaging wind or hail event, the county's processing and field availability can create a wave effect that temporarily slows field crews. If you anticipate a storm or a scheduled replacement, it helps to have a flexible plan that can shift by a few weeks without losing momentum. Communicate early with your roofing contractor about anticipated busy periods and how your preferred downtime might align with county inspection scheduling, so you can avoid last-minute rescheduling and keep your project moving forward efficiently.
In Virginia, roof age and material can affect premiums, renewals, or claim scrutiny, which is especially relevant for homes with aging second or third roofs. The local mix of older suburban homes and mature trees means storms can push many of these roofs into the renewal red zone sooner than homeowners expect. Your roof's type and condition can quietly shape how insurers view risk after a wind or hail event, so understanding this dynamic helps you plan realistically rather than assuming protection is automatic.
After a Springfield storm, insurers may ask for pre-loss and post-loss photos, contractor estimates, and evidence that damage came from a covered event rather than deferred maintenance. Photos taken from multiple angles, dates stamped if possible, help clarify the timeline. Contractor estimates should distinguish hail or wind damage from wear. If a claim hinges on a fault line between storm damage and aging material, expect closer scrutiny and a longer path to resolution. In this climate, be prepared to demonstrate that the event, not neglect, caused the loss.
Homeowners should preserve inspection notes, permit records, and final invoices because complete documentation helps when claims, supplements, or future underwriting questions arise. Keep dated reports from reputable local roofers familiar with common Northern Virginia vulnerabilities-low-slope areas near additions, tree-induced debris, and penetrations around vents and chimneys. Digital backups of everything-photos, emails, and receipts-ensure you can access necessary files quickly if a dispute arises or a grant of funds is challenged years down the line. A well-kept trail reduces surprises and supports a smoother path through the process.
Connect with contractors who help homeowners navigate the claims process from damage assessment to final approval.
Artin Services
(703) 451-5151 www.artinservices.com
7304-C Boudinot Dr, Springfield, Virginia
5.0 from 50 reviews
Cornerstone Exteriors
(703) 596-9978 cornerstoneexterior.com
7401 Fullerton Rd unit e, Springfield, Virginia
5.0 from 39 reviews
R.M. Banning
(703) 455-9418 www.rmbanningco.com
7635-B Fullerton Rd, Springfield, Virginia
4.7 from 95 reviews
Springfield homes with rear additions, porch enclosures, and some townhome designs often include low-slope sections that age differently from the main shingle roof. Those flatter grades tend to trap moisture longer, slow drainage after storms, and see faster wear on flashing and edging. The result is not always obvious from the street, but the low-slope areas can develop leaks even when the main roof still looks decent.
These low-slope transitions are common leak points where drainage slows, flashing details become complex, and tie-ins to older roof systems fail before the main field does. Pay attention to areas around walls where the slope changes, near skylights, and along drainage edges where eaves meet siding or brick. In addition, joints where the low-slope section meets the higher roof can be vulnerable to mismatched materials and shifting framing.
Homeowners replacing only the visible shingle roof in Springfield can miss active problems on attached low-slope sections, especially around walls, skylights, and drainage edges. A thorough inspection should trace all penetrations, confirm proper slope and drainage, and verify that flashing and transition details are integrated with the rest of the roof system. Neglecting these zones often means leaks return after the new shingles curl or lift.
If you're facing a replacement, plan for a detailed assessment of the entire roof assembly, not just the main field. Ask for a close inspection of the low-slope sections, and request tests or assessments around skylights, dormers, and wall penetrations. Document every concern you find, since timely repairs in these zones can prevent widespread water intrusion during the next wind-driven downpour.
Find specialists in TPO, EPDM, and built-up flat roofing systems for residential and commercial properties.
Artin Services
(703) 451-5151 www.artinservices.com
7304-C Boudinot Dr, Springfield, Virginia
5.0 from 50 reviews
DreamHome
(703) 688-8938 www.dhremodeling.com
7420 Fullerton Rd #100, Springfield, Virginia
4.7 from 678 reviews
R.M. Banning
(703) 455-9418 www.rmbanningco.com
7635-B Fullerton Rd, Springfield, Virginia
4.7 from 95 reviews
After a Northern Virginia wind or hail event, hurry matters. In the dense contractor market around Fairfax County, you will see many firms vying for your business, but speed should not trump reliability. Seek a crew that can be on site quickly, assess damage, and begin temporary mitigation to stop leaks. Ask how they handle debris removal and jobsite cleanliness so that storm cleanup is included in the process, not afterward. Check that the crew has a track record of coordinating with homeowners during the recovery window rather than leaving you to chase fresh crews every day.
Residents here value proven residential experience, steady crews, and a straightforward workflow. Look for a firm with a balance of long-term local presence and repeat customers in nearby neighborhoods with similar roof types and penetrations. One-off crews may look cheap, but a familiar team tends to communicate better with homeowners and inspectors, especially when timelines tighten after a storm. Request recent references from nearby towns with comparable roofs, and ask about how they handle common local penetrations like chimney stacks, vent pipes, and branchy tree lines.
In a Fairfax County permit environment, clarity on who pulls the permit is essential. Confirm who will be the point of contact for the county and who will meet inspectors on the day of the inspection. Ensure the crew regularly navigates county inspection workflows and can provide documented proof of inspection progress. A dependable firm will schedule inspections promptly and be ready to address any notes or revisions the county issues.
Cleanliness on the jobsite matters in shady, tree-dense lots. Ask about daily cleanup routines and how seasonal debris from nearby trees will be managed. A reliable Springfield crew will treat storm repair as a complete service: prompt, tidy, and with a plan for durable, long-lasting workmanship that stands up to the next Virginia wind gust.