Last updated: Apr 19, 2026
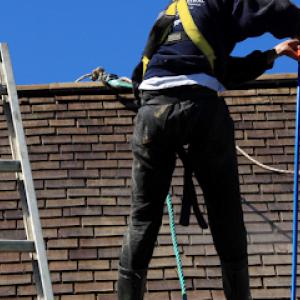
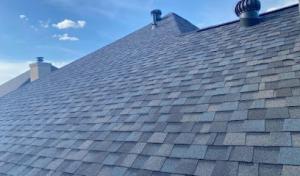
On the blufftop and along the ridges where sand and spray mingle with sea breeze, metal flashings, fasteners, and other edge components take the brunt of marine exposure. Even when the main roof covering still looks serviceable, you can see accelerated corrosion and staining on nails, screws, and seam seals. When planning a reroof, prioritize edge detail improvements and choose fasteners with corrosion resistance appropriate for coastal climates. Consider sleeve or seal technologies at penetrations, and inspect every panel bend and flashing joint after the first high-wind season-small leaks or loose edges tend to show up there first in this environment. Over the long haul, a roof system that integrates corrosion-resistant metal flashings with a carefully designed drip edge helps keep water away from fastener lines and underlayment, which is essential when salt air is constant.
Blufftop and ridgeline homes experience stronger gusts than inland South Bay neighborhoods, so wind uplift becomes a central design and installation detail during reroofing. Materials respond differently to that uplift: some lose their integrity under repeated cycles, while others hold fast but may require more rigorous nailing or adhesive strategies. For roof coverings, look for systems that suppliers and installers describe as rated for uplift in exposed coastal settings. Fastener patterns should be engineered for higher wind zones, with longer nails or screws and a careful sealant plan at eave and rake edges. Edge-to-edge performance matters, so verify that ridge and hip closures, valley membranes, and tile or shingle transitions are tied into a cohesive wind-deterrent assembly. If you or your contractor anticipates many windy days, discuss secondary restraint methods and ensure the attachment points reach through to solid framing where practical.
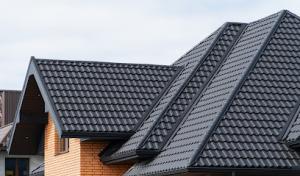
The Peninsula's salt air and persistent wind tilt material choice toward durability in edge details and long-term resistance to weathering. Metal roofing offers excellent wind performance and lifespan in the right coastal-grade forms, but marine exposure can corrode exposed components if coatings aren't maintained. Clay and concrete tiles bring strong wind resistance and a long service life when properly installed and flashed, yet certain textures and profiles can trap salt-laden moisture at seams if not vented or drained correctly. Asphalt and synthetic shingles provide practical options in a coastal setting, but look for products with enhanced UV stability and salt resistance in edge applications. Wood shingles or shakes can achieve a classic look, but coastal humidity and salt air increase maintenance for fasteners, flashing, and sealants and may demand more frequent refreshment of protective coatings. In addition to the primary roof covering, insist on a robust edge detailing package-flashing, sealants, and drip edges designed for coastal use, with materials that resist corrosion and cupping from sun exposure.
Spring and fall emerge as the preferred reroof windows because they dodge the wet-season intrusion risk and the peak summer UV stress on exposed underlayment. The wet winters in this region can complicate work sequencing, while the dry season, though convenient for crews, can bake underlayment if exposed too long. The goal is to complete a reroof with a margin for coastal moisture and wind testing before the first winter storms and before the hottest months intensify UV degradation. If a roof edge shows early signs of salt-induced corrosion or if fasteners start loosening after a season of salt-laden winds, treat those issues as signals to accelerate the refresh cycle within the spring-to-fall window rather than letting minor problems become larger failures. In blufftop locations, plan for additional inspection intervals after major storm events, and schedule a follow-up check of edge components and penetrations, especially around chimneys, vents, and skylights, where salt deposition and wind-driven rain concentrate.
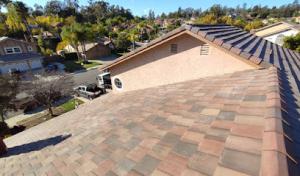
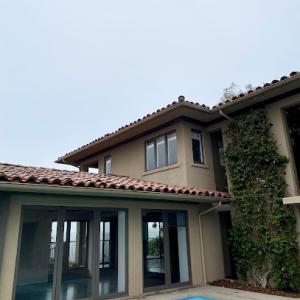
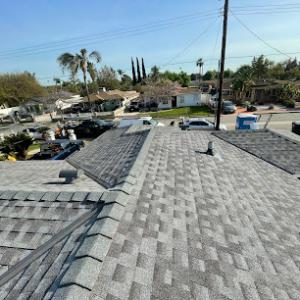
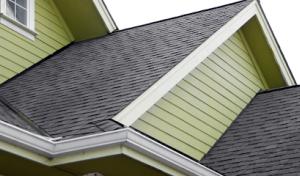
Clay and concrete tile are especially relevant on Peninsula homes because Mediterranean and Spanish-influenced architecture is common in coastal hillside neighborhoods. The combination of warm stucco walls, arched windows, and terracotta or pale concrete hues often sits atop steep lots that capture the ocean breeze. When selecting a material, consider how tile shapes and colors complement the terrain and how the roof's silhouette integrates with nearby coastal architecture. Tile roofs on hill routes can deliver enduring curb appeal, but the long, exposed lines may also demand attention to underlayment and flashings that support tile performance in salt-laden air.
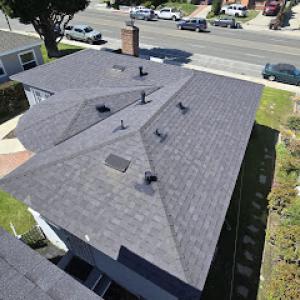
On sloped lots and custom homes, tile reroofs can involve added staging, access, and material handling complexity compared with flatter inland subdivisions. The hillside environment creates unique challenges that affect replacement timing and process. Access points, private driveways, and neighboring structures influence how staging equipment is positioned and how debris is contained. Transportation of large tile bundles around tight corners or through narrow streets requires planning, and crews may need additional time to protect landscaping and ensure safe work zones. Coastal visibility can emphasize the importance of coordinating reroof work to minimize disruption to adjacent properties and to preserve sightlines that contribute to the neighborhood's distinctive character.
Metal roofing can perform well near the coast, but in Peninsula conditions homeowners need attention on corrosion-prone accessories and transitions, not just the panel system itself. Aluminum and galvalume options resist salt air better than traditional bare steel, yet every roof line ends in corners, vents, skylights, and penetrations where fasteners, sealants, and flashing are exposed to wind-driven spray. When considering metal for hillside homes, evaluate the full system: roof-to-wall transitions, chimney and vent terminations, and the integration with existing clay or concrete tiles if a retrofit involves mixed materials. The salt air doesn't just wear the panels; it accelerates the aging of gutters, drip edges, and edge trim, so plan for upgraded coatings and periodic inspection of sealant lines along hips and ridges. In coastal-adjacent microclimates, wind-driven moisture can exploit small gaps, making careful installation and ongoing maintenance essential.
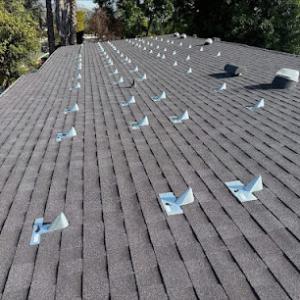
For tile selections, weight and thickness matter in hillside applications. Heavier tile kinds require structural verification to ensure the framing can bear the load, particularly when reroofing over older assemblies that may have been designed for lighter coverings. In many hillside neighborhoods, tile profiles-low-profile Spanish, barrel, or flat interlocking designs-also influence drainage patterns on slopes. Proper spacing and underlayment choices matter to resist wind-driven rain and to prevent water infiltration at roof penetrations. Consider the long-term performance of each tile type in the local marine climate: color stability against sun exposure, potential for thermal movement on slopes, and the ease of sourcing replacement pieces if damage occurs during storms.
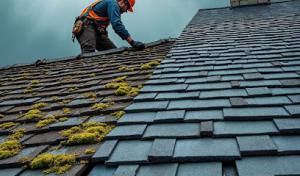
From a maintenance perspective, coastal wind and salt air can heighten the need for proactive inspection after heavy storms or Santa Ana winds. Tile roofs benefit from periodic resealing of flashings and timely replacement of broken tiles to prevent micro-leaks that may migrate under the tile layer. Metal roofs, while resilient to impact, still require attention to fastener corrosion and sealant life at valleys, ridges, and transitions to chimneys or vent stacks. In hillside homes, the interplay between tile and metal-whether as a mixed roof or as a replacement strategy-demands careful coordination. A coordinated plan helps ensure that the aesthetic rhythm, architectural details, and functional integrity remain aligned as the climate and wind patterns shift with the seasons.
In practice, a hillside homeowner weighing tile versus metal should envision not only the visible roof surface but also the hidden pathways rain takes as it travels along slope-driven microdrainage routes. With tile, anticipate maintenance cycles that address broken or displaced pieces promptly to protect the underlayment and deck connections. With metal, prioritize corrosion-resistant accessories, robust sealants, and a thoughtful approach to transitions where water can linger or salt spray concentrates. The goal is a roof that honors coastal hillside character while delivering durable performance against the Peninsula's distinctive blend of wind, salt air, and architectural heritage.
Find contractors who specialize in clay and concrete tile roofs, known for their durability and curb appeal.
SM Remodeling Roofing
(424) 289-1223 sm-remodeling.com
Palos Verdes Peninsula, California
5.0 from 33 reviews

On the Peninsula, a full reroof in most jurisdictions is treated as more than routine maintenance. Instead of being handled as a simple tile swap or patch, most reroofs trigger a formal permit process. This reflects the structural and coastal exposure realities of hillside homes and blufftop sites, where a reroof affects wind paths, drainage, and underlayment safety. Treating reroofing as a permit-required project helps ensure that the roof system, fasteners, flashing, and sealants meet the specific standards that coastal environments demand. If a project runs afoul of local expectations, the consequence is delays and potential redo work that can ripple through the schedule.
Permit issuance typically follows a clear sequence: plan or scope review, fee payment, and then inspections. Before any material comes off or new underlayment goes on, the reviewing authority wants to see a coherent plan that shows roof geometry, insulation details, and ventilation strategy. That plan needs to align with local wind uplift requirements and coastal ventilation expectations, and it will be checked against the chosen roofing material and its installation method. Inspections are commonly staged around underlayment or rough-in work, then installed roofing, and finally a final sign-off. If the plans don't clearly demonstrate a compliant wind and moisture strategy, the review can pause progress and require revisions.
Coastal wind exposure and salt air demand more than aesthetic considerations. Local reviewers may require proof of wind uplift compliance for the specific roofing system and fastener pattern, as well as verified ventilation design for attic or roof cavity spaces. A roof exposed to prevailing ocean breezes benefits from a ventilation plan that maintains adequate airflow without creating channels for wind-driven water intrusion. Expect questions about ridge, soffit, and eave vents, and be prepared with calculations or manufacturer documentation that supports the chosen configuration. Missing or weak ventilation can trigger correction notices prior to final approval, which matters on exposed coastal roofs where moisture buildup and heat spikes can accelerate material degradation.
If deficiencies are found, a correction notice may be issued with a clear path to compliance. This could involve detailing additional flashing, adjusting fastener patterns, or upgrading ventilation components. The goal is a durable roof that resists salt spray and wind-driven water intrusion while remaining code-compliant across jurisdictional boundaries on the Peninsula. The final sign-off confirms that the reroof project aligns with local requirements and that the roof-installed system, including underlayment and ventilation, meets long-term performance expectations. Navigating this process with upfront documentation and a cooperative contractor can minimize delays and help secure a smooth transition from permit review to a completed, coastal-ready roof.
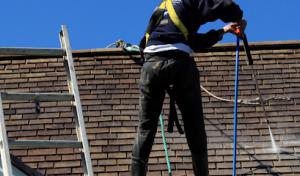
Winter rain events on the Peninsula can interrupt tear-off schedules and raise the risk of moisture exposure if crews open too much roof area at once. When a storm rolls in, a cautious approach matters more than speed. If your roof is showing stained sheathing or with a suspected leak, insist on staging the repair in smaller sections or using temporary coverings that protect exposed decking. The blufftop winds and marine moisture mean any prolonged exposure can accelerate wood rot and underlayment deterioration, so timely, staged work is healthier for the roof system than a single long tear-off during a high-saturation period. Coordinating with the contractor to avoid large open areas during heavy rain fronts reduces moisture intrusion and preserves the roof's structural integrity.
Santa Ana wind cycles in fall can affect Peninsula roofs through uplift pressure and wind-driven debris, even though the area is coastal rather than inland. These gusts can lift vulnerable flashing, vent caps, and edges if left unsecured, creating rapid leaks behind seasonal debris or damaged tiles. When planning repairs, consider temporary bracing for loose tiles and securing flashing through the peak wind months. If wind forecasts predict a particularly strong cycle, postpone non-critical tear-offs and prioritize protecting interior spaces and attic ventilation. Quick stabilization of leaks during these wind periods buys time for a proper, durable fix afterward.
Because many local contractors advertise emergency response and storm repair, homeowners here often seek fast leak stabilization first and full replacement planning second. A rapid leak stop can prevent interior damage, but it should be treated as a temporary measure. Use a written plan that clearly outlines a staged replacement timeline, prioritized by highest weather exposure and the remaining lifespan of the current roof. This ensures the most vulnerable sections are protected while the larger replacement strategy is developed, reducing the chance of repeating storm-related damage.
Act quickly when a leak is detected, but resist rushing into a full tear-off during a heavy storm window. Request a staged repair map that shows how each section will be addressed without leaving wide open decks exposed. Verify that temporary protections-tarps, water barriers, and secure flashing-are properly installed before rain or wind spikes. Keep a close eye on wind alerts and be prepared to pause nonessential work if a forecast calls for elevated uplift risk or airborne debris. A disciplined, weather-aware plan minimizes damage and keeps replacement timing aligned with long-term roof performance.
When you can't wait, these contractors offer fast response times to stop leaks and prevent further damage.
SM Remodeling Roofing
(424) 289-1223 sm-remodeling.com
Palos Verdes Peninsula, California
5.0 from 33 reviews


Rolling Roof Repair
Serving
4.9 from 85 reviews
Rolling Roof Repair is your trusted source for efficient and effective roofing repairs. Our team of experienced technicians specializes in diagnosing and fixing a wide range of roofing issues. We understand the impact of a damaged roof on your property, and we strive to provide timely solutions. With attention to detail and a commitment to quality, we ensure that your roof is restored to its optimal condition. Count on Rolling Roof Repair for prompt and professional roofing repairs that prioritize the safety and longevity of your roof.
Solid Reach Roofers
(424) 499-8333 ranchopalosverdesroofing.com
Serving
4.9 from 84 reviews
Solid Reach Roofers is a trusted roofing company dedicated to providing top-quality roofing services. Our experienced team of professionals specializes in roof repairs, installations, and maintenance for residential and commercial properties. We prioritize attention to detail and use high-quality materials to ensure the longevity and functionality of your roof. With our expertise and commitment to customer satisfaction, you can trust Solid Reach Roofers to deliver exceptional craftsmanship and reliable results. Whether you need a minor repair or a complete roof installation, we have the skills and resources to meet your roofing needs with precision and expertise.
Ray & Sons Roof Repair
(424) 361-0009 torranceroofmasters.com
Serving
4.8 from 71 reviews
Welcome to Ray & Sons Roof Repair, your reliable partner for all your roof repair needs. Our dedicated team of professionals is committed to providing exceptional results and exceeding customer expectations. With our attention to detail and expertise, we offer reliable and efficient repair services to address any issues with your roof. Whether it's fixing leaks, replacing damaged shingles, or addressing structural issues, trust Ray & Sons Roof Repair for reliable and professional solutions. Experience the difference we can make for the longevity and functionality of your roof.
AAA Roofing Services
(818) 654-5977 www.aaaroofingsvc.com
Serving
4.7 from 16 reviews
AAA Roofing Services is a family owned full-service roofing company that prides itself in providing the highest level of quality and workmanship on all of our commercial and residential services. With over hundreds of satisfied customers; our referrals are our biggest attribute and we are confident you will not want to look else where.
Modern Solution Roofing
(661) 339-3278 www.modernsolutionroofing.com
Serving
5.0 from 27 reviews
At Modern Solution Roofing, we’re not just a roofing company, we’re your neighbors with innovative, reliable roofing solutions, delivered with integrity ,expert craftsmanship, and unwavering commitment to customer satisfaction. We specialize in roof replacement, re roof, roof repair We’re local roofers, proudly serving Santa Clarita as a trusted, owner-operated company. 10+ years of experience in SCV, San Fernando Valley and Los Angeles County. We hold a C39 roofing license, full insurance, bonded, and workers’ comp, because your peace of mind matters. Free estimates. No hidden fees or pushy up sales. We’re proud to support our military, ask about discounts for active duty and veterans.

Torrance Roofing Pros
(310) 912-6646 rite-wayroofing.store
Serving
5.0 from 31 reviews
Torrance Roofing Pros is the go-to roofing contractor for homeowners and businesses in Torrance and the South Bay. Our experienced team specializes in roof repairs, replacements, new installations, leak detection, and emergency roofing services, delivering high-quality results that keep your property safe and secure. We work with a wide range of roofing systems including asphalt shingles, tile, flat roofs, and energy-efficient options, ensuring every project is built to last. At Torrance Roofing Pros, we pride ourselves on honest estimates, skilled craftsmanship, and dependable service—making us a trusted choice for roofing solutions throughout the community.

Torrance Roofing
Serving
4.8 from 75 reviews
Torrance Roofing is your trusted partner for professional roofing services in the Torrance area. With our team of experienced roofers, we provide top-quality roofing solutions for both residential and commercial properties. We understand the importance of a durable and well-maintained roof to protect your property. Whether you need roof repairs, installations, or maintenance, Torrance Roofing delivers efficient and effective solutions. Trust us for professional and reliable roofing services.
Watershield Roofing
(424) 221-2118 watershieldroofingco.com
Serving
5.0 from 24 reviews
Watershield Roofing in Los Angeles, CA is a roofing company that offers expert installation, repair, and maintenance services for both residential and commercial properties. Our skilled team, quality materials, and commitment to customer satisfaction ensure durable and stunning roofs. Choose Watershield Roofing for all your roofing needs. Call today to schedule an appointment!
One Roofing Solution
(323) 543-7482 oneroofingsolution.com
Serving
5.0 from 23 reviews
Protect your largest investment with our reliable roofing services. We are a locally owned and operated roofing company currently serving Maywood, CA and surrounding communities. If you want to make your roof last as long as possible, it is vital that you never put off a roof repair. Small issues with roofing become big issues in a hurry. No matter how major or minor the repair you need, we are here to help. We offer roofing services, roof installation, and roof repair.
AEL Roof Leak Repair Los Angeles
Serving
5.0 from 23 reviews
AEL Roofing Leak Repair Los Angeles are a team of professional roofers that can handle roof leak repair and replacements on residential roofs, commercial roofs, or specialty roofs. We are one of the top roofing companies in the greater Los Angeles area, and we have experience working with a wide variety of products, including composition shingles, asphalt shingles, metal roofs, tile roofs, PVC, and TPO. We can also work with flat roofs, roof coating, PVC, and single ply roofing, and there are many more options available. Be sure to consider us when you’re choosing a roofer for your next project. Looking forward to work with you ! AEL Roofing Leak Repair Los Angeles
NR Roofing CA
(626) 654-4714 nrroofinglosangeles.com
Serving
4.7 from 42 reviews
Roof repair & Installation Services in Pasadena California: NR Roofing CA repair and install all types of roofs in Los Angeles County California.
United Master Roofing
(626) 627-3959 www.unitedmasteroofing.com
Serving
5.0 from 18 reviews
We are a small local family-run business dedicated to meeting all your roofing needs. We offer a wide range of services from repairs, maintenance, and replacement to installations. We promise to give you the best quality of work for your home or business.
On the Peninsula, salt air and sea wind shape a practical approach to roof material selection. The coastal environment accelerates corrosion on metal components and can drive faster wear on fasteners and flashings. When planning replacement, expect that not only the field roofing but also flashings, vents, and metal accessories may need extra attention or more frequent replacement compared to inland areas. This means the overall project scope can be larger than a straightforward field roof swap, especially on hillside parcels where access and staging add complexity.
Provided local pricing ranges per square are Asphalt Shingles 350 to 650, Metal Roofing 600 to 1100, Clay Tile 1000 to 1800, Concrete Tile 900 to 1500, Wood Shingles or Shakes 800 to 1400, and Synthetic or Composite Shingles 600 to 1000. These ranges reflect how coastal exposure and hillside siting influence material choice and long-term performance. For example, metal may carry a higher upfront cost but can offer better wind resistance in exposed blufftop areas, while concrete or clay tiles provide durability against salt spray but add weight and require structural consideration.
Peninsula reroof costs can rise on hillside parcels and custom homes where access, staging, and debris handling are more difficult than on standard tract lots. Narrow driveways, steep pitches, and tight lot lines can slow material delivery and elevate crew hours. For a Mediterranean-inspired hillside home with multiple slopes, expect time spent coordinating crane or hoist use, securing debris containment, and protecting adjacent landscaping. These factors translate into higher overall project costs even when the per-square price remains within the general range for the chosen material.
Asphalt shingles sit lower in upfront cost, but coastal risks may tilt the decision toward products with enhanced wind resistance or longer service life if the budget allows. Concrete and clay tiles handle salt spray well and offer excellent longevity, yet their weight and installation overhead are higher, particularly on hillside homes where structural checks and crane time add cost. Wood shingles or shakes bring a classic look but demand vigilant maintenance in coastally salted air. Synthetic or composite shingles deliver a balanced option with easier installation and decent durability, often appealing where weight or access constraints are significant.
In the Peninsula, replacement timing should account for abrasion from salt-laden winds and the potential for faster deterioration of metal fasteners and penetrations. Expect more frequent inspection of flashings and vents, especially around hips, ridges, and transitions from roof to wall. If a full tear-off is conducted, consider upgrading metal components adjacent to the field to minimize future corrosion risk and extend the life of the entire roof system.
Don't let upfront costs delay a critical repair - these contractors offer payment plans to fit your budget.
For homes perched along bluff edges and near marine spray, wind and salt air can quietly accelerate wear on flashing, fasteners, and roof penetrations. In California, roof claims affecting Peninsula homeowners can be shaped by both wind exposure and broader wildfire underwriting pressure, even when the immediate roof issue is a leak or partial storm loss. When a storm gusts off the ocean or a wildfire risk assessment tightens, insurers may scrutinize the roof integrity beyond the visible leak, looking at long-term resilience and how well the roof handles uplift. The patchwork of city rules in this stretch adds another layer, so a claim isn't only about damage but about how the roof held up under coastal conditions and how well it aligns with the surrounding community's expectations for wind and ember resistance.
You are better positioned when you can show what the coast and wind have done to components exposed to salt air and spray, including fascia, ridge vents, and mechanical penetrations. Insurers may request roof age, detailed photos, and on-site adjuster inspections, so Peninsula homeowners benefit from documenting exposed coastal components, uplift damage, and any code-related reroof requirements. Take clear pictures before and after storms, capture corner details on hips and valleys, and keep a running record of repairs that reveal a pattern rather than a one-off patch. A well-organized file of images and notes helps an adjuster see how the roof performed under wind loads and during ember exposure events.
Coverage decisions can be influenced by code compliance during replacement, which makes permit records and inspection sign-offs especially useful when a claim involves a full reroof. If a reroof becomes necessary, the insurer will weigh whether the new installation aligns with resisting uplift, windborne debris, and ember contact standards. In the context of broader wildfire underwriting pressure, the better the replacement aligns with recognized safety and durability benchmarks, the more the claim can stay on a predictable path. Maintaining a transparent narrative about the roof's wind and salt-life history helps cushion the impact of any coverage questions.
Connect with contractors who help homeowners navigate the claims process from damage assessment to final approval.
SM Remodeling Roofing
(424) 289-1223 sm-remodeling.com
Palos Verdes Peninsula, California
5.0 from 33 reviews

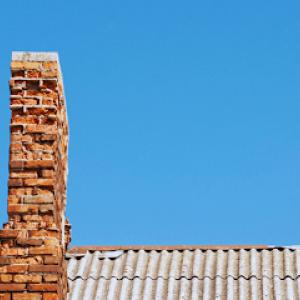
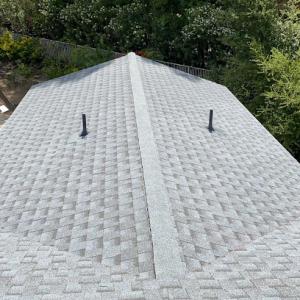
Skylights and chimneys are common on Peninsula homes, and many local roofing pros treat these repairs as routine add-ons to reroof jobs. Salt air and constant coastal wind stress flashing details at every transition, not just the main field. Leaks tend to start where a skylight, chimney, or other penetration meets the roof plane, especially where salt spray and driving rain push against joints and sealants.
Custom hillside homes bring more roof geometry-extra valleys, sidewalls, and multiple intersections where skylights and chimneys meet the roof deck. Each angle or offset grows the number of vulnerable seams. Pay close attention to the flashing around skylights, sidewall flashings, cricket slopes behind chimneys, and the transition from venting to ridge lines. Salt exposure accelerates corrosion on metal flashings and fasteners, while wind-driven rain can force moisture into any small gap.
During a close-up inspection, first inspect the skylight curb and chimney chase for hairline cracks or loose sealant. Check the up-slope flashing for lift or corrosion, and verify that counter-flashing overlaps are intact. Test the sealant at all exposed edges with a gentle push; any movement or tearing indicates replacement. Look at the valleys where multiple penetrations converge-these are high-priority areas for waterproofing because they funnel rain toward flashing joints.
Plan a proactive approach: reinforce or replace flashing with corrosion-resistant metals where salt exposure is strongest, and ensure sealants are compatible with coastal conditions. When reroofing, align skylight and chimney flashing with the chosen roofing material, and consider additional counter-flashing or kick-out flashing where water flow concentrates. For hillside layouts with complex geometry, specify extra attention to every penetration during the tear-off and reinstallation to maintain a continuous, watertight envelope.
Find contractors experienced in skylight installation, flashing, and leak repairs to bring natural light into your home.
SM Remodeling Roofing
(424) 289-1223 sm-remodeling.com
Palos Verdes Peninsula, California
5.0 from 33 reviews
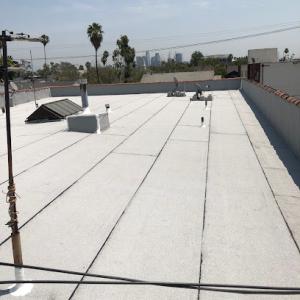
While tile and shingles dominate the Peninsula, many custom homes feature flat or low-slope sections over additions, garages, decks, or modern architectural elements. These areas sit alongside steeper pitched roofs and face a different set of challenges that demand focused attention. The marine salt air and blufftop winds can intensify moisture problems on low-slope or flat portions, where runoff and drainage behave differently than on the main roof. Planning around these zones early in a reroof project helps prevent hidden leaks and uneven aging.
Low-slope areas experience ponding during winter rains, and even small amounts of standing water can lead to accelerated wear, especially when the substrate is near the edge of a system designed for a steeper pitch. Peninsular microclimates push salt-laden air across every corner of the roof, and wind-driven spray can accelerate corrosion or degrade membrane edges on flat assemblies. Over time, you may notice slow seepage at seams, blistering of coatings, or faster aggregation of debris that traps moisture. Recognize that these symptoms often begin subtly and progress differently than issues on a main slope.
Because flat-roof specialization is meaningfully present in the local contractor market, homeowners should treat low-slope sections as a separate scope rather than assuming the main roof material solves every area. Approach each flat or low-slope patch with its own waterproofing strategy, flashing details, and drainage plan. This may involve dedicated lofted or deck-adjacent membranes, distinct edge termination, and targeted insulation considerations that align with the overall architecture.
Coordinate closely with the roofing team to map drainage paths and confirm that gutters and scuppers align with every low-slope surface. Inspect for ponding after heavy rains and verify that transitions between pitched and flat areas are continuous and well-sealed. When selecting materials, consider systems that pair well with flat sections-materials that resist standing water, maintain membrane integrity, and hold up against marine exposure without excessive maintenance. Regular inspections after wind events are especially valuable on Peninsula homes, where wind exposure can disproportionately impact less steep surfaces.
Find specialists in TPO, EPDM, and built-up flat roofing systems for residential and commercial properties.
SM Remodeling Roofing
(424) 289-1223 sm-remodeling.com
Palos Verdes Peninsula, California
5.0 from 33 reviews