Last updated: Apr 19, 2026
Rialto's hot, dry summers compress the daily installation window for safe roofing work. The combination of high temperatures and strong sun can trip heat-related concerns for both crews and materials. On the hottest days, asphalt shingles may lose manageable stiffness, and underlayment can fatigue faster when left exposed. If a roof is slate or tile, heat makes handling heavier bundles especially cumbersome and increases the risk of accidental damage. Plan to begin work early, aim to complete the bulk of tear-off and decking preparation before the peak heat hours, and schedule heavy lifting for cooler mornings. Portable shade, strategic staging, and keeping bundles covered when waiting can help maintain material integrity. In practice, this means building a schedule that prioritizes material delivery and critical fastenings to the cooler portions of the day, with nonessential prep tasks moved to early morning or late afternoon windows when feasible.
Spring and fall operate as the most practical reroof seasons in this climate. The shoulder seasons provide more forgiving temperatures for long days on the roof and reduce the risk of heat-related delays. Fall brings ventilation benefits and better access for crews and equipment, reducing the likelihood of overheating the roof structure during the work. In these seasons, try to match delivery days with anticipated weather so that underlayment and weatherproofing layers can be installed in a continuous sequence. Plan for longer dry-in periods in spring or fall to ensure shingles and flashings lay flat and seal properly before any potential rain. If a homeowner is choosing between a late spring start or a mid-fall start, lean toward those months for a smoother workflow and faster completion times.
Most local rainfall arrives in winter, so tear-off work from roughly November through March carries higher dry-in and leak exposure. Wet afternoons can stall progress and impact plywood or deck sealing, which then influences the quality of the new roof's first line of defense. The risk isn't just rain - it's the scheduling ripple: you may find that compacted schedules to finish a project before the next storm lead to rushed underlayment or less-than-ideal flashing details. Strategy here is to target the wetter months for more limited tear-off windows and prioritize closing the roof deck quickly with trusted underlayment, drip edge, and flashing so as to minimize exposed periods. When winter weather looks unsettled, consider temporarily pacing the tear-off to a two-day block with a dry-in plan that accommodates possible arroyos or Santa Ana wind gusts that can drive dust and moisture under exposed surfaces.
Fall Santa Ana wind periods in the Inland Empire can disrupt shingle handling, underlayment staging, and debris control on active reroof jobs. These winds can lift lightweight materials, blow granules into newly installed sections, and complicate debris containment. To mitigate, secure all loose items at the start of the day, create wind breaks for staging areas, and schedule the most wind-sensitive tasks for mornings when winds are typically calmer. If a wind hazard appears on the forecast, consider pausing the tear-off and securing the site rather than pushing through riskier conditions. Debris control is essential because gusts can drive material and waste toward property lines or neighbors, inviting complications that slow progress and add cleanup time.
Align your calendar with the local climate rhythm: push major tear-off and decking work into early morning slots during summer, target spring and fall for the longest uninterrupted daylight windows, and reserve winter for dry-in-critical phases with ready-to-seal underlayment. Build buffer days into the plan to absorb weather interruptions, particularly in late fall when Santa Ana winds are more likely. Communicate clearly with the crew about expected wind shifts and heat days, and maintain a visible weather checklist at the job trailer so everyone can adjust tasks quickly. This season-aware approach helps reduce leak risk, protect installed components, and keep the reroof project moving steadily through Rialto's unique patterns of heat, wind, and rain.
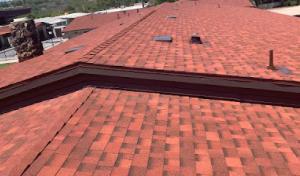
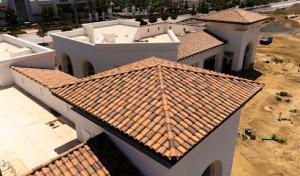
Clay and concrete tile dominate the local roof landscape because they handle the Inland Empire sun and heat well when properly installed. Their high thermal mass helps moderate attic temperatures, and the light reflection on white or pale tiles can reduce heat gain. But the weight of these tiles matters: on some reroof projects, the existing frame or truss system must be reviewed for structural support before tile installation proceeds. When a roof is loaded beyond its original design, settlement or hairline shifting can create cracks and misalignments that worsen leak risk over time. Expect a careful assessment of rafters, connections, and the overall roof structure during the planning phase.
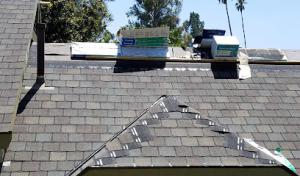
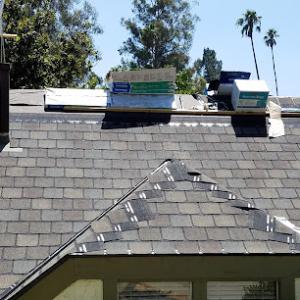
In this dry, sun-drenched environment, the surface tiles themselves are not the sole failure point. The underlying layers-underlayment, flashings, and the interface where field tiles meet roof penetrations-often fail first. Heat accelerates drying and aging of underlay materials, and the expansion-contraction cycle of clay and concrete tiles stresses the fasteners and gaskets that keep valleys, vent pipes, and chimneys sealed. A seemingly pristine tile surface can hide a compromised underlayment or flashing that leaks during winter rain events or Santa Ana wind gusts when pressure surges around roof penetrations.
Tile roofs in Rialto typically see their biggest leak risk during the transition from the hot, dry months to the wetter season. Summer heat expands metal flashings and loosens seals around penetrations; fall Santa Ana winds can lift loose or slipped field tiles, exposing underlayment and fasteners to blowing dust and debris. Then, winter rains reveal gaps where water can travel along underlayment seams or around flashing joints. The timing of reroof work matters: scheduling major tile replacements or underlayment updates before fall wind season reduces the risk of wind-driven damage during construction and mitigates the chance of weather-related delays that leave a roof vulnerable to rain.
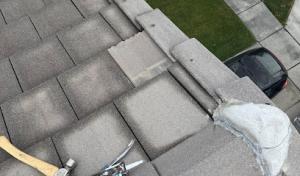
If tiles are cracked, broken, or slipping, those issues often show up after a dry spell rather than after a single heavy rain. In Rialto's climate, a tile with a hairline fracture can look fine but let water behind it during a wind-driven downpour. That hidden pathway commonly opens at the underlayment, not on the visible surface. A proactive approach is to inspect after peak heat and again after the first substantial rain, focusing on flashings at valleys, around vents, and at roof-to-wall transitions.
The Rialto market features a robust specialization in tile work, reflecting how common tile repair and reroof projects are in this city. A local contractor will typically bring a preferred set of tile profiles and underlayment systems that are known to perform under the Santa Ana wind cycles and winter rainfall patterns. When consulting a roofing team, confirm they conduct a thorough structural assessment and provide a written plan that includes underlayment type, flashing details, tile layout, and fastener selection tailored to your house's framing and roof pitch. Ask about their experience with tile set-down on existing roofs and their approach to joint sealing at penetrations and terminations.
Schedule a mid-summer inspection to verify tile alignment and check for loose or slipped field tiles before Santa Ana winds begin. Have a professional examine underlayment condition and flashings around vents, chimneys, and skylights. If underlayment shows signs of drying, cracking, or wear, plan replacement before the first heavy rain, rather than reacting to a leak after a storm. Keep debris from dust storms and irrigation spray away from roof edges to preserve seal integrity at transitions. When planning reroofing, prioritize a system that pairs a durable underlayment with high-performance flashing and a tile layout that minimizes foot traffic and stress on critical seams. By aligning reroof timing with Rialto's heat, wind, and rain cycles, you reduce leak risk and extend the life of a clay or concrete tile roof.
Find contractors who specialize in clay and concrete tile roofs, known for their durability and curb appeal.
Valley Roofing
(909) 725-4771 valleyroofingwebpage.godaddysites.com
Rialto, California
5.0 from 117 reviews
Protecting your home from the elements involves investing in your roof. At Valley Roofing in San Bernandino, CA, we can help you deal with any roofing problems you may have, whether you're experiencing leaks or need a new roof altogether. Our family-owned and -operated roofing company has over 30 years of combined experience in the roofing industry, and we help residential and commercial customers alike. Contact us today and see how we can get your roof fixed fast!
MC Roofing
(909) 726-1691 site-v3tmqaun1.godaddysites.com
Rialto, California
4.5 from 8 reviews
MC ROOFING SPECIALIZES IN A WIDE RNGE OF ROOFING SOLUTIONS, INCLUDING ROOF REPAIR,ROOF REPLACEMENT, INSTALLATION OF CONCRETE TILE, CLAY TILE COMPOSITION SHINGLE BUILD-UP ROOFING AND MORE.

Reyes Single Ply Roofing Mstrs
(909) 258-2857 reyessingleply.com
516 W Rialto Ave, Rialto, California
5.0 from 3 reviews
Reyes Single Ply Roofing is your trusted partner for top-quality roofing, sheet metal, wall panel systems, and general construction services. We specialize in TPO and single-ply installations, delivering durable, energy-efficient solutions for commercial and industrial projects. From custom metalwork to full-scale construction support, our skilled team brings precision, reliability, and unmatched craftsmanship to every job. Let’s raise the standard—one roof at a time.
Jimgov Roofing
(909) 957-1252 jimgovroofing.com
Serving
5.0 from 23 reviews
Commercial and residential roofing company new roof and repair specialists

Oscar & Rosa Roofing Restoration
Serving
5.0 from 29 reviews
Oscar & Rosa Roofing Restoration is a family-owned business proudly serving Los Angeles county, Orange County and the surrounding areas with expert roofing and restoration services. Founded by Oscar and Rosa, the company combines hands-on craftsmanship with a commitment to client care, delivering high-quality solutions that protect homes and provide peace of mind. From minor roof repairs to full roof replacements, their team ensures each project is completed with precision and integrity. With decades of experience and a focus on enduring workmanship, Oscar & Rosa is dedicated to building lasting relationships and safeguarding communities through reliable, top-tier roofing services.
E.F. Roofing Services
(909) 834-1167 efroofingservices.com
Serving
5.0 from 15 reviews
E.F Roofing Services es una empresa líder en servicios de techado dedicada a brindar soluciones de primer nivel para propiedades residenciales y comerciales en todo el condado de San Bernardino. Nuestra experiencia abarca la instalación de techos nuevos, la reparación de techos y la impermeabilización de techos. Ya sea que esté buscando instalar un techo nuevo o necesite reparaciones para extender la vida útil de su techo actual, nuestro equipo capacitado está equipado para manejar todos los aspectos del trabajo con una atención excepcional a los detalles. Además de nuestros servicios básicos de techado, también ofrecemos reparación e instalación de canaletas. Tenemos personal bilingüe disponible.
Fontana Roofing Experts Pro
(840) 217-7622 fontanaroofingexpertspro.com
Serving
5.0 from 43 reviews
With years of experience serving Fontana and surrounding communities, Fontana Roofing Experts Pro is your trusted partner for all roofing needs. We pride ourselves on quality workmanship, exceptional customer service, and competitive pricing. Our team of certified professionals is available 24/7 to handle any roofing emergency or scheduled service. We use only the highest quality materials and the latest techniques to ensure your roof stands the test of time.
Local Roofer
(909) 645-5745 www.localrooferus.com
Serving
5.0 from 13 reviews
Local Roofer provides dependable roofing support for homeowners needing long-lasting repairs or full replacements. As the most skilled roofing contractor in Colton, we inspect roofs, resolve leaks, install new systems, and guide clients toward strong, reliable options. We use proven methods and steady planning to ensure every project is handled with professionalism and clear communication. Moreover, we also specialize in commercial roof installation in Colton, offering durable solutions for offices, warehouses, and industrial buildings. Our team focuses on long-term strength, structural reliability, and installation that supports daily operations. Contact us today and learn how we can support your building’s protection.

United Roofing California SB
(909) 473-5221 www.unitedroofingcalifornia.com
Serving
5.0 from 13 reviews
United Roofing California SB is a trusted roofing company providing high-quality roofing solutions for residential and commercial properties across Southern California. With years of industry experience, our team is committed to delivering durable, reliable, and aesthetically pleasing roofing systems tailored to meet our clients’ specific needs. We specialize in: ✔ Roof Installations & Replacements ✔ Roof Repairs & Maintenance ✔ Re-Roofing & Inspections ✔ Commercial & Residential Roofing At United Roofing California SB, we use top-quality materials and the latest roofing technology to ensure long-lasting protection and energy efficiency for your home or business. Our expert team is dedicated to excellent craftsmanship, customer satisfacti
CRT Roofing Co. Inc,
(909) 566-4036 www.crtroofing.com
Serving
4.1 from 44 reviews
CRT Roofing Inc, Is a roofing contractor with over 50 years of combined knowledge in the field. We have experience working with property management companies, general contractors, commercial building owners, and facility managers. Need a roof inspection for repairs? Contact us today and receive a free quote!

Atlas Roofing
(818) 536-7661 atlasroofingpro.com
Serving
5.0 from 63 reviews
Atlas Roofing is a veteran-led, licensed, and insured roofing company proudly serving Los Angeles, San Francisco, San Diego, and Portland. We specialize in residential and commercial roofing, offering services such as new roof installations, repairs, maintenance, and custom rooftop decks. Our commitment to quality craftsmanship and customer satisfaction is backed by flexible financing options and comprehensive warranties. With a diverse selection of premium materials—including shingles, tiles, and flat roofing systems—we tailor solutions to meet your aesthetic and budgetary needs. At Atlas Roofing, we stand behind our work, ensuring your property is protected with durable, high-quality roofing solutions.
Fernandez Roofing
(714) 504-3290 fernandezroofingcorp.com
Serving
5.0 from 15 reviews
Welcome to Fernandez Roofing CORP, your trusted provider of top-notch roofing services. With 30 years of experience, we have built a reputation for excellence in both residential and commercial roofing. Our team of skilled professionals is dedicated to delivering high-quality workmanship and exceptional customer service. Whether you need a new roof installation, repair, or maintenance, we have the expertise and resources to get the job done right. We use the best materials and the latest techniques to ensure your roof is durable, reliable, and aesthetically pleasing. At Fernandez Roofing CORP, we are committed to protecting your property with roofs that stand the test of time.
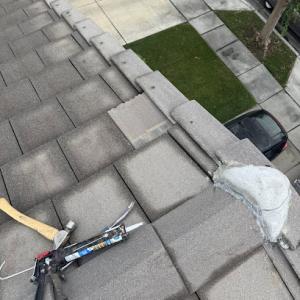
Rialto homeowners face fall wind events that can lift edges, displace ridge components, and drive debris onto roof surfaces and into valleys. When gusts grip the slopes, loose shingles or flashing edges can peel back just enough to create tiny openings that seem minor at first but become channelways for water. Those patterns are most visible on homes with clay or concrete tiles, but asphalt and metal roofs aren't immune to edge lift in sustained gusts. The result is a rapid, localized risk that can escalate during a single strong afternoon wind event.
Wind doesn't just lift; it scatters. Debris forced onto the roof can bounce into valleys, clog vents, and push into joints where tiles meet substrate. In The Inland Empire climate, debris intrusion is a common trigger for leaks that look like storm damage after the fact. Valleys act as focused paths for water and debris, so any wind-embedded breach there becomes a rain-driven leak as soon as moisture returns. If a roof has even a small wind-created opening, a winter storm can push rapid water intrusion that stacks up damage quickly.
Because winter rain follows the windy season, those small openings often become active leaks once storms arrive. A roof that endured a windy afternoon without immediate notice can reveal a leak once the first big storm hits. In Rialto, this sequence is a reliable pattern: wind creates the opening; rain confirms the leak; and then it's a race to seal before more moisture penetrates attic spaces, insulation, and framing. That timing makes early wind-damage detection essential, long before the next storm cycle.
The local contractor signal mix shows strong demand for emergency repair and storm damage response, matching this wind-to-leak pattern. When residents call after a Santa Ana wind, the window to prevent widespread interior damage is narrow. Crews prioritize secure tarping, temporary shoring of ridges, and rapid re-sealing of flashing to reduce the next storm's impact. Homeowners should treat even small protrusions or creased flashing as a red flag, not a cosmetic concern.
Inspect after a windy spell for lifted edges, displaced ridge components, or unusual gaps around flashing. If dark staining or damp spots appear in the attic following a storm, investigate the suspected leak path to determine whether it aligns with wind-driven openings. Prepare for the first winter rain by having a trusted roofer assess critical valleys and flashing joints, and arrange prompt emergency tarping if a leak is detected during or after a storm. In Rialto, timely response minimizes downstream damage and reduces the risk of widespread interior moisture.
Find local contractors experienced in assessing and restoring roofs after hail, wind, and severe weather events.
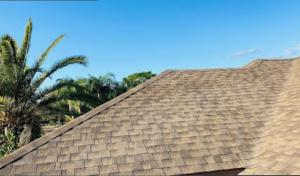
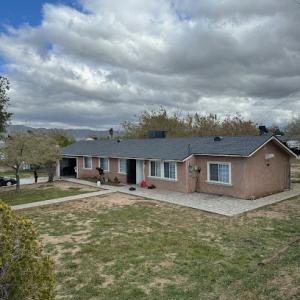
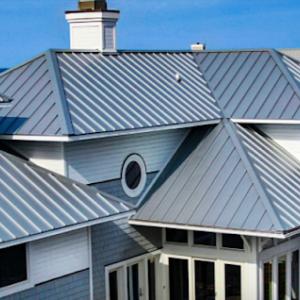
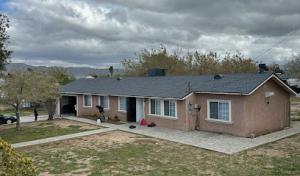
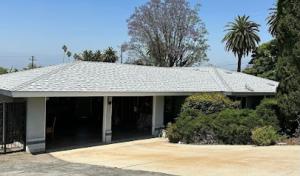
Rialto's dominant residential options are asphalt shingles, metal roofing, clay tile, concrete tile, wood shingles or shakes, and synthetic or composite shingles. The mix means choosing a roof type often comes down to how a current system pairs with the home's structure. If the house already carries a heavy tile system, continue on that path; if it's a lighter shingle setup, stay with or upgrade within that family. For homes with a low-slope section, plan for a roof assembly that accommodates waterproofing and drainage without creating new cold spots or heat traps.
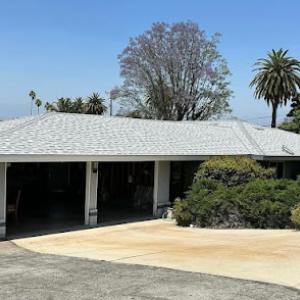
Heat exposure in this area makes solar reflectance, attic ventilation, and underlayment quality more important than in cooler coastal markets. If you're considering replacement or a major reroof, prioritize materials with high reflectivity or a cooling-capable coating, especially on metal and tile options. Ensure the attic has adequate intake and exhaust ventilation to reduce attic temperatures and minimize shingle or underlayment degradation. For clay and concrete tile, confirm proper underlayment and flashing details to handle daily sun load and long summer afternoons.
Clay and concrete tiles offer long-term durability and strong heat resistance, but they add weight and require a solid roof deck and framing. If the home already supports heavy tile, staying with tile makes sense, but verify structural compatibility and local wind performance, especially against Santa Ana gusts. Asphalt shingles or synthetic options can provide lighter weight and quicker installation, with modern high-reflectance laminates closing the gap on heat gain. If the house features a low-slope section, a roof with a high-quality underlayment and appropriate flashing details becomes essential to prevent leaks during winter rain.
Santa Ana winds stress edge fasteners and penetrations. When selecting a material, look for reinforced edge protection and a proven warranty against wind uplift. For winter rain, choose systems with robust underlayment and integrated leak barriers at valleys, chimneys, and transitions. Tile systems should include proper sealants and a clean, debris-free drainage plan to prevent water backup at eaves and soffits.
In this climate, ongoing maintenance matters almost as much as initial material choice. Regular inspections after heavy winds and seasonal rains help catch fractured tiles, loose fasteners, or compromised underlayment early. A practical reroof plan accounts for the home's existing load, whether tile or shingle, and aligns with heat tolerance, wind exposure, and rainy-season readiness.
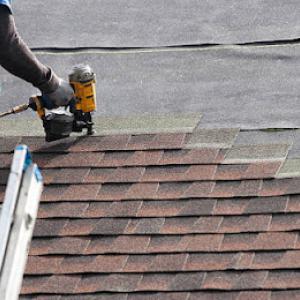
The most popular roofing material in the US. Find pros who install, repair, and replace asphalt shingles.
For asphalt shingles, local price ranges run about $350 to $650 per square. Metal roofing typically lands between $700 and $1,200 per square. Clay tile projects commonly fall in the $1,000 to $2,000 per square band, while concrete tile sits around $900 to $1,800 per square. Wood shingles or shakes usually run $600 to $1,000 per square, and synthetic or composite shingles come in at roughly $450 to $800 per square. These figures reflect Rialto's heat, Santa Ana wind exposure, and the mix of older homes with tile-compatible assemblies and newer, lighter roof decks.
Costs in Rialto often rise when homeowners switch from a lighter roof to tile-compatible assemblies or when structural reinforcement is required for heavy materials. If a roof isn't already prepared to carry clay or concrete tile, expect extra work: upgrading decking, adding rafter ties, or other reinforcements. That investment can add several thousand dollars to the project, but it stabilizes long-term performance under Inland Empire heat and seasonal wind gusts. If you're choosing tile, budget for extra labor in both removal and installation, and plan for longer timelines if structural work is needed.
Scheduling pressure from winter rain, fall wind events, and summer heat can affect labor efficiency and temporary dry-in needs on reroof jobs. In practice, that means winter and shoulder seasons may see tighter availability and slightly higher labor costs if crews must weather delays or work around frequent storms. Summer heat can slow productive hours on high-slope roofs, increasing duration and total cost. When planning, build in a window that accommodates potential weather interrupts and dry-in contingencies, and confirm that the chosen crew can provide a reliable dry-in strategy if a late-season storm arrives.
Get a clear picture of your project costs upfront - no commitment required.
Full reroof projects in Rialto generally require a building permit through the city's Building & Safety Department. Starting the process early helps you avoid delays that can disrupt Santa Ana wind season or the winter rain window. The permit signals that your plan has been reviewed for structural integrity and ventilation, and that the work will meet local code demands for this climate. Missing or late permits can trigger fines, stop-work orders, or expensive rework when inspectors arrive.
Inspections commonly occur at staged milestones, including underlayment and final roof covering, rather than only at project closeout. That means you should expect at least two important checkpoints: one after the underlayment is installed but before shingles or tiles go on, and a final inspection once the new roof is complete. These milestones help catch ventilation or moisture-trapping issues early, which is especially important when hot days can bake an imperfect attic air balance and Santa Ana winds stress roof edges.
Plan review in Rialto is typically tied to permit valuation, and some jobs may require structural reinforcement review or ventilation confirmation depending on the existing roof system. If the current structure has older rafters, hip rafters, or a history of leaks, a structural assessment may be requested. Ventilation balance is key in this climate, so be prepared for review of soffit intake, ridge venting, and attic ventilation capacity. If the plan shows significant changes to venting, attic space, or roof slope, expect the reviewer to check those details carefully and to require adjustments before approval. Missing notes on these elements can stall the permit, pushing the project into worse weather windows. Plan accordingly, and coordinate with the contractor to ensure the submission matches what the inspector will expect to see on site.
Rialto homeowners operate under California insurer pullbacks and premium pressure tied to wildfire exposure and catastrophe modeling in Inland Empire risk areas. That reality can shape how quickly a claim moves and how it's evaluated after a leak or wind event. When a claim lands, adjusters may ask for roof age, prior repair history, and documentation of recent material changes. Having solid pre-loss records makes a difference in how smoothly the file proceeds and how the claim is understood in terms of cause, timing, and scope.
After a wind event, smoke exposure, or a winter rain shower, the sequence matters. Dated photos that show the roof's condition before any incident help distinguish existing wear from new damage, especially when soffit or fascia connections were stressed by Santa Ana winds. Permit records for past reroofs or material changes establish a clear timeline of updates. You want a narrative that supports when deterioration began versus when an incident occurred, so you're not caught explaining a sequence after the fact.
Keep a running log of any suspected leaks or attic staining, even if inconclusive, so the timeline is easier for an adjuster to follow. Document material changes, such as a switch to a different shingle profile or a reroof with a new underlayment, and store receipts or supplier invoices. In this climate, where wind, smoke, and rain timing can complicate claims narratives, a straightforward file with dated evidence reduces back-and-forth and helps the file stay focused on actual damage, not assumptions.
Connect with contractors who help homeowners navigate the claims process from damage assessment to final approval.
Valley Roofing
(909) 725-4771 valleyroofingwebpage.godaddysites.com
Rialto, California
5.0 from 117 reviews
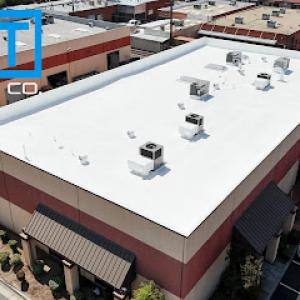
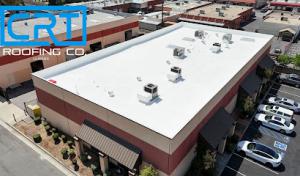
Rialto's contractor market includes a meaningful flat-roof segment, reflecting the presence of low-slope sections on homes, additions, patios, and commercial properties. On these low-slope roofs, intense sun exposure can accelerate membrane and coating wear even when annual rainfall is modest. The hot Inland Empire sun can bake the surface, cause polymer degradation, and shorten the life of seam tapes and flashing. Materials that look durable in a garage or showroom can show signs of aging in just a few seasons if they sit exposed to full sun on a tilted plane. Pay particular attention to edges, corners, and transitions where sunlight concentrates and heat can stress the membrane.
Because most rain arrives in winter bursts, drainage performance on low-slope Rialto roofs matters more than annual totals alone would suggest. Scuppers and downspouts that seem adequate in dry months may back up during heavy winter storms, sending water toward seams and penetrations. Gutters on low-slope areas sometimes collect debris that blocks flow, worsening ponding and accelerating leakage risk around penetrations or flashing. Regularly check for standing water after storms, and ensure that drainage paths remain clear even after palm fronds or leaves accumulate in late fall. If a roof section backs up during a rain event, it's a signal to re-evaluate deck slope, membrane integrity, and the condition of edge details.
For homes with low-slope additions or patios, proactive upkeep matters more in Rialto than in towns with gentler winters. Schedule mid-season inspections after the hottest months and again after the winter rainy window, focusing on seams, flashings around skylights, wall terminations, and penetrations through parapet walls. Choose coatings or membranes rated for high-heat environments and confirm compatibility with existing materials. Promptly address small coating wear or minor flashing lifts before they become larger leaks that follow the line of a winter downpour.
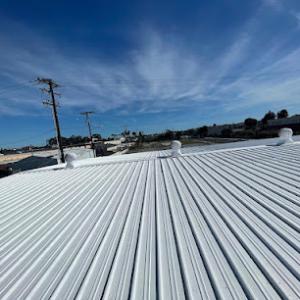
Find specialists in TPO, EPDM, and built-up flat roofing systems for residential and commercial properties.
Reyes Single Ply Roofing Mstrs
(909) 258-2857 reyessingleply.com
516 W Rialto Ave, Rialto, California
5.0 from 3 reviews

United Roofing California SB
(909) 473-5221 www.unitedroofingcalifornia.com
Serving
5.0 from 13 reviews