Last updated: Apr 19, 2026
In this front-row seat to Florida storms, you feel the rhythm every summer: hot, muggy mornings that suddenly break into booming thunder and a fast-downpour downpour. Full replacements are best scheduled in the drier part of the year because the city's hot, humid summers bring frequent thunderstorms that interrupt tear-off schedules and reduce ideal sealant conditions. When a contractor has to pause for a weather window, that delay can stretch into days or weeks. The risk isn't just rain; it's the pressure of a changing forecast that can shift from a calm afternoon to a sudden blast of wind and rain that turns a planned sequence into a scrambling job. Expect longer timelines than inland markets, and plan around the most predictable dry spells you can rely on.
The city sits along the St. Johns River in Clay County, so roofs here are routinely exposed to wind-driven rain and tropical moisture rather than the drier inland conditions found farther west. That exposure matters for every roofing decision: the way drip edges are seated, how flashing around chimneys and vents is treated, and whether the rake edges get additional wind protection. You'll notice that even minor roof lines face a higher frequency of wet days with gusty outbursts. That pattern means a reroof or major repair should assume more frequent rain interruptions and a tighter window for shingle adhesion and sealant cure. The moisture in this climate travels quickly, and a roof that's nearly done can be undermined by a single long cell of heavy rain if the sealant hasn't had a chance to cure fully.
When a big storm season is on the horizon, you want momentum, not downtime. Coordinate reroof timing with the dry stretches in late spring or early fall when possible, but be prepared for a sudden change in the forecast that pushes work into the next available window. Build a contingency plan with your crew for rapid waterproofing of vulnerable areas if a storm edge creeps into the schedule. Confirm that temporary tarping and wind-resistant fasteners are ready, and insist on a clearly marked sequence so occupants aren't left exposed to rain while flashing and underlayment sections are still exposed. For homes along the river, prioritize secure fastening around eaves and overhangs, where wind-driven rain tends to strike first and hardest. If a delay is unavoidable, request ongoing interim protection to prevent interior damage from repeated summer downpours that can exploit even small gaps.
Local seasonal risk is not just hurricanes; repeated summer downpours can turn small flashing or underlayment defects into active interior leaks before a full tropical event arrives. A single thunderstorm can push water behind a poorly sealed seam, drawing it toward attic joints and ceilings. Inspect after every heavy rain, focusing on valleys, chimney flashing, vents, and any existing repairs. If a leak shows up early in the season, treat it as a warning sign: resolve the source promptly, because a larger storm could compound the damage quickly. In this area, the goal is to secure the roof's weather barrier before the next moisture surge, not just to finish a cosmetic layer. This approach protects the interior while the season still has several heat and rain cycles left to run. Nervous weather can turn routine maintenance into urgent repair in short order, so stay vigilant and plan ahead.
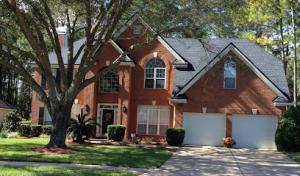
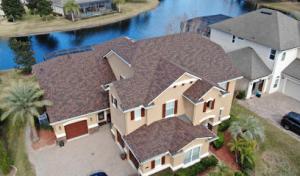
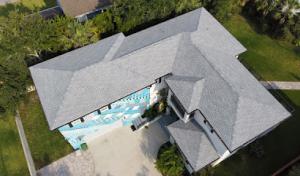
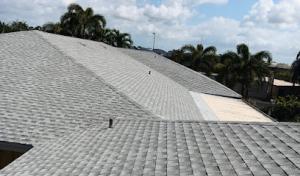
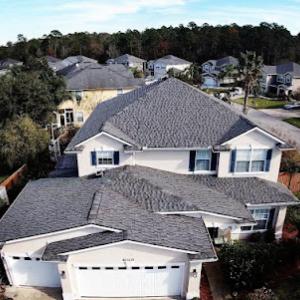
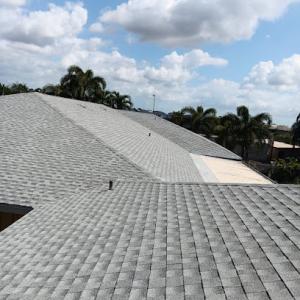
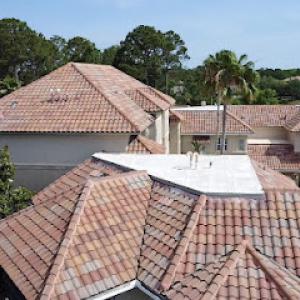
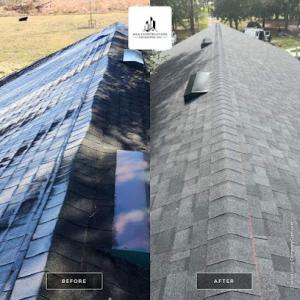
The dominant local material mix includes asphalt shingles, metal, clay tile, concrete tile, wood shakes/shingles, and synthetic/composite shingles, so homeowners are usually choosing among systems with very different wind, weight, and moisture behaviors. In this climate, thunderstorms roll in heavy and frequent in summer, often with gusty rain that tests edge details and underlayment. Asphalt shingles stay common for practical reroof timing, but you will notice that metal and tile systems respond differently to those same downpours. If the roof has a mix or if you're planning a retrofit, size up the prevailing wind exposure and the roof's ability to shed water quickly after a storm. For homes with clay or concrete tile, the weight adds a layer of structural consideration that can redefine what you're able to reroof with and how the existing framing will handle it.
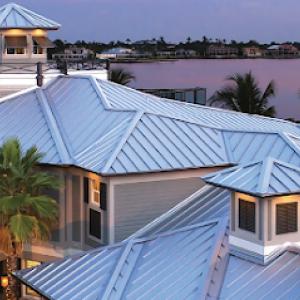
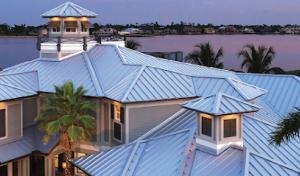
Metal roofing has a meaningful local specialist presence, reflecting demand for systems that handle Florida heat and shed heavy rain quickly during thunderstorm season. If you're weighing metal, look for panels with proven coastal and river-adjacent performance: corrosion resistance, fast drainage, and a standing-seam or concealed-fastener approach that minimizes potential water infiltration during driving rain. A key practical step is to verify that corners, ridges, and penetrations are sealed with metal-friendly detailing rather than generic solutions. In practice, metal shines where you want durability against wind-driven rain and rapid drying after a downpour, so it often earns a longer service life in this market. If the roof sits beneath large trees or overhangs, ensure the edge trim and gutter system are matched to metal's expansion and contraction cycles to prevent loose fasteners after heavy storms.
Tile remains part of the market here, but clay and concrete systems require attention to structural load, underlayment condition, and repair logistics that differ sharply from standard shingle reroofs. Clay and concrete tiles resist hail better than some shingles, yet their weight can push retrofit options to the next size or a partial rebuild if the structure isn't prepared. The sun and heat also affect tile expansion and the sealant at flashing, so a reroof that uses tiles needs careful inspection of the underlayment and the flashing transitions around chimneys, vents, and skylights. Underlayment choice matters more with tile, since you want a layer that can tolerate heat while remaining watertight during monsoon season. If a tile roof shows signs of aging or previous patchwork, expect to budget for more meticulous replacement of flashing and a closer look at the eave overhangs to maintain proper drainage.
In practice, you'll approach reroofing with a focus on how each system handles wind-driven rain and how quickly moisture evaporates after a storm. Asphalt and synthetic shingles tend to offer quicker, lighter reroofs with straightforward repair logistics, but you should still verify that ventilation and attic insulation align with the new covering to avoid heat build-up. If choosing tile, plan for a longer, more deliberate installation window and confirm that the contractor can coordinate tile-cutting and ridge work without compromising the underlayment. Regardless of material, inspect for damaged fasteners, compromised flashing, and potential tree-related hazards that can spell trouble during Florida's storm season. A well-timed inspection after a heavy storm becomes a practical habit to catch and address creeping leaks before they become noticeable inside the living space.
A full roof replacement generally requires a building permit through the local Clay County/municipal building oversight process rather than being treated as a no-paperwork job. Start by requesting the permit through the county's permit portal or at the local building department, and be prepared to submit project scope, architectural drawings or roof plan, and material specifications. In this jurisdiction, the permit is not just a formality-it formalizes the structural work and protects both you and your home from weather-related setbacks during the work window. Expect checks for ventilation, attic access, and proper roofing underlayment as part of the review. The county's reviewers look for compliance with current code year requirements, so confirm the code edition in effect for your project before submitting.
Reroof inspections commonly occur after tear-off at the rough stage and again at final. That means the first inspection will typically verify that the decking is sound, any decayed or damaged sheathing has been replaced, and underlayment is properly installed before shingles or tiles are applied. The final inspection confirms that the roof covering is complete, flashing at penetrations is sealed, and all components meet code and permit conditions. Because Green Cove Springs sits in a storm-heavy climate with frequent summer deluges, scheduling becomes a practical safety issue: if a storm is forecast, you may want to coordinate with your contractor to avoid exposing decking for extended periods. Have a contingency plan for wind-driven rain and temporary protection, and keep an eye on permit timelines so the project does not linger past the storm season.
Wind mitigation considerations may be reviewed depending on project scope and code year, which makes attachment details and documentation especially important for Florida homeowners seeking insurance value. Expect a review of fastener types, roof-to-wall connections, nailing patterns for shingles or tiles, and potential upgrades that improve wind resistance. If the project scope includes adding or upgrading underlayment, straps, or other protective measures, document these changes with photos and supplier data for the inspector and your insurer. Depending on the code year, certain mitigation features may qualify for insurance credits, so ensure the permit file includes a clear record of all attachment methods and materials used. This documentation can be as important as the roof itself when the next storm enters the forecast.
In this area, homeowners operate under Florida's volatile insurance market, where elevated wind and hail claim activity has led many carriers to tighten underwriting and demand stronger roof documentation. That reality can show up as stricter required proof of condition before a reroof approval, longer timelines, and more frequent requests for detailed history of how the roof was maintained and repaired. For a homeowner, that means thinking not just about shingling a roof, but about compiling a robust record package that shows the roof's true state both before and after work.
Because local contractors frequently advertise storm damage and insurance-claim help, homeowners here are clearly dealing with claim-driven reroof decisions more often than in calmer markets. The key difference is not just having a new roof, but having the right paperwork to back it up when insurers review it. Start by keeping clear permit records, inspection sign-offs, and photos after storms. If a storm damaged the roof, take dated, high-resolution photos from multiple angles, focusing on lifted edges, granule loss, and interior leaks near the ceiling. Wind mitigation documentation matters, too: any evidence of additional fasteners, hip-and-ron nailing patterns, roof-to-wall connections, or other enhancements can influence how a replacement is evaluated. Collect and store these details in a single, organized file that you can share with your contractor and insurer when needed.
Storm-driven leak risk peaks during the summer thunderstorm and hurricane season, so timing matters. A reroof decision in the heat of a storm-prone period can complicate both the installation and the claim process if leaks occur during the work. Plan for a window when storms are less likely to interrupt progress, and ensure your contractor has a clear plan for temporary protection if an unexpected downpour occurs. When signs of rising wind or hail activity are forecast, confirm that your documentation is up to date and that the contractor's scope includes not only shingles or panels but also the necessary fasteners and edge protections to satisfy both weather resilience and insurer expectations.
You will be weighing the reroof's quality against how well it will be documented for insurance, so select a local contractor who understands the importance of wind mitigation details and post-storm documentation. Ask for a written rundown of the documentation package they provide, and verify that the crew can deliver not just a new roof, but a complete, well-supported narrative of its installation and reinforced features that insurers expect. The outcome hinges on transparent records as much as the shingles themselves.
Connect with contractors who help homeowners navigate the claims process from damage assessment to final approval.
ARC Roofing & Construction
803 Leonard C Taylor Pkwy, Green Cove Springs, Florida
4.9 from 10 reviews
Here at ARC Roofing and Construction we exist to be your roofing guide, advocate, and solutionist. Our 12 Pillar Programs address every pain point you have with other roofers. From our Recorded Inspections, Nail in the Tire Guarantee, Pet Health Care Program, Family Crews, Flashback Credit, 10 years of included Gutter Cleanings, and so much more -- We skip the lip service and deliver unmatched value because we were created for you and to take the sting out of the roofing process. This is why we were voted the #1 Construction Company in Duval County for 2019, carry a pristine reputation with insurance companies, and have held an A+ rating with the BBB throughout our 17 years of experience. At ARC, Family Just Does It Better.
High Caliber Roofing
(904) 510-4867 www.highcaliberroofing.net
Green Cove Springs, Florida
5.0 from 8 reviews
Family owned roof contracting company servicing the homes and business of Jacksonville and surrounding areas for 3 generations. We take pride in every project we undertake no matter the size. We stay true to our promise, to provide High Caliber Service to ALL customers from the first inspection thru the final walk through. We honor our trade by bringing honesty, Integrity, service, and excellence in every professional AND personal interaction we encounter.
Hester's Roofing & Coating
(904) 484-4324 www.hestersroofing.com
Serving
4.9 from 124 reviews
Hester's Roofing and Coating is a veteran-owned roofing company and local industry leader based in St. Augustine, FL. With 16+ years in business, our GAF certified + GAF coding pros deliver high-quality residential and commercial roofing services. We specialize in roof replacements, repairs, inspections, and advanced coating solutions, including metal, tile, and flat roofs. Serving St. Augustine, St. Johns, Ponte Vedra, Palm Coast, and surrounding areas, we provide durable roofing systems built to handle Florida’s demanding weather while delivering exceptional craftsmanship and customer service. Upgrade your roof with our professional team!
The Roof Boutique
(904) 902-7663 www.theroofboutique.com
Serving
5.0 from 21 reviews
Our mission is to ensure exceptional customer service while providing a superior roof. The Roof Boutique values integrity, professionalism, and delivering great results. We make sure our customers’ homes and properties are quickly restored in the aftermath of northeast Florida’s torrential rains, severe winds, and the inevitable hurricanes that impact our communities. The Roof Boutique works hard to demonstrate a passion for our customers, their property, and their complete satisfaction with our work.

Maxxim Construction & Roofing
(904) 402-0101 www.maxximroofing.com
Serving
4.8 from 22 reviews
At Maxxim Construction and Roofing, we offer top-tier roofing and construction services and work diligently to meet our customer’s needs while adhering to industry standards in quality and safety. We are committed to completing our work with diligence and with extreme attention to detail. Maxxim Construction and Roofing is your top choice when it is time to inspect, repair, or replace your roof or construction. Contact us today, our team is waiting to assist you!
ARICA Roofing & Construction
(904) 232-8475 aricaconstruction.com
Serving
5.0 from 47 reviews
At ARICA Roofing & Construction, LLC, we proudly serve homeowners and businesses across Jacksonville, FL, with expert roofing solutions you can trust. As a family-owned and operated company, we’re dedicated to completing every project on time, within budget, and to the highest standards of quality and craftsmanship. As GAF Certified Contractors, we bring top-tier roofing, and siding services to your doorstep—without breaking the bank. We also offer flexible payment plans designed to fit any budget, making it easier than ever to protect and enhance your property. Your satisfaction is our top priority. Contact ARICA Roofing & Construction, LLC today for your free estimate—and let’s build the roof of your dreams together!
Trinity Restoration & Roofing
(904) 763-2006 trinityrestoration.com
Serving
4.9 from 1146 reviews
Established in 2019, Trinity Restoration and Roofing is a premier roofing service dedicated to the Jacksonville community. They specialize in both full-service roof repair and complete replacement, ensuring that every project is handled with professionalism and expertise. Their commitment to quality craftsmanship and customer satisfaction has made them a trusted name in the industry. For reliable and comprehensive roofing solutions, Trinity Restoration and Roofing is the local expert you can depend on.
Sublime Roofing
(904) 343-8077 sublimeroofs.com
Serving
5.0 from 57 reviews
Sublime Roofing: Trusted Roofing Experts in Jacksonville, St. Augustine & Northeast Florida! With 20+ years of experience, Sublime Roofing is proud to serve Jacksonville, St. Augustine, and surrounding areas in Northeast Florida. We specialize in roofing installations, repairs, and high-quality materials paired with skilled craftsmanship. Your satisfaction is our priority, and we proudly stand behind every project, delivering both protection and style. Whether you need a roof replacement, leak repair, or general roof maintenance, we’re your go-to experts. Call today for your FREE estimate and experience why Sublime Roofing is the trusted choice in Jacksonville and beyond!

HCA Construction & Roofing
(904) 204-9598 hcaconstructionandroofingfl.com
Serving
5.0 from 75 reviews
HCA Construction and Roofing, Inc. is a trusted, locally owned company serving Middleburg, Florida. We prioritize honesty, integrity, and high-quality service, treating your home or business as if it were our own. Specialising in installations and roof replacement Middleburg, we offer personalized solutions tailored to each project. Whether you need a new roof or a replacement, our team is dedicated to delivering excellent results and ensuring customer satisfaction. With a focus on lasting relationships and quality craftsmanship, HCA Construction and Roofing, Inc. is here to meet all your roofing needs. Contact us today for reliable service!

Legacy Roofing & Solar
(904) 442-7663 www.roofsbylegacy.com
Serving
4.9 from 70 reviews
Legacy Roofing & Solar, in St. Augustine, FL, is the area's leading roofing company serving St. Johns County, FL, and surrounding areas. We specialize in commercial and residential roofing. From repairs and replacements to restoration and installations, we have the experience, skills, and equipment needed to deliver the premier roofing services you need. For all your roofing and solar needs, contact Legacy Roofing & Solar in St. Augustine, FL.

Armor RoofingCompany
(904) 371-0234 www.armorroofingcojax.com
Serving
5.0 from 51 reviews
Locally owned and operated family run business. I estimate every new roof project personally and am a State Certified Roofing Contractor. I oversee every project personally. We do not sub out our work and take pride in maintaining an excellent relationship with our customers. Call today for a free estimate and I promise you will not be disappointed.
Typical local pricing runs about $350 to $550 per square for asphalt shingles, $650 to $1100 for metal, $1000 to $1800 for clay tile, $900 to $1700 for concrete tile, $550 to $1000 for wood shingles/shakes, and $500 to $900 for synthetic/composite shingles. In this coast-fed climate, those ranges reflect not just material, but the extra labor for handling skylights, low-slope transitions, and the frequent wind-driven rain that hits after a quick afternoon storm. When planning, expect the highest dispersion in tile and metal systems because flashing, penetrations, and edge details drive the cost more than a straight shingle job.
Costs in Green Cove Springs can rise after tropical weather because reroof-heavy demand spikes across Clay County and nearby Northeast Florida, tightening labor availability and extending schedules. That means a reroof could push toward the upper end of the scale if crews are booked weeks out or if suppliers experience short-term shortages. Timelines stretch not just for materials, but for coordinating tarping, dumpster access, and crew safety during hurricane-season risks. Factor in potential weather-related delays when you're comparing bids in late spring or early summer.
Material choice matters more than usual here because tile systems, metal details, and any roof with skylights or low-slope transitions create larger labor and flashing cost swings than a straightforward shingle reroof. Concrete and clay tiles demand careful handling to avoid breakage, and metal requires precise flashing around dormers and vents. Synthetic or composite shingles offer a middle ground but still benefit from skilled installation at transitions. For homes with multiple roof lines, tile or metal often translates into higher overall costs but can pay off in longer service life in this climate.
Begin with a cost-conscious plan by gathering three written bids that itemize roofing, flashing, underlayment, and disposal. Ask bidders to note any extra labor for skylights or transitions, and request a phased schedule if a storm window exists. Track seasonal suppliers and weather forecasts; timing a reroof for late spring, before the peak storm months, can reduce both cost and disruption. Keep awareness of long lead times and pre-order critical components when a chosen material type is prone to stockouts.
Get a clear picture of your project costs upfront - no commitment required.
ARC Roofing & Construction
803 Leonard C Taylor Pkwy, Green Cove Springs, Florida
4.9 from 10 reviews

In this market, repeated thunderstorm exposure makes flashing transitions, penetrations, and edge details critical because leaks often show up during ordinary summer weather before a named storm ever hits. That means a roof can look fine after a brief downpour, only to reveal a wet attic or ceiling a few days later when heat and humidity push water through the smallest gaps. Pay particular attention to valleys, step-flashings, and any place where metal meets shingles. A misstep here doesn't just drip; it accelerates rot in plywood and sags in ceilings when the sun bakes damp spots.
The local contractor signal mix includes skylight and chimney work, suggesting that roof penetrations and transition areas are common service calls in Green Cove Springs homes. Skylights can lose sealant integrity under high heat, and chimneys invite water entry where flashing needs re-freshing after storm cycles. If a contractor asks to reseal or reflash more than once, consider whether the underlying deck, underlayment, or shingle alignment is being compromised by heat cycles and wind-driven rain. Those recurring visits aren't cosmetic-each touch raises the chance of hidden damage behind the wall.
Heat and humidity in Northeast Florida can accelerate wear patterns tied to sealants, underlayment exposure during delayed jobs, and moisture intrusion after wind-lifted sections. When a job drags into humid days, adhesives may cure improperly or dry rot set in behind backer boards. If you notice blistering shingles, lifted edges after a quick summer squall, or musty attic smells after a hot week, treat it as a warning: the next thunderstorm can expose weaknesses that a calm spell never reveals.
Find contractors experienced in skylight installation, flashing, and leak repairs to bring natural light into your home.