Last updated: Apr 19, 2026
Storms roll in fast in this inland Seminole County neighborhood. The dry mornings can quickly flip to torrential, afternoon thunderstorms that interrupt tear-off and dry-in schedules even when crews started the day with clear skies. That means if a roof project is underway or scheduled right after a storm, plan for possible delays caused by sudden weather shifts-and have contingency windows in your project calendar. The pattern here is storm-driven, not just season-driven, so timing isn't a luxury; it's a critical risk factor that determines whether a repair stalls or a full replacement moves forward as planned.
During hurricane season, wind and rain events stay on the radar, but the demand they create for roof work isn't limited to those extremes. Routine wind-driven rain can trigger claims or force inspections long after a storm has passed. The challenge is that wind-driven damage can appear subtle at first-lifted shingles, compromised underlayment, or granules in gutters-yet documentation delays can complicate insurance interpretation. The window between a storm and a claim decision can feel narrow, especially when a project's schedule clashes with weather setbacks or when crews have to pause to ensure ventilation and tear-off integrity meet the load demands of a Florida roof.
Florida's insurance environment rewards thorough, well-photographed records. Start with clear, dated photos taken before any work begins, showing the overall roof, attic ventilation, and any visible damage. As soon as storms pass, capture post-storm conditions-shingle alignment, flashing, ridges, skylights, and flashing around vent pipes. These images become a narrative that supports the need for replacement or repair and can speed up the claim review if the adjuster is evaluating wind-related damage versus wear and age.
If a roof is being repaired or replaced, preserve every critical piece of information: pre-existing conditions, layers of roofing material, and any signs of moisture intrusion visible from the attic or crawlspace. Your claim benefits from a simple, consistent filing routine: date-stamped photos, a written brief describing observed issues, and notes on any temporary weatherproofing measures you implemented to mitigate further damage. In this market, the more you document in the weeks surrounding a storm, the clearer your case becomes when the insurer assesses wind-load performance and ventilation compliance.
Act with urgency when a significant weather system looms. If you anticipate a lengthy teardown or a complex dry-in, coordinate a plan with your contractor to secure temporary protection that minimizes interior exposure. After the storm passes, move quickly to initiate the claim with your insurer and schedule a thorough roof assessment. Be prepared to share the pre-storm baseline photos alongside post-storm images, reinforcing why a full tear-off and ventilation assessment are necessary for compliance and long-term performance.
Maintain a running set of roof records that you can reference at any moment. A simple, repeatable process-date, description, and photos-keeps your file ahead of the next storm cycle. In a climate where wet-season afternoon storms can interrupt progress, precision in documentation isn't just helpful; it's a practical shield against delays and a smoother path to securing the coverage you're entitled to when wind and rain have challenged your roof.
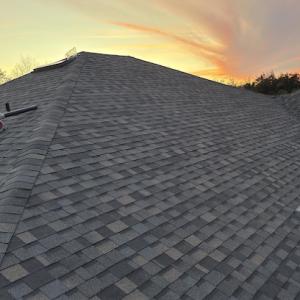
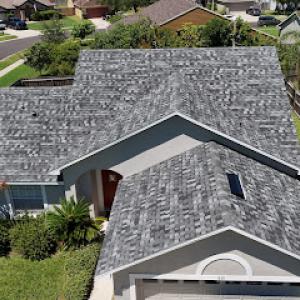
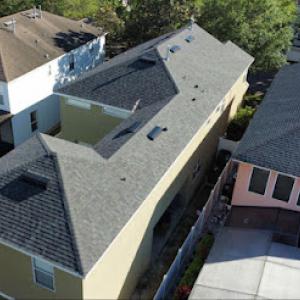
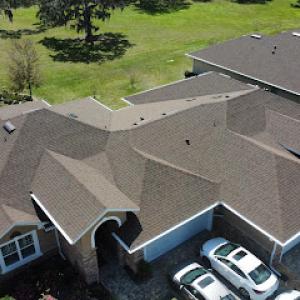
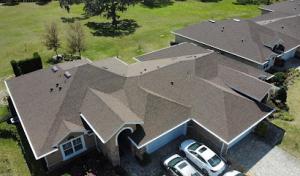
The dominant residential materials in Winter Springs are asphalt shingles, metal, clay tile, concrete tile, wood shingles or shakes, and synthetic or composite shingles. Each material behaves differently under Central Florida heat, humidity, UV exposure, and repeated thunderstorm cycles. In neighborhoods with HOA-driven reroofing, the choice often aligns with existing look-and-feel while balancing long-term performance against the Florida sun and storm patterns. The market here shows a strong tilt toward tile and shingle specialists, so the consensus among local crews tends to favor materials with known performance records in this climate and a manageable installation window for storm season.
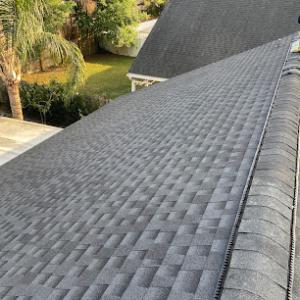
Asphalt remains a practical, widely available choice in this area. In the heat and humidity, asphalt shingle granules can shed faster, especially on darker shades where UV exposure is intense. A practical approach is to plan reroofs with shingles that have good UV resistance and reinforced seals to weather rapid afternoon storms. When choosing asphalt, focus on products with compatibility to Florida wind-load expectations and a proven track record in humidity cycles. If an HOA requires a particular look, select a shingle profile that respects the subdivision's aesthetic while prioritizing wind resistance and moisture handling.
Metal systems handle heat and moisture well and can outlive many shingle configurations when properly installed. In this market, metal roofs often perform admirably against heavy rain and wind, with the caveat that installation quality matters-especially sealant longevity and panel edge detailing. Consider a lighter color to reduce heat gain and to preserve finish life under repeated sun exposure. Metal is less prone to granule loss, but flashing and through-fastener seals demand attention during the initial install and after major storms.
Clay and concrete tile roofs are well-suited to the local climate, offering excellent durability against sun and rain. Clay tends to be lighter on weight and can have a longer lifespan in blistering heat, while concrete tiles often provide more impact resistance in hail-prone cycles. Tile systems typically require professional assessment for underlayment and ventilation because blockages or improper attic ventilation can accelerate moisture-related wear. In areas with strong tile specialization, expect crews to emphasize proper roof deck preparation, underlayment selection, and alignment with tile-specific wind uplift requirements.
Wood shingles or shakes bring a distinct look but require attentive maintenance in Florida's humidity and storm cycles. They can be vulnerable to moisture intrusion, mold, and faster aging if the attic ventilation isn't balanced with the roof assembly. If choosing wood, prioritize species with better resistance to humidity and consider applying conservative maintenance cycles to address potential moisture-related checks.
Synthetic and composite options aim to mimic traditional looks while offering enhanced durability in hot, humid conditions. They often balance wind performance with a lighter weight and consistent granule retention. In this market, composites can pair well with HOA guidelines and provide predictable performance under repeated t-storm loads when paired with proper underlayment and ventilation details.
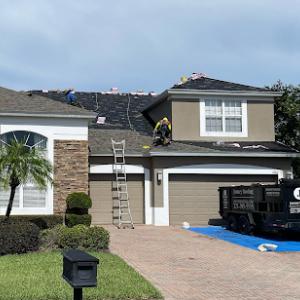
Start with a storm season readiness check: assess the existing deck for moisture intrusion and inspect for any hail or wind damage after a storm. If a contractor identifies widespread wear, granule loss, or sealant degradation, prioritize reroofing during a window with calm weather ahead to minimize storm interruptions and ensure proper installation conditions. Documentation matters for insurance and wind-load compliance, so gather dated photos of pre-storm conditions and post-storm findings, including attic ventilation checks and any attic entry points that reveal moisture changes. When discussing material choices, align the selection with the home's architectural style and the local market's tile specialization, ensuring the final system integrates with the home's drainage and HOA expectations. This alignment supports smoother inspections and a clearer insurance documentation trail after the work is complete.
New Standard Roofing Orlando
(407) 512-0144 newstandardroofingorlando.com
170 W State Rd 434, Winter Springs, Florida
5.0 from 111 reviews
For high-quality roofing services in Orlando, New Standard Roofing Orlando is the best option. As seasoned Florida roofers, we are pleased to provide Orlando and the Central Florida region with superior materials and skilled labor. Stone-coated steel shingles, polymer-modified shingles, and lifetime metal roofing are the areas of expertise for our Orlando roofers. We take care of everything with care and accuracy, from leak repairs and roof repairs to complete roof replacements and new roof installations. Searching for trusted roofers near me? Look no further than New Standard Roofing Orlando—where every roof is built to last and every customer matters.
Raptis Roofing
(321) 444-6484 www.raptisroofing.com
1255 Belle Ave #171, Winter Springs, Florida
4.9 from 135 reviews
Experience top-notch roofing services with Raptis Roofing! We specialize in quality installations, repairs, and inspections. Trust our skilled team for reliable solutions that prioritize durability and customer satisfaction. Your roof, our expertise – a perfect match for a secure and stylish home
Hogan Roofing Orlando
(407) 917-4049 www.hoganroofs.com
358 Roberts Family Ln, Winter Springs, Florida
4.9 from 57 reviews
Hogan Roofing Orlando located in Orlando, Florida. We are proud to serve the local Florida community's home and business owners, with quality roofing services including repair, restoration, and replacement. Building Better Florida Roofs, through our alliances and guidance of FRSA. Service areas include: Altamonte Springs, Avalon Park, Baldwin Park, Buena Ventura Lakes, Casselberry, Doctor Phillips, Harmony, Kissimmee, Lakehart, Lake Mary, Lake Nona, Orange County, Osceola County, Orlando, Oviedo, Sanford, St. Cloud, Tampa, Waterford Lakes, Winter Park, Winter Springs and more. License: CCC1335396
Pro Roofing Contractors
(407) 901-1733 www.proroofingcontractorsfl.com
518 Lombardy Rd, Winter Springs, Florida
4.8 from 46 reviews
We are a family owned-business helping homeowners with their roofing needs. We are known for attention to detail, prompt and quality work. Our service includes: Asphalt Shingles | Flat Roofs | Tile Roofs Repairs | Replacements | Inspections ✔ Affordable, Honest and Reliable Service ✔ Prompt Free Estimates ✔ Quality Roof Repairs & Replacements ✔ Fully Licensed & Insured ✔ Over 10+ Yrs of Experience
Gold Eagle Roofing
(321) 407-7663 goldeagleroofing.com
3625 FL-419, Winter Springs, Florida
4.8 from 46 reviews
Gold Eagle Roofing is a family owned and locally operated roofing company with over 25 years of experience in all areas of residential and commercial roofing. The Gold Eagle way provides homeowners and business owners alike with extensive knowledge starting with ethical and competitive free estimates to the supervision, installation, and maintenance of your roof. We offer great warranties, clean work environments, financing, and superior workmanship to ensure you get the roof you deserve! We have a team of experienced and licensed professionals in all roofing systems from all types of shingles, metal, tile, torch, hot mop, and wood shake, so you can rest easy that you are receiving the best service and the best roof!
O'John Roofing
(407) 613-4717 ojohnroofing.com
Winter Springs, Florida
4.9 from 34 reviews
O’John Roofing was established in 1987 and has been service Seminole County and is family owned and operated. With over 50 years of experience, O’John Roofing has been providing the best roofing and repairs. From fixing roof leaks, to replacing chimneys, O’ John Roofing will make your roof water proof!
Roof Top Services of Central Florida
(407) 696-7663 www.rooftopservices.com
1150 Belle Ave #1060, Winter Springs, Florida
4.6 from 123 reviews
For over 25 years, Roof Top Services of Central Florida, Inc. has been a trusted leader in the roofing industry. As a dedicated roofing contractor, we are committed to providing exceptional service and superior craftsmanship for every project. Our commitment to excellence is reflected in our A+ rating with the Better Business Bureau. We are proud to offer a range of roofing products, including Energy Star options, designed to enhance the efficiency and durability of your home. With our extensive experience and dedication to quality, you can trust us to protect your most valuable asset.

Excellence Roofing Group & Construction Orlando
(407) 971-7663 excellencerestoration.com
Serving
4.9 from 163 reviews
We are a full service Roofing Contractor and General Contractor company that specializes in insurance related roof and home restoration projects related to storm damage. We work with the homeowner and guide them through the entire restoration process, helping them navigate the intricacies of their insurance claim. We repair or replace anything related to an insurance claim, including but not limited to roofs, gutters, screens, flooring, painting, sheet rock repair, mold mitigation, and more.
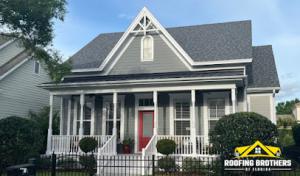
Roofing Brothers of FL
(407) 710-1250 www.roofingbrothersfl.com
Serving
4.8 from 46 reviews
At Roofing Brothers of Florida, we believe that a roof is more than just a protective covering for your property. A well-installed and properly maintained roof is also an investment in the safety, comfort, and value of your home or business. That's why we are committed to providing our clients with the best possible roofing Services, using only the highest quality materials and industry-leading techniques. Our team of roofing experts has the knowledge and experience to handle all types of roofing projects, from simple repairs to complete roof replacements. Whether you need a new asphalt shingle roof for your home or a commercial flat roof for your business, we have the skills and expertise to get the job done right, the first time.
Roof Maxx of Deltona, FL
Serving
5.0 from 171 reviews
Roof Maxx of Deltona provides a cost-effective, environmentally friendly alternative to traditional roof replacement. Our plant-based bio-oil treatment restores the flexibility of asphalt shingles, extending your roof’s life by up to 15 years with three simple treatments. Proudly serving Deltona, Sanford, Volusia, and Seminole Counties, we offer discounts for military, police, firefighters, and seniors. Enjoy peace of mind with our five-year transferable warranty and commitment to protecting both your roof and the environment. Contact us today for a free, no-obligation estimate and see how Roof Maxx can rejuvenate your roof!

Centaur Construction
(407) 844-7200 www.centaurfl.com
Serving
4.6 from 42 reviews
Centaur Construction is dedicated to providing the highest quality roofing and construction services. We will always strive to build long term relationships with our clients, based on quality, timely service, safety and knowing that our customers are our family. Local, quality, and customer service. Call us today!
Janney Roofing
(407) 305-5049 janneyroofing.com
Serving
4.9 from 1945 reviews
Your home matters. Roofing problems don’t have to be stressful or complicated. As a roofing company in Orlando, regardless if you need a repair or complete replacement, the experts at Janney Roofing provide you with a guided experience from start to finish.
Typical local reroof pricing ranges from 350 to 800 USD per square for asphalt shingles, 700 to 1300 for metal, 1000 to 2000 for clay tile, 800 to 1400 for concrete tile, 700 to 1300 for wood shingles or shakes, and 600 to 1100 for synthetic or composite shingles. In this area, those figures reflect a mix of tile and shingle reroofs common in HOA neighborhoods and a market that leans toward premium options when a storm-damaged roof needs replacement. When you're evaluating bids, ask for a per-square breakdown that includes tear-off, disposal, underlayment, and any insulation or ventilation upgrades you're likely to need. A low bid that omits these factors often costs more later.
Costs in Winter Springs can rise after major Florida storm events when reroof demand spikes across the Orlando metro and contractor schedules tighten. If a hurricane or severe thunderstorm season hits, expect longer lead times and tighter crew availability, which can push prices up and extend project windows. If you're working around a storm-impacted market, it's prudent to lock in material choices and a start date as soon as you have an approved scope, since delays compound both labor costs and scheduling challenges.
Material choice matters more than usual in Winter Springs because tile and metal are both actively installed here, creating a wider spread between entry-level and premium reroof budgets than in markets dominated by shingles alone. A clay tile roof, for example, sits at the top end of the cost spectrum, but offers long life and a distinctive Florida look that many HOA guidelines favor. Metal provides durability and energy performance, with a significant premium over asphalt. If budget is tight, asphalt shingles deliver reliable protection at a lower upfront cost, but you'll still want to plan for ongoing maintenance and potential repairs. If aesthetics or a tile-compatible HOA requirement drives your choice, expect the higher end of the range to be the baseline.
Don't let upfront costs delay a critical repair - these contractors offer payment plans to fit your budget.
Gold Eagle Roofing
(321) 407-7663 goldeagleroofing.com
3625 FL-419, Winter Springs, Florida
4.8 from 46 reviews

Excellence Roofing Group & Construction Orlando
(407) 971-7663 excellencerestoration.com
Serving
4.9 from 163 reviews
A full reroof in Winter Springs typically requires a permit through the City of Winter Springs Building Division. Before any tear-off begins, you or your contractor should file for the permit, specify the scope of work (tear-off and replacement), and secure approval that the planned roof system meets current wind-load and ventilation standards. Because this process ties into both structural safety and energy efficiency, the permit review tends to scrutinize attic ventilation pathways, eave soffit openings, and the method of roof attachment. Expect clear guidance on required nailing patterns, underlayment, and any deck reinforcements if the deck is showing age or weathering.
The city commonly performs an inspection at roof tear-off and another after installation, so scheduling and access matter during active reroof projects. Plan in advance for both inspections and coordinate with the permit inspector to avoid delays. On tear-off day, ensure the property is accessible for the inspector to verify deck integrity, eave clearance, and attic space ventilation. After installation, the final inspection verifies that the ventilation is unobstructed, the attic is properly vented, and that wind-load attachment meets code requirements. If you have a HOA requirement, align the permit timeline with HOA approval as early as possible to prevent overlapping red tape. Notify neighbors when large renovation work will occur, since shared driveways or street access can influence inspector scheduling and material deliveries.
Winter Springs reroofs must satisfy Florida wind-load and ventilation requirements, making attachment methods and attic airflow part of the approval process rather than just contractor preference. The permit review will specifically look at how shingles or tiles are fastened to withstand Central Florida gusts, how perimeter and attic vents are balanced, and whether soffit intake and ridge exhaust are not blocked. If an older home uses vented soffits or has retrofitted soffit baffles, be prepared to demonstrate that these components remain effective after the new roof is installed. Contractors should present installation details that clearly show compliance with wind-pressure ratings and that attic ventilation remains adequate to prevent moisture buildup. During inspection windows, be ready to provide photos, product data sheets, and any manufacturer wind-resistance documentation to support the chosen attachment method and venting strategy.
In this area, repeated UV exposure and humidity steadily wear asphalt shingle components like granules, seal strips, and flashing sealants. The sun's intensity can thin the protective granules, making shingles brittle and more prone to cracking or curling over time. Humidity accelerates algae and mold growth, which superheroes your roof's protective surface and can compromise color, durability, and granule retention. If you notice a chalky or worn surface after a few seasons, don't assume a simple cleaning will fix it-the underlying layer may already be compromised. In many homes, the first sign is a subtle edge curl or dark streaks near eaves, especially after a heavy storm.
Central Florida's heavy rain events stress roofs quickly, particularly when a roof is opened during the wet season for repairs or reroofing. Underlayment, meant to seal against moisture, can deteriorate or fail under prolonged exposure to moisture and wind-driven rain. Flashings, especially around chimneys, vents, and transitions, may loosen or compress if sealants or metal joints weren't fully re-sealed with the roof's main surface. When a roof is opened during rain-sensitive months, the exposure risk multiplies: you may see leaks that were invisible during dry spells. The consequence is not just interior staining but potential mold growth in attic spaces and faster plywood/osb deterioration.
Seasonal wind events in this area can lift or shift shingles and tile components even if the roof otherwise looks sound. The combination of wind pressure and loose fasteners creates micro-leaks that only become apparent after a weather system passes. Tile roofs are especially susceptible where fasteners, laps, or bedded sealants have aged. When wind events occur, small flaps or displaced edges can become larger issues with repeated exposure, leading to accelerated wear and the need for rapid storm repairs. The practical takeaway is that timely inspection after such events is essential to prevent hidden damage from becoming larger, more costly failures.
Inspect after big storms for lifted edges, granule loss, or broken flashing. If you notice shingles that don't lay flat or missing granules near the eaves, arrange a professional assessment promptly. Delays can allow minor issues to escalate into leaks in the attic or damaged decking. In this climate, a cautious, proactive approach to storm-related repairs protects the roof's ability to shed water and resist wind without escalating costs or interior damage.
Tile roofs are a durable staple in this area, with many homes sporting clay or concrete tiles that stand up to the Central Florida storms with careful installation. In updates or reroofs, tile systems require attention to rake edges, hip ridges, and proper underlayment that handles vented soffits and attic air exchange. When a storm damages a tile roof, the replacement approach often favors matching existing profiles used on nearby houses, to keep the street scene cohesive. A local contractor with tile experience knows how to manage tile fasteners, mortar setting, and the need for clean roof deck inspection as part of a reroof that will last. In HOA-weighted neighborhoods, color and profile consistency can matter for approvals, so plan ahead and select a tile that meets both performance and aesthetic expectations.
Metal roofing continues to grow in popularity for its longevity and wind performance, with many homeowners choosing standing-seam or exposed-fastener panels. Flat or low-slope sections appear in add-ons, lanais, and some commercial structures, and those areas call for careful drainage planning and edge details that minimize ice dam and wind-driven water concerns. A roof replacement that includes metal should address panel seams, sealant compatibility with nearby skylights, and the way vent pipes penetrate the roof surface to maintain a clean weather barrier.
Skylight and solar-related roof work are active locally, so roofers pay close attention to penetrations, flashing, and mounting rails to prevent leaks. When considering a replacement, evaluate how new skylights or solar arrays will tie into attic ventilation and your insulation strategy. The goal is a unified system where shading devices, venting, and waterproofing work together without creating heat buildup in attic spaces. A local Winter Springs crew can tailor this mix to match existing architectural lines while preserving ventilation and warranty requirements too.
Find specialists in TPO, EPDM, and built-up flat roofing systems for residential and commercial properties.
Pro Roofing Contractors
(407) 901-1733 www.proroofingcontractorsfl.com
518 Lombardy Rd, Winter Springs, Florida
4.8 from 46 reviews
Winter Springs sits in a high-claim roofing environment where frequent storm losses have made insurers more selective about roof age, condition, and replacement documentation. The weather patterns, with intense Florida storms rolling through inland Central Florida, mean roofs face repeated stresses that can shift an insurer's attitude from "repair" to "replace." That stance directly affects how an insured homeowner is treated after a roof incident and how quickly a claim progresses.
Homeowners should keep permit records, inspection approvals, photos, and product information because insurers may scrutinize new roof work and ask for wind-mitigation-related details. A clean trail of evidence helps demonstrate proper installation, adherence to installation standards, and compliance with wind-load considerations. When a claim arises, clear, well-organized files can shorten the evaluation window and reduce pushback over roof age or condition.
The insurance value of a reroof in Winter Springs is tied not just to age but to how clearly the installation can be documented under current Florida underwriting conditions. Photographs from before, during, and after the project, contractor receipts, and a detailed description of roof assemblies-underlayment, fasteners, and ventilation strategies-can sway underwriting decisions. In a market where storm history matters, a meticulous paper trail matters as much as the actual roof material.
If a claim involves wind or hail damage, the insurer will review whether the roof replacement met modern wind-resistance expectations and whether all components were installed per current standards. Ambiguity in documentation can delay payment or limit coverage, even if the physical roof looks sound. Being prepared with orderly, accessible records helps protect the settlement path and reduces the risk of coverage disputes down the line.
In this market, the job type matters as much as the contractor's reputation. If the work is a standard residential reroof, a firm with broad experience handling typical asphalt shingle or synthetic applications can move efficiently. If the job involves storm damage, look for crews known to respond quickly after a claim is filed and able to work with adjusters. For tile or metal projects, seek crews with formal training and dedicated crews, since these materials require specialized handling and installation sequences. The best choice often follows whether the roof is a standard reroof, a storm-damage claim, or a tile or metal project requiring more specialized crews.
Winter Springs has a large reroofing-heavy contractor pool, so responsiveness becomes a practical indicator of reliability. When you call, note how quickly the firm answers, whether the representative collects basic details about the roof, and whether a qualified estimator can visit promptly. Favor contractors who can provide a clear timeline for next steps and who balance speed with accuracy in the initial assessment. In neighborhoods with HOA oversight, timely communications help prevent delays.
A reputable roofer treats cleanup as part of the service, not an afterthought. Ask about daily debris containment, dumpster placement, and post-job street-cleaning policies. Local crews that prioritize careful material handling reduce the risk of property damage and preserve landscaping, driveways, and curb appeal-critical in the eye of HOA managers and neighbors.
Verify licensing and insurance, but also request references specifically from residential reroofs and, if applicable, from tile and metal installations. Hearing about completed projects in similar housing stock and neighborhoods helps judge fit for a given scope. Long-established, family-owned firms often bring steadiness and local alignment, while storm-focused teams can move quickly when a claim is active.
Coordinate with the contractor on the planned work window, especially where an HOA or neighborhood covenants influence roofing cycles. Ensure the crew's schedule accommodates any access restrictions, staging requirements, or precedent for temporary ventilation adjustments. The right match minimizes disruption, ensures quality, and keeps the project on a predictable path.