Last updated: Apr 19, 2026
June through November is when the Gulf storms roll in with confidence, trading predictable sunshine for sudden, heavy rain and punctuated wind bursts. As a homeowner, you're met with a calendar that can shift from quiet to crisis in a matter of hours. That means every thunderstorm is a potential trigger for new leaks, shingle lifting, or even soffit and fascia snagging. Your planning should assume that a single strong storm can cascade into a sequence of issues: an urgent tarping need, a dry-in, and then a full re-roof if the wind and water damage prove more extensive than the initial inspection suggests. The pace of this season isn't just about the storm itself-it's about the backlog that follows. Scheduling windows tighten, material deliveries stall, and the window to start repairs narrows as urgency compounds.
On the Gulf Coast, wind damage tends to be obvious, but water intrusion often hides behind the eaves and within attic framing after multiple rain bands. A roof can look visually intact from the ground while underlayment or decking has already started to fail. After a heavy session of storms, you may notice damp patches that appear days later, or a musty scent in the attic that didn't exist before. Immediate action is required when shingle edges curl, granules wash into gutters, or you see visible gaps along flashing. In this market, you'll also encounter temporary repairs that look sufficient but don't stand up to the next squall. Do not wait for a perfect blue-sky assessment-the next storm can worsen the existing breach.
When a storm hits, tarping becomes a lifeline. The first 24 to 48 hours are critical to prevent interior water damage, ceiling staining, and mold risk. If you can't secure a tarpaulin quickly, get professional help as fast as possible-timing matters. A proper emergency dry-in is not a cosmetic fix; it preserves insulation, reduces rapid temperature swings, and protects interior finishes. Keep all receipts and take dated photos of damage from multiple angles. Insurance adjusters will want to see a clear before-and-after record, and the sooner you establish a documented trail, the smoother the replacement timeline can move. If a full-replacement is in play, the insurer will weigh your current roof's condition against the risk exposure during hurricane season, so timely, orderly documentation is essential.
If you suspect wind damage or new leaks, arrange a storm-response assessment from a reputable roofer who understands high-humidity environments and salt air effects on fasteners and flashing. Request a written assessment that highlights immediate risks, recommended temporary measures, and a staged repair plan. Because simultaneous demand for tarping, dry-in, and full replacement is common, you should confirm scheduling ahead of time and secure priority slots when storms threaten. Keep communication lines open with your insurer and the contractor, so you can coordinate immediate actions and avoid delays when the next front arrives.
Expect that each storm could redefine the urgency of your roof project. A simple leak today might become a full-replacement decision next week if wind-driven rain penetrates deeper than initial estimates. Given the summer storms and backlogs, acting with clarity, quick triage, and well-documented inspections is your best defense against escalating damage and extended outages. Stay proactive, stay organized, and treat every new leak as a signal to mobilize-before it snowballs into a larger, costlier setback.
Florida's high wind and hail claim environment directly affects Tampa homeowners through tighter underwriting, changing deductibles, and more scrutiny of roof condition. When a storm rolls through the Bay area, carriers tighten their belts fast. That means even a roof that's held up for years can suddenly be viewed as the weak link in a policy that's otherwise solid. The consequence is a real emphasis on diagnosing roof age and condition before a renewal hits your desk, not after a surprise claim. The scene is practical: insurers want evidence that your roof can stand the next season, not just last year's patchwork. If your attic shows signs of moisture intrusion or your shingles reveal unusual wear patterns for the age, expect more questions and a tighter quote.
Insurers in this region commonly want current roof documentation, including condition evidence and wind-mitigation-related information, before renewal or after a storm event. That means you should be prepared with a clear narrative of your roof's history, including recent repairs, visible wear, and any wind-borne damage that may have occurred during a hurricane or tropical storm. A simple, well-kept file with dated photos, inspector notes, and records of upgrades can streamline the process when the carrier asks for it. If your roof is approaching the mid-life mark, you'll want to bring a professional assessment to the table early-before the insurer raises the doubt about long-term durability. In practice, this shifts some planning work from "if it happens" to "it's already accounted for."
After a major storm event, carrier pullbacks and restricted options in Florida can push Tampa homeowners to replace aging roofs sooner than expected to preserve insurability. The pressure isn't just about immediate damage; it's about the policy's continuity and the ability to secure a fair renewal date. A roof that has endured years of exposure to humidity, salt air, and relentless sun will show signs more quickly than inland homes. Cracked tiles, granule loss, and soft sheathing become warning flags. The homeowner's best move is to treat active wind events as a prompt to re-evaluate the overall roofing package, not as a reason to delay action for another season. Prepared homeowners often find that timely replacement reduces the risk of a claim being jeopardized by age-related condition.
Ownership in this climate demands a proactive stance. Regular inspections by a qualified contractor who understands Florida's wind loads, hail patterns, and UV-driven aging can catch issues before they become insurance headaches. In practice, this means scheduling a mid-season check after the peak of hurricane season and again before the next cycle begins, especially if the roof is several decades old or has shown intermittent problems. Keeping up with evidence of performance-photos, inspection reports, and any corrective work-helps you retain credibility with your carrier and may ease the tension around renewal timelines.
The Florida landscape rewards foresight. When insurers want proof of a roof's current state, and when market dynamics tug toward earlier replacement, your best defense is an honest, well-documented narrative that connects age, exposure, and observed performance. Here, a well-maintained roof isn't just about immediate protection-it's about sustaining insurability through the season's next gust and the one after that.
Roof Panda
(813) 295-7663 www.theroofpanda.com
4726 N Lois Ave Unit B, Tampa, Florida
5.0 from 241 reviews
Roof Panda is your local Residential and Commercial Roof Repair, Replacement, and Installation professional to call for your Roofing needs in Tampa, FL. We service Shingle, Tile, Cedar, Metal, and Flat Roof Systems. Roof Panda is available now for all types of Emergency Roof Repair, which includes Hurricane Damage Roof Repair, Collapsed Roof Repair, and Roof Leak Repair. If you notice a leak coming from your roof, don't delay. Call us for reliable and affordable roof leak repair. Our service area includes Hillsborough County, FL, and Pinellas County, FL. Call us today for a Free Estimate!
Hytz Roofing
(813) 436-0761 hytzroofing.com
333 N Falkenburg Rd, Tampa, Florida
5.0 from 229 reviews
We are a Florida Company! Hytz Roofing has three office locations to serve the residents in Florida. We understand Florida storms and how to navigate the insurance process. Hytz also provides quick turnaround service to be able to sell your home quickly with a new roof. Your Florida home is a valuable asset. At Hytz Roofing, we are striving to provide exceptional customer service and quality products to protect your home from the weather that happens in our state. From Tampa to Naples and over to Orlando and Lake Mary area. We serve a huge area of Florida! Hytz is here to help you every step of the way, so call us today for a consultation on your roofing.
West Florida Roofing
(813) 819-3712 westroofingfl.com
4515 George Rd Suite 355A, Tampa, Florida
5.0 from 105 reviews
West Florida Roofing, located at 4515 George Rd Suite 355A, is your premier roofing contractor dedicated to providing top-quality roofing solutions in the West Florida area. Our team of skilled professionals specializes in roof repairs, installations, and maintenance, ensuring your home or business is protected year-round. With a commitment to excellence and customer satisfaction, we use the finest materials and innovative techniques to deliver durable, weather-resistant roofs. Whether you need a minor repair or a complete roof replacement, West Florida Roofing is your trusted local expert for all roofing needs. Choose us for reliable service, competitive pricing, and exceptional workmanship.
Native Sons Roofing
(941) 239-8188 www.nativesonsroofing.com
601 S Harbour Island Blvd, Tampa, Florida
5.0 from 90 reviews
Building Quality Roofs and Long-Lasting Relationships! We've been in the roofing industry since 2019. Over the years, we've built a reputation for excellence in both residential and commercial roofing services. From roof repairs to complete roof replacements, we've got you covered. We take a customer-centric approach to everything we do. We believe in listening to our customers' needs and tailoring our services to meet those needs. Our goal is to build long-lasting relationships with our customers by providing exceptional service and quality workmanship.
SCM Roofing
(855) 726-7663 scmroofingfl.com
13909 N Dale Mabry Hwy, Tampa, Florida
4.9 from 237 reviews
SCM Roofing is a locally owned and operated business by 2 best friends. They pride themselves on customer service and quality installation. The community is a large part of what drives SCM. They offer discounts for military service, first responders, teachers and seniors. Dedicated to continually growing, SCM offers the latest technology to customers and the best training for their employees.
Prime Roof Repair Tampa
(813) 723-5093 primeroofrepairtampa.com
610 E Zack St Suite 910, Tampa, Florida
4.9 from 133 reviews
At Prime Roof Repair Tampa, we specialize in top-tier roofing solutions for homeowners and businesses. Our team of experienced roofing contractors is dedicated to providing reliable, high-quality roof repairs and installations. From minor fixes to major overhauls, we use the latest tools and best materials to ensure your roof's durability and longevity. Trust us to protect your property with precision and care. For exceptional roofing services, Prime Roof Repair Tampa is your go-to expert.
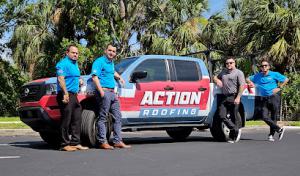
Action Roofing
(813) 680-5787 actionroofing.com
5401 W Kennedy Blvd ste 100 unit 132, Tampa, Florida
4.9 from 118 reviews
Action Roofing, established in 1986, operates on a strong foundation of quality, service, and integrity. This fully insured and bonded company stands behind its top-notch workmanship and unparalleled service with unwavering guarantees. Their team of certified experts works with various roofing types, specializing in tile (clay & cement), to deliver reliable solutions for properties of all sizes. Action Roofing is also a FEMA-approved contractor, offering free estimates and working directly with public adjusters and insurance companies to ensure fair treatment for clients.

American Roof Pros
(727) 433-5413 americanroofprosllc.com
Tampa, Florida
5.0 from 75 reviews
American Roof Pros is your local, friendly, family-owned Tampa Bay roofing contractor. We specialize in roof replacements, emergency repairs, storm damage restoration and expert roof installations for asphalt, tile, metal and flat roofs. Our certified team provides expert work, honest pricing and fast response—whether it’s a new roof or insurance claim assistance. Backed by 5-star reviews, flexible financing and transparent service, for trusted roof work, we’re the ones to call. We provide residential and commercial roofing services designed to withstand hurricanes, hail, high winds and heavy rain. From preventative roof maintenance to full-scale reroofing, we help protect your home or business with reliable, long-lasting roofing systems.
Fix Roofing
(833) 944-7446 www.fixroofingllc.com
4818 N Grady Ave, Tampa, Florida
5.0 from 72 reviews
Fix Roofing is Tampa’s trusted expert for residential and commercial roofing solutions. From emergency roof leak repairs and storm damage restoration to full roof replacements, our team delivers high-quality craftsmanship designed to withstand Florida’s climate. We specialize in shingle, flat, and metal roofing, providing honest estimates and reliable service across the Tampa Bay area. Whether you need a minor repair or a complete overhaul, Fix Roofing ensures your home is protected with a roof that lasts.
Wilson Roofing & Renovations
(813) 946-9867 www.wilsonroofingandrenovations.co
1100 N 50th St St #3i, Tampa, Florida
5.0 from 99 reviews
Wilson Roofing and Renovations offers customer-focused roof inspections, repairs, maintenance, and replacements in Tampa and the surrounding areas of the Florida Gulf Coast. Offering a combination of first-class craftsmanship, exceptional quality materials, and highly trained and licensed technicians, they are committed to delivering an all-world experience from a local business that understands the community and its people. They are a local expert in standing seam metal roofing, offering an eco-friendly, durable, and energy-efficient alternative for both homes and businesses, and work with leading brand names like CertainTeed and GAF to provide premier products. They can even handle roofing emergencies and are available by phone 24/7.
Roof X
1512 Mckay Bay Ct suite 1, Tampa, Florida
4.9 from 288 reviews
Since 2015, Roof X has been a premier Tampa roofing contractor, serving residential and commercial clients. With over 250 5-star reviews, we specialize in roof replacement, roof repair, new roof installations, and gutter installation. Using premium materials and expert craftsmanship, we ensure lasting durability and enhanced property value. Our team completes every project with precision and care, and our emergency roofing services keep your property protected in any weather. Contact Roof X today for a free consultation.
VNPS Roofing
(813) 609-5596 vnpsroofing.com
14034 N Florida Ave, Tampa, Florida
5.0 from 85 reviews
Veteran-owned Tampa roofing company: Fair pricing, quality work - period. For 11 years, Veterans National Property Services has been Tampa Bay's trusted roofing experts serving Lake Magdalene, Carrollwood, University Area, Temple Terrace & Westchase. We specialize in roof repairs, replacements, storm damage restoration, and shingle, tile, metal roofing installations. Our licensed, insured professionals use top-rated materials from Owens Corning, Atlas & Duro-Last. We handle insurance claims, emergency repairs, and offer transparent pricing with flexible payment options. Free inspections, honest guidance, no-pressure estimates. Serving residential and commercial properties with military precision and integrity. Your roof built to last.
Scheduling work from fall into early spring aligns with the typical pattern of quieter weather in this area. Dry-season windows tend to offer more predictable days, which helps crews lay down underlayment and complete roof tear-off with fewer interruptions from sudden downpours. Planning around this stretch means you're less exposed to the peak heat and humidity that can slow activation of tarps, set-up, and drying times. For replacement projects, that means smoother progress and fewer days lost to afternoon rain showers.
Afternoon rain is a regular fixture in this hot, humid climate, even when mornings look clear. That means the most reliable progress happens when crews front-load critical work like tear-off and plywood or deck preparation early in the day, then shift to less weather-sensitive tasks later. If a forecast shows a potential shower around mid-afternoon, it's reasonable to adjust the schedule to finish up mating, flashing, and accessory installation before that window closes. Communication with the crew about likely shower timing helps keep the project moving without stalled sections.
Fall might seem like a safe bet, but tropical storm remnants still drift through the area and can disrupt both crews and inspection calendars with sporadic storms. It's wise to build a realistic buffer into the plan for late-season weather surprises and to have a contingency day or two set aside. This isn't about overreacting to every inch of rain, but about recognizing that even moderate storms can interrupt roofing work in progress and shift timelines.
Coordinate closely with the roofer to target dry spells or mornings with low humidity when possible, and agree on a rollback plan if a storm threatens a scheduled tear-off. Aim to have the most weather-sensitive tasks completed during the early hours of a workday so that if a quick shower comes through, the most critical stages are already secured. Keep communication lines open with the crew about expected rain patterns and adjust the sequence if delays begin to accumulate. By treating the dry-season window as a flexible target rather than a fixed deadline, you minimize the chance of a project stalling due to late-summer or early-fall storms.
Get a clear picture of your project costs upfront - no commitment required.
Roof Panda
(813) 295-7663 www.theroofpanda.com
4726 N Lois Ave Unit B, Tampa, Florida
5.0 from 241 reviews
Action Roofing
(813) 680-5787 actionroofing.com
5401 W Kennedy Blvd ste 100 unit 132, Tampa, Florida
4.9 from 118 reviews
Sidd Roofing
(813) 837-0000 www.siddroofing.com
4306 E Broadway Ave, Tampa, Florida
5.0 from 55 reviews
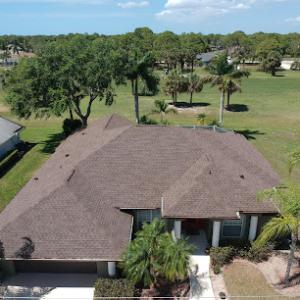
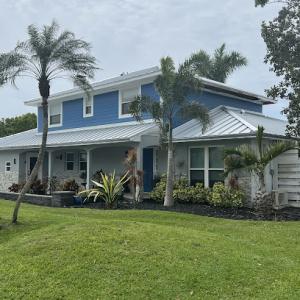
Asphalt shingles remain the most common residential choice because they blend with older Florida styles while adapting to newer, storm-conscious replacements. In the Gulf Coast climate, the rough combination of strong UV and high humidity accelerates surface aging and color fade for asphalt, so choose higher-ALbedo or reflective shingle options when possible to slow heat absorption. Look for shingles with good granule retention and a proven track record against moisture infiltration, since humidity can loosen or loosened granules over time, revealing accelerated wear along edges and valleys.
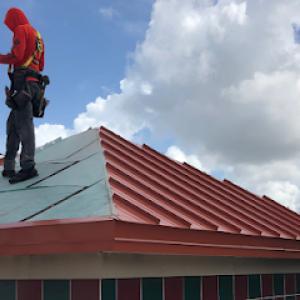
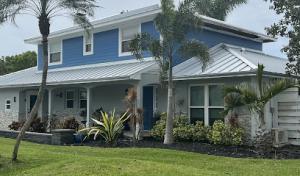
Metal roofs handle Tampa's sun and rain cycles well when properly installed, offering excellent hail and wind performance. The reflective coatings and lighter color options help reduce heat buildup, which can translate to lower attic temperatures and longer shingle-level life for underlying underlayment. Pay attention to panel seams and fasteners, as humidity and salt air near coastal zones can promote corrosion in exposed components. A well-sealed edge detail and a corrosion-resistant coating are practical investments for this climate.
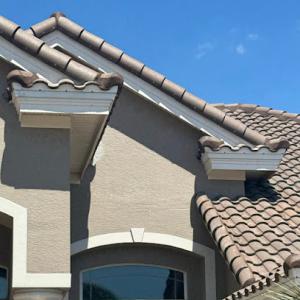
Clay tile presents a classic, drought-season-appropriate aesthetic that many Tampa homes still embrace. The weight of clay tile is a defining factor here; it requires a robust structural frame and a reliable underlayment setup to manage wind uplift and seasonal shifts. In a sunny, humid environment, clay tile surfaces tolerate heat well, but color fade and surface crazing can occur if the finish is not specifically formulated for Florida UV exposure. Complex repairs may be needed after wind-driven debris, so anticipate a longer lead time for service relative to lighter materials.
Concrete tile shares many advantages with clay, including strong UV resistance and long service life, while offering greater impact resistance and sometimes lower cost. The material's mass helps moderate attic temperatures, but installers must ensure proper venting and underlayment because moisture can migrate through the substrate if seams are not well sealed. In Tampa's heat and humidity, concrete tiles can last a long time with the right sealant and maintenance schedule, though color retention still depends on the finishing and coating quality.
Wood shakes deliver a distinct architectural look that remains popular in certain neighborhoods, but they demand diligent maintenance in a coastal, sunny climate. Molding and sealing must keep moisture out, as humidity accelerates warp, splitting, and rot. UV exposure can fade wood color faster than other materials, and repairs can be more involved due to the nature of individual shakes. A proactive approach to staining or sealing, along with vigilant inspection after storms, is essential for longevity.
Synthetic or composite shingles offer flexibility in color and texture while typically resisting fade and moisture more consistently than natural fibers. This makes them a practical choice where sun and humidity are persistent. Look for products with documented performance in hot, humid climates and warranties that cover color retention and granule shedding under Florida sun exposure. These materials can provide an attractive balance of appearance, weight, and repair ease in a hurricane-prone area.
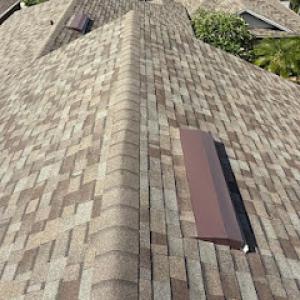
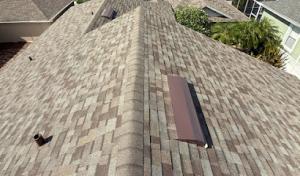
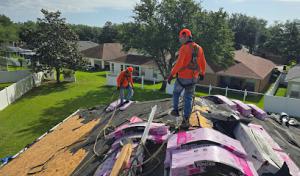
In Tampa, repeated heat, UV exposure, and heavy rain show up in concrete and clay tile roofs as brittle shingles, lifted tabs, and exposed fasteners. Those sun-rotted edges don't just snag a breeze during a storm; they invite water behind the surface where you can't easily see it. Over time, the combination of heat cycling and humidity weakens the adhesive and sealant in areas that once seemed solid. If you notice tabs that don't lay flat, or granules collecting in gutters like spilled salt, treat it as a warning sign that a closer inspection is overdue.
On clay and concrete tile roofs common in the area, the visible tile may outlast the waterproofing layer beneath it, making underlayment failure a major local replacement trigger. When tiles crack or lift, the underlayment is exposed to back-to-back downpours and tropical humidity. You may hear a persistent drip during or after a heavy shower, or find damp spots that don't align with a single leak source. This is not merely a tile problem-it's a signal that the water barrier under the tile needs attention before it rots the roof deck.
Humidity and frequent rain in the Tampa area can turn small flashing or penetration defects into recurring interior leak complaints during the wet season. Worn step and counter-flashing around chimneys, vents, and skylights can seep after a storm surge when rain storm drains are overwhelmed. If you notice staining along ceiling seams, swollen drywall, or musty odors near penetrations, don't ignore it. A tiny gap or loose boot now can become a widespread interior leak after the next front of storms rolls in.
The pattern is clear: heat, humidity, and storm cycles turn minor roof vulnerabilities into repeated failures. Regular inspection after major rain events is essential, looking specifically for loose tiles, exposed fasteners, compromised flashing, and any signs of underlayment distress. If you find issues, address them promptly rather than delaying-the longer a problem sits, the more damage can creep into plywood or decking behind the tile or shingle surface.
Find contractors experienced in skylight installation, flashing, and leak repairs to bring natural light into your home.
Wilson Roofing & Renovations
(813) 946-9867 www.wilsonroofingandrenovations.co
1100 N 50th St St #3i, Tampa, Florida
5.0 from 99 reviews
Service Pro Roofing
(813) 645-7700 serviceproroofing.com
8267 Causeway Blvd Unit F, Tampa, Florida
4.8 from 166 reviews
Universal Roof & Contracting Tampa
(813) 295-7872 www.universalroof.com
5112 E Adamo Dr, Tampa, Florida
4.9 from 81 reviews
Local re-roof pricing is shaped by the mix of materials you'll see on daytime crews across neighborhoods. Asphalt shingles sit at the lower end of the cost spectrum, while clay or concrete tile push toward the high end of the ranges listed. In practice, asphalt shingles land around the mid-to-lower portion of the published band, with metal and synthetic options sitting between, and tile options driving the high end. When you compare bids, check whether crews itemize tear-off, disposal, and waste-hauling charges separately-these can add noticeably to the bottom line, especially if the old roof contains a lot of architectural features or tile remnants that must be removed carefully.
Costs in this market can rise during storm-recovery periods when demand surges for labor, tear-off crews, tarping, and permit processing. In Tampa, that means a visible premium for timely re-roofs after named storms or tropical activity, and it's common for crews to be booked weeks out with elevated crew rates. If you have flexibility, consider scheduling outside the peak window to lock in steadier pricing and shorter waits for inspections and material deliveries. Factor in the practical reality that the most storm-resilient installation-proper underlayment, fasteners, and wind-rated detailing-adds value beyond the sticker price, particularly when paired with appropriate wind mitigation documentation.
Tile-heavy homes, which are not unusual in Florida subdivisions, push labor time higher compared with simpler roof shapes. Clay and concrete tile require careful layout and sequencing to avoid breakage, which translates into longer project timelines and higher labor-per-square costs. Complex rooflines-multiple hips, valleys, or skylights-also extend the job, increase waste, and demand more crew coordination. You'll notice these factors show up as higher per-square rates within the same material category.
Rain windows and Florida's high humidity create practical pacing challenges. A roof that must be sequenced around intermittent downpours or inspected in stages will often mean longer project durations and more frequent tarps or temporary protection. If a bid shows a tight, back-to-back schedule, verify how rain days are treated in the timeline and whether a contingency for weather delays is baked into the price. In a market where timing matters as much as material, this planning can affect total cost and the smoothness of insurance claim progress in the weeks that follow, especially when coordinating with wind-mitigation documentation. In Tampa, keep that balance in mind as you compare bids and set expectations with your install team.
Don't let upfront costs delay a critical repair - these contractors offer payment plans to fit your budget.
West Florida Roofing
(813) 819-3712 westroofingfl.com
4515 George Rd Suite 355A, Tampa, Florida
5.0 from 105 reviews

For a full re-roof, a building permit is normally required rather than handling the project as informal maintenance. The process expects a clearly defined scope of work and plan details that describe the new roofing system, underlayment, ventilation, and any deck or sheathing work. If a re-roof involves replacing like-for-like with no structural changes, some jurisdictions may try to relax rules, but in Hillsborough County the full-replacement path usually triggers the formal permit track. Expect to provide product specifications, wind mitigation details, and drainage considerations as part of the submittal.
The contractor submits the scope of work and plan details to the local building department, and you should receive a copy of the approved plan before any roof work begins. The review focuses on wind resistance, underlayment installation, nail patterns, and any required reinforcement in vulnerable sections. During the process, the inspector may request additional information or revisions to ensure the design meets current Florida Building Code requirements for wind loads and hurricane exposure. Keep notes of who you spoke with and when, in case questions arise later.
Inspections typically occur at key milestones: once the rough framing and underlayment are in place, then again at final to verify closeout details, including fastener patterns, flashing, and venting. In practice, this means scheduling around the crew's progress so inspectors can view the work in the relevant stage. The local process usually expects a rough or underlayment inspection before shingles or tiles are applied, followed by a final inspection after completion. Plan for a possible re-inspection if any corrections are noted.
Review times can vary with season and workload in the local building department, which matters more during peak storm and replacement periods. If a hurricane season comes on quickly, approvals and inspections can compress or extend timelines, so coordinate closely with the contractor and the building department. Have contingency windows in your schedule for weather delays and permit-related follow-ups, and confirm inspection appointments well in advance to keep the project moving.
Flat and low-slope roofing is a meaningful part of the market, especially on additions, porches, multifamily buildings, and commercial properties. In frequent downpours, drainage performance becomes the daily predictor of wear. You want positive drainage to the gutters and downspouts, with no standing water longer than 24 hours after a storm. Inspect surface slopes, transitions at parapets, and deck drains after every hurricane-season blow-through. A small dip or clogged scupper can translate into hidden moisture that damages underlayment and decking over time.
Low-slope areas in Tampa often become the first leak points during prolonged summer rain even when the main pitched roof still appears serviceable. Look for blisters, splits, or delaminating membranes where heat and humidity concentrate moisture. UV exposure accelerates surface aging, so plastic seams, fasteners, and edge details cry out for closer attention. Where the roof is shaded by live oaks or neighboring structures, you may see slower drying and microbial staining; address those spots before they soak through.
If a repair or replacement involves low-slope sections, compatibility matters. Built-up and single-pply membranes behave differently under Florida heat and humidity. Ensure the chosen system has proper UV resistance, wind uplift performance, and a proven track record with Tampa's seasonal downpours. Pay attention to edge detailing at transitions to steeper roofs, penetrations, and skylight flats, where fastener timing and sealant durability drive long-term performance.
Create a monitoring routine timed with the rainy season forecast. After heavy rains, walk the surface with dry feet and a flashlight to spot shallow ponding or moisture staining. Keep debris from gutters and scuppers to prevent backups that force water into seams. Seasonal inspections should focus on sealant old-age cues, membrane conditioning, and flashing integrity around vents and parapets.
When a sudden leak appears in a low-slope area during a storm, prioritize quick temporary fixes to divert water away from critical materials while arranging a formal assessment. Document the leak location, the storm time, and the affected components with photos. This history supports timely decision-making for replacement or repair workflows and helps clarify next steps after a weather event.
Find specialists in TPO, EPDM, and built-up flat roofing systems for residential and commercial properties.
Roof Panda
(813) 295-7663 www.theroofpanda.com
4726 N Lois Ave Unit B, Tampa, Florida
5.0 from 241 reviews
Fix Roofing
(833) 944-7446 www.fixroofingllc.com
4818 N Grady Ave, Tampa, Florida
5.0 from 72 reviews
In a hurricane-prone market with tight insurance scrutiny, the record trail on a re-roof is as valuable as the roof itself. After a replacement, documentation supports not only workmanship questions but also future underwriting and resale inquiries. Warranties, if kept organized, can streamline any post-storm claim process and help explain fixes or upgrades years down the line.
After a re-roof, assemble a single, durable folder or digital vault that includes every detail: product data sheets for the exact shingles or panels used, contractor and manufacturer warranty documents, and final inspection sign-offs from the building department or inspector. Take clear photos of all ridge lines, penetrations, air vents, and flashing species and placements, plus close-ups of sealants and fasteners. Log installation dates, crew names, and the exact roof area covered. Store copies of any change orders and notices of completion in a clearly labeled, easily retrievable location.
Because storms are common here, the value of a complete install record grows when a claim is filed or when underwriting questions arise years later. Easy access to installation details and final approvals makes it simpler to verify coverage, communicate with insurers, and demonstrate compliance with wind-mitigation or code-related expectations that may influence claim outcomes.
Maintain the file as a living record. Add new warranty extensions, service notices, or repair documentation whenever generated. Update product details if any components are replaced or upgraded, and keep the contractor contact information current so it's ready for quick reference during emergencies or claims.