Last updated: Apr 19, 2026
Michigan City sits on Lake Michigan, so roofs face lake-effect snow, shoreline wind, and persistent moisture that inland LaPorte County does not. Those forces push against flashing, edge details, and ridge caps in ways that ordinary weather patterns simply don't. Freeze-thaw cycling-and the rapid shifts between freezing and thawing-jolts shingles loose, widens already stressed seams, and invites micro-cracks that let moisture creep inward. Humidity sits heavy on attic decks, inviting mold and deck rot that weaken the roof's structure from the inside out. Periodic hail adds pockmarks and micro-damage that accelerates wear across the entire roof surface. In practical terms, this means you'll see more loose granules, faster flashing movement, and leaks that appear where you least expect them.
Start with a visual check from the ground after storms and again after heavy snowmelt. Look for lifted edges along hips, valleys, and eaves, especially where wind can bat the roof during winter nor'easters or lake gusts. Inside the attic, pay attention to signs of moisture: dark stains, halos around nails, or warm spots that suggest insulation is losing its seal. In the attic, inspect ridge lines and joints for hairline cracks and any daylight peeking through from overhead. On the roof itself, keep an eye out for granule loss that slicks off in bare patches, and for flashing that has shifted or pulled away from chimneys, vents, and skylines. Since humidity and freeze-thaw cycles accelerate movement, repeated quick checks after heavy rain, sleet, or thaw cycles become non-negotiable. If a hail event brushes the area, plan a targeted inspection soon after, even if the roof looks mostly intact from the ground.
Replacement timing should align with late spring through early fall, when installation risks are lowest and weather windows are more predictable. Winter freezes, spring hail, autumn wind swings, and summer humidity each create distinct installation risks in this lakeside market. Prioritize scheduling a project start soon after the safe window opens in late spring, and aim to complete before autumn storms ramp up again. For homes exposed to lake winds and moisture, consider material choices that resist wind uplift and resist moisture intrusion without sacrificing performance. If replacement or major repairs cannot wait, plan interim protections: reinforce flashing, seal penetrations, and trim back branches that overhang the roof to reduce wind-driven debris. A proactive approach now helps prevent leaks that quickly multiply in a lake-exposed climate, where the next storm is never far away.
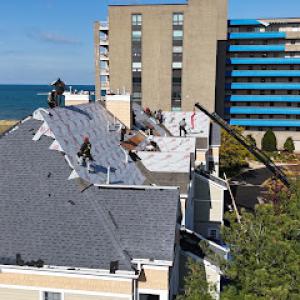
Northwest Indiana faces a steady rhythm of hail, wind, and lake-effect events that drive frequent insurance claims. In this market, adjusters are conditioned to scrutinize roofing damage carefully, which means a claim can hinge on the quality and clarity of the supporting documentation. The weather pattern here-lake-enhanced storms, repeated freeze-thaw cycles, and persistent humidity-creates both real storm damage and accelerated aging of materials. Treat a roof failure as a potential claim, but approach it with methodical documentation and honest assessment. The goal is to separate what happened in the latest storm from what has been slowly evolving due to lake exposure over years.
When a claim is filed, photo sets are routinely requested, often accompanied by a roof condition report. Then there is a demand for repair estimates that reflect a clear remedy path. In practice, adjusters commonly require confirmation of shingle type and underlayment type before approving the scope of work. That means you should know, with confidence, the exact products installed on your roof-not just the color or appearance, but the manufacturer and model, plus the underlayment beneath. If the shingle type or underlayment is misidentified, the scope can be delayed or altered, potentially increasing friction when settlement discussions begin. A careful, up-to-date inventory of the roof's components helps prevent that friction and supports a smoother claim review.
Because claim scrutiny is elevated in this region, homeowners need documentation that separates recent storm damage from older wear caused by humidity and freeze-thaw aging. Lake humidity can silently erode the fasteners, degrade the underlayment, and hasten granule loss on asphalt shingles. Freeze-thaw cycles crack and widen joints, accelerating visible signs of wear and making it harder to separate cause and effect after a heavy storm. When collecting evidence, note the timing of the storm event, the observed damage immediately after the storm, and changes that have occurred in the months or years prior. Include prior maintenance records, previous repairs, and any prior storm impacts that may complicate the claim narrative. The clearer the timeline, the stronger the case for a scope that reflects genuine storm-driven needs rather than cumulative aging.
Begin with current, high-resolution photos taken from multiple angles and, if possible, a short video walking the roof edge and eaves. Add a professional roof condition report that identifies material type, installation details, and any redemption of damaged components such as underlayment or flashing. Obtain repair estimates from reputable contractors who specialize in storm-damaged roofs, and ensure the estimates clearly itemize materials, labor, and any notable contingencies. Keep a written log of observations, including what was visible before the recent weather event and what appeared afterward. This level of detail supports conversations with adjusters and reduces the likelihood of scope disputes during the settlement process.
Coordinate early with the contractor and the insurer to align on the evidence needed for approval. If a adjuster requests confirmation of shingle and underlayment types, have the exact product names ready, including color-sorted alternates if the primary option is unavailable. In a Northwestern Indiana environment prone to storm-driven claims, proactive documentation and precise identification of materials can prevent delays and misinterpretations that routinely complicate claim outcomes. Stay organized, stay specific, and approach the process with a cautious eye toward distinguishing recent storm impact from long-standing lake-induced aging.
N&K Roofing & Construction by Weldon Roofing
(219) 207-8270 www.weldon-roofing.com
722 Franklin St Suite 11, Michigan City, Indiana
4.9 from 82 reviews
Choose Weldon Roofing & Construction for trusted Roofing Services in Michigan City. As a leading Local Roofing Contractor, we stand out among roofing companies in Michigan City. Our experts provide roof repair in Michigan City and roof replacement in Michigan City. Rely on the Best Roofing Contractor in Michigan City for Best Asphalt Roofing Shingle Michigan City and Best Metal Roofing Michigan City. Enjoy quality craftsmanship, transparent communication, competitive prices, and peace of mind warranties. Services: Roof Repair and Replacement (Shingle, Metal, EPDM, TPO) Roof Cleaning Gutter Cleaning Vinyl Siding Replacement LP Smartside Siding Installation Soffit and Fascia Repair and Replacement
Kolar Roofing
(219) 363-6714 kolarroofing.com
6713 N 525 W, Michigan City, Indiana
4.9 from 204 reviews
Kolar Roofing is a privately owned roofing company in Michigan City, Indiana designed to serve the community by providing roofing installation and repair services. We offer friendly, timely, professional service and advice across Northwest Indiana. Commercial and Residential Storm Restoration Also Available by Appointment Services: Roofing: Fiberglass, Synthetic, Asphalt, Shingles Storm Restoration Hail and Wind Damage New Construction Chimney Flashing Skylight Installation Gutters Brands: IKO Owens - Corning GAF Certain Teed
RL Roofing
(219) 872-8281 www.rlroofingservice.com
6012 E Michigan Blvd, Michigan City, Indiana
4.7 from 196 reviews
RL Roofing, Inc. - your local roofer in Michigan City, Indiana, with over 35 years of experience in the industry. R.L. Roofing has established itself as one of the top roofing companies in Northwest Indiana and Southwest Michigan. Our expertise extends beyond roofing. We proudly provide a comprehensive range of exterior renovation services, in additional to roof installation, including siding installation, replacement window installation, gutters, as well as garage and pole barn building. Take advantage of our offer for a free, no-obligation estimate and discover the the unparalleled level of service we offer in the exterior home improvement industry. We are the home improvement experts you can trust to get the job done right!
A-1 Commercial Roofing Specialist
(800) 203-0295 commercialroofingind-mich.com
Michigan City, Indiana
5.0 from 9 reviews
A-1 Commercial Roofing Specialist, with over 35 years of experience, delivers full-service commercial and industrial roofing in Northern Indiana and Southern Michigan. Our expert contractors specialize in low sloped and flat roofs using advanced materials like TPO, EPDM, and PVC. We collaborate closely with project managers to ensure projects are completed on time and within budget. Serving local businesses and international corporations, we provide durable, high-quality roofing solutions. Contact A-1 Commercial Roofing Specialist for all your commercial and industrial roofing needs.

Kelly Roofing & More
434 Hendricks St, Michigan City, Indiana
5.0 from 2 reviews
Kelly Roofing & More, over 18 yrs experience, a true American run company that values quality and price to a high standard! FULLY LICENSED, BONDED, INSURED
Alco Exteriors
(219) 508-1957 alcoexteriors.com
Serving
4.8 from 44 reviews
Alco Exteriors has been serving the people of Northwest Indiana since 1995. Licensed, bonded, and insured, we offer roofing, siding, and window systems by all major manufacturers for both residential as well as commercial installation. Our team of experienced roofing, window, and siding technicians is among the most highly trained in the business for roofing, window replacement, vinyl siding, aluminum siding, soffit, fascia, trim, and more. We maintain in-house training to keep up with industry standards and regulations. You can trust Alco Exteriors to handle any job you have, from simple repairs to the most complex and challenging projects. Call us today to learn more about our services!
Goodwin Construction
(219) 508-0308 goodwinconstructionnwi.com
Serving
4.9 from 44 reviews
Goodwin Construction is your go-to source for expert exterior construction in Northwest Indiana. Specializing in roofing, siding, windows, doors, and complete exterior remodeling, our family-owned business is dedicated to transforming your home with superior craftsmanship and unmatched customer service. We pride ourselves on our commitment to quality and our ability to bring your vision to life. With free estimates available, we ensure every project begins with transparency and confidence. Get your project started today with a free estimate from Goodwin Construction.

DMG Exteriors
(219) 286-7350 www.dmgexteriors.com
Serving
4.9 from 327 reviews
Here at DMG Exteriors, with offices located in Valparaiso, Hobart and Granger, IN, we understand the value of providing top-notch exterior finishes for your residence and business. Known for our expertise, superior craftsmanship, and extraordinary results, we provide best-in-class services that you can trust for all your exterior home needs. Whether you need roofing, siding, or complete home exterior remodeling—our team of experts has you covered! Get a free, accurate estimate for your next roofing, siding, or home remodeling project in Indiana.

Restoration Builders of Indiana
(630) 833-6721 restorbuilders.com
Serving
4.2 from 46 reviews
Welcome To Restoration Builders of Indiana. Restoration Builders of Indiana is a residential & commercial contractor operating in the United States. Our Roof, Windows, Siding and Gutter repair and restoration experts provide assistance with everything from roof inspections and minor repairs to comprehensive storm damage rebuilds and just about everything in between. Our mission is to protect, restore and build properties, strengthen families and support our communities. We are committed locally and ready to serve wide scale for disaster response. Contact us for a free inspection: info@restorbuildersIN.com.
Grimes Exteriors
(219) 242-4250 www.grimesexteriors.net
Serving
5.0 from 53 reviews
If you’re looking for a roofer who can provide top-tier quality and excellent customer service, look no further than Grimes Exteriors. We are providing reliable workmanship to homes and businesses in the Valparaiso, IN area. Our company is experienced in all types of roofs: asphalt shingle, tile, slate, metal—you name it. So come to us today and let us show you why we are one of the most trusted and reputable roofers in the area!
Tri-County Roofing & Gutters
(219) 548-0897 www.tricountycompanies.com
Serving
4.8 from 321 reviews
At Tri-County, we all work hard to ensure that our motto, "Done Right," is built into each and every one of our projects. We take pride in offering the best in customer service from the first time you inquire about an estimate to the final clean-up around your house. Our roof technicians have been with us for a long time, and have years of experience in diagnosing, recommending, and installing the most reliable, cost-effective roofing system for your home.

Stash Property Restoration
(219) 924-0266 stashpropertyrestoration.com
Serving
4.5 from 215 reviews
Stash Property Restoration is an interior and exterior full-service general contractor specializing in restoration, roofing, and remodeling in the Northwest Indiana and Chicagoland areas. Our top-notch team provides construction expertise, superior products, and an exceptional result from minor repairs to entire transformations. Your home has been our purpose for nearly 40 years. Contact us today to schedule a free in-home estimate! Available 24/7 via phone for emergency mitigation services.
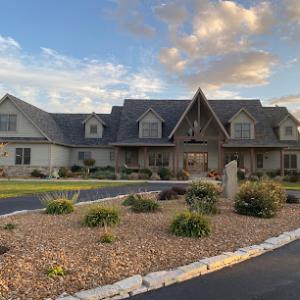
The dominant local material mix includes asphalt shingles, metal roofing, clay tile, concrete tile, wood shingles or shakes, and synthetic or composite shingles, giving homeowners more than one viable path depending on exposure and structure. Lake-effect snow, shoreline winds, humidity, and freeze-thaw cycles shape what lasts and what fails here. If a roof faces strong summer humidity, sealants on asphalt shingles can lose adhesion faster, and freeze-thaw cycles paired with hail can shorten service life more quickly than inland climates. Understanding how each option handles that mix helps you pick a roof that withstands the season-to-season grind.
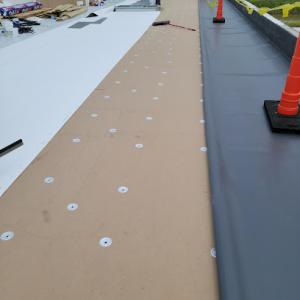
Asphalt shingles stay common for a reason: they're adaptable to typical attic layouts and relatively forgiving to install. In this climate, focus on premium blends with durable sealants and thicker granules to resist heat-softening effects in July and the creeping damp that follows a heavy humidity spell. If your roof sees frequent hail or severe wind events, consider specialty granule blends or thicker early-life warranties. Underlayment should be a robust, water-tight layer, and fasteners must be sized for wind zones to prevent adhesive sealant vulnerability in peak summer heat.
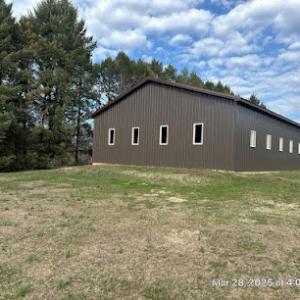
Metal offers a strong response to lake effect winds and cold snaps, with excellent impact resistance when panels are properly seated and fastened. Look for a system with standing seams or concealed fasteners, plus a corrosion-resistant coat for high humidity. Match it with a reinforced underlayment and a snow-retention strategy if your eaves collect heavy snow. A well-sealed edge detail and accurate flashing over chimneys and vent penetrations prevent moisture ingress during warm, humid periods that push condensation into vulnerable joints.
Clay and concrete tile are part of the local mix but require attention to structural suitability and underlayment performance in a climate with snow load, moisture, and temperature swings. Ensure the roof deck can carry the weight, and verify a fastened, continuous underlayment system designed for freeze-thaw cycles. Tile edges should be sealed, and installation must account for ice dam formation potential at eaves. For best results, specify higher-grade moisture barriers and consider a secondary insulation layer to slow heat transfer that can stress tiles during sudden warm spells.
Wood shingles and shakes offer a traditional look but demand meticulous maintenance in this climate. They're more sensitive to humidity and insect exposure, so choose treated or engineered options with proven rot resistance and staggered installation to prevent leaks. Synthetic or composite shingles can mimic wood while delivering lower maintenance and better hail resistance. Select products tested for freezing conditions and UV exposure, with a solid warranty on colorfastness and impact resistance.
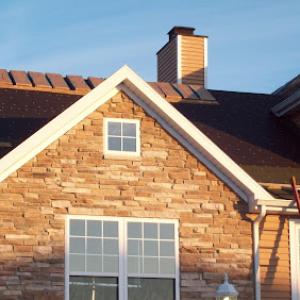
Regardless of material, prioritize a roof with a well-ventilated attic and a durable, continuous underlayment. Lake-adjacent weather can push moisture into the roof system; good ventilation reduces condensation and helps sealants perform consistently through hot summers and cold winters. In all cases, ensure flashing details around hips, ridges, chimneys, and skylights are continuous and corrosion-resistant. A careful, material-appropriate installation is the single most practical step toward extending a roof's life in this lake-front environment.
Typical local material pricing runs about 300 to 550 USD per square for asphalt shingles, 700 to 1500 for metal, 1000 to 2400 for clay tile, 800 to 1600 for concrete tile, 350 to 1100 for wood shingles or shakes, and 350 to 700 for synthetic or composite shingles. For a standard Cape Cod or ranch-style home near the lake, these ranges anchor initial planning, but expect differences based on roof size, attic ventilation, and existing decking condition. In practice, you'll see asphalt shingles remain the most common starting point, with metal rising in popularity where longer life and wind resistance are priorities.
Costs in Michigan City can rise after hail and wind events because storm-driven demand spikes across Northwest Indiana tighten contractor schedules and inspection backlogs. If a hailstorm hits, you'll encounter compressed timelines for estimates, material availability, and crew routing. This pressure can push prices upward and extend project timelines, especially for larger or more intricate layouts. Planning ahead, securing multiple bids, and aligning schedules with weather forecasts helps prevent overpaying during peak periods.
Lake-facing exposure, moisture-related deck repairs, and the need for more robust underlayment or flashing details in this freeze-thaw climate can push local reroof totals above simple material-based estimates. Expect higher costs when additional ice and water shield, upgraded flashing around chimneys and vents, or reinforced fasteners are advised by local crews. History shows wind-driven lifts and lake-effect moisture demand meticulous edge detailing and attic ventilation improvements to prevent early system failure, which should factor into both quotes and long-term performance.
When requesting bids, ask for itemized line items that separate decking, underlayment, flashing upgrades, and disposal fees. Compare warranties that address wind and hail exposure, as well as anticipated maintenance cycles after severe winters. Given the lake's influence on durability, consider one or two premium shingle or metal options if the existing deck shows signs of moisture intrusion or if the home's roof geometry concentrates wind uplift.
Reroof projects in this area typically require a building permit issued by the City Building Department serving the LaPorte County jurisdiction. The permit process is designed to align with Lake Michigan exposure and the region's storm-driven roof challenges, ensuring that the chosen roof system and installation practices meet local standards for wind resistance, moisture management, and snow loading. Before any shingles come off or new material goes on, confirm that a permit is in place and that the project scope matches the permit description. This helps avoid delays or enforcement holdbacks if inspections reveal an issue tied to fasteners, underlayment, or venting compatibility with climate-specific loads.
The usual submittal is straightforward and oriented toward practical risk management rather than a highly specialized package. Expect to provide basic project information, such as the planned roofing type, square footage, and any changes to roof penetrations or ventilation. Contractor credentials carry substantial weight here: ensure the contractor holds current licenses (where applicable in this jurisdiction), proof of insurance, and a clear statement of responsibility for the work. In lake-exposed neighborhoods where storm occurrences influence claim activity, the department often looks for diligent installation details and a plan that addresses wind uplift resistance and proper moisture barriers. Have your contractor ready to verify product specifications, warranty coverage, and any manufacturer-required installation notes that pertain to your chosen roofing material.
Inspections are typically scheduled at key milestones to verify code compliance and weather-ready installation. A common sequence includes an early check after underlayment installation to confirm proper nailing patterns, alignment, and moisture barrier installation, especially in areas prone to lake-effect humidity and rapid freeze-thaw cycles. A final completion inspection is required to close out the permit and confirm that all components-flashing, vents, drip edge, and penetrations-meet the local standards for durability in a shoreline-adjacent climate. Turnaround can range from a few days to a couple of weeks depending on department workload, so coordinate with the contractor to align weather windows and to anticipate any follow-up items that may arise after the initial inspections. Keep a calendar reminder for each milestone and have all inspection contact information ready to streamline communications with the Building Department.
Start early by validating that the selected roofing system aligns with the lake-facing exposure and seasonal storm patterns common in this area. If a claim has occurred in prior winters, review whether the chosen method addresses known vulnerabilities (such as wind-driven uplift and edge protection) and ensure the permit package includes any notes on product-specific installation requirements. Maintain open lines of communication with the contractor and Building Department throughout the process to minimize delays caused by documentation gaps or schedule shifts.
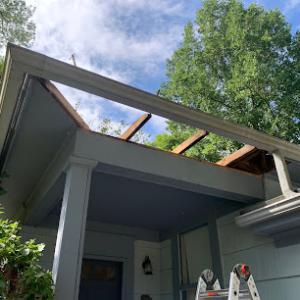
Winter freezes and snow in Michigan City can delay tear-offs, limit safe access, and affect material handling during emergency repairs. In icy conditions, plan for shorter work windows and consider staged tear-offs so crews can secure areas quickly when a storm rolls in from the lake. Ice builds on ladders and walkways, so ensure footing is cleared and de-iced before any ascent. If a roof is visibly saturated but still holding snow, prioritize shingle protection over a full rush to remove, especially when crews must navigate wind-blown drift and shoreline gusts. Temporary tarps and windbreaks should be ready to shield exposed decking if a thaw suddenly exposes a weakened edge.
Spring brings the city's highest leak and disruption risk because hail and heavy rain can interrupt open-roof work and trigger insurance activity at the same time. Schedule with a weather buffer: a dry spell of at least a few days is ideal to complete an area before a front moves in. Protect interior spaces with drop cloths and ensure ventilated, heated spaces dry out quickly after a storm to prevent mold. Have a clear plan for rapid tarp deployment if a passing squall hits mid-project, and coordinate with an insurer about weather-closure contingencies so work halts won't cost you progress or coverage gaps. Expect more inspections and paperwork during this period; keep all documentation organized and accessible.
Autumn wind events and temperature swings near Lake Michigan can narrow ideal installation windows even when daytime conditions still look workable. Crosswinds can affect shingle alignment and nail depth, so crews should secure the ridge and eaves before higher winds pick up. Temperature swings between warm afternoons and chilly nights can impact adhesive set times and sealant performance; plan for flexible scheduling to avoid mid-application freezes that could compromise the install. Use wind-rated underlayment where possible and inspect fasteners for loosening after a strong gust. Maintain a ready-within-reach kit of fasteners, sealant, and batt insulation to address small issues quickly as the season shifts.
Repeated moisture exposure and freeze-thaw cycling make flashing transitions, sealant joints, and underlayment integrity more consequential than in drier inland markets. In this climate, small gaps or softened sealants can become leak paths after a winter storm or a sudden thaw. Reroofs that rush through flashing details or cut corners on underlayment lose resilience when lake winds slam against the eaves and attic humidity spikes. The result is slow moisture intrusion that propagates into rafters and ceilings before a homeowner notices.
Periodic hail in the Michigan City area creates a recurring pattern of granule loss, bruising, and disputed partial-versus-full replacement conversations with insurers. Shingles that look visually sound can hide hidden bruising or delamination under the granule layer, making the roof vulnerable to leaks after subsequent storms. The challenge is the cycle: insurers may push for limited repairs, while ongoing weather exposure means those capped fixes rarely hold up long-term. Expect to scrutinize hail reports and ask for independent assessments after severe hail events.
Humidity and seasonal temperature swings can expose workmanship weaknesses faster, especially where reroofs are rushed during storm-recovery surges. Inexperienced crews may omit curing time for sealants, misstate underlayment compatibility, or overlook proper necking of vent boots and skylight sidelites. If the project timeline compresses, vulnerable joints across valleys, dormers, and chimneys become high-risk points. The weather cycle then magnifies these oversights into recurring leaks that require costly retraining or redo work.
You should expect to look closely at every transition-where roof meets wall, around chimneys, and at vent penetrations. After a storm or a fast reroof, inspect interior ceilings for spidering stains that indicate hidden moisture. Keep an eye on attic humidity, especially after long stretches of snowmelt and warm days. A reliable contractor will document flashing materials, sealant brands, and underlayment types, and will not rush critical details even when the next storm front is looming.