Last updated: Apr 19, 2026
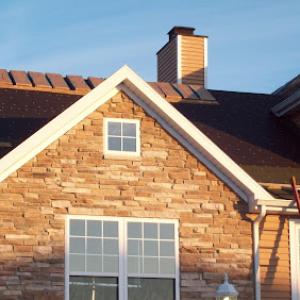
In Chesterton sits in the Lake Michigan weather zone where lake-effect snow and repeated thaw-refreeze cycles can shorten shingle and underlayment life compared with milder inland conditions. That pattern means a roof that looks fine in late fall can develop vulnerable spots once January moisture and biting winds swing through. You'll notice granule loss on shingles, curling edges, and soft spots where ice has forced water under the roofing layer. Don't wait for a dramatic leak to confirm trouble-the combination of persistent moisture and cold snaps means small gaps can turn into cold-weather leakage that mirrors into spring's thaw and later wind-driven damage. If you've got an older roof or a mix of softer shingles, expect more pronounced wear along eaves, valleys, and penetrations.
The local seasonal pattern combines winter ice-dam risk with spring hail and wind events, so many Chesterton roof problems show up as both cold-weather leakage and later insurance-related storm damage. Ice dams form when uneven roof temperatures melt and refreeze along the edge, backing water up under shingles and into attic spaces. In spring, hail and gusty winds become the second wave: dents, cracked shingles, and blown-off granules that expose the underlayment to further moisture. After a long winter, those hail-driven dents can go unnoticed at first because snow covers them, then emerge as leaks when rains hit or when temperatures swing quickly. The effect is a paradox: the roof seems okay after a thaw, only to reveal failures when the next storm arrives.
Because the area sees recurring hail and wind claims, insurers commonly expect photo documentation and prompt inspection records before and after work rather than informal verbal damage reports. That means you should photograph the roof while clean weather holds, capturing shingles' edge wear, granule loss, and any visible cracking or curling. After a hail event or a windstorm, arrange a professional inspection quickly, ideally within days, so a detailed report with close-up images, a roof plan, and measurements can accompany a claim. Keep a timeline: note the date of any snowfall or thaw cycle, the first time you observed leakage, and the day you scheduled assessments. Insurance adjusters often rely on a clear before/after narrative to validate repairs and avoid disputes about when damage occurred.
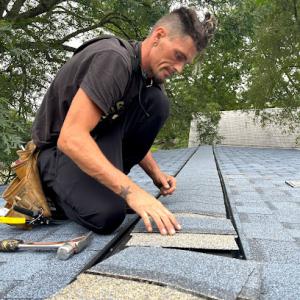
Start by inspecting exterior roof lines from ground level after a dry day. Look for lifted or missing shingles, especially around ridges and hips, and check for broken ceramic or fibrous tabs that show through. If ladders are safe to use, take a careful walk along the eaves to spot any unusual gaps or curling that indicates moisture intrusion. Inside the attic, look for dark spots, moisture staining, or a musty odor near joints and penetrations. If you see evidence of ice damming or water intrusion after a thaw, capture the thickness of ice along the eaves in photos, then document any staining or mold growth behind attic insulation. Maintain a simple log of all weather events that correlate with damage; add dates and any observed changes in roof performance.
If you identify moisture leakage or obvious shingle damage, contact a local roofing professional experienced with Lake Michigan weather quirks and the Chesterton climate. Prompt inspection is essential because delayed repairs can escalate into interior damage and more complicated insurance claims. A knowledgeable pro will assess shingle integrity, underlayment condition, and the risk to attic insulation, then propose targeted steps that minimize further water intrusion. If hail-driven or wind-driven damage is confirmed, coordinate with your insurer for an adjuster visit with the contractor present to verify the scope of work. The right timing matters: delaying a documented assessment can complicate claim approval and extend the period of exposure to cold and wet conditions that worsen the initial damage.
Restoration Builders of Indiana
(630) 833-6721 restorbuilders.com
802 Wabash Ave #350a, Chesterton, Indiana
4.2 from 46 reviews
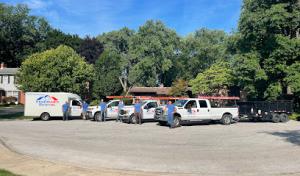
Welcome To Restoration Builders of Indiana. Restoration Builders of Indiana is a residential & commercial contractor operating in the United States. Our Roof, Windows, Siding and Gutter repair and restoration experts provide assistance with everything from roof inspections and minor repairs to comprehensive storm damage rebuilds and just about everything in between. Our mission is to protect, restore and build properties, strengthen families and support our communities. We are committed locally and ready to serve wide scale for disaster response. Contact us for a free inspection: info@restorbuildersIN.com.
Care Roofing & Construction
1516 Washington Ave, Chesterton, Indiana
5.0 from 5 reviews
Local Family Owned Residential Roofing Company. Expert Workmanship at Competitive Prices! We Do Repairs, Replacement, and Restoration of the Best Quality! Free Estimates! Call Today

Stash Property Restoration
(219) 924-0266 stashpropertyrestoration.com
Serving
4.5 from 215 reviews
Stash Property Restoration is an interior and exterior full-service general contractor specializing in restoration, roofing, and remodeling in the Northwest Indiana and Chicagoland areas. Our top-notch team provides construction expertise, superior products, and an exceptional result from minor repairs to entire transformations. Your home has been our purpose for nearly 40 years. Contact us today to schedule a free in-home estimate! Available 24/7 via phone for emergency mitigation services.
Grimes Exteriors
(219) 242-4250 www.grimesexteriors.net
Serving
5.0 from 53 reviews
If you’re looking for a roofer who can provide top-tier quality and excellent customer service, look no further than Grimes Exteriors. We are providing reliable workmanship to homes and businesses in the Valparaiso, IN area. Our company is experienced in all types of roofs: asphalt shingle, tile, slate, metal—you name it. So come to us today and let us show you why we are one of the most trusted and reputable roofers in the area!

DMG Exteriors
(219) 286-7350 www.dmgexteriors.com
Serving
4.9 from 327 reviews
Here at DMG Exteriors, with offices located in Valparaiso, Hobart and Granger, IN, we understand the value of providing top-notch exterior finishes for your residence and business. Known for our expertise, superior craftsmanship, and extraordinary results, we provide best-in-class services that you can trust for all your exterior home needs. Whether you need roofing, siding, or complete home exterior remodeling—our team of experts has you covered! Get a free, accurate estimate for your next roofing, siding, or home remodeling project in Indiana.
Tri-County Roofing & Gutters
(219) 548-0897 www.tricountycompanies.com
Serving
4.8 from 321 reviews
At Tri-County, we all work hard to ensure that our motto, "Done Right," is built into each and every one of our projects. We take pride in offering the best in customer service from the first time you inquire about an estimate to the final clean-up around your house. Our roof technicians have been with us for a long time, and have years of experience in diagnosing, recommending, and installing the most reliable, cost-effective roofing system for your home.
My Style Exteriors
(815) 666-2086 www.mystyleext.biz
Serving
5.0 from 20 reviews
My Style Exteriors sets the standard for both residential and commercial exterior restoration, with over 40 years of proven experience in the industry. As your #1 trusted home improvement company, we specialize in roof replacements, roof repairs, siding installations, siding repairs, gutter replacements, and gutter repairs, offering top-quality solutions to protect and beautify your home or business. Whether you’re facing exterior damage from a storm or simply want to enhance the curb appeal of your property, our expert craftsmanship and personalized service ensure a seamless experience. Call us today for a free, no-obligation inspection or estimate, and discover why “Your Style Starts at Home” with My Style Exteriors.

Discount Roof
(219) 248-7628 mydiscountroof.com
Serving
4.8 from 247 reviews
Discount Roof is a fully licensed and insured contractor delivering outstanding exterior home remodeling and roofing services. Utilizing top-quality materials and exceptional installation procedures ensuring the ultimate reliability for your project, offering peace of mind and lasting beauty for your property.
N&K Roofing & Construction by Weldon Roofing
(219) 207-8270 www.weldon-roofing.com
Serving
4.9 from 82 reviews
Choose Weldon Roofing & Construction for trusted Roofing Services in Michigan City. As a leading Local Roofing Contractor, we stand out among roofing companies in Michigan City. Our experts provide roof repair in Michigan City and roof replacement in Michigan City. Rely on the Best Roofing Contractor in Michigan City for Best Asphalt Roofing Shingle Michigan City and Best Metal Roofing Michigan City. Enjoy quality craftsmanship, transparent communication, competitive prices, and peace of mind warranties. Services: Roof Repair and Replacement (Shingle, Metal, EPDM, TPO) Roof Cleaning Gutter Cleaning Vinyl Siding Replacement LP Smartside Siding Installation Soffit and Fascia Repair and Replacement
Universal Restorations
(219) 799-7663 universalrestorationsnwi.com
Serving
5.0 from 12 reviews
At Universal Construction & Restorations, we provide high-quality residential and commercial roofing services across Northwest Indiana. From storm damage inspections and insurance claims to complete roof replacements, our experienced team delivers craftsmanship you can count on. We use only premium materials, back our work with solid warranties, and treat every home as if it were our own. Whether you need a free inspection, urgent repairs, or a brand-new roof, we’re here to protect what matters most — your home and your peace of mind.
Roman's Roofing
(219) 838-9111 romansroofing.net
Serving
4.8 from 348 reviews
We are a licensed, bonded, and insured home improvement company in Northwest Indiana, with years of experience in roofing, siding, windows, and other renovation projects. We serve Lake County Indiana and the surrounding towns and areas including; Cedar Lake, Crown Point, Dyer, East Chicago, Gary, Griffith, Hammond, Highland, Hobart, Lake Station, Lowell, Merrillville, Munster, Schererville, St. John and Whiting. We do the job right using quality materials and expert installers at a fair price. Your project will be completed efficiently and to factory specifications. We can help make your home maintenance free, more energy efficient, and the envy of your neighbors.
RL Roofing
(219) 464-0507 www.rlroofingservice.com
Serving
4.7 from 21 reviews
RL Roofing is your local roofing company with a long history of serving Valparaiso! We are a family owned and operated business who is licensed, bonded and insured. In business since 1985, we offer a great selection of top products in the roofing, siding, and windows industry. At RL Roofing, we take pride in the reputation we have built throughout the years and are committed to continuing in our tradition of excellence in product quality, installation and customer service. We look forward to providing you with a free estimate, showing you how we can eliminate roof problems, increase your your space with a new garage, and help you boost the value and energy efficiency of your home or business with new windows, insulation and siding.
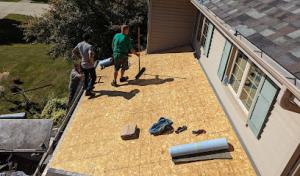
Late spring through early fall is the preferred replacement window in this area because winter snow, freeze-thaw cycling, and wet conditions make tear-off and sealing less predictable. If a roof needs attention after a harsh winter, aim to start once the ground dries and temperatures stay consistently above freezing. That means checking forecasts for a solid stretch of milder days rather than chasing a sudden warm spell that could unravel with rain. In practice, the goal is to complete tear-off and installation before the first heavy autumn rainstorms, but without rushing into a brief warm spell that invites cut corners. This timing helps ensure roof deck drying, proper underlayment adherence, and solid sealants before the next freeze.
Autumn scheduling in this area can tighten quickly because leaf buildup and fall storms affect drainage checks and inspection timing before winter sets in. If planning a replacement in September or October, map out the sequence weeks in advance: material lead time, tear-off, deck inspection, underlayment, and final sealing. Leaves can obstruct gutters and downspouts even when the roof overlay is progressing, so plan for gutter cleaning as a concurrent step and leave a buffer day for unanticipated minor debris removal. Early autumn is manageable, but by mid-fall, chilly mornings and moisture can slow checks and inspections, potentially delaying critical weather sealing. Secure a concrete inspection window with the contractor and set expectations for rapid decisions when weather permits.
Weather-related delays are a practical local issue because permit inspections may need to align with tear-off and completion stages during a climate with frequent seasonal interruptions. Have a contingency plan for back-to-back storms or sudden cold snaps that stall adhesive cures or sealants. If a forecast shows a week of clear, dry days, prepare to mobilize quickly; otherwise, schedule a two-to-three day block rather than a single day to absorb weather hiccups. In this climate, the crew should monitor overnight frost risk and morning dew, adjusting start times to keep moisture off the deck and underlayment. Clear communication with the contractor about expected weather windows helps minimize idle days and preserves the integrity of the install.
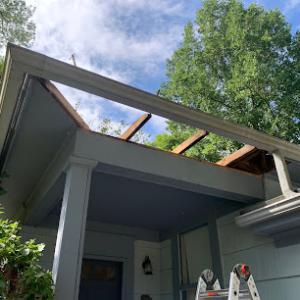
Coordinate tear-off with a window that allows a full, uninterrupted sequence: removal, deck inspection, underlayment, and final reseal. When a storm threat looms, shifting to a partial tear-off with temporary covers can protect the home while waiting for a dryer spell, but beware that this can complicate warranty coverage if moisture is trapped. Schedule the inspection for the day after completion while the roof is still exposed and accessible. This alignment matters because inspections need to verify proper attic ventilation, shingle alignment, and flashing before materials settle in. If a mid-season storm disrupts progress, keep documentation of weather days and adjust the shot list to prevent gaps in critical steps.
Before the roofer arrives, perform a quick internal check: look at attic spaces for any signs of new leaks or frost stains after seasonal transitions, and note any prior gutter or fascia issues that may influence drainage. Outside, clear nearby limbs that could rub against edge metals and ensure temporary tarps are positioned to shed potential rainfall away from work zones. Keep a simple calendar handy to track progress milestones-tear-off date, deck inspection, underlayment installation, and final sealant cure-so the project remains on track despite Chesterton's mix of lake-influenced weather patterns.
Get a clear picture of your project costs upfront - no commitment required.
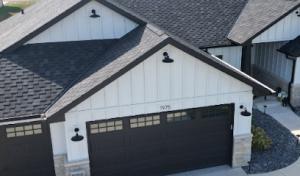

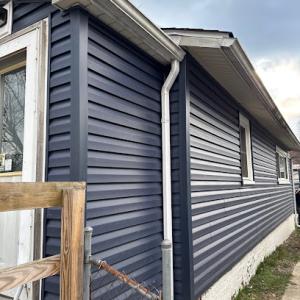
Asphalt shingles dominate installations here because they align with the typical residential re-roofing market and strike a practical balance between storm exposure and replacement cost. They're easier to work with on a tight winter schedule, perform well under freeze-thaw cycles, and offer dependable wind resistance when installed with the right underlayment and sealant methods. For most walks of life in this area, asphalt shingles provide a familiar, straightforward upgrade that fits common roof pitches and attic layouts found on Northwest Indiana homes. When selecting asphalt, look for a product with good granule adhesion and a robust warranty, and pair it with proper attic ventilation to mitigate heat buildup during shoulder-season warm spells.
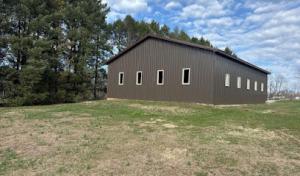
Metal roofing presents a compelling option for homeowners thinking long-term about snow shedding, rain exposure, and a longer lifecycle. In this region, metal can help reduce snow buildup and ice dam risk on steeper sections, while offering excellent wind performance and rapid shedding of moisture after storms. If choosing metal, consider panels with a proven coating that resists corrosion from road salt and humid springs, and confirm that the installation layout accommodates typical attic venting and insulation needs. A metal roof can also contribute to lower maintenance through its structural longevity, which matters in a climate that alternates between lake-effect snowfall and spring deluge.
Tile and slate options exist in the market, but their higher weight and cost make them a narrower fit compared with asphalt-focused replacement work. Clay and concrete tiles, as well as natural slate, require reinforced decking and careful structural assessment to manage load, especially on older homes or those with limited attic access. In practice, these materials are most suitable for custom projects where the roof structure is known to support the weight and the owner is prepared for a slower, more involved installation process. For most standard rebuilds after winter damage, these options should be evaluated against a more forgiving, cost-effective substitute.
In a climate influenced by lake effect, choosing a roof that resists rapid weathering and resists water intrusion during wet springs matters as much as initial appearance. The right material should align with typical Chesterton storm cycles, enabling you to complete installations or repairs in windowed periods that minimize exposure to snow and rain. Regardless of material choice, prioritize durable underlayment, robust fasteners, and attention to drainage detail to keep a roof performing well through multiple lake-effect seasons.
For many homes in this area, asphalt shingles stay the most practical option given a balance of upfront cost and performance through Lake Michigan winters. In Chesterton, you'll typically see asphalt shingles priced around 350 to 800 USD per square for a full replacement, depending on the profile, warranty, and installer. When weather windows tighten after a winter storm, scheduling pressure can push both labor pricing and availability higher, so it's not unusual to see rates drift toward the upper end after hail events or wind season. Keep in mind tear-off complexity during a full roof replacement can add to the total, especially if decking needs repair or insulation upgrades are contemplated.
Metal panels are a common upgrade choice when homeowners want longer life and better wind resistance. In this market, metal roofing typically runs from 600 to 1000 USD per square for a full replacement. Premium metal options-thicker gauges, standing-seam systems, and color matching-rise well above that, which is a practical consideration when planning around a potential hail season. The payoff tends to be reduced maintenance and faster installation in favorable weather blocks, but heavy spring storms can compress scheduling slots and heighten labor demand in the local trade pool.
If a Chesterton project leans toward clay tile, concrete tile, or slate, expect materially higher costs. Clay tile and concrete tile land in the higher ranges, with concrete often more favorable than clay for weight and installer availability, while slate sits at the top end. These selections respond well to certain architectural styles and long-term durability, but the price impact is steep, and weather-driven delays can compound the budget as crews coordinate lifts, inspections, and potential roof-to-deck work after a harsh winter.
Synthetic or composite shingles offer a middle-ground option for durability without pushing the budget as hard as premium tiles. Prices typically sit between asphalt and metal in Chesterton, and they respond well to freeze-thaw cycles. As with other materials, spring storm activity can spike demand and complicate scheduling, particularly for full re-roofs. Project costs will reflect both material choice and the pace at which crews can mobilize after hail or high-wind events.
A full re-roof isn't treated as a no-paperwork project here. The permit process runs through the local Porter County jurisdictional system, and that means you'll encounter formal applications, inspections, and a defined flow rather than a quick brush-off. The authority between the roof deck and the new surface is watching for proper approvals, which helps protect you from hidden code issues that could bite later-especially after a rough Lake Michigan winter. If you're replacing a roof due to wind or hail damage, plan for the paperwork to reflect the scope changes as the project evolves, not just as a single checkbox item.
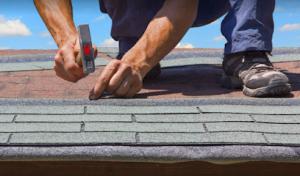
The inspections are not mysteries tucked away behind the tarp. There's typically one inspection after tear-off to confirm that the old layers are off, the deck is sound, and the underlayment approach aligns with the chosen roofing system. Then, once everything is in place and before final signoff, another visit verifies nailing pattern, underlayment coverage, and venting details. Hearing the word "inspected" at the right milestones can save you from last-minute snags or rework, especially when a windstorm or late snow pushes the timeline a bit.
In the local climate, you'll learn that inspection windows are often staggered and weather can skew timing. Freeze-thaw cycles, late-season snow, and spring storms can push work days around, meaning a roof can linger between tear-off and final approval longer than you'd expect. Keep your contractor's crew flexible and factor in the possibility of shifts in start dates or inspection slots. Communicate early if a forecast shows a stretch of bad weather, so you don't surprise yourself with a missed inspection and an extra trip or two. This isn't about caution for caution's sake; it's about avoiding delays that expose the deck and underlayment to unnecessary moisture risk during a longer-than-expected replacement window.
Chesterton sits in an Indiana hail and wind claim environment where roof insurance decisions are heavily shaped by seasonal storm frequency rather than only age-related wear. That means a roof's life can look radically different depending on how many big events show up on your calendar. When a storm rolls through, the claim file you submit carries more weight than a bare assessment of shingle wear. A roof that held up for a decade can still trigger a high-stakes claim if a late-season hail event leaves microscopic damage that's not obvious to the untrained eye.
Adjusters in this market often ask for bid proposals plus pre-work and post-work photos, making documentation quality especially important for Chesterton homeowners. Those photos aren't just for pretty records; they become part of the decision-making thread that can lengthen or shorten your claim path. Have clear, dated images from multiple angles, noting any pre-existing issues and the exact areas where hail or wind impact occurred. Do the same when repairs begin and finish; inconsistent visuals can complicate negotiations and extend timelines.
Timely inspection notes matter locally because claim files can be scrutinized more closely in a market with recurring storm losses and multiple contractors offering storm-related services. If you delay an evaluation, you risk questions about whether preexisting conditions were properly disclosed or if post-storm repairs were completed promptly. Schedule your inspection while the memory of the event is fresh, and coordinate with any contractor who will be providing bid documentation to ensure your file moves efficiently through the process.
In Chesterton, winter ice dams and freeze-thaw cycles commonly expose weaknesses first at shingle edges, underlayment transitions, and roof drainage paths. Look for shingles that curl, edge granules that have washed away, or flashing that seems loose along valleys and rake edges. Pay attention to gutter junctions where ice can back up and push against underlayment. A small, early sign-wet staining along the attic ceiling near a soffit vent-often points to a hidden edge or seam that failed during a thaw. Inspect after heavy snow melts and after sustained cold snaps when ice moves through the eaves.
Spring wind and hail in the area can turn minor existing defects into active leaks, especially on aging asphalt roofs that already went through several Northwest Indiana winters. If a hail event follows a long dry period, check for dented or pocked shingles, loosened granules, or warped edges. Loose or missing fasteners along the rake, along skylight flanges, and at dormer connections invite water entry once rain returns. In Chesterton, a quick walk around the roof line after storms helps catch wind-driven damage before it progresses into a full leak, particularly on lower slopes or overhangs.
Local contractor signals show recurring homeowner demand for skylight and chimney-related roof work, indicating penetrations and transition details are a practical concern in this market. Inspect caulking around skylight housings, sidewall flashings, and chimney crickets for cracks or separation. Notice any staining along chimney step flashing or around the skylight frame during dry, sunny days, which often hides a leak that shows up with the next spring shower. Regular checks here prevent small gaps from becoming active leaks.
Find contractors experienced in skylight installation, flashing, and leak repairs to bring natural light into your home.

While Chesterton is primarily a pitched-roof re-roofing market, local contractor activity shows enough flat-roof demand to justify guidance for garages, additions, and low-slope sections. The combination of moderate-to-heavy rainfall and autumn debris means drainage reliability matters more on low-slope sections than on steeper main planes. Expect gutters, downspouts, and edge flaws to reveal themselves sooner after wet seasons. Plan for regular checks of membrane seams, ridge terminations, and any transitional flashing where a low-slope area ties into a higher roof.
Low-slope roofs in this climate need clear, continuous drainage paths. Check for scuppers and internal drains that can clog with pine needles, leaves, and dirt during the wet shoulder seasons. Ensure membrane edges are secured with proper terminations and that zip-fastener details along parapets stay watertight. Periodic testing after heavy rains helps catch slow leaks before they become bigger problems. In garages or additions, keep a watch on interior ceilings for signs of moisture migration, especially after rapid thaw cycles.
Freeze-thaw cycling in Northwest Indiana makes small ponding or flashing issues on low-slope areas recur leak sources across multiple seasons. Inspect around flashings at terminations, curb penetrations, and any rooftop equipment. Look for seam separations, punctures, or degraded ballast if present. Address small ponding areas by improving slope with minimal disturbance to the adjacent main roof, and reinforce flashing where water tends to back up. Regular maintenance after snowmelt and spring storms reduces the chance of a slow, multi-season drip turning into a repair-episode.
Adopt a scheduler that emphasizes post-winter and post-storm checks, with a mid-season mid-summer review to clear debris and confirm drainage paths stay open. For garages and additions, keep an eye on interior evidence and prioritize early intervention when you notice damp spots near seams or under edge caulking. A proactive approach protects low-slope sections from the cumulative toll of lake-influenced weather.
Find specialists in TPO, EPDM, and built-up flat roofing systems for residential and commercial properties.
Artisan Quality Construction
(219) 400-3358 artisanqualityconstruction.com
Serving
4.8 from 17 reviews