Last updated: Apr 19, 2026
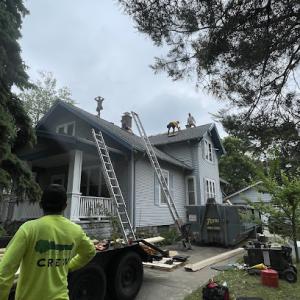
In this neighborhood-heavy climate, the skies can flip from clear to chaotic fast. NW Indiana has a moderate-to-high probability of hail and wind events, making roof claim activity a recurring issue for Portage homeowners. A hail jam can hit after a late-night thunderstorm or during a March wind event, leaving shingle granules glittering in the gutters and smooth patches along the rake lines. The practical takeaway is clear: treat every suspicious impact as a potential claim trigger, especially after a storm that rattles gutters, loosens flashing, or leaves dents on metal edges. When a storm rolls through, your roof is the first line of defense, and the clock on repairs is the clock on risk mitigation.
Spring hail storms are a known local replacement trigger, often creating sudden demand spikes for inspections and scheduling. If your neighbor gets a notification from their insurer or a knock at the door from a contractor during a sunny spell after a hail episode, expect the same pattern to repeat. The surge isn't just about roofs failing-it's about insurers mobilizing adjusters, public adjusters, and crews to handle a flood of claims in a few short weeks. Your plan needs to anticipate that window: contact a qualified local roofer early after a hail event, secure a clear inspection, and prepare for a fast-but-thorough evaluation. Delays compound risk: missed documentation, weather-limited access, and the possibility of pre-existing wear being mistaken for storm damage. If you notice bruised shingles, granule loss, or dented metal edging after a storm, move quickly to document and protect the roof with temporary measures if advised by a pro.
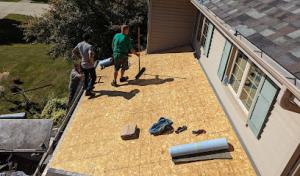
Insurers in this market often require detailed pre- and post-work documentation, including roof photos, contractor estimates, and sometimes an on-site adjuster inspection after damage. Start with a high-quality attic-to-crownline photo set immediately after a storm and before any tarps or temporary repairs, so you have a baseline in case wind-driven debris shifts the assessment. Capture close-ups of hail hits, edge damage, and any moisture intrusion in ceilings or attic spaces. Keep a dated log of every storm, every visible change on the roof, and every communication with the insurer or adjuster. When you call in a claim, insist on a dated on-site inspection by an insurer-approved adjuster, and request to accompany the adjuster to point out hail marks, flashing gaps, and shingle delamination that may be hidden from ground view. In many cases, the contractor's estimate is a critical piece of the puzzle; make sure the estimate aligns with the visible damage and the adjuster's notes. If the roof has multiple layers or if decking shows signs of moisture, be prepared for a directive to perform a more comprehensive replacement rather than a patch job. The timing here matters: proactive documentation and a precise scope reduce back-and-forth, speed up approvals, and minimize the risk of covering only partial damages with what ends up a full replacement later in the season.
When a storm watch is posted, establish a rapid response plan. Keep a current list of preferred local roofers with a history of working with insurers in this market. Have extension ladders, tarps, and safety equipment ready, not the week after a hail event when your roof looks rougher and the claim becomes more urgent. In Portage, the insurance-driven path to replacement can hinge on precise, timely documentation and the insurer's on-site inspector corroborating the damage. Build your readiness around that cadence: document early, call early, and coordinate with a contractor who can align a thorough assessment with the insurer's expectations. Acting decisively now reduces exposure to weather-driven deterioration and speeds you toward a solid, properly documented resolution.
Find local contractors experienced in assessing and restoring roofs after hail, wind, and severe weather events.


Stash Property Restoration
(219) 924-0266 stashpropertyrestoration.com
1777 Armstrong St, Portage, Indiana
4.5 from 215 reviews
Stash Property Restoration is an interior and exterior full-service general contractor specializing in restoration, roofing, and remodeling in the Northwest Indiana and Chicagoland areas. Our top-notch team provides construction expertise, superior products, and an exceptional result from minor repairs to entire transformations. Your home has been our purpose for nearly 40 years. Contact us today to schedule a free in-home estimate! Available 24/7 via phone for emergency mitigation services.
Quality Roofs 4 Less
(219) 213-6090 qualityroof4less.com
2758 Willowdale Rd, Portage, Indiana
5.0 from 1 review
Quality Roofs 4 Less is your local roofing company in Portage, IN. We provide service to Lake County, Porter County, and La Porte County in Northwest Indiana. We bring quality roofing to you at great value. We put our years of experience to work for you so that you don’t have to worry about a thing. Contact us today for a free quote on all your roofing needs!
Roman's Roofing
(219) 838-9111 romansroofing.net
Serving
4.8 from 348 reviews
We are a licensed, bonded, and insured home improvement company in Northwest Indiana, with years of experience in roofing, siding, windows, and other renovation projects. We serve Lake County Indiana and the surrounding towns and areas including; Cedar Lake, Crown Point, Dyer, East Chicago, Gary, Griffith, Hammond, Highland, Hobart, Lake Station, Lowell, Merrillville, Munster, Schererville, St. John and Whiting. We do the job right using quality materials and expert installers at a fair price. Your project will be completed efficiently and to factory specifications. We can help make your home maintenance free, more energy efficient, and the envy of your neighbors.

Alpha Storm Solutions
(219) 945-9518 www.alphastormsolutions.com
Serving
4.3 from 27 reviews
Alpha Storm Solutions provides roofing, roofing repair, siding, soffit, fascia, and gutter services to the NWI area since 2018. We work hand in hand with your insurance company to maximize your claim. Stop by to visit or call us today for a FREE property inspection.
Ruel Roofing & Siding
(219) 942-0611 ruelroofingandsiding.com
Serving
4.5 from 34 reviews
Ruel Roofing & Siding is a Roofing Contractor located in Hobart, IN. We specialize in Roofing Service, Shingle Roofs, Siding Service, Flat Roofs, Gutter Roofing Repairs, Roofing Repairs, Roofing Inspections, Rubber Roofs Service, Single Tear Off Service, and Roof Installation Service. We're Ruel Roofing & Siding, and we’re a premier roofing contractor for over 40 years.Located in Hobart, IN. We specialize in new construction, repair, and installation of roofing and siding. We’re licensed, bonded, and insured, so you can rest assured that your home or business is in good hands when you choose us. Contact us today for more information and services!
CMA Exterior Remodeling
(219) 331-0129 cmaexteriorremodeling.com
Serving
5.0 from 24 reviews
CMA Exterior Remodeling specializes in residential Roof Service and Installation, and Exterior finish service/repair. We are the premier roof repair service with sucess in solving industry failure as well as providing service for routine maintenance. We specialize in repairing asphalt shingle roofs, we repair/service skylights,chimneys, sewer stacks, wall flashing, and other petrusions through roof. Our service is designed to enhance the appearance and functionality of your home's exterior finish with durable and long-lasting protection. We also do routine inspections and provide gutter cleaning service , and now offering solar panel cleaning ! (Basic No Chemicals)
Grimes Exteriors
(219) 242-4250 www.grimesexteriors.net
Serving
5.0 from 53 reviews
If you’re looking for a roofer who can provide top-tier quality and excellent customer service, look no further than Grimes Exteriors. We are providing reliable workmanship to homes and businesses in the Valparaiso, IN area. Our company is experienced in all types of roofs: asphalt shingle, tile, slate, metal—you name it. So come to us today and let us show you why we are one of the most trusted and reputable roofers in the area!
Artisan Quality Construction
(219) 400-3358 artisanqualityconstruction.com
Serving
4.8 from 17 reviews
We provide many services including roofing, asphalt shingle roofing, gutter installation, gutter repair, gutter replacement, downspout cleaning, asphalt shingle roof installation, asphalt shingle roof repair, flat foam installation, single ply roof installation, metal roof installation, wood shake roof installation, siding installation, home repair, and home improvement. Being a locally owned and operated business, we’ll arrive in a timely manner and provide work that exceeds your expectations. Customer satisfaction is our number one priority. We provide high quality work and make after service calls. We offer competitive pricing and provide free quotes.

Armour Construction
(219) 987-2023 www.armourconstruction.net
Serving
4.8 from 95 reviews
Armour Construction stands among Indiana’s most reliable roofing companies, known for honesty, precision, and five-star results. As a professional roofing contractor, we handle every project with care—from roof installation and roof replacement to repairs and inspections. Our team uses trusted materials and proven techniques built to handle Indiana’s changing weather. Every roof is installed with lasting protection, energy efficiency, and curb appeal in mind. At Armour Construction, you’ll find clear communication, dependable service, and craftsmanship that stands the test of time. Whether you’re upgrading your home or fixing storm damage, we make sure your roof and your experience are built to last.

STARS Roofing & Masonary
Serving
4.4 from 9 reviews
We are a 24/7 emergency service company servicing all of indiana & Chicagoland in all types of home remodeling including interior & concrete we are licensed-bonded-insured
Tri-County Roofing & Gutters
(219) 548-0897 www.tricountycompanies.com
Serving
4.8 from 321 reviews
At Tri-County, we all work hard to ensure that our motto, "Done Right," is built into each and every one of our projects. We take pride in offering the best in customer service from the first time you inquire about an estimate to the final clean-up around your house. Our roof technicians have been with us for a long time, and have years of experience in diagnosing, recommending, and installing the most reliable, cost-effective roofing system for your home.

Restoration Builders of Indiana
(630) 833-6721 restorbuilders.com
Serving
4.2 from 46 reviews
Welcome To Restoration Builders of Indiana. Restoration Builders of Indiana is a residential & commercial contractor operating in the United States. Our Roof, Windows, Siding and Gutter repair and restoration experts provide assistance with everything from roof inspections and minor repairs to comprehensive storm damage rebuilds and just about everything in between. Our mission is to protect, restore and build properties, strengthen families and support our communities. We are committed locally and ready to serve wide scale for disaster response. Contact us for a free inspection: info@restorbuildersIN.com.
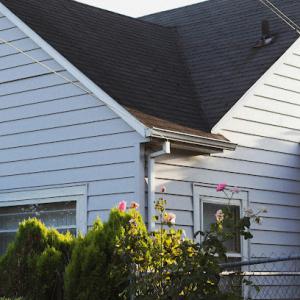
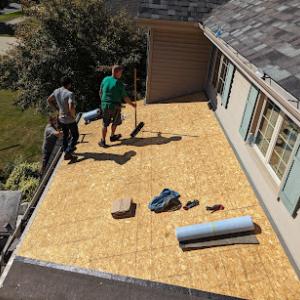
In this area, the roof endures a pronounced cycle: cold, snowy winters impose freeze-thaw stress that can weaken shingles and sealants, followed by hot, humid summers that push underlayment and flashing to cope with moisture and thermal expansion. That swing means coatings, fasteners, and penetrations need to be robust enough to handle both frost heave and summer humidity. Materials chosen for Portage should tolerate repeated moisture exposure and temperature shifts without becoming brittle or separating at fasteners.
Replacement work is most reliably completed when the weather is dry and moderate. Late spring through early fall offers the most predictable conditions for roof replacement crews, with fewer cold snaps and less snow risk to slow tear-off and reinstallation. If a project drifts into the late fall, expect tighter daylight hours and cooler nights that can slow adhesive cures and complicate certain installation steps. A well-timed window helps protect indoor comfort and reduces the chance of weather-related delays or call-backs.
Fall in this area is notorious for rapid weather changes. A few warm afternoons can quickly flip to windy, damp, or stormy days, squeezing contractor schedules before winter. That pressure can translate to tighter timelines for residents who are coordinating multiple trades, securing supplies, and scheduling inspections. If a storm-heavy forecast appears in early autumn, it's wise to confirm calendars early and align on contingency plans for tarp protection, debris containment, and follow-up checks.
Storm exposure makes proactive maintenance especially valuable. A home that experiences hail or wind-driven damage benefits from timely assessments and documented condition reports. In practice, that means keeping clear notes on shingle granule loss, flashing integrity, ridge vent performance, and any signs of interior moisture after storms. A detailed record helps when insurance review or remediation decisions come into play, and it supports determining whether a full roof replacement is advisable versus targeted repairs.
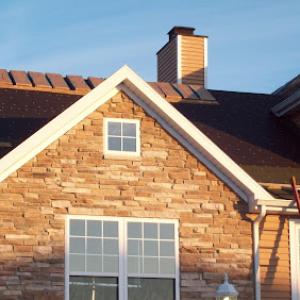
Most local homes rely on asphalt shingles or metal under challenging conditions, with variations in attic ventilation and insulation influencing how rapidly heat and moisture affect the roof deck. Homes with exposed edges, flat detailing near chimneys, or older underlayment tend to show distress sooner after harsh winters or a humid summer season. Understanding the specific roof assembly-sheathing type, ventilation balance, and flashing material-helps homeowners anticipate maintenance cycles and choose the right timing for proactive repairs or replacements, especially when capitalizing on a favorable weather window.
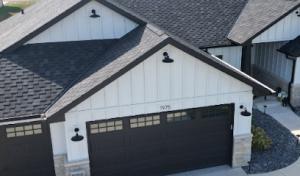
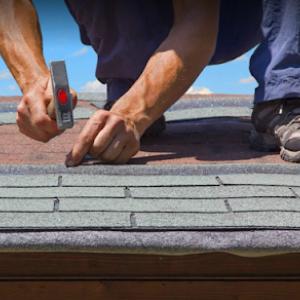
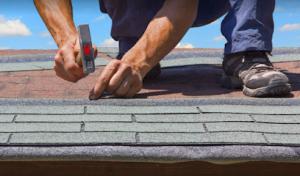
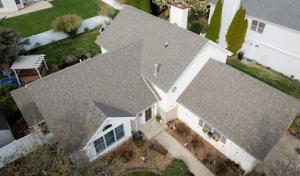
Asphalt shingles remain the dominant practical choice for Portage homes. The combination of a broad contractor base, good local availability, and solid warranty options makes them the default in many neighborhoods. The key for this market is impact resistance and reliable sealing, since hail and wind exposure in NW Indiana can stress a roof quickly. When selecting shingles, look for impact-resistant grades and a strong warranty that covers wind-driven issues. A well-sealed shingle layer helps resist wind uplift on stormy days, and a quality underlayment beneath the shingles adds a forgiving margin for temperature swings and winter moisture. For most homes, choosing a stout granule mix and a reinforced sealant can pay off in fewer callbacks after hail events.
Metal roofing is used locally and can be attractive for snow shedding, especially on homes with steep pitches or metal-friendly aesthetics. The snow tends to shed more predictably, which reduces ice dam risk along eaves. However, installation quality around flashing and vent penetrations matters a lot in Portage's storm-prone conditions. Poor flashing, inadequate valley treatment, or gaps around chimneys and vents can negate the inherent rain and wind resistance of metal. If you consider metal, prioritize a proven flashing plan, precise panel alignment, and contractor experience with Portage-style roof lines and ventilation needs. Metal can be a strong long-term option where a homeowner appreciates light weight and a modern look, provided workmanship is meticulous.
Clay tile, concrete tile, wood shakes, and slate exist in the market but are more specialized choices that can be harder to schedule and repair locally than standard asphalt systems. Clay and concrete tiles bring distinct curb appeal and good longevity, but they demand a reinforced structure and careful installation to handle Portage's freeze-thaw cycles. Wood shakes offer a traditional look but require regular maintenance and are susceptible to weather and pests; gaps in sealing can lead to rapid wear after hail. Slate provides elegance and durability, yet the local supply chain for repairs and matching small sections can be limiting. If you pursue any of these, work with a contractor who has direct experience in this region and a plan for prompt repairs when storm damage occurs.
In storm-aware neighborhoods, the material choice should align with a plan for documentation, inspections after hail, and a reliable repair network. Asphalt shingles deliver predictable performance, straightforward repairs, and broad availability. Metal can excel where wind and snow shedding matter, but only with precise flashing. The other materials stay viable for specific looks or heritage homes, yet their repair paths are less forgiving locally. Your best bet is to pair a material with a trusted local contractor who understands Portage weather cycles, insurance documentation needs after a storm, and timely siding-and-roof coordination in the wake of hail events.
The most popular roofing material in the US. Find pros who install, repair, and replace asphalt shingles.
Artisan Quality Construction
(219) 400-3358 artisanqualityconstruction.com
Serving
4.8 from 17 reviews

In this area, typical material pricing runs in a clear progression by type. Asphalt shingles sit around $350-$550 per square, a familiar baseline for mid-southwest Indiana homes with standard roofs. Metal roofing commands a higher mid-range, about $700-$1200 per square, reflecting durability and faster installation when weather cooperates. Clay tile runs roughly $900-$1700 per square, concrete tile $800-$1300, wood shingles or shakes $600-$1000, and slate leads the pack at $1200-$2400 per square. Those figures are your starting point for budgeting, with actual quotes varying by roof complexity, deck height, and local supplier availability.
Storm-driven surges after hail and wind events tighten contractor availability and push scheduling into more competitive windows. In practice, a sudden spike after a major NW Indiana hail event can leave you waiting longer for crews, and it may push material orders into tighter lead times. If your area experiences a swift change in weather patterns, expect communications to be more urgent and timelines to compress, even for familiar materials. Having an established plan with preferred shingle type and a trusted crew can help mitigate delays when storms shift the calendar.
Because replacement work concentrates from late spring through early fall, labor demand is often strongest during those moderate-weather months. Winter and early spring can bring delays, not just from cold conditions but from limited daylight and reduced field crews. If you're weighing a replacement, consider aligning with the kinder weather window to minimize weather-related risk and to keep on-site work manageable. Proactively choosing a preferred timing can also improve insulation against price fluctuations that follow storm activity.
Given Lake Michigan's influence on local weather swings, material selection matters beyond upfront cost. Asphalt shingles remain a practical, cost-conscious option when timing is tight. For deeper protection against hail or high-wind events, metal roofing offers a longer service life but comes at a higher install price. Clay and concrete tiles provide distinctive longevity but require careful roof framing and proper underlayment to handle load and ice scenarios common in late-season freezes. Wood shingles or shakes offer traditional aesthetics with moderate cost, while slate delivers endurance at the top of the range. Pricing within these bands should be weighed against expected replacement intervals and insurance positioning.
Get a clear picture of your project costs upfront - no commitment required.
Artisan Quality Construction
(219) 400-3358 artisanqualityconstruction.com
Serving
4.8 from 17 reviews
A permit is more than a formality; it's the record that your re-roof was inspected and installed to code. Portage typically requires a building permit for a full re-roof through the Porter County Building Department. Getting this right can prevent future headaches when you sell or when storm insurance adjustments come into play. The county's permit system also helps ensure that the work meets local standards for weatherproofing, ventilation, and flashing around chimneys and valleys.
Processing times are commonly around 1-2 weeks, which can affect scheduling after storm events when permit volume rises. In busy weeks, that window can slip, pushing start dates and short-term insurance documentation timelines. If a severe hail or wind event has just hit, anticipate a backlog that might nudge your project into a tighter window than you'd prefer. A proactive approach-submitting as soon as you have a contractor lined up and material orders confirmed-helps avoid weekend work creeping into your planning.
Inspections are typically scheduled during and after the work to verify installation details such as flashing and venting. Expect a rough-in check partway through if the contractor is doing a tear-off, and a final inspection once the roof is complete. If an inspector finds something that doesn't meet code, a return visit will be required, potentially delaying your project and impacting storm-season timing. Clear communication with the contractor about inspection windows can reduce waiting time.
Before work begins, confirm your project with both the contractor and the county department-verify permit numbers, expected inspection dates, and any required documentation such as contractor credentials and material specifications. Have copies of your storm damage documentation ready in case the insurer or adjuster asks for proof during scheduling. Finally, maintain open lines of communication with the contractor about anticipated weather holds, so inspection readiness stays aligned with the project's pace.
Winter ice dams are a real threat that shows up fast along eaves and roof edges. In this area, repeated freeze-thaw cycles can push meltwater under shingles and flashing, risking interior leaks and board rot. Eaves, soffits, and gutters are often the first weak points, so inspect those transitions after every thaw. If you see icicles forming heavily or a dark stain along the ceiling near exterior walls, act now-delay can turn a small leak into widespread interior damage.
Heavy snows pile up quickly, and a sudden thaw can create dangerous ice layers on the roof deck. This is a frequent call-year risk in our winter pattern, where wind-driven snow shifts load and stresses old seams. Pay attention to sagging shingles, cracks at flashing junctions, or unusual roof creaks after storms. Those are not cosmetic hints-they signal a compromise that could worsen as more weather moves in.
In cold months, active leaks deserve prompt temporary protection before weather returns. Use tarps or boards to shield open flashings and vulnerable eave lines to buy time for a proper fix. Ventilation gaps can close up with ice, so ensure vents remain clear and free of snow buildup. If you notice persistent dampness or ice dam formation, call for rapid assessment and stabilization to stop further damage while scheduling a longer-term repair.
When you can't wait, these contractors offer fast response times to stop leaks and prevent further damage.

In this area, hail and wind losses are common enough that carriers routinely examine roof condition and claim documentation with a sharper eye. After a storm season, insurers may pause to assess how well your roof held up and whether any preexisting issues were addressed. That means a simple hail claim can cascade into questions about age, maintenance history, and evidence of prior damage. Keeping a factual record helps you avoid surprises when the renewal notice lands.
Some insurers periodically reevaluate policy coverage after major hail seasons in this region. When that happens, renewal terms can hinge on the documented condition of your roof and the clarity of your claim history. A roof that looks weathered but unverified might trigger stricter terms or a higher deductible at renewal, even if the current hail event didn't cause a new failure. This is where continued vigilance pays off.
Homeowners benefit from date-stamped roof photos taken after storms and fresh contractor findings that note visible damage, missing granules, or shingle lifted by wind. Written assessments from a reputable contractor can serve as a bridge between what you saw and what the insurer needs to approve replacement scope. In a market where carriers want detailed evidence, having a clear trail of inspections and repairs can reduce back-and-forth and help you move toward a timely resolution.
When a claim edges toward replacement, the timing can influence both coverage decisions and out-of-pocket exposure later. Insurers often look at the roof's age and the history of storm-related projects to gauge whether a full replacement is warranted or if repairs suffice. Staying proactive with documentation and contractor updates helps you navigate this careful process without waiting until a crisis hits.
Connect with contractors who help homeowners navigate the claims process from damage assessment to final approval.
Local contractor signals show meaningful demand for skylight work, indicating that these penetrations near the roofline are a recurring homeowner concern. In this market, improper flashing around skylights combines with seasonal freezes and rapid thaw cycles to cause small leaks that spread across attic spaces quickly. Inspect skylight seals after heavy snow events or extended cold snaps, paying close attention to the nail flange, dome or curb, and the intersection where the skylight meets the surrounding roofing. If you notice drying sealant or visible ridge creep at the flashing edge, it's time to reflash or reseal before the next thaw. When replacing a skylight or upgrading flashing, choose a flashing kit that matches the type of roof and ensure the seal transitions smoothly to the neighboring shingles or metal panel. Schedule a targeted inspection after hail storms, since dented frames can shift the seal and create micro-leaks even if the surface looks intact.
Chimney-related roofing work is also common in the local contractor mix, suggesting flashing transitions around masonry are a frequent service item in this market. Inspect chimney flashing where the deck meets brick or stone, especially at the base and along the vertical joints. Loose or corroded step flashing, improper apron flashing, or degraded counter-flashing are typical culprits that allow water to bypass the roofing material. In winter, ice dam formation around a chimney can force water under flashing and into the attic. If you notice staining on interior ceilings or damp spots near the chimney line, pause roof activity until flashing is stabilized. For repairs, ensure the chimney flashing is installed with proper slope away from the chimney and integrates with the roofing material to channel runoff cleanly toward the drip edge.
Portion of re-roof inspections in the county specifically verify flashing and venting details, making penetration workmanship especially important in this market. Ask for a written plan that shows exact flashing materials, termination points, and any vent or pipe sleeves tying into the roof assembly. Have the roofer demonstrate how the seal around both skylight and chimney penetrations will withstand freeze-thaw cycles and wind-driven rain. After service, request a follow-up check to confirm that all flashing seams remain tight and the sealant remains pliable through a couple of winter cycles.
Find contractors experienced in skylight installation, flashing, and leak repairs to bring natural light into your home.
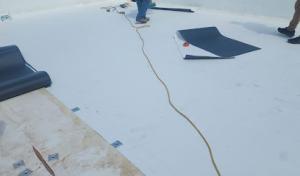
Flat-roof specialization appears in the Portage market but is not dominant, suggesting low-slope sections are a secondary issue rather than the city's main roofing story. On many homes, the low-slope areas show up as additions, porches, garages, or mixed-roof designs rather than as the primary whole-home roof type. When you're assessing a property, map these secondary surfaces first: identify any missing or compromised edge flashing, transitions between the main roof and flat sections, and how the parapets drain toward scuppers or internal drains. Expect more weather drama near the lake, which makes these spots a frequent source of leaks after heavy spring hail or sudden storm gusts.
These sections can be more vulnerable during humid summers and stormy shoulder seasons if drainage and flashing details are weak. Check for ponding water, especially along the parapet walls of porches or garage canopies, and confirm that surface membranes or built-up seals are continuous around drains and perimeters. Joint flashings near skylights or doors should be inspected for seam separation, cured caulking, and proper termination at drips or scuppers. In Portage, small gaps in a flat roof's edge detail can become salt-and-pepper leaks across adjacent living spaces when storms roll in from the lake breeze.
When choosing materials for low-slope zones, consider compatibility with the primary roof and existing drainage routes. Valleys and transitions between flat sections and the main roof deserve extra attention to ensure proper slope and drainage. In garages and additions, favor membranes or single-pply systems with robust UV and hail resistance, paired with reliable edge detailing. For mixed-roof designs, plan a cohesive flashing strategy that ties together different textures while preserving a clear drainage path to prevent ice-dam-style backups during fast-changing storms. Regular seasonal checks are encouraged to catch shifting supports or membrane wear before leaks become noticeable indoors.
Find specialists in TPO, EPDM, and built-up flat roofing systems for residential and commercial properties.
Artisan Quality Construction
(219) 400-3358 artisanqualityconstruction.com
Serving
4.8 from 17 reviews
In this market, homeowners typically pursue replacement and repair work over new construction sheets. Look for contractors who emphasize re-roofing experience, especially with storm-related damage and rapid leak responses. The strongest indicators are a robust track record with repair scenarios, clear communication after hail events, and demonstrated ability to manage insurance-related coordination.
Cleanup included and quick response are high-value signals in this area. After a leak or storm, you want a contractor who will cover debris removal promptly and return calls or on-site visits within a few hours or the same day. Confirm they have a dedicated crew for projects of typical residential sizes and a system for scheduling hail-season inspections without delays.
Many long-established firms operate alongside family-owned and residential-focused teams. Look for a company that can show steady, multi-year performance with a local roster and a history of steady crews. Check if they assign a sole point of contact for the project and provide a written plan that aligns with the needs of common Portage housing stock, including homes with aging underlayment or mixed roofing materials.
Ask for examples of past storm repairs, including how they documented damage, coordinated with adjusters, and managed temporary protection during outages. A credible contractor will supply a detailed, itemized scope of work, evidence of proper tarping, and a realistic timeline that accommodates weather delays without compromising safety.
Request at least two references from Portage-area homeowners and verify a workmanship warranty that covers installation and flashing integrity. Ensure the contract outlines cleanup standards and defines responsibilities for any incidental moisture found after installation.
Get a clear picture of your project costs upfront - no commitment required.
Artisan Quality Construction
(219) 400-3358 artisanqualityconstruction.com
Serving
4.8 from 17 reviews