Last updated: Apr 19, 2026
Spring-to-summer storms in this valley bring abrupt hail bursts and gusts that can lift shingles, loosen flashing, or expose granules. In your attic or on the deck after a storm, you may notice granule loss that looks fresh or unusual shingle curling. That timing matters: insurers expect damage tied to the most recent weather event, not pre-existing wear masked by a few seasons of freeze-thaw cycles. If a storm arrives after a long winter, you'll need to distinguish new strike marks from older wear, and fast action helps preservation of evidence and your claim's credibility.
Iowa is known as a high weather-claim environment, and Cedar Falls homeowners should expect adjusters to scrutinize pre-existing conditions, maintenance history, and photo documentation closely after storms. The goal is to separate what was already fading from what the latest hail or wind event caused. If you've left a record of prior repairs or have not documented your roof's condition over time, an adjuster may use that absence against a fresh claim. Be prepared with a clear, consistent narrative supported by visuals that show the roof's state before and after each storm.
Because winter ice and prior freeze-thaw wear can be mistaken for fresh storm damage, maintaining dated photos and notes becomes a practical defense. Start a simple file: dated exterior photos of the roof from multiple angles, close-ups of damaged flashing, and shots of any granule loss in gutters or on the ground. If a contractor has previously inspected or repaired your roof, keep receipts and a concise inspection note that describes the roof's condition at that time. After a Cedar Falls storm, your most compelling claim package combines the latest storm evidence with a clear timeline of prior conditions and repairs.
First, inspect safely or arrange a professional inspection the day after a storm, focusing on shingles edges, flashing around chimneys and vents, and valleys where wind and hail concentrate impact. Photograph areas that look damaged, and note whether granules appear to be washing away or if shingles show unusual lifting. If you see active leaks, interior signs like staining or damp spots, address those immediately with temporary containment to minimize interior damage before an inspection. Once you have an initial assessment, contact your insurer promptly and share the dated photos and notes. The narrative you provide should align with your photo timeline to avoid confusion about when damage occurred.
Choose a local, experienced contractor who understands Cedar Falls' climate and typical residential materials. When a storm hits, you want a contractor who can quickly document damage, provide a professional third-party assessment, and help translate that assessment into an accurate claim submission. An on-site inspection note from a contractor-dated, detailed, and tied to identified weather events-can significantly influence how an adjuster views the scope of work. If repairs become necessary, selecting materials and detailing flashing and ventilation needs with a Cedar Falls-specific perspective helps ensure your roof system remains durable through next winter's freeze-thaw cycles.
Seamless Exterior
(319) 277-3441 www.seamlessexterior.com
33730 160th St, Cedar Falls, Iowa
4.9 from 236 reviews
Since 2004, Seamless Exterior, a family-owned business in Cedar Falls, IA, has become a leading provider in siding, windows, gutters, awnings and roofing for the Cedar Falls, Waterloo and surrounding areas. As a customer-focused company, they value professionalism, courtesy, and skill in every project they undertake. Seamless Exterior is committed to doing business "in a better way," ensuring customers have a positive experience and exceptional results for their homes.
Raber Roofing Systems
(563) 929-1567 www.raberroofing.com
203 W Lake St, Cedar Falls, Iowa
5.0 from 75 reviews
Raber Roofing Systems is your trusted roofing service contractor in Waterloo, Cedar Falls, Evansdale, IA, and surrounding areas. Our team of skilled local roofers has extensive experience specializing in metal, low-slope, flat, and asphalt roofs. We offer services in roof replacement and roofing installation, ensuring each project upholds the highest standards of quality and craftsmanship. Known for our timely, professional service and use of superior materials, we are dedicated to protecting and enhancing your home. Need a dedicated roofing expert? Contact us today for a free estimate!
JSB /Roofing Specialist
6119 Sunnyside Ln, Cedar Falls, Iowa
5.0 from 70 reviews
JS Builders/Roofing Specialists At JS Builders, we bring top-quality residential roofing services with honesty, craftsmanship, and care. Whether you’re looking for a full roof replacement, a stylish upgrade, or a durable repair, our team has you covered with trusted materials like metal, impact-resistant shingles, and premium steel roofing systems. Locally owned and operated, we treat every home like it’s our own—focusing on clean job sites, clear communication, and a roof that’s built to last. From storm damage inspections to full new construction roofing, we’re proud to serve homeowners across the region with professionalism and 5-star results. ✔ Fully insured ✔ Free estimates ✔ Impact-rated materials available ✔ Family-owned

Yutzy Construction
(563) 203-4221 americatopbusi.top
3603 Skyview Dr, Cedar Falls, Iowa
5.0 from 3 reviews
Do-it-yourself home improvements are taking homeowners by storm, and there is no sign of that changing. DIY projects are often easier on budgets, and there is nothing like the satisfaction of completing a home renovation on your own. However, when it comes to the repair and replacement of your roof, leave it to the professionals at Yutzy Construction. As the leading roofing contractor in the Cedar Falls, IA, area, their team specializes in competitively priced residential and commercial roofing services. The locally owned and operated company offers a wide variety of services, such as metal roof replacement or repair, asphalt roofing shingles, and solar roof vents, all of which are customizable to your individual project.
Advanced Building & Design
(319) 233-5307 advancedbuildinganddesign.com
Serving
4.7 from 40 reviews
"Advanced Building and Design has provided the following services for Eastern Iowa since 1992. Roofing, Gutters, Siding, Home Exterior renovations, Remodeling, Home construction. Residential & Commercial."
Jp Roofing & Solutions
(319) 529-4584 jproofingiowa.com
Serving
4.9 from 116 reviews
JP Roofing & Solutions is your trusted roofing contractor serving the Waterloo, IA, and surrounding areas, including Cedar Falls, Evansdale, Elk Run Heights, Hudson, and more. We specialize in residential and commercial roofing, offering expert roof repairs, roof installations, and flat roof repairs. Our experienced team is also skilled in siding installation and repair, gutter services, and storm damage repairs. Whether you need help with a roof leak, a damaged gutter, or you’re dealing with the aftermath of a storm, we’ve got you covered. We provide high-quality gutter repair, siding repair, and commercial roof repairs, along with comprehensive insurance claim assistance to make the process easier for you.
Vasquez Roofing
(319) 961-3069 vasquezroofingllc.com
Serving
5.0 from 40 reviews
Vasquez Roofing is a testament to the enduring values of hard work, dedication, and excellence. Founded in Waterloo, IA, over 20 years ago, we have grown from a modest family-owned business into a leading roofing service provider in the region. Our journey is marked by a relentless pursuit of quality and innovation, driven by the vision of delivering top-tier roofing solutions to our community. Our team comprises seasoned professionals who bring a wealth of experience and skill to every project. We are not just roofers; we are craftsmen passionate about creating safe, durable, and aesthetically pleasing roofs that stand the test of time. Our ethos at Vasquez Roofing revolves around the belief that our customers deserve the best.
Mills Construction & Concrete
(319) 961-0954 www.millsroofingandconstruction.com
Serving
5.0 from 6 reviews
Mills Construction & Concrete provides windows, siding, shingled and metal roofs, concrete work, basement remodeling and more in the Cedar Valley area.

AE Roof Rescue
(319) 236-6100 www.aeroofrescue.com
Serving
4.6 from 15 reviews
At AE Roof Rescue, our highly trained team brings over 30 years of experience, industry-leading warranties, and proven expertise to protect your building and enhance its value.
Robert Castro Construction
(319) 269-0615 robertcastroconstruction.com
Serving
4.9 from 49 reviews
Robert Castro Construction is a premier roofing contractor based in Waterloo, IA, servicing a wide area including Hudson, Janesville, La Porte, and beyond. Established in 2011, we specialize in roofing, siding, and windows, offering top-quality services such as wooden and aluminum siding, soffits, fascia, and various roofing options including asphalt, steel roofs, and wood shingles. With a strong commitment to customer satisfaction, we provide 3-year warranties, free estimates, and insurance quotes. Our skilled team excels in installation, remodeling, storm damage repair, emergency services, and more. From tear-offs to reshingling, overlays to new constructions, we handle it all with precision and expertise.
Heyn Brothers Service Roofing
(319) 302-3260 heynbrothers.com
Serving
5.0 from 98 reviews
We pride ourselves in being the most professional roofing business in the Cedar Valley. For 26 years we have been helping homeowners and businesses with all of their steep slope roofing needs. With over 20 years experience installing steel roofing! We have been installing flat commercial roofing in the area for over 90 years as Service Roofing. Fast and dependable service is our highest priority on every project. Our professionalism has made us one of the elite roofing companies in Iowa. After working with us, you will see that our staff is easy to work with and very knowledgeable on all of our products and services offered. Give Heyn Brothers a call and protect your biggest investment!
Afordable Roofing
Serving
5.0 from 10 reviews
We do various types of roofs such as shingles, metal, in residential. In commercial we do PTO, PVC, EPDM rubber, and torch down. Roof consulting in commercial leaks 40 years experience in all aspects of roofing
Cedar Falls winters bring repeated freeze-thaw cycling that accelerates wear at shingle tabs, flashing transitions, fastener penetrations, and roof edges. In practical terms, this means every season flip-from a quick warm spell to a cold snap-shifts moisture in and out of the roofing system. Those rapid changes push granules loose, loosen nails, and stress sealant joints. Over several winters, small degradations compound into visible wear at vulnerable spots like any edge detail, around vents, and along roof-to-wall transitions. The result can feel gradual until a heavy snow year or a strong wind event exposes weaknesses you didn't notice on a clear day.
Ice damming is a practical local concern because snow accumulation followed by thaw-refreeze events can back water up under roofing materials and into eaves and attic edges. In this climate, even a modest attic temperature difference can melt a layer of snow near the center while the overhanging edges stay cold. That creates a disciplined backwater effect: meltwater travels up under shingles or under flashing, then refreezes at the colder edge and creates a dam. The consequence often shows up as staining, moisture pockets in the attic, or damp insulation. If left unaddressed, those damp spots can lead to mold growth, wood rot, and accelerated deterioration of the roof deck. The pattern is especially common after spring storms when daytime thaws meet cool nights in rapid succession. Knowing where heat leaks exist in the attic can help you anticipate where ice dams are most likely to start.
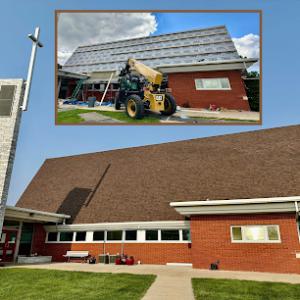
Replacement timing in Cedar Falls is affected by winter conditions, since emergency patching may be needed first and full tear-offs are often more practical once temperatures stabilize. Early-season repairs can stop ongoing water intrusion, but frozen or brittle materials make proper sealing and shingle replacement difficult. If a roof shows widespread cracking, loose tabs, or lifted flashing after a thaw, temporary measures may buy time, but the priority is to create a dry, stable deck before any major work begins. Full roof replacement tends to be more reliably scheduled when mid-spring to early summer weather allows for consistent temperatures and safer, more efficient tear-off and installation. Plan for a window where multiple days of dry, moderate weather are expected, so crews can complete the work without weather-driven setbacks.
Begin with a careful, ground-level survey after storms: look for obvious shingle damage, lifted edges, or granule loss visible in gutters or on the lawn. Inside the attic, check for any signs of moisture, staining along rafters, or unusual attic insulation compression near eave lines. Seal and insulate known drafts in the attic to reduce heat loss that starts ice dam formation, but avoid clogging soffit vents; proper ventilation remains essential to slow melt rates and equalize temperatures across the roof surface. If ice dams are suspected, do not aggressively chisel them from the ground-use a roof rake with a long handle from a safe distance to clear thick snow above edge lines, while avoiding contact with brittle shingles. Engaging a local roofing professional who understands Cedar Falls weather patterns can help implement targeted fixes, such as improved attic insulation, ventilation improvements, or updated flashing assemblies, which are more durable against the repeated stress of freeze-thaw cycles.
Regular, season-focused inspections help catch issues before they snowball. Pay particular attention to edges, valleys, and how flashing meets the deck. The combination of freeze-thaw wear and occasional ice damming means that a proactive approach-addressing minor flaws promptly and coordinating timely maintenance-will extend the life of the roof and protect the home's interior from moisture intrusion, season after season.
When you can't wait, these contractors offer fast response times to stop leaks and prevent further damage.
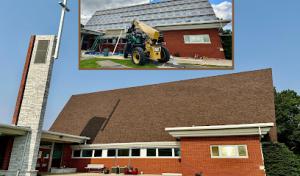
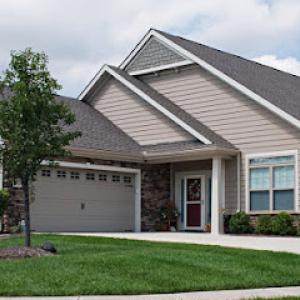
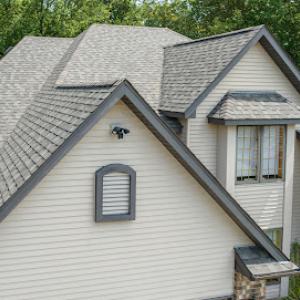
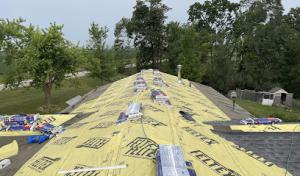
Asphalt shingles remain the dominant practical choice in Cedar Falls. The local climate tests them with freeze-thaw cycles through winter, spring hail, and gusty winds that can bruise or lift edges. Performance hinges on three factors you can control: hail resistance, wind uplift rating, and how a shingle handles thermal expansion and contraction between the attic's warm days and chilly nights. Look for a high wind uplift rating and a design that minimizes surface voids where hail can bite in. A stout underlayment and proper nailing pattern become more important here than fancy color choices, because a solid install helps the shingles resist edging lift and ice dam formation during sudden thaws. In practice, the best Cedar Falls asphalt selections use impact-resistant granules and a mid-range to high wind rating, paired with a roof deck that's clean, dry, and well-ventilated. If a hail event is common in your neighborhood, consider a 30-year or longer product that carries robust impact resistance and ensure the shingles are secured with nails or clips suited to the wind zone you face.
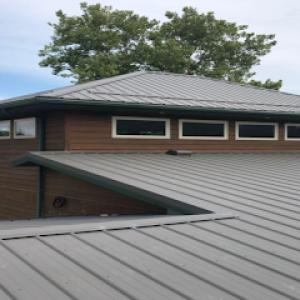
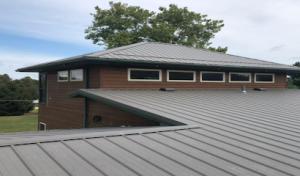
Metal roofing has strong local relevance because contractors actively specialize in it and homeowners often consider it for snow shedding, durability, and lower maintenance after repeated storm seasons. In winter and spring, metal sheds snow more predictably, reducing ice dam risk and creating safer eaves in deep snow years. After back-to-back storm seasons, metal's resilience to hail and wind can translate into fewer repeated repairs. The installation must account for Cedar Falls's thermal cycling: the fast expansion and contraction of metal can stress fasteners if the roof isn't properly vented and flashed, particularly at transitions to walls and chimneys. Look for a system with a standing-seam design or hidden-fastener options from reputable local installers who understand Cedar Falls wind patterns. A well-sealed valley and ridge line, plus robust sealants around penetrations, will help maintain integrity through spring hail and autumn cold snaps. If snow shedding is a priority, confirm a profile that minimizes shingle-like surface areas where hail can bounce and ding, and ensure the substrate is solid enough to support the added weight of any snow embankments during heavy winters.
Clay tile, concrete tile, wood shakes, and slate are available but face Cedar Falls-specific tradeoffs tied to freeze-thaw stress, weight, impact exposure, and the need for installers familiar with less common systems in this market. Clay and concrete tile bring distinctive aesthetics and excellent durability in dry periods, but heavy weight demands a strong structure and careful attachment details to avoid cracking in cold snaps. Freeze-thaw cycles can push and pull at expansive materials, especially where water can pool or infiltrate fastener channels. Wood shakes offer a rustic look but encourage more maintenance in exposure zones and bruise easily from hail, with higher susceptibility to moisture-related warping if not properly ventilated and finished. Slate delivers long life and a refined profile, yet its weight and the need for specialized crews reduce flexibility and increase install complexity in typical Cedar Falls homes. Each option benefits from an installer with proven familiarity with southern Minnesota-Iowa climates, local wind zones, and Cedar Valley roof lines, ensuring the system is engineered to handle repeated storms without undue stress on fasteners or underlayment.
The right roof in this market balances local weather realities with the home's structure and typical soffit-to-ridge ventilation. A well-ventilated attic, solid deck condition, and properly flashed penetrations help any material meet Cedar Valley's spring-to-summer weather stress. When choosing between options, prioritize a combination of impact resistance, wind resilience, and a system approach that minimizes weak points exposed by freeze-thaw cycles. This approach keeps the roof performing through the region's typical storm sequence and helps maintain the home's envelope without frequent interruptions.
In this market, asphalt shingles dominate replacement budgets, with metal roofing gaining ground as a durable option that appeals to homeowners facing frequent freeze-thaw cycles and hail exposure. Typical costs reflect that mix: asphalt shingles generally range from about 350 to 550 USD per square, while metal can be 650 to 1100 USD per square. The choice often comes down to long-term resistance to wind and hail, local roof pitch, and how much the decking holds up under exposure during tear-off.
Spring to early summer storms trigger a surge in inspections and bids, which can tighten calendars for several weeks. After hail or strong winds, crews may be booked out as neighbors line up for replacements, and prices can spike accordingly. If weather events linger, the window for securing a contractor and coordinating a full replacement expands, and so does the chance of encountering surprise deck repairs once the tear-off begins.
Tear-off complexity is a real cost driver. A steeper pitch common to newer suburban layouts and two-story homes increases labor hours and safety precautions, pushing per-square costs upward. Hidden decking damage discovered during exposure-rot, warped boards, or insect damage-can add to the bill, sometimes substantially. Weather patterns that favor longer exposure can also lengthen the project duration, influencing both material orders and labor rates.
Beyond shingles versus metal, the overall price is affected by roof footprint, number of penetrations, and the need for ventilation upgrades. Local crews often offer bundled adjustments for insulation checks and underlayment quality-worth considering for long-term performance. Referencing the typical cost ranges helps anchor expectations when discussing quotes, and planning ahead for potential price shifts after wind or hail events reduces sticker shock later in the season.
Get a clear picture of your project costs upfront - no commitment required.
Raber Roofing Systems
(563) 929-1567 www.raberroofing.com
203 W Lake St, Cedar Falls, Iowa
5.0 from 75 reviews
JSB /Roofing Specialist
6119 Sunnyside Ln, Cedar Falls, Iowa
5.0 from 70 reviews
A building permit is required in Cedar Falls for a full roof replacement. The City of Cedar Falls Building Department handles permit issuance and inspections for roofing work. Knowing who to call and where to file documents saves time when spring weather brings a mix of hail and wind. Before any shingle or panel removal begins, verify that the permit is requested in the property owner's name and that the scope of work matches the replacement being performed. The department will want a basic outline of materials, the method of installation, and an anticipated schedule. If the project involves structural repairs or changes to ventilation, decking, or underlayment, expect a deeper plan review and an extra layer of documentation.
Inspections in Cedar Falls are scheduled after roof exposure and again upon project completion. This two-step approach captures both the installation process and the finished result before the project is considered complete. The exposure inspection typically happens after the roof deck is ready and shingles or other coverings are installed enough to evaluate nailing patterns, flashing, and underlayment integrity. A second inspection confirms that the work complies with local codes and the permit's scope. Depending on the project, the process may include plan review before work begins and re-inspection if any element does not conform to code requirements.
Coordinate with the roofing contractor to submit the permit application early in the project. Cedar Falls inspectors appreciate a clear timeline, listing of materials, and confirmation that the work meets wind and climate-related standards common to the Cedar Valley. Have the contractor provide a pre-inspection checklist to anticipate what the inspector will look for during the exposure visit-common focuses include proper nailing, adequate ventilation, and proper flashing around chimneys and vents. If a discrepancy is found during the exposure inspection, plan for prompt corrective work and a re-inspection to avoid delays.
Keep a centralized folder for all permit-related documents, inspection notices, and weather-related delays. The building department may request plan pages, sheathing details, and manufacturer specifications for underlayment and fasteners. When hail events occur in spring or early summer, it helps to document any hail damage observations and share them with the inspector and contractor so that the replacement remains aligned with code requirements and insurance settlements. Once the final inspection passes, retain the completion record for your files and for any future property transfers.
In the Cedar Falls area, the Iowa insurance market has learned to expect storm claims after spring and early summer storms. Carriers tend to respond more slowly when hail and wind events are common, and they document conditions with careful scrutiny. Because conditions can change quickly after a major weather event, the delay can affect how a claim unfolds and whether a claim is approved or denied on the spot. The result is a need for precise and thorough documentation from the outset, especially when a claim involves a roof that already shows wear from freeze-thaw cycles and prior seasons.
Insurers commonly require thorough documentation in this region, including contractor estimates, date-stamped photos, and supporting receipts for prior repairs or maintenance. The photos should show the roof from multiple angles and include the attic if possible to illustrate interior signs of water entry. Contractor estimates should be dated and itemized, with notes on material types and scope of work. Receipts for previous repairs help establish a clear history of wear versus recent damage, which matters when adjusting a claim.
Because adjusters may scrutinize whether damage is storm-related or pre-existing, Cedar Falls homeowners benefit from prompt inspections after major weather events and organized records before filing. Schedule a quick roof inspection with a trusted, local contractor soon after a hail or high-wind incident, and store all evidence in a dedicated folder. Keep the contractor's contact information and every estimate, invoice, and photo aligned by date. When filing, present a concise timeline of events, including the date of the storm, the dates of inspections, and any interim repairs, so the adjuster can see the sequence of condition changes clearly.
Connect with contractors who help homeowners navigate the claims process from damage assessment to final approval.
Seamless Exterior
(319) 277-3441 www.seamlessexterior.com
33730 160th St, Cedar Falls, Iowa
4.9 from 236 reviews
JSB /Roofing Specialist
6119 Sunnyside Ln, Cedar Falls, Iowa
5.0 from 70 reviews
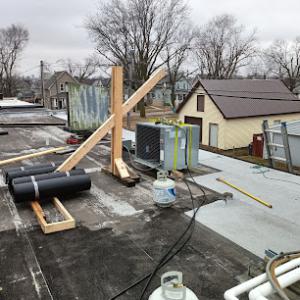
Low-slope and flat sections are a common feature on additions, porches, garages, and mixed-roofline homes in this market. Even when the main roof is steep, those lower profiles see a different load and drainage pattern, especially after winter freeze-thaw cycles. In Cedar Falls, the added surface is more prone to ponding and ice dam risk when gutters and downspouts aren't aligned with the main drainage path. Expect stubborn moisture in seams that are not visible from ground level, and plan for longer-lasting sealants and flashing that tolerate rapid temperature swings.
These sections tend to accumulate ice and meltwater differently than the primary roof, so leaks often show up at transitions between materials, at rake and end walls, and around penetrations that were not originally detailed for low-slope movement. Sun exposure on flat or near-flat planes can dry laminated sealants unevenly, creating micro-cracks that widen with every thaw. Porches and attached garages commonly share a common parapet or step-down that concentrates water flow; misalignment there invites hidden leaks behind trim and fascia.
Flashing around low-slope areas must be continuous and mechanically fastened through any underlying deck. Pay special attention to field seams where two planes meet, such as the junction between an addition roof and the main house, or where a gutter line intersects a low-slope surface. Use compatible sealants rated for temperature cycling and verify that valley, parapet, and kick-out details extend beyond the edge to prevent edge seepage. Snow guards or overflow outlets should be evaluated for proper function during heavy winter events.
After a heavy ice event or a spring thunderstorm cycle, inspect transitions from the main roof to the addition with a ladder and a good flashlight. Look for lifted edges, compressed seam tapes, and any signs of water staining on interior ceilings near the addition. Track any changes in drainage patterns from the addition surface during spring runoff, and verify that downspouts discharge well away from the foundation. Regular, proactive checks reduce the chance of long-term damage where leaks tend to develop long before the main roof shows failures. In addition, schedule a targeted inspection after major storms to confirm that all low-slope elements performed as intended.
Find specialists in TPO, EPDM, and built-up flat roofing systems for residential and commercial properties.
Raber Roofing Systems
(563) 929-1567 www.raberroofing.com
203 W Lake St, Cedar Falls, Iowa
5.0 from 75 reviews

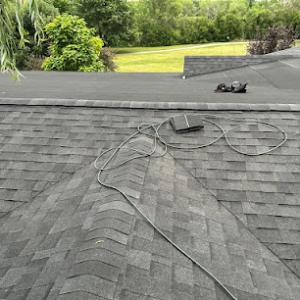
Cedar Falls faces a unique mix of freeze-thaw cycling, spring hail, and summer humidity that makes flashing at skylights, chimneys, and roof-to-wall transitions more vulnerable than broad field shingles alone. The area's typical roof stock-low-slope transitions around penetrations and steeper main planes-puts extra emphasis on the weather seal around every corner.
Summer humidity and thunderstorm-driven rain can rapidly turn small flashing defects into interior staining or attic moisture problems. Look for staining on ceilings near penetrations after a heavy rain, damp insulation near skylights, or soft spots around flashings at the chimney seam. Even when shingles look intact, flashing around skylights is a common failure point because those pieces flex with temperature swings and wind-driven rain.
Because local contractor signals show some skylight specialization, homeowners with leak symptoms around penetrations should separate flashing issues from full-roof replacement needs. A leak that travels along a seam or traces to a single flashing foot usually does not require replacing the entire roof. However, a widespread pattern of staining, persistent wet insulation, or multiple failed flashings across a roof edge can indicate broader system trouble.
Start with a careful exterior inspection during dry, daylight hours. Check the skylight curb, chimney flashing, and the transition to the wall for gaps, loose sealant, and cracked metal. For ice and wind resilience, ensure metal flashings are properly bent and sealed with compatible sealants used in this climate. If any flashing looks corroded or has lifted tabs, repair or replace just that component, not the entire roof, when feasible.
Keep skylight flashing clean of debris, and re-seal joints as temperatures moderate after mid-winter thaws. Schedule a targeted inspection after spring hail and after the first heavy summer rain to catch issues before interior damage grows.
Find contractors experienced in skylight installation, flashing, and leak repairs to bring natural light into your home.
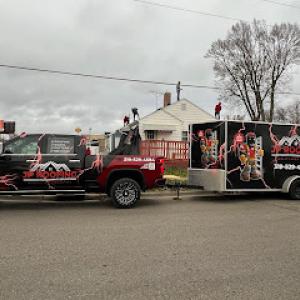
A practical approach starts with trusted, local builders who can move quickly after a storm and who have a track record of steady work in Cedar Falls. The market leans toward quick-response teams and long-established companies, so you'll benefit from knowing who answers calls promptly, who maintains a solid local reputation, and who has crews that stay on the job until cleanup is complete. If a contractor's response time is inconsistent, or they can't provide references from nearby neighbors, keep looking.
In this community, re-roofing is more common than niche specialty work, so verify that the contractor regularly handles full tear-offs, garbage and debris cleanup, and coordination with the city's inspection process. Ask specifically about whether the crew will remove all old material, sagging underlayment, and nails, or if some debris might be left in tight eaves or behind shrubs. Confirm that the company has a system for site protection during wind and spring hail, including tarps or boards to shield landscaping and vehicles, since Cedar Falls weather can swing quickly from clear to windy.
Because affordability and cleanup are recurring local priorities, compare scope details rather than price alone. Do not assume every proposal includes same debris removal depth, roof-to-ground cleanup, and waste disposal methods. Ask how they safeguard your siding, drip edges, and landscaping during material hauling. Request a written breakdown of the teardown, reinstall, and final touches. A reliable contractor will outline how they manage nails and scrap, and how they verify nothing is left behind after the job is done.
A dependable Cedar Falls contractor keeps you informed with a clear schedule, from material delivery to the final inspection. Look for a company that assigns a single point of contact for daily updates, especially if weather windows compress or inspections are needed before work resumes. Fast communication is as valuable as a steady crew when spring storms have you juggling multiple estimates.
Storm events often trigger insurance questions. Choose a contractor who assists with documentation, helps prepare scope pictures, and coordinates with insurers without requiring you to chase them. You want a partner who can supply color-matched materials samples and a straightforward process to track progress, so you aren't left with gaps between the storm, the claim, and the finish.
Get a clear picture of your project costs upfront - no commitment required.
Raber Roofing Systems
(563) 929-1567 www.raberroofing.com
203 W Lake St, Cedar Falls, Iowa
5.0 from 75 reviews
JSB /Roofing Specialist
6119 Sunnyside Ln, Cedar Falls, Iowa
5.0 from 70 reviews