Last updated: Apr 19, 2026
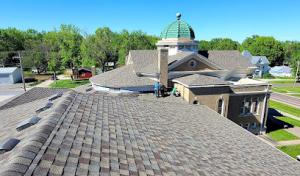
Spring hail and high-wind events in this market hit fast and hard, turning calm afternoons into emergency roof days. When a storm rolls through, you'll see a sudden surge of inspections, temporary repairs, and full re-roof demand across neighborhoods built with aging asphalt shingles and mid-range metal roofs. The clock is unforgiving: hail damage can appear minor at first glance but hide under shingle granules, crease edge metal, or crack clay and concrete tiles. If you hear hail alarms or watch the radar tick up into the afternoon hours, assume the roof will be a topic of conversation with neighbors by the next morning. Storm windows, gutters, and vent boot connections often trap moisture after a day-or-two lull, so keep a cautious eye on any new damp spots inside the attic or attic fan.
Missouri's active hail and wind claim environment means carriers want verifiable proof before writing bigger payouts for roofs. Detailed photo documentation is non-negotiable: close-ups of bruised shingles, dents in metal vents, and any granule loss scattered in gutters or around downspouts. Capture the full roof from multiple angles, include attic photos showing daylight through sheathing, and photograph any interior staining or moisture signs in the top floors. After a severe storm, the adjuster will often request a line-by-line walk-through of the affected roof zones, so organize your records by section: front slope, back slope, and any secondary structures like a detached garage or porch roof. If you're hiring a roofer for the claim, ensure they provide a professional, itemized scope and a dated, stamped estimate that aligns with the photos. Do not rely on memory when the carrier asks for what happened, when it happened, and why it affected the roof; precision here can determine whether a full replacement is approved or only a patch gets funded.
After severe metro hail seasons, insurers in the metro area tighten underwriting or adjust coverage terms in pockets of the market. This means some policies become more conservative about repairs versus full replacements, or they demand stronger proof of storm causation before approving larger payouts. The risk isn't abstract: a quiet spring afterward can stall a pending claim if the insurer questions the severity, the link to a specific storm, or whether previous maintenance contributed to the current condition. Expect more scrutiny on older roofs, on roofs with mixed materials, or on properties that experienced multiple storms in a single season. In practice, that translates into a potential move from rapid, patchwork fixes to a more deliberate, replacement-focused approach if the documentation and photo trail don't clearly establish storm-related damage.
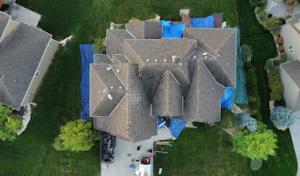
The storm cycle creates real timing pressure. Patching too soon after a hail event without solid documentation risks a second hail hit undoing the work, while delaying a replacement can leave vulnerable decking exposed to weather until temperatures fall and days shorten. A practical plan is to secure temporary protection quickly-temporary tarps or board-ups where safe-while you assemble the documentation, then coordinate with your adjuster on an authorized sequence: if the evidence supports it, pursue a full replacement rather than piecemeal patches, especially on aging roof systems. If a policy pending review lingers into the next season, discuss interim mitigation steps with your contractor to minimize interior damage risk while you wait for the decision. Communicate clearly about the timing of storms and your intended approach so that your contractor aligns with insurer expectations and your home's exposure remains limited.
Keep a storm diary for the season: date, wind speeds if available, hail size reports, and the immediate effect on your roof and attic. Photograph after every notable event, including status checks two or three days post-storm, to document any delayed moisture signs. When you file, present a chronological packet of photos, a dated damage map, and a detailed scope from a trusted roofer that matches the insurer's expectations for a storm-related loss. If you notice sudden leaks or unusual attic drafts after a hail event, treat it as an urgent signal rather than a routine maintenance issue. In these tight windows, proactive outreach to your insurer, a seasoned local roofer, and a careful, documented claim file can mean the difference between a patch and a complete roof replacement that stands up to the next round of spring weather.
Garcia Roofing Kansas City
(816) 286-7387 www.garciaroofing.biz
119 W Gregory Blvd, Kansas City, Missouri
5.0 from 196 reviews
Garcia Roofing Kansas City provides professional high quality roofing, siding & gutter replacement and repairs. We also help homeowners with storm damage claims. We will handle all paperwork and communication with your insurance company. This way you can avoid the frustration and confusion that many homeowners experience during the claims process. We provide roofing services for the Kansas City metro area within a 50 mile radius. We never ask for money upfront or a deposit! Only after the work is completed to your satisfaction, will we accept payment for our roofing services rendered. If you're looking for an honest, high quality and reliable company, call Garcia Roofing your Kansas City Roofing Contractor at 816-286-7387

Red-tail Roofing
(816) 200-1845 www.red-tailroofing.com
Kansas City, Missouri
5.0 from 120 reviews
At Red-tail Roofing, we focus on educating, not selling. We believe that understanding roofing, gutters, storm damage repair, and insurance claims empowers you to make the best decisions for your property and family. During our first visit, we provide a no-cost, no-obligation evaluation and explain your next step options clearly. We proudly serve the greater Kansas City area: Liberty, Kearney, Parkville, Smithville, Bonner Springs, Independence, and more. Our services include residential and commercial roofing, roof repair, insurance claim evaluations, guttering, and storm damage repairs. With transparency and expert care, Red-tail Roofing is here to protect what matters most—your home and family.
Downunder Roofing
(816) 547-0713 www.downunderroofing.com
Kansas City, Missouri
5.0 from 101 reviews
Downunder Roofing is a trusted roofing contractor with over 15 years of experience serving Kansas City, MO. We specialize in expert roof repair and roof installation services for residential properties. Whether you're dealing with leaks, storm damage, or need a full roof replacement, our skilled team provides reliable, high-quality solutions tailored to your needs. With a focus on craftsmanship, honesty, and customer satisfaction, Downunder Roofing ensures every job is done right the first time. We work with a variety of roofing materials to match your home’s style and budget. Count on us for dependable service, clear communication, and lasting results. Contact us today for a free roof inspection!

Nations Roofing & Solar
(816) 678-4220 www.nationsroofingandsolar.com
5810 E Red Bridge Rd, Kansas City, Missouri
5.0 from 122 reviews
At Nations Roofing and Solar, we are a Class A General Contractor and solar roof installer with 20 years of experience in roofing construction. As such, we know what makes a quality roof and can help you find one that fits your needs and budget. Our services stand out from the rest because we have long-lasting relationships with our suppliers, allowing us to offer high-quality work at competitive prices.
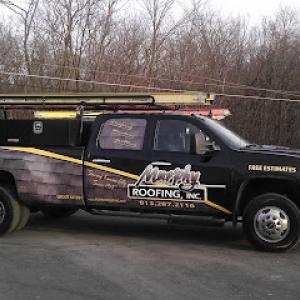
Murphy & Sons Roofing
(913) 287-2116 www.murphyroofing.com
1010 N 54th St, Kansas City, Kansas
4.9 from 228 reviews
With many years of experience behind them and a long reference list of satisfied customers, MURPHY & SONS ROOFING, Inc. is fully equipped to meet your individual needs in roofing service.
Handlin Construction
(913) 707-8082 www.handlinconstruction.com
8833 State Ave # 4, Kansas City, Kansas
5.0 from 75 reviews
Handlin Construction is a class A licensed contractor, specializing in roofing and gutter systems. Handlin Construction has been providing quality workmanship and outstanding customer service in Kansas City since 2004

Osage Ridge Roofing
Kansas City, Missouri
5.0 from 70 reviews
Osage Ridge Roofing, a trusted and reliable service provider in the roofing industry, is committed to delivering unparalleled quality, personalized service, and eco-friendly solutions. With a focus on exceptional craftsmanship and transparent communication, our company has earned a reputation for surpassing customer expectations. Our team of skilled professionals, using the latest methods and premium roofing materials, ensures the longevity and durability of your roof. Our strong community-centric approach and sustainable practices demonstrate a genuine dedication to making a positive impact. By choosing Osage Ridge Roofing, you are not just getting a quality roof, but also contributing to a greater cause, which should make you feel proud.
RoyCo Roofing
1142 Merriam Ln, Kansas City, Kansas
4.9 from 155 reviews
RoyCo Roofing is your roofing company in Kansas City. We specialize in all types of roofs and services. We install new shingle, tile and metal roofs, we do re-roofing and repairs from storm damage or normal wear and tear due to old age of the roof. We stock discontinued concrete tile, slate and clay roofing materials. We provide many services to meet your roofing needs and strive to provide our customers with fast, fair priced, quality services. We offer: -Metal Roofing -Cedar Shake Roofing -Tile Roofing -Slate Roofing -TPO Roofing -Commercial Roofing -Residential Roofing -Roof repairs -Roof replacements -Roof maintenance -Roof inspections -Emergency roof repair -Roof tarping Now offering balcony waterproofing.
Farha Roofing
(816) 244-3231 farharoofing.com
720 Main St Ste 145, Kansas City, Missouri
4.9 from 176 reviews
Farha Roofing is your residential and commercial roofing contractor serving Kansas City and surrounding communities. Our local Kansas City roofing contractors concentrate on high-quality work with affordable pricing. Rest assured that our Kansas City roofers will complete all your roofing projects on time and with professional-level craftsmanship. We are licensed and registered to help you handle any storm damage or other insurance-related claims. Our focus is to build a lasting relationship with our customers and provide a seamless experience when looking for Kansas City roofers. Farah is here to assist the Kansas City area with any commercial, multi-family, or residential roofing project with superior craftsmanship and customer service.
Redhammer Roof Group
(816) 965-6220 www.redhammerroof.com
1417 Jackson Ave, Kansas City, Missouri
4.9 from 123 reviews
Redhammer Roof Group has been one of the leading residential and commercial roofing contractors in Kansas City, MO and the surrounding areas since 1998. We got there the hard way with: Twenty-five years of experience Highly trained roofing and support teams Taking the time to really understand our residential, commercial clients roofing requirements Putting people on the job from top to bottom who have the knowledge and authority to make the right decisions on any job site If you need a roof we can help. Call today.
Legacy Roofing & Exteriors
(816) 210-6099 legacyroofingandexteriors.com
4380 N Oak Trafficway Suite 204, Kansas City, Missouri
5.0 from 89 reviews
Upgrade your home with our roofing, siding, and window installation services. Specializing in shingle roofing, James Hardie and Vinyl Siding, and efficient windows. Trust us for expert solutions that enhance both style and function.

Agape Grace Roofing
(913) 800-3788 www.agroofingservices.com
1447 S 55th St Suite # A, Kansas City, Kansas
5.0 from 89 reviews
Agape Grace Roofing is the top Kansas roofing Contractor serving Greater Kansas City and surrounding metro area markets. We specialize in Architectural Asphalt Shingles, modified Bitumen, and TPO Roofing System for both residential and commercial. We are proficient at dealing with storm damage roof repairs, roof replacement as well as the installation of siding and seamless gutter.
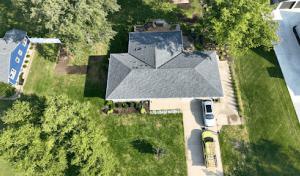
Kansas City's mix of hot summers and cold winters means shingles heat up fast and cool down quickly. Asphalt shingles can become brittle in cold snaps and soft in humid heat, which affects nail drive, adhesive performance, and overall installation quality. Winter freezes and snow add another layer of complexity, delaying tear-off work and complicating material handling when the ground is slick or frozen. Those swings are a reminder that the best time to replace a roof is when temperatures stay moderate enough to keep the shingles and underlayment behaving as intended.
Spring arrives with hail, wind, and rapid temperature changes, so many homeowners prefer a milder window just after the worst storm season and before the heat of July. Look for stretches of stable temperatures, with daytime highs in the 50s to 70s and no early heat waves in the forecast. Fall can also work when the sun is lower and temperatures stay comfortable through the workday. The goal is to reduce weather interruptions during open-roof phases and minimize exposure of exposed decking and underlayment to rain, wind, or snow.
A full replacement means multiple days of open roof exposure. In practice, this means scheduling around days that are dry, with forecasts showing back-to-back fair weather. If spring storms are inevitable, plan within a window that allows several consecutive good-weather days for tear-off, deck inspection, and shingle installation. Early plan changes into a new window should be considered rather than risking a partial teardown that folds into a storm event. When possible, choose a time when afternoon humidity is lower and dew points are manageable to prevent adhesive sogginess or misalignment.
Kansas City's heat and humidity can slow crews or compromise shingle sealants on the hottest days. On high-humidity afternoons, underlayment and fasteners can behave differently, so a crew with experience handling asphalt in heat should pace installation to maintain nail straightness and proper sealing. If a lull in heat is available, you can concentrate the most critical tasks-nailing, alignment, and flashing-during the cooler morning hours. Proper ventilation and interior access during installation also reduce interior heat buildup and help protect attic spaces from rapid temperature swings.
If a replacement must occur late in the year, choose a stretch with a reliable forecast of above-freezing days and minimal snowfall. Shorter winter windows require precise scheduling and rapid sequencing to avoid moisture intrusion. A well-prepared crew carries heated tarps or temporary coverings for unexpected cold snaps, but the aim remains to keep decking dry and underlayment wind- and moisture-resistant until the roof is fully closed.
Because spring is the metro's main storm season, many homeowners time full replacements in milder weather windows to reduce weather interruptions and exposure during open-roof phases. The timing strategy should consider the typical hail season, wind events, and the likelihood of post-storm claims processing. A clear plan that targets non-storm periods helps minimize accelerated schedules and potential damage from sudden weather shifts.
Get a clear picture of your project costs upfront - no commitment required.

Easton Roofing
(913) 257-5426 eastonroofing.com
1707 W 39th Ave, Kansas City, Kansas
4.8 from 383 reviews
Done Right Roofing & Guttering
(816) 799-2745 donerightguttering.com
Kansas City, Missouri
4.9 from 56 reviews

Innovative Roofing
(913) 396-8888 innovativeroofusa.com
1134 W Cambridge Cir Dr, Kansas City, Kansas
5.0 from 26 reviews
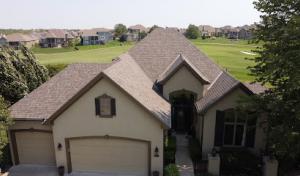
Asphalt shingles remain a dominant choice in Kansas City because they fit the area's large re-roof market, but hail impact and wind uplift are recurring concerns after spring storms. When evaluating asphalt, focus on impact-resistant options and wind-rated bundles that meet local expectations for severe weather. Look for thicker profiles, advanced sealant technology, and asphalt shingles that carry higher wind resistance ratings. A practical approach is to inspect for granule shedding after hail events, since granule loss can signal accelerated aging even if surface damage isn't obvious. Regular inspections after the storm season help catch hidden damage in valleys, around penetrations, and along eave edges where hail and wind exposure is greatest. Also consider the installation quality: improper nailing or inadequate underlayment can undermine performance during a fast-moving hail storm or a quick swing in temperature.
Metal roofing is a meaningful local upgrade path for homeowners trying to improve durability against hail, temperature swings, and long-term maintenance in the Kansas City climate. Metal panels or standing-seam systems offer robust hail resistance and superior wind uplift performance when installed with proper seams and underlayment. In practice, metal can reduce roof life-cycle concerns in storm-prone seasons, but weight, compatibility with existing trim, and the need for precise flashing around chimneys, skylights, and vents matter more here than elsewhere. A skilled crew that understands metal transitions, fastener patterns, and expansion gaps will help prevent panel oil canning, leaks, or paint failure after repeated freezes and thaws. When evaluating metal, consider finish coatings that resist chalking and UV degradation, and verify that the panel profile aligns with roof geometry to minimize exposed fasteners where moisture can accumulate.
Clay tile, concrete tile, slate, and copper appear in select Kansas City neighborhoods and older higher-end housing stock, but their weight, repair complexity, and storm vulnerability require more specialized crews than standard shingle work. Tile and slate demand weight allowances from the structure, plus careful integration with gutters and flashing to accommodate hail impact without cracking. Copper brings longevity and a distinct aesthetic, but its installation requires precision detailing and a crew familiar with proper seam work and corrosion considerations against steel components. In weathered areas, these materials tend to show hail hits as chips or edge fractures before the interior structure is affected, so proactive inspection after hail events is essential. If contemplating upgrades, assess roof framing capacity, access for heavy materials, and the availability of local craftsmen who regularly handle these systems.
Storm-season timing matters: roof work scheduled immediately after a major hail event can help mitigate additional interior exposure if temporary coverings fail, but it also demands fast, coordinated coordination with insurers and contractors. Documentation of hail damage, including photos and timelined notes, simplifies claims and scheduling of replacements when needed. For any material type, maintain clear communication with the installer about attic ventilation, underlayment choices, and attic insulation compatibility, as temperature swings drive expansion, contraction, and moisture dynamics across the year. In neighborhoods where older homes meet newer upgrades, compatibility between existing framing and the chosen material will determine not only the performance in hail but overall energy efficiency and wind resilience.
A practical maintenance cadence targets the spring and fall windows, aligning with Kansas City's storm patterns. After storms, perform a targeted roof check that includes gutters, downspouts, and flashing around penetrations. Track any new creases, lifted edges, or granule accumulation, and have a professional assessment if damage is suspected. Regular, proactive inspections extend the life of the roof and support better outcomes when insurance decisions arise after a severe weather season.
In this market, spring hail and high-wind events drive pricing up quickly. After a severe storm, crews and material suppliers tighten schedules and bid higher to secure work, and that pressure can last for weeks. If damage appears only in a few spots, some contractors may still price a full replacement to protect against hidden damage under shingles. Be prepared for a quicker decision window when a hail season hits a metro-wide backlog.
Kansas City pricing can spike after major hail events because storm-driven demand increases competition for crews, materials, and scheduling slots across the metro. Costs are shaped by whether the project is a straightforward asphalt re-roof or a specialty installation such as metal, tile, slate, or copper, all of which are active but less common local categories. An asphalt re-roof remains the baseline, with a wide range that reflects shingle quality, deck condition, and waste disposal. Specialty materials push price higher, and the project timeline can stretch when crews juggle multiple storm repairs.
Asphalt Shingles: roughly 350 to 700 USD per square. Metal Roofing: about 700 to 1,100 USD per square. Clay Tile: 1,000 to 1,600 USD per square. Concrete Tile: 800 to 1,400 USD per square. Slate: 1,200 to 2,500 USD per square. Copper Roofing: 1,500 to 3,500 USD per square. These ranges reflect not just material but the labor mix, square footage, and the complexity of detailing around penetrations, chimneys, and skylights. In a hail-damaged neighborhood, expect bids to converge around the high end for a full roof replacement unless an early, thorough insurance assessment reduces scope.
Storm-damaged roofs often trigger insurance involvement, which can speed up or complicate the replacement timeline. Insurers may require documentation of hail impact, and contractors frequently coordinate debris removal and tarp protection before a claims decision. Timing decisions hinge on whether the roof can be safely patched or must be replaced promptly to prevent interior damage. In practice, early, clear documentation and a solid repair/replace plan help align expectations with the insurer and minimize delays during peak season.
When hail seasons end, the market stabilizes and pricing becomes steadier. If a full replacement is necessary, selecting a contractor with a track record of coordinating inspections, weather window scheduling, and material ordering speeds the project along. Expect a staged process: temporary protection, material delivery, tear-off, deck inspection, and careful installation. For larger metro storms, confirm that crews have access to preferred slots and that weather forecasts align with a realistic install plan to avoid weekend surges and cost escalations.
Don't let upfront costs delay a critical repair - these contractors offer payment plans to fit your budget.

AAA Midwest Roofing
(913) 399-1601 aaamidwestroofing.com
8040 Parallel Pkwy Suite #300, Kansas City, Kansas
4.9 from 128 reviews
Bumble Roofing of Greater Kansas City
(913) 675-9187 bumbleroofing.com
7431 Broadway St Suite 32, Kansas City, Missouri
4.9 from 54 reviews
Residential full re-roofs are not something to handle informally. In Kansas City, MO, the permit process is handled through the city rather than by the contractor alone, and skipping it can cost you down the line-literally in delays, fines, or voided warranties after a big hail season. The city's approach isn't an obstacle; it's a gatekeeper that helps ensure the roof over your head stays safe under the next storm. If a contractor asks you to skip the permit, push back politely but firmly and verify that the project will be properly documented and inspected. This isn't a needless formality; it's a public safeguard that catches ventilation, drainage, and structural concerns before the first nail goes in.
The city uses an online permit portal, and plans are screened for key features before work proceeds. Expect questions about ventilation balance, underlayment choices, drainage design, and overall structural compatibility with storm patterns you've already seen in spring hail. It helps to have clear, site-specific details ready: attic venting plans, downspout routing, and any local hip or valley configurations that influence water flow. If the portal flags a concern, address it early with the contractor and, if needed, with the city plan reviewer. The outcome saves time and keeps the project from stalling mid-season.
Kansas City inspections are typically scheduled at milestone stages, including after tear-off and at final completion. City inspectors visit the site to verify the work underway and that key steps are properly executed. Don't schedule a storm repair or a quick patch in the same timeframe as a permit inspection window; the city wants validation of removal, installation, and finished details before signing off. Prepare access for the inspector, keep the attic and roof lines clear of clutter, and have the permit and project documents ready. If anything doesn't line up with the approved plan, address it before the inspector arrives to avoid rework and delays in getting your claim or replacement fully settled.
You live in a storm-heavy corridor where insurers expect strong documentation: before-and-after photos, date-stamped damage records, and clear adjuster confirmation. After a hail event, you'll want to photograph nuanced roof features-tip sheets, granule loss on shingles, dented flashing, and any tissue damage around gutters. Make sure photos are time-stamped and saved in a cloud-backed folder you can share with your adjuster. In practice, the quickest settlements come when you can demonstrate sustained, event-linked impact rather than relying on memory weeks later.
Higher regional claim volume can influence the uninsured realities you see on the premium notice, deductible structure, and how policy terms read after a storm season. Insurance partners here tend to adjust expectations, especially if the neighborhood has a string of recent hail days that overwhelmed local adjusters. If you've had multiple claims in a short window, expect more scrutiny and potential changes to coverage language over time. The outcome is not uniform, but the trend is real enough to affect mid-term decisions about how to approach repairs.
Because some carriers have tightened coverage in metro areas after severe hail seasons, you need to read the policy language carefully before deciding between patching and full replacement. Smaller repairs may trigger gaps or exclusions later on if a broader issue isn't addressed, and some carriers reserve the right to require a full roof replacement after multiple impact events. If a claim leans toward restoration rather than renewal, you should verify whether specific components-underlayment, ventilation, or flashing-are covered and whether maintenance records support a durable, long-term fix. In this market, patience and precise language matter as much as the damage itself.
Kansas City's freeze-thaw winters and storm-driven rain make flashing transitions and roof penetrations recurring leak points when older roofs begin to fail. Start with a careful inspection of step flashing along chimneys, vent pipes, and wall transitions after hail or heavy rain. Look for hairline cracks, lifting metal, or sealant gaps that widen with temperature swings. When a leak appears inside, trace it to the nearest flashing joint rather than the obvious dry-spot on the ceiling-the water often travels along roof lines before dripping. In aging shingles, roof-to-wall transitions and chimney cricket details are common failure sites after the season's first hail. Prioritize resealing or re-flashing those joints with materials rated for freeze-thaw cycles, and plan to re-anchor any loose or overdriven nails found during inspection.
Skylights are a notable enough specialty in this market to warrant dedicated repair attention, especially after hail or wind events that disturb surrounding flashing and roofing materials. Inspect the skylight flange where it meets the roof deck for cracked glazing, lifted shingles, or deteriorated sealant. Check curb mounting for movement or gaps, and test the flash seal around the skylight with a water spray on a calm day to locate leaks promptly. If moisture shows up at the skylight edge, consider resealing with a higher-performance sealant or, when the unit is older, replacing the skylight with a model designed for aggressive weather and improved flashing integration. Keep an eye on the surrounding shingles; wind-driven hail can damage the flashing belt, creating slow leaks that worsen with spring rains.
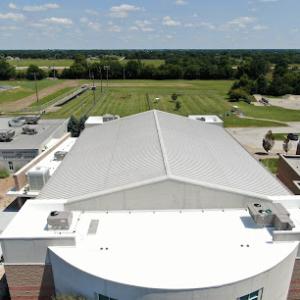
Low-slope and flat roof sections appear often enough in the local contractor market that homeowners with additions, porches, or mixed-roof designs should not assume every roofer handles them well. Verify that the contractor uses proper gradient and drainage details, plus robust edge termination and worded warranties for water testing. After a storm, perform a careful inspection of all seams, elastomeric coatings, and misunderstood transitions where flat planes meet vertical walls. If you spot blistering, edge pooling, or seam separation, schedule targeted repair before UV exposure or another hail event compounds the damage. Prioritize projects that restore robust flashing at transitions between roof planes and at skylight or vent connections, especially in older structures.
Find contractors experienced in skylight installation, flashing, and leak repairs to bring natural light into your home.
Downunder Roofing
(816) 547-0713 www.downunderroofing.com
Kansas City, Missouri
5.0 from 101 reviews

Murphy & Sons Roofing
(913) 287-2116 www.murphyroofing.com
1010 N 54th St, Kansas City, Kansas
4.9 from 228 reviews
In Kansas City, homeowners commonly prioritize quick response because storm events create immediate demand for inspections, tarping, and leak control. When a hailstorm rolls through, the first hours after the event matter. Look for contractors who offer rapid on-site assessments, visible availability in your ZIP, and a clear plan for temporary measures to stop leaks while the team evaluates whether a full repair or replacement is needed.
Tarping and water intrusion control should be handled by a crew with a track record of careful weatherproofing, not just a flashy pitch. In practice, that means a company arrives prepared with tarps, plywood boards, and a method to secure vulnerable areas without creating new damage. A Kansas City project often shifts between pressure from high winds and sudden heat, so expect crews to adjust tarps to withstand gusts and sun exposure that can accelerate interior damage.
Documentation around damage matters. Homeowners should require thorough photo logs, time-stamped notes, and a written inspection report that identifies hail impact patterns, attic moisture, and any compromised underlayment. The best teams bring digital or on-site documentation tailored to insurance needs, so you have a straightforward trail if an adjuster visits. In this climate, storms come in bursts, and accurate documentation helps prevent delays during the claim review.
Experience with storm-repair versus new-construction work is a key screen. The market includes affordable residential-focused contractors, but those who primarily do low-bid re-roofs may lack the coordination depth required after a major hail event. Look for references that demonstrate steady handling of multiple-week repair campaigns, clear communication with adjusters, and a proven sequence for scheduling, staging, and quality checks-especially for homes with complex layouts or multi-story sections.
Response timing and cleanup capacity round out the screen. Ask about crew size, schedule blocks for debris cleanup, and daily progress updates. In practice, a reputable storm-repair contractor aligns its pace with the neighborhood storm response, minimizes disruption to neighbors, and maintains a routine for post-install inspection. A strong local contractor will explain the sequence from initial assessment to temporary stabilization, through to final roof protection and a clean, orderly site.