Last updated: Apr 19, 2026
Spring in Kansas City, KS brings concentrated bursts of hail and powerful wind that can turn a quiet roof into a cracked, dented, or missing-shingle problem sooner than most homeowners expect. Those storms don't just create isolated damage; they often hit neighborhood blocks in quick succession, triggering a surge in demand for roof work that can stretch local crews thin. When a major hail event rolls through, it's common to see contractor activity spike within days and extend for weeks, and that backlog translates into scheduling pressure and higher wait times for appointments. The result is a tight window between damage detection and project start, with mistakes in timing easily turning into costly delays or suboptimal repairs.
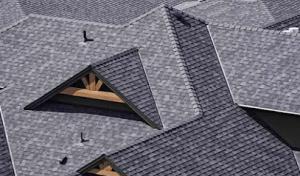
The local insurance environment here is notably high-claim, with carriers regularly expecting photo documentation, contractor estimates, and weather-date support before approving roof-related claims. That means you should be prepared to assemble a concise, photo-docused claim packet quickly after a storm, ideally within 24 to 48 hours of impact. Photos should clearly show roof damage types-granule loss, curled or missing shingles, dented panels on metal roofs, and evidence of interior leaks around ceilings and attic spaces. Line up a licensed contractor's estimate or scope of work that corresponds to the damage you've documented, and ensure the estimate itemizes hail-related repairs rather than general wear and tear. Weather data, such as storm reports and timestamped radar images, can help corroborate the timing and intensity of the event to support your claim.
Because storm seasons can trigger area-wide reroof demand, homeowners in Kansas City, KS often face scheduling delays and price pressure immediately after major hail events. Expect crews to book quickly, sometimes with limited availability for the first few weeks after a storm. Action steps are essential: photograph every angle of the roof from ground level and, if safe, from a ladder line of sight that captures the extent of hail impact; secure a written evaluation from a contractor that outlines the extent of damage and a clear repair or replacement plan; and coordinate with the insurer to align on documentation and timelines. Have a precise calendar for the anticipated claim milestones, and don't commit to repairs before the claim is approved or your insurer signs off on the scope. If a primary contractor's schedule is booked, don't settle for a half-measure-ask for a written timeline from the insurer and a queue for the actual work so you're not left with exposed roofing or secondary damage as weather turns again.
Begin by listing all storm events in the last two years and map them to any leaks, ceiling stains, or attic condensation that could indicate roof trouble. During the claim process, keep a single, organized folder of photos labeled by date and storm event, plus copies of all correspondence with the insurer and the contractor. If contractors pressure you to hurry the claim process or sign off on a scope before documentation is complete, pause and request written confirmation of the exact documents needed for approval. In Kansas City, KS, a disciplined approach to documentation, timing, and insurer coordination protects you from the most disruptive consequences of spring hail and wind cycles.
Garcia Roofing Kansas City
(816) 286-7387 www.garciaroofing.biz
119 W Gregory Blvd, Kansas City, Missouri
5.0 from 196 reviews
Garcia Roofing Kansas City provides professional high quality roofing, siding & gutter replacement and repairs. We also help homeowners with storm damage claims. We will handle all paperwork and communication with your insurance company. This way you can avoid the frustration and confusion that many homeowners experience during the claims process. We provide roofing services for the Kansas City metro area within a 50 mile radius. We never ask for money upfront or a deposit! Only after the work is completed to your satisfaction, will we accept payment for our roofing services rendered. If you're looking for an honest, high quality and reliable company, call Garcia Roofing your Kansas City Roofing Contractor at 816-286-7387

Red-tail Roofing
(816) 200-1845 www.red-tailroofing.com
Kansas City, Missouri
5.0 from 120 reviews
At Red-tail Roofing, we focus on educating, not selling. We believe that understanding roofing, gutters, storm damage repair, and insurance claims empowers you to make the best decisions for your property and family. During our first visit, we provide a no-cost, no-obligation evaluation and explain your next step options clearly. We proudly serve the greater Kansas City area: Liberty, Kearney, Parkville, Smithville, Bonner Springs, Independence, and more. Our services include residential and commercial roofing, roof repair, insurance claim evaluations, guttering, and storm damage repairs. With transparency and expert care, Red-tail Roofing is here to protect what matters most—your home and family.
Downunder Roofing
(816) 547-0713 www.downunderroofing.com
Kansas City, Missouri
5.0 from 101 reviews
Downunder Roofing is a trusted roofing contractor with over 15 years of experience serving Kansas City, MO. We specialize in expert roof repair and roof installation services for residential properties. Whether you're dealing with leaks, storm damage, or need a full roof replacement, our skilled team provides reliable, high-quality solutions tailored to your needs. With a focus on craftsmanship, honesty, and customer satisfaction, Downunder Roofing ensures every job is done right the first time. We work with a variety of roofing materials to match your home’s style and budget. Count on us for dependable service, clear communication, and lasting results. Contact us today for a free roof inspection!
Nations Roofing & Solar
(816) 678-4220 www.nationsroofingandsolar.com
5810 E Red Bridge Rd, Kansas City, Missouri
5.0 from 122 reviews
At Nations Roofing and Solar, we are a Class A General Contractor and solar roof installer with 20 years of experience in roofing construction. As such, we know what makes a quality roof and can help you find one that fits your needs and budget. Our services stand out from the rest because we have long-lasting relationships with our suppliers, allowing us to offer high-quality work at competitive prices.
Murphy & Sons Roofing
(913) 287-2116 www.murphyroofing.com
1010 N 54th St, Kansas City, Kansas
4.9 from 228 reviews
With many years of experience behind them and a long reference list of satisfied customers, MURPHY & SONS ROOFING, Inc. is fully equipped to meet your individual needs in roofing service.
Handlin Construction
(913) 707-8082 www.handlinconstruction.com
8833 State Ave # 4, Kansas City, Kansas
5.0 from 75 reviews
Handlin Construction is a class A licensed contractor, specializing in roofing and gutter systems. Handlin Construction has been providing quality workmanship and outstanding customer service in Kansas City since 2004

Osage Ridge Roofing
Kansas City, Missouri
5.0 from 70 reviews
Osage Ridge Roofing, a trusted and reliable service provider in the roofing industry, is committed to delivering unparalleled quality, personalized service, and eco-friendly solutions. With a focus on exceptional craftsmanship and transparent communication, our company has earned a reputation for surpassing customer expectations. Our team of skilled professionals, using the latest methods and premium roofing materials, ensures the longevity and durability of your roof. Our strong community-centric approach and sustainable practices demonstrate a genuine dedication to making a positive impact. By choosing Osage Ridge Roofing, you are not just getting a quality roof, but also contributing to a greater cause, which should make you feel proud.
RoyCo Roofing
1142 Merriam Ln, Kansas City, Kansas
4.9 from 155 reviews
RoyCo Roofing is your roofing company in Kansas City. We specialize in all types of roofs and services. We install new shingle, tile and metal roofs, we do re-roofing and repairs from storm damage or normal wear and tear due to old age of the roof. We stock discontinued concrete tile, slate and clay roofing materials. We provide many services to meet your roofing needs and strive to provide our customers with fast, fair priced, quality services. We offer: -Metal Roofing -Cedar Shake Roofing -Tile Roofing -Slate Roofing -TPO Roofing -Commercial Roofing -Residential Roofing -Roof repairs -Roof replacements -Roof maintenance -Roof inspections -Emergency roof repair -Roof tarping Now offering balcony waterproofing.
Farha Roofing
(816) 244-3231 farharoofing.com
720 Main St Ste 145, Kansas City, Missouri
4.9 from 176 reviews
Farha Roofing is your residential and commercial roofing contractor serving Kansas City and surrounding communities. Our local Kansas City roofing contractors concentrate on high-quality work with affordable pricing. Rest assured that our Kansas City roofers will complete all your roofing projects on time and with professional-level craftsmanship. We are licensed and registered to help you handle any storm damage or other insurance-related claims. Our focus is to build a lasting relationship with our customers and provide a seamless experience when looking for Kansas City roofers. Farah is here to assist the Kansas City area with any commercial, multi-family, or residential roofing project with superior craftsmanship and customer service.
Redhammer Roof Group
(816) 965-6220 www.redhammerroof.com
1417 Jackson Ave, Kansas City, Missouri
4.9 from 123 reviews
Redhammer Roof Group has been one of the leading residential and commercial roofing contractors in Kansas City, MO and the surrounding areas since 1998. We got there the hard way with: Twenty-five years of experience Highly trained roofing and support teams Taking the time to really understand our residential, commercial clients roofing requirements Putting people on the job from top to bottom who have the knowledge and authority to make the right decisions on any job site If you need a roof we can help. Call today.
Legacy Roofing & Exteriors
(816) 210-6099 legacyroofingandexteriors.com
4380 N Oak Trafficway Suite 204, Kansas City, Missouri
5.0 from 89 reviews
Upgrade your home with our roofing, siding, and window installation services. Specializing in shingle roofing, James Hardie and Vinyl Siding, and efficient windows. Trust us for expert solutions that enhance both style and function.

Agape Grace Roofing
(913) 800-3788 www.agroofingservices.com
1447 S 55th St Suite # A, Kansas City, Kansas
5.0 from 89 reviews
Agape Grace Roofing is the top Kansas roofing Contractor serving Greater Kansas City and surrounding metro area markets. We specialize in Architectural Asphalt Shingles, modified Bitumen, and TPO Roofing System for both residential and commercial. We are proficient at dealing with storm damage roof repairs, roof replacement as well as the installation of siding and seamless gutter.
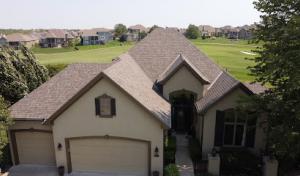
In this market, asphalt shingles are the default choice because they fit the large reroof volume and the broad mix of home styles seen across older neighborhoods and newer subdivisions. They're familiar to local crews, respond well to common Kansas City spring hail events, and install quickly when a storm-damaged roof needs to be replaced after insurance work gets moving. When selecting shingles, look for a hail-friendly profile and a warranty that covers impact resistance. A practical approach is to choose a shingle with a robust warranty and a dimensional profile that hides minor hail hits while maintaining curb appeal across varying home architectures.
Metal roofing stands out as a meaningful upgrade for homeowners aiming to improve resistance to hail, wind, and intense summer sun compared with standard shingles. In Kansas City, KS, metal can reduce the risk of punctures from hail and lessen the blowback from high wind events that chip or loosen shingles. If a home already has a metal starter or upgraded underlayment, it typically performs well during a storm season. Consider metal if the roof spans are large, if there are multiple roof lines, or if the homeowner plans to stay in the home through several insurance-driven reroofs. The longer-term durability often justifies the upfront effort in coordinating a reroof cycle with insurers and contractors.
Clay tile, concrete tile, wood shakes, and synthetic products exist in this market but are more specialized choices that demand crews familiar with heavier or more detail-sensitive systems. Clay and concrete tiles add longevity and a distinctive look, but they require solid deck preparation, precise underlayment choices, and careful installation to cope with Kansas City's freeze-thaw cycles and hail exposure. Wood shakes bring a rustic character but can be vulnerable to moisture effects and require extra attention to ventilation and underlayment notes. Synthetic products offer a compromise, but still need installation teams with experience handling their unique fastening patterns and edge detailing. If a home features complex roof geometry or if the budget allows for a more distinctive style, vet local installers who can demonstrate a track record with the chosen material, including hail-season performance and storm-caused repair histories.
Choosing a roof type in this market is as much about the home's age and style as it is about weather resilience. Older neighborhoods may benefit from proven asphalt blends that blend with existing aesthetics, while newer subdivisions can handle sleek metal or bold tile profiles with equal ease. For homes with steep pitches, complex dormers, or multiple ridgelines, a contractor's experience with wind uplift and hail load calculations becomes critical. In all cases, prioritize roofing crews that understand how Kansas City's spring storm patterns interact with your roof's slope, eave detail, and edge flashing. This knowledge helps ensure the selected system not only looks right but also performs reliably through the season.
Spring hail events trigger a sharp, citywide surge in demand for roof inspections and replacements. After a big hail week, many homeowners start shopping at once, and crews quickly run through available material and labor slots. That spike pushes per-square costs upward, especially for complex tear-offs or jobs that require expedited scheduling. In this market, timing matters as much as the material choice, and pricing can shift week to week during peak storm season.
Asphalt shingles remain the baseline reference for most homes, because they are the most common replacement choice in this area. In practice, the asphalt price range you'll see tends to align with the local market's typical storm-driven demand: a wide spread reflecting shingle quality, tear-off complexity, and the need for additional underlayment. Kansas City, KS has a broad material mix, but when you compare options, asphalt is the anchor you'll hear about most often from neighbors and local crews. Other materials-metal, clay tile, concrete tile, wood shingles, and synthetic offerings-add capability and appearance variety, but the asphalt benchmark helps you gauge value and fit.
Costs can rise on homes needing upgraded underlayment, flashing corrections, ventilation work, or more complex tear-off conditions identified during final inspection review. When roofs are older or previously damaged by wind and hail, contractors may recommend a more thorough tear-off and re-seal to prevent leaks. Upgraded underlayment improves long-term performance, especially against Kansas spring moisture and rapid temperature shifts. Flashing around chimneys, valleys, and penetrations can add noticeable labor and material cost, particularly if some flashing must be replaced with heavier gauge metal. Ventilation additions or upgrades are another common driver in this market, tied to attic airflow needs identified during the project scope.
Asphalt Shingles: 350 to 700 USD per square
Metal Roofing: 600 to 1100 USD per square
Clay Tile: 950 to 1800 USD per square
Concrete Tile: 900 to 1600 USD per square
Wood Shingles/Shakes: 700 to 1100 USD per square
Synthetic/Composite Shingles: 550 to 1000 USD per square
When storms hit, expect a back-to-back cycle of inspection, assessment, and appointment scheduling. If a contractor identifies upgrade needs or a more thorough tear-off, ask for a written itemized scope that clearly shows where extra costs come from and what happens if inspection items are adjusted during replacement. In this market, clarity on scope guards against surprise charges once the project starts. Consider allocating a portion of the budget to contingencies for upgraded underlayment or ventilation work so a reroof can address long-term performance rather than just a patch.
Get a clear picture of your project costs upfront - no commitment required.

Easton Roofing
(913) 257-5426 eastonroofing.com
1707 W 39th Ave, Kansas City, Kansas
4.8 from 383 reviews
Done Right Roofing & Guttering
(816) 799-2745 donerightguttering.com
Kansas City, Missouri
4.9 from 56 reviews

Innovative Roofing
(913) 396-8888 innovativeroofusa.com
1134 W Cambridge Cir Dr, Kansas City, Kansas
5.0 from 26 reviews
A building permit is typically required for a full reroof in Kansas City, KS, and the permit is handled through the local building department. The process is not something to gloss over-if a permit isn't properly obtained, subsequent insurance claims can be stalled or denied, and code compliance can become a long-term headache. Before any nails go into the first shingle, confirm who is pulling the permit and that the contractor's paperwork will be filed in the right office. In practice, some metro jurisdictions also verify contractor licensing or insurance status before permit issuance, so you want to know up front who is responsible for submitting the application and coordinating inspections.
Reroof projects in this area are commonly inspected after completion to verify code-related items such as underlayment, nailing, flashing, and ventilation. Inspections are not a box-ticking exercise; they are there to ensure the roof will perform through the next spring hail season and the summer wind cycles, which Kansas weather tends to dish out with stubborn regularity. An incomplete inspection or a skipped step-like missing proper underlayment or improper nailing-can lead to red tags, rework, or required adjustments that slow down your project and add stress during an already busy storm season.
From a practical standpoint, align your contractor's timeline with the permitting calendar in early planning. Some crews assume the permit is a simple formality, but in reality, the clock can tighten quickly if inspections are delayed due to missing details or damaged paperwork. Keep steady communication with the contractor and the building department, and set clear expectations about what is required before, during, and after the installation to avoid lag time caused by administrative hold-ups.
Due to the permit checks that can occur in this market, the homeowner should verify who is responsible for the permit pull and who will be the point of contact with the building department. If the contractor is not the permit holder, obtain written confirmation of who is submitting documents and who will attend the inspections. This clarity helps prevent last-minute surprises and ensures that the final inspection reflects a correctly completed installation rather than a hurried wrap-up.
In Kansas City, KS, the combination of hail-driven damage history and the post-storm reroof cycle makes handling permits and inspections with caution and clear accountability essential. When the permit is properly pulled, and the final inspection confirms code compliance-underlayment, nailing patterns, flashing detail, and ventilation in place-you gain a more resilient roof ready to withstand the next round of severe spring weather.
Kansas City, KS roofs are stressed by hot summers that accelerate aging and by winter freeze-thaw cycles that can open up flashing details and seal points. That combination means your roof needs robust ventilation and well-sealed edges to hold up through a full annual cycle. When the attic is too hot or too damp, shingles expand and contract more than they should, and subtle gaps can become leaks after a hail season or a heavy rainfall. A practical approach is to align attic ventilation with the roof's geometry-gables, dormers, and any soffit lines should breathe evenly so warm, moist air doesn't pool at the wrong moment.
In this climate, paying attention to ventilation pays dividends. If ridge vents or continuous soffit vents are blocked by insulation or dust, hot attic air gets trapped, speeding shingle aging and loosening sealants. Periodic inspections after summer heat waves and after winter thaw events help catch problems early. Flashing details-around chimneys, vents, skylights, and transitions to walls-are especially vulnerable to freeze-thaw movement. Small hairline gaps can widen when water freezes and expands, then refreeze, creating slow leaks that aren't immediately obvious. A local roofer can test flashing with a hose at grade level and check for variability along the seams. If metal flashing shows signs of corrosion or bending, it's a red flag that the sealants should be refreshed and the flashing replaced where needed to maintain a continuous barrier.
Different roofing materials respond to heat and cold in distinct ways, but all benefit from consistent, well-installed edge details. Asphalt, synthetic, and metal options each have unique aging patterns under Kansas City's swings. What matters most is a roof that can move with the seasons without losing its seal. That means upgraded sealants at penetrations, properly padded step and valley flashing, and careful alignment of shingles to prevent wind uplift at the edges. Regular biofilm and moss checks are prudent too, since summer moisture and shade pockets can hide early moisture intrusion that becomes more evident after a harsh winter.
Replacement timing in Kansas City, KS is often influenced not just by age but by cumulative weather exposure from hail, heat, and repeated seasonal expansion and contraction. A proactive stance-addressing modest issues before they compound-helps preserve ventilation effectiveness and flashing integrity, reducing the frequency of emergency reroofs and keeping the roof performing across many seasons.
The Kansas City area sees enough hail and wind claim activity that insurers may scrutinize roof claims more closely than in lower-loss markets. When a storm leaves scalloped granules in the gutters or dented shingles, a carrier may request more evidence to separate storm damage from wear. That means the timing of a claim and the documentation you present can influence outcomes, especially on older roofs or in neighborhoods with a mixed stock of upgrades.
Some carriers may adjust premiums, limit coverage on older roofs, or expect wind-rated materials and underlayments when a roof is replaced after a claim. Expect questions about wind-resistance, attic ventilation, and the age of decking. When a roof is renewed after a loss, the replacement may be evaluated against newer standards, so understanding what your insurer considers "adequate" can help prevent surprises down the line.
Kansas City, KS homeowners should keep dated photos, inspection notes, contractor estimates, and storm-date records because documentation quality can affect claim outcomes. Photos taken at multiple angles, with timestamps, combined with a concise note about observed damage, create a stronger file. Retain service invoices and any communication with the insurer. A well-organized set of records reduces back-and-forth and supports a smoother claim review during spring hail season and wind events.
Connect with contractors who help homeowners navigate the claims process from damage assessment to final approval.
Garcia Roofing Kansas City
(816) 286-7387 www.garciaroofing.biz
119 W Gregory Blvd, Kansas City, Missouri
5.0 from 196 reviews
Downunder Roofing
(816) 547-0713 www.downunderroofing.com
Kansas City, Missouri
5.0 from 101 reviews
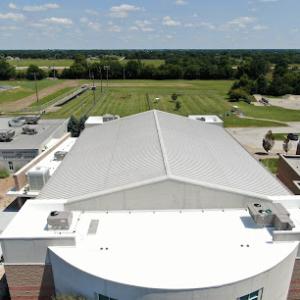
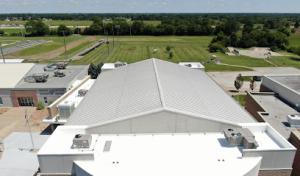
In this market, pitched residential reroofing dominates, but the local contractor scene also supports a steady flow of flat or low-slope work. When you encounter a low-slope section, start with a careful inspection of edge detailing and transitions to vertical walls. Look for loose or punctured membrane seams, worn ballasting, and any weathered fixtures where flashing should be continuous and well-sealed. In Kansas City, KS, spring hail and wind can hammer low-slope areas hardest, so pay particular attention to hail mottling, punctures, and punctured gravel caps. Document moisture signs with a simple rhythm: note the roof surface, note penetrations, then trace any staining or dampness down into attic spaces. A quick, non-destructive moisture test around edges and penetrations can save a lot of back-and-forth later.
Skylights show up in many homes here as common points of failure because penetrations and flashings age differently than the main roof plane. If a leak appears near a skylight, start tracing from the interior: look for condensation trails, stained drywall, and corroded or loose fasteners around the curb. Outside, inspect the flashing boot, curb sealant, and the seal between the skylight frame and the curb. In storm-prone neighborhoods, hail can crack glass or deform frames even when the surface looks intact. Consider resealing the curb and replacing weather seals first if the skylight frame is over ten years old. For aging skylights, prioritize a full curb flashing upgrade and ensure the skylight bears a proper water-ponding-free slope away from the glass.
Emergency leak response is active here because wind-driven rain can create urgent protection needs before full repair scheduling opens up. When rain starts or an attic shows active moisture, place temporary tarps or roofing plastic over the most vulnerable areas to buy time. Use weighted edges and secure fasteners to prevent wind-flapping. In the attic, protect insulation with a barrier if active leaks persist, and coordinate response with the next available repair window. After the immediate storm pass, capture detailed photos of both interior water intrusion and exterior roof conditions to support rapid insurance communication and scheduling.
Find specialists in TPO, EPDM, and built-up flat roofing systems for residential and commercial properties.
Nations Roofing & Solar
(816) 678-4220 www.nationsroofingandsolar.com
5810 E Red Bridge Rd, Kansas City, Missouri
5.0 from 122 reviews
Redhammer Roof Group
(816) 965-6220 www.redhammerroof.com
1417 Jackson Ave, Kansas City, Missouri
4.9 from 123 reviews

Agape Grace Roofing
(913) 800-3788 www.agroofingservices.com
1447 S 55th St Suite # A, Kansas City, Kansas
5.0 from 89 reviews