Last updated: Apr 19, 2026
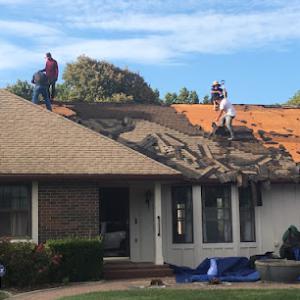
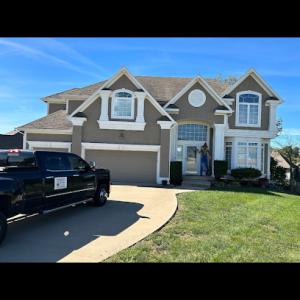
This Jackson County city endures repeated spring hail and high-wind events that turn storm damage into a primary roof-replacement trigger. The pattern isn't occasional-it's expected, and it hits established neighborhoods just as hard as newer subdivisions. When hail hammers shingles and wind rips at flashing, the roof becomes a claim-driven project long before any planned upgrade. The cycle matters because your roof isn't just weathered-it's assessed, photographed, and evaluated through an adjuster's lens, with every dent and lifted edge part of the file that shapes the final decision.
Independence homeowners face recurring spring hail and high-wind events that make storm damage and insurance claims a primary roofing trigger in this Jackson County market. That reality changes how you approach maintenance: storms don't just cause isolated issues; they set in motion a sequence of inspections, documentation, and approvals that determine whether a roof gets replaced at all and what material gets installed. The pressure to respond quickly is real, because delays often complicate coverage or lead to additional wear that reduces the chances of a clean, durable fix.
Local contractor activity is heavily concentrated in insurance claims and storm damage work, indicating that many roof replacements in Independence begin with adjuster inspections rather than planned upgrades. That means your first contact after a storm is not simply a contractor's pitch, but the adjuster's review and the photo-documented condition of the entire roof. If you wait for a random season, you risk gaps in coverage or misalignment between the damage observed by the adjuster and the work your roof actually needs. Proactive scheduling of a contractor who understands the insurance-driven process, and who can accompany you during the adjuster walk-through, can help keep the project on track and prevent surprises.
Because Missouri storm deductibles can be higher and carriers often require detailed photo documentation and roof condition reports, Independence homeowners need to document damage immediately after hail and wind events. Take clear, dated photos from multiple angles, including attic views if there are signs of leaks, and keep a running log of every impacted area. Record approximate measurements of dented vents, lifted shingles, and any granule loss visible in gutters or downspouts. Save all correspondence with the insurer, and ensure the adjuster's scope matches the observable damage. When you have thorough records, you constrain the back-and-forth and help ensure that the replacement reflects the actual condition rather than a best-guess estimate.
The path from storm to a completed roof replacement moves quickly, but it's not instant. Expect staged milestones: initial inspection, claim approval, material selection, and the actual installation window. In practice, the first crucial window is the post-storm period when damage is most clearly documented and the insurer's file is opened. From there, a coordinated effort with a contractor who regularly navigates adjusters, scope revisions, and weather windows can keep the project on a steady course. Given the local pattern, a thorough pre- and post-storm documentation routine isn't just prudent-it's essential to secure a reliable, long-lasting restoration that holds up under the region's spring hail and wind cycles.
Recon Restorations
(816) 516-6498 reconrestorations.com
16400 US-24 HW, Independence, Missouri
5.0 from 79 reviews
You can't afford to put off roof repairs. Thankfully, you can get in touch with a local roofing company in Kansas City, MO in your time of need. Recon Restorations can provide you with emergency service to protect your property and help keep you safe.

DHI Roofing Kansas City
3675 S Noland Rd Suite 335, Independence, Missouri
4.9 from 539 reviews
The most common question homeowners face when dealing with their insurance claim is, “Did my insurance cover me properly?” Most homeowners have no way of knowing if they were fairly and properly covered. Many adjusters miss damage or miss some required components necessary to complete repairs, which result in poorly adjusted claims. This puts pressure on homeowners and contractors alike to properly fix the damage. Neither party wants to pay out of pocket for repairs that the insurance company should have paid for. So, what now? Rather than adding another estimate to the pile, many prefer to get professional help and an education on the process. We invite you to reach out for a free inspection with an experienced project manager.
CRG Roofing & Guttering
(816) 608-9561 crgconejoroofing.com
11015 East 23rd St S, Independence, Missouri
4.9 from 76 reviews
Looking for a trusted roofing company? We provide expert roof repair, roofing installation, and full-service roofing solutions to protect your home. As one of the top roofing companies, we deliver high-quality craftsmanship, reliable service, and durable roofing systems built to last. Whether you need repairs after a storm or a brand-new installation, our experienced team is here to help. If you're searching for a roofing company near me, count on us for professional service and long-lasting results. At CRG Roofing, we are OC, GAF and BBB accredited business, and we focus on delivering a high level of craftsmanship in every roofing project we take on. Call today if you want your roofing problems solved by certified professionals!
Artisan Roofing & Guttering
(816) 833-0334 www.artisanroofingandguttering.com
15312 E Truman Rd, Independence, Missouri
4.9 from 61 reviews
Protect your largest investment with our reliable roofing services. We are a locally owned and operated roofing company currently serving Kansas City, MO and surrounding communities. If you want to make your roof last as long as possible, it is vital that you never put off a roof repair. Small issues with roofing become big issues in a hurry. No matter how major or minor the repair you need, we are here to help. We offer roofing contracting, metal roofing, and flat roofing.
Ron's Roofing
(816) 252-9496 ronsroofingcompany.com
15636 E US Hwy 24, Independence, Missouri
4.9 from 71 reviews
Founded in 1984. Ron’s Roofing has built quite a reputation in the local area for providing reliable roofing services combined with one-on-one care. We’ll take the time to consult with you so that we have a better understanding of your needs. By doing so, we’ll be able to offer you individualized service options. So whether you need your entire roof replaced, a quick tuneup, or an emergency tarp after a storm, we’ll be there for you every time to deliver the results you deserve. Let our 40 years in business and experience help you, give us a call today for a free estimate.
Summit Roofing
(816) 656-7663 www.summitroofs.com
Independence, Missouri
4.9 from 79 reviews
Summit Roofing is your trusted roofing contractor in Blue Springs, Missouri. We focus on roof replacement Blue Springs residents can rely on. Our licensed and insured team is dedicated to providing quality workmanship and exceptional customer service. Whether you need a new roof, guttering, siding, or assistance with insurance restoration, we've got you covered. We offer free inspections and quotes to ensure you're making informed decisions about your home. With years of experience and a commitment to excellence, Summit Roofing delivers reliable results. Contact us today for all your roofing needs in Blue Springs.
Top Peaks Roofing & Construction
Independence, Missouri
4.8 from 77 reviews
Top Peaks Roofing and Construction is a trusted leader in the roofing and construction industry, providing high-quality services tailored to meet the unique needs of each client. With a team of skilled professionals, the company specializes in roof installations, repairs, and maintenance, ensuring durable and aesthetically pleasing results. Committed to using the finest materials and cutting-edge techniques, Top Peaks Roofing and Construction guarantees customer satisfaction on every project. Their dedication to excellence extends beyond roofing, offering a range of construction services that enhance the beauty and functionality of residential and commercial properties. Trust Top Peaks for all your roofing and construction needs.
AGR Roofing
(816) 714-9669 www.agrroofingllc.com
1220 N Ponca Dr, Independence, Missouri
5.0 from 23 reviews
At AGR Roofing, our goal is to provide top-quality roofing services to our valued customers. Specializing in residential and commercial roofing, offering expert roof repairs, roof installations, and flat roof repairs. Our experienced team is also skilled in siding installation and repair, gutter services, and storm damage repairs. Whether you need help with a roof leak, a damaged gutter, or you’re dealing with the aftermath of a storm, we’ve got you covered. We provide high-quality gutter repair, siding repair, and commercial roof repairs, along with comprehensive insurance claim assistance to make the process easier for you.
Guaranteed Affordable Roofing
(816) 529-0706 www.guaranteedaffordableroofs.com
3250 S Selsa Rd, Independence, Missouri
4.8 from 26 reviews
Family owned and operated Commercial and residential roofing company. We also offer guttering siding and windows Quality work at an affordable price
Gomez Roofing
17201 E US Hwy 40 STE 114, Independence, Missouri
5.0 from 12 reviews
Gomez Roofing is a company specialized in the installation, repair, and replacement of metal roofs on domestic homes, commercial, and industrial buildings and structures. We work for insurance companies, insurance builders, loss adjusters, property managers, property investors and developers, individuals and businesses. We also provide our services to other large roofing companies when available.
K&L Roofing & General Contracting
(816) 886-5026 klroofingmo.com
1140 S Dodgion Ave, Independence, Missouri
5.0 from 10 reviews
We provide quality, reliable roofing repairs and more so that homeowners can have peace of mind knowing the roof over their heads is safe and secure. We offer free estimates, so get in touch with us today to learn how affordable your needed services can be.
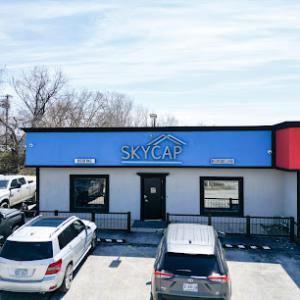
SkyCap Roofing & Remodeling
(816) 800-4105 www.skycaproofing.com
10531 E US Hwy 40, Independence, Missouri
4.6 from 22 reviews
Top Roofing Company A family-owned and operated business with a reputation for quality workmanship. Skycap Roofing & Remodeling has serviced Kansas City and the surrounding areas with all types of new roofing and gutter systems. Skycap Roofing & Remodeling specializes in existing or new commercial, industrial, institutional and residential roofing. Our knowledgeable staff and highly skilled employees are here to make your new project a pleasant and professional experience. No matter the type of roofing project, whether residential or commercial, you’re in good hands with Skycap Roofing & Remodeling. Contact us today and experience our commitment to you and your home first-hand. Call us anytime at 816-800-4105 click
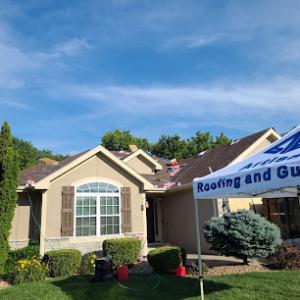
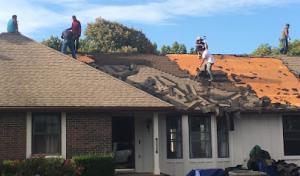
Fast-moving spring storms in the Kansas City metro can leave Independence homes with lifted shingles, exposed underlayment, and active leaks that need same-day tarping. If you notice rain pouring through the attic or along interior walls, treat it as an urgent leak. Do not delay on choosing a tarp or securing access to the roof-water driven by wind can travel far, finding its path through weakened flashing and gaps you may not immediately see. In neighborhoods with older roofs, those vulnerabilities show up quickly where shingles peel away at wind edges or where the roof line meets dormers, chimneys, or vent pipes. The goal is to slow the intrusion before it travels to ceilings and insulation, which can compound damage and invite mold.
The strong prevalence of emergency repair contractors in Independence reflects how often homeowners need immediate stabilization before a full inspection or claim decision. Storms can leave roofs in a precarious state even when shingles look intact from the ground. A failed quick seal around a vent boot, a loose flashing corner, or a crinkled edge where the roof meets a wall becomes a leakage conduit once rain resumes. Older homes common in established neighborhoods often feature aging underlayment and brittle flashing transitions that don't tolerate wind-driven debris well. If a storm hits with hail or wind gusts, the exposed underlayment can soak through within minutes, and attic temperatures can push moisture deeper into the structure. That is why an urgent, focused response is essential.
First, ensure safety: stay off visibly damaged areas and avoid climbing in wet conditions. If water is actively entering, place a sturdy tarp or plastic sheeting over the most exposed spot to slow the drip. Secure the edges with temporary fasteners or weights if needed, but do not override structural concerns with makeshift fixes that could create a fall risk. Move valuables away from the leak path and protect outlets or electronics from moisture with plastic, if reachable. Photograph the affected interior and exterior areas from multiple angles to document the damage for the insurer and the contractor. Create a simple timeline: when the leak started, where water is appearing, and any changes after the storm's progress. If you have a known roof vent or flashing transition that has shown weakness in the past, consider marking its location so responders can prioritize it.
When the first responders or emergency repair crews arrive, expect a focus on stabilization rather than a full repair plan. The goal is to establish a durable temporary barrier that limits further intrusion while a full roof assessment is scheduled. Communicate clearly about where water is entering and any signs of compromised underlayment in the attic. If you have prior documentation of wind or hail impacts, share it to help the contractor gauge the likelihood of related interior damage beyond the visible leak. After tarping, arrange a thorough inspection as soon as daylight allows and before the next round of weather, to map out flashing, edge seals, and potential ridge lines that may require replacement rather than quick fixes. In Independence, rapid action now helps protect the home's structure and fibers for the long repair cycle ahead.
When you can't wait, these contractors offer fast response times to stop leaks and prevent further damage.
Recon Restorations
(816) 516-6498 reconrestorations.com
16400 US-24 HW, Independence, Missouri
5.0 from 79 reviews

Ron's Roofing
(816) 252-9496 ronsroofingcompany.com
15636 E US Hwy 24, Independence, Missouri
4.9 from 71 reviews

Top Peaks Roofing & Construction
Independence, Missouri
4.8 from 77 reviews
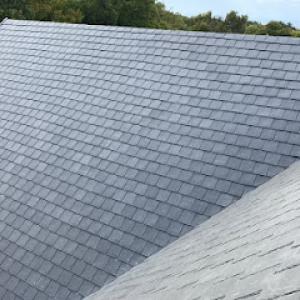
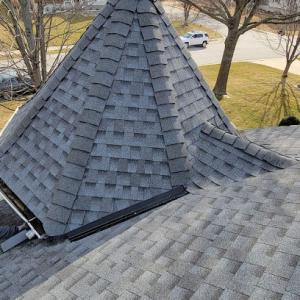
Asphalt shingles dominate Independence because they fit the area's storm-repair economics, broad contractor availability, and the housing stock found across both older neighborhoods and postwar subdivisions. They're familiar to local crews, respond well to typical Independence roof pitches, and offer straightforward, reliable repairs after hail events. When choosing asphalt, look for at least a 30-year laminate or better for long-term performance, and opt for shingles with good impact resistance ratings to reduce immediate damage from spring hail. In practical terms, a well-sealed installation with proper ventilation and careful flashing ensures you don't invite premature failure during the freeze-thaw cycles that follow storm season.
Metal roofing is a meaningful local upgrade option for homeowners prioritizing wind performance and long-term durability through hot summers and freeze-thaw winters. Metal panels resist uplift better than many other options and shed hail more predictably, which can translate into lower repair frequency after severe storms. In Independence, where wind and hail are common, metal can be a wise investment if the roof structure can handle the weight distribution and if the edges are properly integrated with vents and flashings. A standing-seam system tends to deliver the best wind performance, while ensuring a clean, weather-tight roof line that's easier to inspect after a storm.
Tile, wood shake, and synthetic roofs exist in the market but require careful evaluation of structural load, replacement matching, and storm repair complexity in a hail-prone Missouri setting. Clay and concrete tiles bring long life and a distinctive look, but they demand a solid deck and competent framing to avoid sag or cracking under wind pressures. Wood shakes offer authentic aesthetics but can struggle with hail impact and moisture if not properly treated or maintained. Synthetic shingles provide hail resistance up front and easier replacement paths, yet still rely on solid overlying structures and precise matching during repairs to maintain performance after storms.
In a hail-prone climate, the roof choice should align with local repair ecosystems and the ease of replacing damaged sections after a severe event. Consider how a given roof type will be matched by nearby contractors during insurance-driven replacements, and prioritize installations that enable straightforward inspection, venting compatibility, and high-quality flashing. When evaluating a roof's long-term performance, balance aesthetic preferences with the realities of Independence storms, ensuring the deck is sound, the underlayment is appropriate, and the chosen material integrates well with the existing ventilation strategy to curb heat buildup and moisture intrusion.
Asphalt shingles in this market typically run about 350 to 650 USD per square. Metal roofing sits higher, generally 600 to 1100 USD per square. Clay tile falls between 900 and 1800 USD per square, with concrete tile from 800 to 1500 USD per square. Wood shingles or shakes are usually in the 600 to 1000 USD per square range, and synthetic or composite shingles sit around 550 to 900 USD per square. These figures reflect typical labor and material costs for full replacements on established homes in the area, including neighborhoods that endure the spring hail and wind cycle.
Spring hail events and wind damage are common in the Kansas City metro, and that pattern shows up in Independence as well. After a major hail storm, crews, materials, and inspection scheduling tighten up, which can push roofing prices upward for a short period. If you're catching the tail end of a storm window, expect neighborhood-wide demand to push quotes higher than the typical ranges listed above. Planning ahead and securing a trusted local contractor early after a hail event can help stabilize the process and protect you from inflated short-term costs.
Beyond the base material price, certain conditions on older homes can add to the bill. If the roof replacement reveals decking in need of repair, or requires additional flashing upgrades to address flashing failures or poor flashing details from previous work, costs can climb. The same can apply if ventilation corrections become necessary to meet attic balance and airflow needs. In practice, the total project cost becomes a blend of the chosen material, the roof's current condition, and the extent of safety and performance measures required to finalize a proper, long-lasting installation.
Get a clear picture of your project costs upfront - no commitment required.
Ron's Roofing
(816) 252-9496 ronsroofingcompany.com
15636 E US Hwy 24, Independence, Missouri
4.9 from 71 reviews
Top Peaks Roofing & Construction
Independence, Missouri
4.8 from 77 reviews
A full roof replacement in Independence typically requires a building permit through the City of Independence Building Department. Before even selecting shingles or scheduling tear-off, confirm your project with the permit office and secure the required permit. Skipping this step can lead to delayed project starts, fines, or a stop-work order that disrupts the timeline you're counting on after spring hail and wind events.
City inspections in Independence commonly verify ventilation, flashing, and overall code compliance rather than treating reroofing as a no-review job. That means your crew should be ready to demonstrate proper attic venting, baffle placement, and balanced intake and exhaust airflow if a new roof is installed. Inspections also check flashing around chimneys, vents, skylights, and roof-to-wall transitions. If the existing ventilation strategy isn't up to current standards, plan for adjustments that both meet code and address your attic moisture concerns.
If a project changes ventilation design or attic access, Independence may require plan review before work proceeds. That can slow a replacement if the design relies on denser intake, added attic fans, or new scuttle holes. Have your contractor bring any proposed changes to the permit office for feedback early in the process. A revised plan review is a common hurdle after a hail-driven decision to upgrade soffit vents or reconfigure attic access doors. Understanding this upfront helps avoid mid-project red tape and keeps the reroof moving forward.
Start by gathering the building permit requirements and any subdivision-specific covenants that might apply. Coordinate with a licensed roofing contractor who is familiar with local inspection expectations, especially around ventilation and flashing details. When scheduling inspections, the contractor should accompany you to the inspectoral point to address any questions from the inspector on site, rather than making adjustments later. If a change in material or underlayment is planned to better handle spring hail, confirm how that impacts plan documentation and the sequence of inspections. Being proactive with the permit and inspection steps can prevent costly rework and ensure your roof replacement remains compliant from tear-off through final approval.
You will want to assess roof condition as soon as the storm passes. In this area, spring hail and wind can hide problems under shingles, at flashing, and along eave lines. Document damaged vent stacks and compromised hips while the house still feels accessible for crews to work. Early evaluation helps avoid delays when the insurance clock starts, and helps you plan a clean replacement window that avoids peak storm risk.
The best scheduling window is shaped around avoiding peak spring storm season while also finishing before winter freeze conditions set in. In practical terms, aim for a late spring lull or a dry stretch in early fall, when heat stress is lower and crews can work longer hours without pushing a roof to the limit. If a contractor must start earlier, ensure ventilation and flashing are addressed in the scope to prevent costly callbacks. Independence roofs tolerate a higher summer heat, but thermal expansion accelerates wear, so plan for intake and exhaust vent checks during the project.
Cold winters bring freeze-related brittleness and ice damming risk, making some repairs and replacements more complicated. Snow or ice during any phase can stall work and affect sealant performance. Schedule with a local crew who understands attic ventilation requirements, as improper sequencing can trap moisture. Having the crew finish before temperatures drop into sustained freezing helps protect shingles and underlayment from thermal shock.
Confirm delivery windows with the supplier to avoid delays that push work into unfavorable weather. Prepare a clear path for material staging and protect landscaping from debris that rides on spring gusts. A well-timed replacement in Independence rides between harsh seasons, minimizing heat-driven distortion and winter-time vulnerabilities.
Independence sits in a Missouri insurance environment with periodic hail and wind losses that keep roof claim activity consistently elevated. That means storm season often brings a run of adjusters, contractors, and questions to neighborhoods that have weathered old roofs and newer constructions alike. The pattern is predictable: a hail event tests shingles and flashing, while frequent winds can reveal attic leakage and ventilation weaknesses. Expect the insurance response to be brisk, but also selective, with both surprises and follow-up requests threaded through the process.
Homeowners should expect adjusters on-site for storm claims, and the value of solid documentation cannot be overstated. Date-stamped photos before and after events help tell the full story of damage progression, while interior leak evidence acts as crucial proof of entry points that may not be visible from the exterior. A contractor condition report can bridge gaps between what is seen and what must be repaired, especially in neighborhoods with older roofs that show their age under fresh hail scars. Keep a clear file of every communication, inspection note, and receipt so the file remains cohesive if the claim moves through multiple eyes.
Some carriers in Missouri have tightened terms for certain roof types or higher-risk properties, so verify depreciation schedules, exclusions, and storm deductibles before committing to a full replacement. In practice, that means reviewing how wear, age, and storm-related damage are valued, and understanding any limits that might shift cost responsibility onto you. A thoughtful, staged approach can prevent last-minute gaps, especially where ventilation and flashing were scrutinized during the replacement window. Understanding the specifics early can spare long-term headaches when the claim settles and the roof is brought up to current conditions.
In Independence, repeated wind exposure commonly shows up first at ridge caps, shingle tabs, and flashing edges after spring storms. You'll notice lifted tabs, small splitting along the tab rows, and granular loss near the ridge lines. Start by inspecting the ridge line after a storm cycle: look for any loose or cracked cap shingles and any upward movement when you press with a palm. Check shingles along the edges of the roof where the wind can grab and tear small tabs. Flashing at vents and along walls should lie flat and corrosion-free; lift or rattle here signals potential water intrusion. If you see soft spots or sagging underlayment at the ridge, plan a pro inspection quickly, because wind damage often progresses from cosmetic to structural.
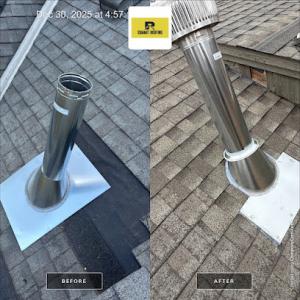
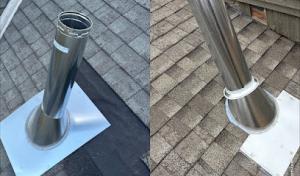
City inspection emphasis on flashing and ventilation reflects two of the most common failure points that can turn a simple reroof into a correction project. Start with the attic: look for signs of insufficient ventilation, such as persistent upstairs heat or moisture, which can rot sheathing and accelerate shingle deterioration. On the roof, visually track the integrity of step and counter-flashing around chimneys, dormers, and transition edges; in Independence, older flashing details can fail where storm-driven rain penetrates the seal. Pay attention to taped seams on low-slope areas or around exhaust vents. If flashing is loose, cracked, or missing sealant, plan for proper resealing and, if needed, flashing replacement rather than a quick patch.
Skylight and chimney transitions deserve extra scrutiny in Independence because storm-driven rain can exploit weak seals and older flashing details. Inspect skylight flanges from the exterior and the interior caulk line around the curb; look for hairline cracks in sealant and any condensation or staining on ceiling drywall beneath. For chimneys, inspect the hearth side and the roof side of the flashing for rust streaks, pulled-up shingles adjacent to the flashing, and any gap where mortar or sealant has cracked. Addressing small cracks early helps prevent larger leaks after a spring deluge. When in doubt, schedule a targeted seal and flashing assessment for these transitions rather than relying on a full roof-only replacement.
Find contractors experienced in skylight installation, flashing, and leak repairs to bring natural light into your home.
Recon Restorations
(816) 516-6498 reconrestorations.com
16400 US-24 HW, Independence, Missouri
5.0 from 79 reviews

CRG Roofing & Guttering
(816) 608-9561 crgconejoroofing.com
11015 East 23rd St S, Independence, Missouri
4.9 from 76 reviews
Artisan Roofing & Guttering
(816) 833-0334 www.artisanroofingandguttering.com
15312 E Truman Rd, Independence, Missouri
4.9 from 61 reviews
While steep-slope shingles dominate, many homes in Independence have porch covers, additions, garages, or rear sections that create low-slope details needing different materials and drainage planning. These secondary roof areas often sit behind or adjacent to the main roof, so drainage and water management hinge on solid transitions. After spring hail and wind, those low-slope sections show their vulnerabilities first, especially where the peak-and-valley geometry meets a flatter run.
In mixed-roof configurations, water can back up at transitions between the main roof and lower-slope sections. Plan for proper internal drainage where possible and ensure the lower roof edges terminate with reliable spillover to gutters or scuppers. For flat or nearly flat spots, consider a slightly positive pitch and surface materials that resist hail impact while still promoting shedding. Flashing at step-overs, corner intersections, and edge interfaces needs particular attention, because weak seals here often fail first after a hail event.
Choice of material matters more on additions and garages. In Independence, you'll want options that tolerate hail impact and wind load without sacrificing compatibility with the main roof. Flat-roof specialists in the local market indicate regular targeted repair or replacement on these secondary areas, so selecting a compatible system that can be serviced independently from the primary roof helps control ongoing maintenance.
After severe storms, inspect transitions from the main roof to the low-slope sections for lifted flashing, punctures, or seam separation. Schedule periodic checks for ponding, membrane wear, and gutter performance, especially along rear and side additions. Document any prior repairs so a contractor can match details precisely and plan targeted improvements rather than a full system overhaul. Keep an eye on edge details where wind-driven debris tends to strike first.
Find specialists in TPO, EPDM, and built-up flat roofing systems for residential and commercial properties.
Artisan Roofing & Guttering
(816) 833-0334 www.artisanroofingandguttering.com
15312 E Truman Rd, Independence, Missouri
4.9 from 61 reviews
AGR Roofing
(816) 714-9669 www.agrroofingllc.com
1220 N Ponca Dr, Independence, Missouri
5.0 from 23 reviews