Last updated: Apr 19, 2026
Liberty sits in the Kansas City Northland, where spring hailstorms and severe thunderstorms are a primary trigger for sudden roof replacement decisions. The local mix of steep-slope asphalt alongside metal, cedar, and tile means the damage patterns aren't uniform, and a single storm can expose several homes to different next steps. The real risk in this climate is not just the hail strike itself but what happens in the weeks that follow. Spring storms can leave compromised shingles, dented flashing, and loosened edge metal that degrade quickly with heat, drought, cold snaps, and freeze-thaw cycles. If those vulnerabilities are allowed to sit, you can end up with leaks, water intrusion, or hidden structural damage that multiplies cost and mess in a hurry. The moment you suspect elevated wind or hail damage, treat the situation as urgent rather than cosmetic.
Missouri has a high roof-claim environment, and Liberty homeowners often move from inspection to insurance documentation quickly after area-wide storm events. Start with a thorough roof inspection as soon as safely possible after a storm. Look for missing shingles, lifted tabs, bruised or dented metal, damaged flashing at chimneys and vents, and stain patterns on ceilings inside the attic. Photograph all areas of concern from multiple angles, including close-ups of texture and edges. Do not rely on memory; rapid weather cycles can obscure fresh damage within days. If the inspector notes damage, begin the documentation immediately. Insurance-friendly reports should clearly tie observed conditions to the storm event. In this climate, even shingles that seem "just fine" visually can be compromised by micro-fissures that let water in at the first warm rain. Delays open the door to further deterioration and possible denial of claims when the inspection appears stale.
Liberty's hot summers, cold winters, and freeze-thaw swings mean storm-damaged shingles and flashing can deteriorate further if repairs are delayed into later seasons. A spring or early summer replacement can prevent the summer heat from accelerating underlayment degradation or panel warping, especially for metal and tile. If a hail-damaged asphalt roof is left untreated, those weak spots become leak pathways as the shingles curl and lift with sun exposure. Cedar and slate or concrete tiles also face accelerated brittleness from alternating freeze-thaw cycles, which can turn a minor patch into a full replacement bug in the fall. The decision timing isn't purely cosmetic; it's about preserving structural integrity and avoiding cascading interior damage that ruins ceilings, insulation, and drywall.
Begin a rapid-response plan: after a major hail event, arrange a professional roof inspection within 48 to 72 hours if daylight and weather permit. Have the inspector document the roof with a written report and photos that highlight hail impact, lifted shingles, cracked flashing, and any sagging along eaves. If damage is confirmed, pursue the insurance claim promptly and expect a swift turnover from assessment to documentation. Select a roofing contractor who can work in a staged, storm-responsive manner-prioritizing areas that show active leaks or visible damage. Ask for a detailed scope that accounts for the common Liberty materials: asphalt, metal, cedar, or tile-and ensure the plan includes gutter and flashing checks, attic ventilation assessment, and warranty options. Time-sensitive decisions protect you from the worst seasonal consequences and support a smoother, lower-risk replacement process when the weather cycle turns.

Elite Master Contractors
(816) 707-7663 elitemastercontractors.com
1580 Ashton Dr, Liberty, Missouri
5.0 from 110 reviews
Roofing contractor that specializes in customer service. We also do siding and gutters. Free Inspections and reports for every client. We also do roof repairs.

Liberty Roofing Siding Gutters & Windows
(816) 624-2713 www.libertyroofingkc.com
109 S Main St, Liberty, Missouri
4.7 from 140 reviews
Liberty Roofing, Siding, Gutters & Windows is a family-owned and operated company, serving the roofing and siding needs of home and business owners throughout Liberty, MO and beyond. We’re the company to call when you need installation, repairs and more! With more than 15 years of experience, our experts are ready to help you protect your home from the elements. We set ourselves apart from other roofing companies in Kansas City by offering more than just general roof repairs and replacements. In fact, we specialize in storm damage repairs—including hail damage. We’re also here to deliver siding repairs and replacements because we know how important your siding is in protecting your home. We do not operate or endorse any other websites.
Restoration Roofing
(816) 812-7663 restorationroofingkc.com
Serving
4.9 from 46 reviews
Family owned, father and son roofing company.
Over the Top Restoration
(816) 648-0157 ottrestoration.com
Serving
4.6 from 45 reviews
Over The Top Restoration (OTT Restoration) is your trusted roofing company in Kansas City, Missouri, specializing in hail and wind damaged roof replacements. With over 20 years of combined experience, our expert team delivers high-quality roof repairs, replacements, installations, and maintenance using premium materials and proven techniques. We take pride in helping homeowners navigate the insurance process with ease, ensuring a smooth and stress-free experience. Contact us today for a free roof inspection to see if your damage qualifies for replacement through your homeowner's insurance. Proudly serving Kansas City and surrounding areas across Mid-Missouri.
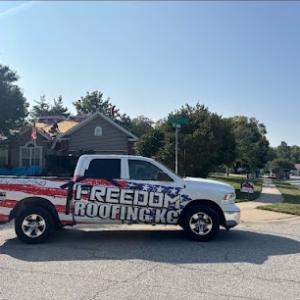
Freedom Roofing KC
(816) 673-5424 freedomroofingkc.com
Serving
5.0 from 83 reviews
Roofing contractor
Done Right Roofing & Guttering
(816) 799-2745 donerightguttering.com
Serving
4.9 from 56 reviews
Combining years of experience with a dedication to client satisfaction, Done Right Guttering And Exterior Solutions has established itself as the local leader in the following categories: Roofing, Gutters, and Siding.
Recon Restorations
(816) 516-6498 reconrestorations.com
Serving
5.0 from 79 reviews
You can't afford to put off roof repairs. Thankfully, you can get in touch with a local roofing company in Kansas City, MO in your time of need. Recon Restorations can provide you with emergency service to protect your property and help keep you safe.
Christian Brothers Roofing
(816) 453-7663 www.christianbrothersroofingllc.com
Serving
5.0 from 1793 reviews
Christian Brothers Roofing is a Kansas City Metro based Roofing and Guttering Company committed to providing great roofs and great construction experiences alike. We expertly handle residential and commercial roof repairs, roof replacements, new roof construction, and guttering projects for the entire Kansas City Metro Area. We were established in 2009 as a faith-based, family run Gladstone, MO company to provide quality residential and commercial roofing & guttering services, and we use our commitments to God, integrity, honesty, and hard work to genuinely take care of our customers.
Ameristar Roofing & Restoration
(816) 415-4230 www.ameristarroofingkc.com
Serving
4.9 from 163 reviews
Ameristar Roofing & Restoration provides residential and commercial roofing, gutters, and siding, to the Kansas City Metro area.
Cloud9 Roofing
(816) 239-2083 www.cloud9roofingllc.com
Serving
4.9 from 108 reviews
Cloud9 Roofing is a family-owned and operated roofing, siding, and gutter company based in Kansas City, MO. They take pride in delivering quality workmanship and a personalized approach to every project. With a strong focus on transparent communication, they ensure clients are informed and confident every step of the way. Their experienced team is committed to treating each home as if it were their own, offering dependable service and lasting results. Whether it's a minor repair or a full installation, they bring professionalism, care, and attention to detail to every job. At Cloud9 Roofing, your home’s protection and appearance are always their top priority.
Ron's Roofing
(816) 252-9496 ronsroofingcompany.com
Serving
4.9 from 71 reviews
Founded in 1984. Ron’s Roofing has built quite a reputation in the local area for providing reliable roofing services combined with one-on-one care. We’ll take the time to consult with you so that we have a better understanding of your needs. By doing so, we’ll be able to offer you individualized service options. So whether you need your entire roof replaced, a quick tuneup, or an emergency tarp after a storm, we’ll be there for you every time to deliver the results you deserve. Let our 40 years in business and experience help you, give us a call today for a free estimate.
AGR Roofing
(816) 714-9669 www.agrroofingllc.com
Serving
5.0 from 23 reviews
At AGR Roofing, our goal is to provide top-quality roofing services to our valued customers. Specializing in residential and commercial roofing, offering expert roof repairs, roof installations, and flat roof repairs. Our experienced team is also skilled in siding installation and repair, gutter services, and storm damage repairs. Whether you need help with a roof leak, a damaged gutter, or you’re dealing with the aftermath of a storm, we’ve got you covered. We provide high-quality gutter repair, siding repair, and commercial roof repairs, along with comprehensive insurance claim assistance to make the process easier for you.
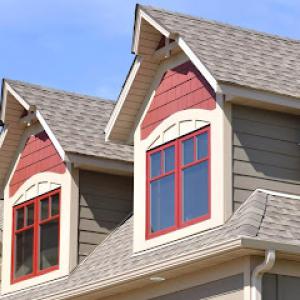
Asphalt shingles dominate the roofline, but it's common to encounter metal, clay tile, concrete tile, wood shingles or shakes, and even slate on longer-lived homes. Each material behaves differently under Liberty's hail-prone skies and brisk winds, so understanding the local climate realities helps you pick a practical path when replacing or repairing a roof.
Storms here come with sharp hail and strong gusts, so your first check after a storm should be the roof's ability to resist impact and shed wind loads. Metal roofs often shine for impact resistance and wind resistance, but look for the right panel profile and proper fasteners chosen for high winds. Clay and concrete tiles can take a beating too, but they require careful installation to prevent crack propagation and to maintain wind uplift resistance. Asphalt shingles remain a solid choice if you select heavy-bond shingles with good impact resistance ratings, yet you should favor products that maintain sealant integrity through temperature swings and freeze-thaw cycles.
In this climate, flashing quality matters as much as the shingles themselves. Pay attention to roofing penetrations, valley details, drip edge, and chimney flashings. High-wind events can lift edges if flashing isn't sealed or integrated with a compatible underlayment. Winter shedding behavior-how quickly ice and snow move off the roof-also influences material choice. Metal roofs typically shed snow more predictably, while some tile assemblies can accumulate ice dams if insulation and ventilation aren't up to par. For slate and tile, ensure the substrate is reinforced and that attachment methods prevent micro-movements that lead to flashing failures during freeze-thaw cycles.
Heavy materials, especially tile and slate, demand closer scrutiny of the roof's structure, particularly on older homes. The extra dead load can reveal weak spots or require additional framing, sheathing upgrades, or reinforcement. If the existing structure isn't rated for heavier coverings, a retrofit plan becomes essential before any replacement. This is not a cosmetic decision; it directly affects safety, warranty validity, and long-term performance in Liberty's stormy season.
When choosing between materials, align your decision with the typical local roof line and house age. Steep-slope asphalt can deliver reliable service with modern, impact-rated shingles. If opting for metal, verify corrosion resistance and the match between panel profile and your roof geometry to prevent water ingress at seams. Tile and slate demand precise substrate preparation and professional attachment methods that resist both wind uplift and fluctuations in temperature. Wood shingles or shakes bring natural beauty but require tighter maintenance for hail resistance and fire safety. If you're weighing options after a hail event, inspect for hidden damage-soft spots, delamination, or tile cracks-that may signal structural vulnerability rather than surface blemishes alone. A qualified contractor can assess whether a full replacement, partial repair, or a combined approach best preserves the roof's integrity while addressing the season's exposure risks.
Typical Liberty pricing runs about $350-$650 per square for asphalt shingles, $600-$1200 for metal, $900-$1900 for clay tile, $800-$1500 for concrete tile, $550-$1100 for wood shingles or shakes, and $1500-$3000 for slate. When hail season hits, those numbers can shift quickly as crews narrow their availability and vacancies fill with storm-related work. If your project is asphalt, you may find the most reliable window for scheduling is still influenced by weather breaks, but you will generally see the most predictable pricing path. For other materials, expect tighter windows and potential premium weeks right after a hail event.
Storm-driven demand spikes in the Kansas City area can tighten labor availability and push scheduling and pricing pressure after major hail events affecting Liberty. That means a few practical consequences: crews may be booked weeks out, and subcontractor teams might bid higher to cover expedited commitments. If your roof is due for replacement and hail has been reported in the area, plan for a longer decision window and some flexibility in start dates. This is especially true for metal and tile, where specialized crews and longer lead times affect both cost and timing. Have a contingency plan for a backup date in case weather windows shift.
Project valuation matters locally because Liberty's permit-driven re-roof process is tied to the declared value of the work. When gathering bids, present a precise scope: number of squares, material type, underlayment, protective measures, and disposal. In a storm-affected market, some adjusters and contractors discuss value carefully to avoid surprises at the end. If coverage-based work is involved, ensure the bid aligns with the insurance estimate and the actual scope you declare for valuation. A well-documented scope reduces the chance of change orders that can inflate final costs after the initial agreement.
With hail damage, the temptation to upgrade may be strong, but costs rise quickly with premium materials. Asphalt remains the most economical path, but if the existing roof is clay or concrete tile, replacements tend to follow the same material pattern unless structural constraints or specialty inspections dictate otherwise. In Liberty, where steep-slope asphalt dominates but metal, cedar, and tile appear often enough to matter, your decision should balance long-term performance, local climate resilience, and the scheduling realities driven by post-storm demand.
Get a clear picture of your project costs upfront - no commitment required.

In Liberty, a full re-roof typically goes through the City of Liberty Building Department, and a building permit is the standard path to ensure the work aligns with local codes and safety standards. The permit process hinges on project valuation, which helps document the scope of work before approval and ensures the system tracks enough detail to verify compliance once the job is complete. Because Liberty sits in a hail- and wind-prone climate, accurate documentation of the project's scope-especially when replacing under insurance coverage or after storm damage-becomes essential for both the contractor and the homeowner. The governing department will want a clear record of materials, layers, and any structural changes, so be prepared to communicate the exact plan, including the roof type, underlayment, and ventilation approach.
Once a licensed contractor submits the permit application, the city will review the plans for code compliance, including decking, flashing, ventilation, and drainage details. The review process can vary with the complexity of the project and the homeowner's neighborhood context. In many cases, the key checkpoint is confirming that the decking is sound and that flashing around penetrations and valleys is appropriate for the local wind loads and hail exposure. After approval, work can begin, but inspections are scheduled to verify that the deck is solid, the flashing is correctly installed, and the ventilation is adequate to prevent moisture buildup under the new roof. The city often requires at least one inspection during the course of the project and a final inspection when the work is completed. For projects impacted by storm damage or insurance-driven replacements, it helps to have the permit documented early in the process so the city has a clear record of the scope and any changes that occurred during repairs.
Beyond the city permit, some Liberty neighborhoods or HOAs may impose their own approval steps or overlays. Before pulling the permit, check with the homeowner's association or neighborhood association to confirm any additional requirements, such as architectural guidelines, color restrictions, or the need for a separate approval letter. Contractors usually handle these checks, but it is prudent for homeowners to be aware that a delay in HOA authorization can stall the project even after city permits are in place. In storm-affected periods, insurers may push for faster timelines, but the city's safety and code standards remain the guiding framework. Keeping a file with permit numbers, inspection dates, and a checklist of decking, flashing, and ventilation milestones can smooth coordination between the city, the contractor, and any HOA requirements.
In a market with frequent hail, wind, and storm activity, insurers expect a straightforward picture: roof age, clear photos, and a professional roof assessment can determine whether a claim moves forward smoothly or hits delays. After a big Liberty storm, you'll quickly hear about the age of the roof, the condition of flashing and vents, and the need for a dated, professional report that ties the damage to recent events. If pieces of your roof show edge damage, bruising, or granule loss, having a credible report in hand can quiet questions from adjusters who want to see the whole story, not vague assumptions about wear and tear.
Adjusters in this market may request a re-roof appraisal as part of evaluating a claim. That's not a scare tactic. It's a reminder that a contractor's notes and measurements carry weight when deciding between repairing or replacing, especially after a storm with hail markings or wind uplift evidence. The documentation you gather after Liberty storm events matters more than you might expect: dated photos from multiple angles, a line-by-line scope of the affected areas, and a clear professional roof report that identifies recent impacts. Without solid contractor documentation, the appraisal process can stretch longer and open room for disputes that could delay restoration.
Missouri's insurance climate can bring periodic rate fluctuations and tighter coverage scrutiny. This reality affects decision points after a claim: choosing to repair versus fully replacing, or upgrading to more resilient materials, can hinge on how the insurer views the overall risk, the roof's remaining life, and the evidence tying damage to the event. If a storm spurs a claim, consider not just patching the obvious holes but also evaluating whether a stronger surface-like reinforced shingles or a more durable profile-aligns with long-term protection and the insurer's perspective. The safest path is to ensure every change is supported by a robust, independent roof assessment and a detailed, photo-backed record of the storm impact.
Connect with contractors who help homeowners navigate the claims process from damage assessment to final approval.
Elite Master Contractors
(816) 707-7663 elitemastercontractors.com
1580 Ashton Dr, Liberty, Missouri
5.0 from 110 reviews
Liberty Roofing Siding Gutters & Windows
(816) 624-2713 www.libertyroofingkc.com
109 S Main St, Liberty, Missouri
4.7 from 140 reviews
Liberty experiences cold winters and frequent freeze-thaw cycles that stress attic spaces more than milder Missouri locations. When moisture behind the roof deck cannot dry out efficiently, repeated freezing and thawing gradually pushes nails, fasteners, and sealants toward failure. That slow degradation often shows up as hidden attic moisture, musty smells, or dew on plywood surfaces after a melt followed by overnight frost. The pattern is predictable enough to anticipate with a proactive ventilation plan.
Ice, snow, and thaw cycles can expose weaknesses in flashing transitions and roof edges on homes with mixed materials or aging sealants. In practice, attic ventilation must move substantial air in winter to keep rafters warmer and reduce condensation that eats at sheathing and insulation. If soffit, ridge, and gable vents are clogged or undersized, the result is concentrated moisture and cold-spot condensation that invites mold and wood rot. Improving airflow should be treated as part of the roof system's core integrity, not a cosmetic upgrade.
A typical approach looks at upgrading attic ventilation as part of the re-roofing plan, with attention to balanced intake and exhaust paths and ensuring baffles keep soffit vents free of insulation. Ventilated ridge lines and properly spaced soffits help maintain a steady flow of air, reducing condensation risk during thaw cycles. Additionally, inspect flashing transitions around chimneys, valleys, and roof-to-wall connections; winter is a harsh tester for any weak seal, and addressing those edges now can prevent costly repairs later. Keep an eye on attic moisture and address lingering leaks promptly, before winter returns.
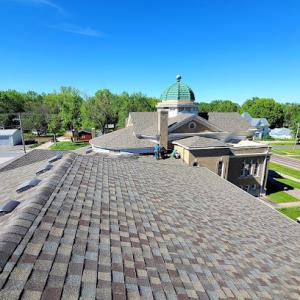
In this storm-heavy climate, leak complaints often concentrate at roof penetrations and transitions rather than only in open field shingle areas. Skylights and chimneys create multiple angles where water can bypass ordinary shingles, especially after hail or strong winds. When a re-roof is planned, prioritize the entire penetration system: how flashing sits against the deck, how the chimney knee or cricket sheds water, and whether step and counter flashing extend far enough up the wall. This focus helps prevent surprises after the first heavy storm.
The local inspection emphasis on flashing makes skylights and chimney intersections especially important details during a Liberty re-roof. Start with clean, dry surfaces and verify the deck is sound. Use continuous, properly sealed flashing boots around skylights and a solid cricket or diverter for chimneys to direct water away from seams. Ensure the transition from roof deck to the skylight curb or chimney sidewall is sealed with a compatible compound and reinforced with metal flashing that overlaps upward and outward. Do not skip the step where flashing is integrated with the valley and the adjoining shingles-misaligned flashing here invites leaks into the attic.
Steep-slope residential roofs common in this area can increase labor complexity around valleys, penetrations, and accessory flashing. When workers handle a steep roof, they should use fall-protection, secure ladders, and staged material placement to minimize foot traffic on delicate flashing zones. Pay extra attention to end points at skylights and chimney feet where shingles meet the vertical surfaces; these are common failure points after hail events. In areas where multiple penetrations line up along a ridge or near a valley, plan for additional flashing redundancy and closely inspect caulking joints for hairline cracks that can grow after a storm. For homes with metal, cedar, or tile accents, compatibility between the chosen flashing and the substrate matters just as much as appearance. Confirm that each penetration has a continuous seal that extends beyond the first layer of shingles and that any accessory flashing blends with the primary roof system to maintain a weather-tight transition.
Find contractors experienced in skylight installation, flashing, and leak repairs to bring natural light into your home.
Liberty Roofing Siding Gutters & Windows
(816) 624-2713 www.libertyroofingkc.com
109 S Main St, Liberty, Missouri
4.7 from 140 reviews
The local climate in this Northland corridor means hail storms and high winds can strike with little notice, so you'll want a roofer who moves quickly from first contact to a tarp and a full assessment. In this market, storm-driven work and emergency repairs drive schedules, and response time often correlates with how smoothly the rest of the process unfolds. You'll notice residents value crews that can be on site fast, cover damaged areas for a safe interim, and communicate clearly about the next steps, including documenting damage for your file and insurance adjuster. Look for teams that show up ready with weathered plans for rapid cleanup and a clearly mapped trajectory from temporary fixes to a complete replacement if needed.
Insurance timelines shape what you can realistically accomplish after a storm. You'll want a contractor who understands the process, can help you distinguish actual hail damage from pre-existing wear, and can provide the documentation your insurer expects without creating delays. The most trusted local pros balance thorough, board-ready assessments with a practical timeline that aligns with claim processing. Expect to see lean crews that can mobilize quickly, coordinate with adjusters, and keep you updated as your claim moves through the system. In practice, this means fewer hold-ups and fewer re-inspections, which helps you regain a dry, secure roof sooner.
The market shows unusually strong demand for re-roofing, storm damage response, and emergency repair rather than niche roof systems. Homeowners here appear to value quick response and cleanup highly, reflecting the realities of storm-driven work and insurance timelines in the Northland. Long-established, family-owned, and affordable providers all have visible presence, so buyers balance trust signals with price and availability. When choosing, prioritize local familiarity-crews who recognize typical Liberty homes, common roof pitches, and the best ways to work with insurance-and pair that with carriers who stand behind their cleanup and warranty commitments.