Last updated: Apr 19, 2026
Belton sits in the Kansas City metro insurance environment where frequent hail and wind events drive high roofing claim activity. That means storm season is not a lull-it's a sprint. The timing of a claim matters, because insurers, adjusters, and roofing crews all move faster when storms have just rolled through and the neighborhood looks pocked with impact marks. In this climate, the road from first impact to decision on full replacement can hinge on how quickly the damage is documented and verified after the storm.
Spring thunderstorms are the most locally important roof-loss trigger, with damage commonly showing up first on asphalt shingles, ridge caps, flashing, and roof penetrations. Look closely for brittle or missing asphalt shingles, hail divots on the shingles' surface, exposed granules in gutters, and dark, dented ridge caps. Damage to flashing around vent stacks, chimneys, and roof-to-wall transitions often signals wind-driven failures that escalate insurance scrutiny. Because Belton roofs are frequently near the risk envelope for hail, a small, early sign can become a larger problem if left untreated, especially after back-to-back storm events.
In this market, insurers commonly require photo documentation and an adjuster visit, and roof condition before the storm can affect whether repair or full replacement is approved. That means you should photograph every issue from multiple angles, including close-ups of shingles, flashing, and any granule buildup in gutters. Keep a dated record of the storm event, and collect visible damage across multiple roof planes if your home has a multi-section roof. When the adjuster visits, have the carried documentation ready, including recent maintenance history and any prior repairs that might influence the scope of a claim. A thorough, organized file can shorten the review window and reduce the risk of a partial denial or dispute over what constitutes necessary repairs versus total replacement.
The decision often hinges on the extent of hidden damage, the overall age of the roof, and the number of impacted sections. A roof that survived multiple recent hits or shows widespread shingle degradation after a single event may be approved for full replacement rather than patchwork repairs. Ridge caps and flashing are frequent weak points; if these components show recurrent hail impact or wind uplift damage, replacement becomes a more economical and durable choice. If repairs are pursued, they should address not just the visible hits but underlying substrate and flashing integrity to prevent new leaks during the next hail season. In Belton, the pressure from insurers to justify a total replacement can be strong when the evidence suggests broad-system failure rather than isolated misfortunes.
Act quickly after a hail event, prioritizing documentation, inspection, and communication with your insurer and a trusted local roofer. Schedule a professional inspection within a few days of the storm to capture timely evidence before heat or rain accelerates further wear. If you suspect roof damage, request an on-site assessment that includes attic inspection for signs of water intrusion and hidden damage to rafters or decking. When you file the claim, present high-quality photos, dated storm information, and a clear summary of observed issues. If the adjuster prioritizes a one-visit assessment, coordinate a follow-up appointment with a contractor to evaluate the full scope necessary for a potential replacement. Quick, decisive action minimizes the risk that small problems become full-replacement obligations, while aligning expectations with the insurance process characteristic of this market.

Brewster Roofing
(816) 750-5423 brewsterroofing.com
7926 E 171st St Ste 114, Belton, Missouri
4.7 from 90 reviews
Brewster Roofing is a roofing contractor in Overland Park, KS & Lee's Summit, MO serving Gardner, Lawrence, Belton, Blue Springs and nearby areas. Our roofing company offers residential roofing, commercial roofing, roof repair, asphalt shingle roofing, and more. We also specialize in gutters, siding, doors and more. Customers love us because of our comprehensive roof warranties and our affordable roof financing options. We also have industry affiliations and certifications such as TAMKO Master Pro Dealer, Beacon Pro Plus Dealer, & GAF Certified. If you want to experience how your most trusted Overland Park, KS & Lee's Summit, MO roofing company embraces our motto "60 years, 15,000 roofs replaced", call us now for a free estimate!
M&M Exterior Services
(816) 401-0062 mmexteriorservices.com
8426 Clint Dr Suite 235, Belton, Missouri
4.8 from 24 reviews
M&M Exteriors is a licensed general contractor specializing in roofing, siding, gutters, windows, and painting.
Brown Roofing
(816) 322-2600 www.brown-roofing.com
16109 Kentucky Rd, Belton, Missouri
4.5 from 33 reviews
Family owned, Brown Roofing has been helping residents and business owners of Missouri and Kansas since 1995. As a general contractor, we provide an experienced team for every phase of your project. Our roof/restoration projects are handled in a courteous, timely, and professional manner. We specialize in residential and commercial roofing including: architectural shingles; all types of metal & tile roofing; cedar shakes; TPO, PVC and EPDM flat roofs; and roof repairs. No money down - satisfaction guaranteed. So there is no stress on you, we work with all insurance companies for the inspection/settlement of storm and hail damage claims, whole house restoration (roof, siding, windows & gutters) and offer free inspections/estimates.
Great Quality Roofing
Serving
5.0 from 8 reviews
Great Quality Roofing is the local trusted roofer in the Beldon, MO and Prairie Village, KS areas. We offer roof repair, roof replacements, and storm damage repair for businesses and homeowners in the Leawood, KS and Peculiar, MO communities. The last thing you want to worry about is a leaky, cracked or sagging roof threatening the safety of your home and family. When your roof starts to show signs of age or damage, turn to Great Quality Roofing. You'll work closely with our local roofers to assess the integrity of your roof and get the quality asphalt roofing your home needs.

Marquee Roofing
(816) 808-6400 www.marqueekc.com
Serving
4.9 from 89 reviews
When you hire Marquee Roofing, you get more than just work done on your home, you get a commitment to excellence and a customer service experience that is second to none. With more than 20+ years of roofing experience, our dynamic team of roofing technicians have been trained and challenged to provide the best possible services in Kansas City and surrounding areas. As a certified roofing contractor in Kansas City, we offer the highest quality roofing materials and the best warranties to our customers. Our commitment is to our customers and their complete satisfaction. We work hard to ensure you get the best roof possible and stand behind every roof.

Pyramid Roofing Company
(816) 966-1101 www.pyramidroofingkc.com
Serving
4.5 from 338 reviews
Looking for reliable roofing contractors in Kansas City? Your search ends with Pyramid Roofing, Inc. As a certified residential and commercial roofing company, we’ve proudly served Kansas City homeowners and businesses since 1992. With over 35,000 roofing installations, we deliver high-quality, affordable roofing solutions—always on time and within budget. Pyramid Roofing Company is a trusted roofing contractor serving the Kansas City Metro and Springfield areas. Specializing in residential roofing, we offer expert roof repairs, installations, and inspections to protect your home.
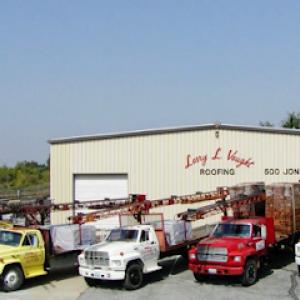
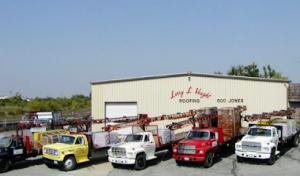
Larry L. Vaught Roofing
(816) 761-9859 www.vaughtroofing.com
Serving
4.9 from 214 reviews
Larry L. Vaught Roofing has been serving the Kansas City area since 1967. Vaught Roofing is a GAF Certified Master Elite Roofing Contractor in Kansas City. Because of GAF’s stringent standards, only 3% of all roofing contractors have qualified as Master Elite® contractors! Because of our unique factory-certified GAF Master Elite® contractor status, the GAF roofs we install are eligible for special warranties. Every certified contractor offers professional installation, superior protection and warranty options.

IBEX Roofing
Serving
4.9 from 57 reviews
Professional Roofing company for customers who want the best products! Joining the IBEX Family gets you an annual inspection, minor repairs and maintenance, and a 24/7 emergency line all for free! We’ll transform your roof to boost your home’s curb appeal, decrease your homeowner’s insurance, improve your HVAC efficiency, and increase your peace-of-mind by protecting you and your loved ones from the elements! We are Veteran-owned and operated local Roofing company in Kansas City and surrounding cities.

Alexanders Roofing
(816) 698-9115 www.alexanders-roofing.com
Serving
4.9 from 61 reviews
Alexanders Roofing is located in Overland Park, KS and serves the Kansas City Metro's residential and commercial roofing needs. We thrive on taking care of people and building upon our solid reputation.
NextGen Restoration
(877) 835-7643 nextgenrestoration.net
Serving
4.6 from 101 reviews
Since 2015, NextGen Restoration has been Leawood, KS's trusted partner for comprehensive exterior solutions. Specializing as a general contractor, cladding expert, and roofing service provider, we bring unparalleled skill to every project. From meticulous storm restoration and robust roofing installations to seamless gutter services and house siding, our commitment is to revitalize and protect your home with lasting quality. We also offer expert basement remodeling to transform your interior spaces.

Nations Roofing & Solar
(816) 678-4220 www.nationsroofingandsolar.com
Serving
5.0 from 122 reviews
At Nations Roofing and Solar, we are a Class A General Contractor and solar roof installer with 20 years of experience in roofing construction. As such, we know what makes a quality roof and can help you find one that fits your needs and budget. Our services stand out from the rest because we have long-lasting relationships with our suppliers, allowing us to offer high-quality work at competitive prices.
Next Level Roofing
(913) 671-9222 nextlevelroofingkc.com
Serving
5.0 from 83 reviews
Serving Kansas and Missouri with quality residential and commercial roof replacements and repairs.
Belton experiences hot summers with strong sun, cold winters, and occasional snow. Replacement windows must stand up to heat, UV exposure, and moisture shifts, while installation itself has to contend with thermal expansion and temporary weather gaps. Summer heat and UV in the Kansas City metro accelerate wear on window frames, seals, and glazing, making late-stage degradation more visible by mid to late summer. In contrast, winter brings freeze-thaw cycling that can stress glass and frame materials, so installation should avoid peak cold snaps when possible. For a homeowner facing storm-season repairs, choosing windows with good solar performance and durable framing helps maintain comfort and reduce energy losses as soon as crews wrap roofing work.
When hail or wind damage is a factor, the timing of window replacement often lines up with roof work for efficiency and storm-response coordination. If a hail event has affected fascia, soffits, or gutters, window openings may also bear indirect impact, such as moisture intrusion around sill flashings or warped trim. A practical approach is to schedule window replacement after a roofing assessment confirms the roof is secure and weather-tight, but before winter moisture starts to intrude. In hot spells, windows with low-emissivity glass and insulated frames help curb cooling loads during the hottest days, and low-maintenance finishes reduce upkeep in peak heat. If winter storms threaten, aim for a window project that can be weatherized quickly and protected until cold weather passes, to minimize air leaks and energy loss when temperatures swing.
Look for windows with strong seal integrity to resist expansion and contraction from heat and cold. In Belton's climate, vinyl and fiberglass frames tend to hold up well under sun exposure and freeze-thaw cycles, while composite sashes can offer improved durability with lighter weight and better insulating performance. Choose glazing with high solar heat gain coefficient control for east and west exposures to reduce afternoon heat, paired with double- or triple-pane configurations for energy efficiency through cold snaps. Pay attention to a seal system designed for exterior weathering-wind-driven rain and hail resistance in the KC metro area can stress less robust designs. The most practical choice balances energy savings, ease of maintenance, and the ability to stand up to seasonal shifts without frequent service calls.
If a roof is being replaced or repaired due to hail damage, align window installations to minimize repeated weather exposure on open openings. Consider sequencing: complete roof and siding repairs first if possible, then schedule window work while exterior temperature and humidity are favorable. In the heat of summer, plan installation early in the day to avoid peak heat, using crews that can maintain indoor comfort during the process. In late fall or early spring, target windows that are ready to meet the colder months with solid sealing and weatherstripping, ensuring that interior moisture does not become an issue during joint projects. A shared checklist with the roofing crew improves coordination: verify flashing around openings remains watertight, confirm interior amentities to protect during demo, and ensure interior teams protect finished surfaces to prevent sun-damage or paint fade from extended exposure.
During Belton's warm season, ensure installers use proper ventilation and air sealing techniques to prevent condensation buildup inside walls once the windows are set. In winter, confirm that temporary heating and ventilation arrangements won't conflict with the roof work, and that interior finishes near openings receive appropriate protection from cold drafts. If insurance-driven repairs are part of the plan, have documentation ready that notes both roof and window work, so the timing can be synchronized with the overall recovery strategy. Finally, prioritize windows with robust weatherstripping and low maintenance hardware, since the combination of heat, cold, and storm exposure makes frequent, minor adjustments less desirable over time.
When planning a roof in this market, base expectations on the provided per-square ranges for common materials: asphalt shingles range roughly from 350 to 700 USD per square; metal from 700 to 1400 USD per square; clay tile from 1000 to 2500 USD per square; concrete tile from 900 to 2000 USD per square; wood shingles or shakes from 600 to 1100 USD per square; and synthetic or composite shingles from 700 to 1300 USD per square. These figures reflect typical Belton projects and account for variations in labor, underlayment, and basic flashing. The majority of residential re-roofing in this area uses asphalt, and that material often delivers the fastest turnaround and most predictable pricing. Heavier systems like clay and concrete tile add heft to the structure and complicate decking and drainage considerations, which tends to push both labor time and cost higher than a standard re-roof.
After major Kansas City metro hail events, you should expect a surge in local demand that can strain scheduling for tear-offs, decking repairs, and flashing replacement. Contractors may experience front-loaded workloads or shifted crews as they triage storm-damaged homes, which can slightly extend lead times and influence pricing during the peak response window. In Belton, that pressure tends to translate into shorter windows for decision-making and a greater emphasis on rapid debris removal, efficient site cleanup, and clear communication about necessary repairs beyond the visible shingle damage. If your project involves a full roof tear-off, expect more variability in timing and potential brief pauses as inspectors and adjusters coordinate. Having a realistic plan for quick access to the job site, organized paperwork, and prompt permit coordination helps keep the project on track when storm response is heavy.
Asphalt shingles dominate the local market, offering a reliable balance of cost, speed, and compatibility with typical Belton homes. If a heavier system such as clay or concrete tile is under consideration, anticipate not only higher per-square costs but also added structural checks, possible decking repairs, and more labor-intensive installation. The heavier systems can require bracing, longer job durations, and sometimes longer lead times if specialized crews or fabricators are in demand after a big hail event. In contrast, synthetic or composite shingles can provide a middle path, often offering improved impact resistance at a price closer to asphalt, with similar installation dynamics. For any option, verify that the existing deck and ventilation align with the material's weight, wind rating, and expected life span, recognizing that hail-driven damage may accompany underlying concerns in the roof system.
Start with a conservative budget based on asphalt shingles as the baseline, then add a contingency for potential decking repairs or flashing replacements that may be required after a storm. If hail damage is evident on the roof or surrounding property, be prepared for a faster-paced insurance coordination process and possible adjuster visits. In scheduling, build in a small buffer for weather-related delays that are common after hail events, and identify a preferred crew or contractor who can maintain a steady pace through tear-off, decking, and roof installation stages. Having clear documentation of pre-storm condition and post-storm needs can help keep the project aligned with expectations, even when demand spikes.
A full roof replacement in this city requires a building permit. The process is designed to ensure storm-damaged roofs meet current safety and building code standards, especially after hail events and high-wiber wind seasons. In practice, the permit application is typically submitted by the roofing contractor to the city building department, not by the homeowner. This means your contractor handles the paperwork, pulls the permit, and coordinates with the city on timing. It's a good idea to verify with the contractor that the permit is in place before any tear-off begins, since work cannot proceed legally without it.
Because the permit is tied to the city's inspection schedule, timing can be influenced by the department's receipt of the project plan and any required documentation. Expect the process to involve an initial plan review, possibly a pre-inspection, and then staged inspections during the installation. If hail damage triggered the replacement, having clear documentation from the insurer and adjuster can help the city see that the project aligns with local safety standards and wind uplift requirements. Your contractor should communicate anticipated inspection windows so you can plan for access and any temporary adjustments to daily life during the install.
City inspections cover several critical components to ensure a durable, code-compliant roof. During installation, inspectors verify underlayment installation and proper edge detailing, attic ventilation where required, decking integrity, and the correct installation of flashing around chimneys, vents, skylights, and transitions. Inspections also confirm fastener patterns, attic ventilation requirements, and proper sealing at problem areas such as gable ends and valleys. These checks are not just formalities; they help prevent leaks and wind-driven failure after the project is complete.
After the roof is installed, a final inspection is required to verify that all work complies with the applicable code and the approved plans. Final approval from the city is needed before the project can be closed out and the permit officially finished. It is prudent to keep a copy of the final inspection report and any notes from the city in case future roof-related questions arise, or if the insurer requires documentation of a code-compliant installation for coverage records.
Ask the contractor for a written inspection plan with anticipated dates and a point of contact for city inquiries. Before tearing off, confirm that the permit is active and that the project scope matches the permit-this minimizes the chance of delays. If a storm response timeline is tight, request staggered inspections or expedited review options from the city, and ensure the contractor is prepared with all required documentation to avoid hold-ups at the site.
Asphalt shingles are the dominant roof covering in Belton, and the pattern you'll see most after a hail event is hail bruising across the surface, accelerated granule loss, and lifted tabs where hail hit hardest. Summer UV exposure also accelerates aging, so sections of the roof that face direct sun can show shorter life expectancy sooner than shaded sections. For homeowners, this means you may notice darkened, granular-mixed runoff in gutters after a storm, plus small, visible dimples or soft spots that weren't there before. These signs aren't just cosmetic-over time they reduce weather resistance, increase the risk of leaks, and shorten the overall life of the roof if not addressed promptly with a proper assessment and timely repairs or replacement.
Metal roofs do present a different set of vulnerabilities. In a climate with strong hail and notable temperature swings, fastener integrity, flashing workmanship, and panel-to-panel detailing become critical. You'll want to evaluate whether fasteners have loosened, if sealants have degraded, or if denting has compromised the panel field or edges. Thermal movement-expansion and contraction with heat-can reveal gaps at seam overlaps or edge trim, allowing moisture intrusion if not properly managed. When a contractor talks through metal's performance, pay close attention to the quality of the flashing and the edge details, because those are the failure points that show up most reliably in Belton's hail-and-UV cycle.
Tile, wood shake, and synthetic/composite options exist here, but they are less common than asphalt. Replacement planning often hinges on finding crews with the right specialty experience rather than assuming every roofer can deploy these materials with equal proficiency. In Belton, you may encounter crews who are comfortable with synthetic products yet less practiced with real clay or concrete tile, or conversely with cedar and wood shake but limited exposure to modern underlayment and seismic-ish detailing. Expect uneven quality across contractors, and prioritize sourcing proven, locally experienced crews who can match the material's exacting installation standards to this climate and weather history.
Explore specialists in steel, aluminum, and standing seam metal roofs built to last 50 years or more.
Brown Roofing
(816) 322-2600 www.brown-roofing.com
16109 Kentucky Rd, Belton, Missouri
4.5 from 33 reviews
In Belton's storm pattern, leaks often trace back to flashing displacement rather than field shingles alone, especially after spring wind-driven rain. That means a roof can look fine from a distance, but wind and hail shove moisture in where flashing meets vents, chimneys, and dormers. When a hail event ends, the first check should not only skim the shingles but follow the moisture trail to flashing seams and step joints. If water shows up inside, assume more than just surface damage and map every penetrations' condition before filing an insurance claim or scheduling repairs.
The city inspection process specifically checking flashing and decking makes detail work at penetrations especially important on full replacements. A fast, surface-only fix can backfire when the city's code-minded inspector spots a loose boot, a lifted corner of step-flashing, or a compromised decking edge. Expect a thorough assessment of every penetration, including plumbing stacks, vent caps, and chimney base flashing. If copper or galvanized metal shows signs of movement or separation, it can signal a broader leak path that undermines newly installed shingles.
Skylights are a meaningful enough specialty in this market that homeowners should treat curb, step-flashing, and surrounding shingle integration as a separate inspection item after hail or wind events. The transition from curb flashing to the skylight itself is a high-risk zone for water intrusion, especially when shingles have been displaced or lifted by hail impacts. If a skylight wears a dented frame or broken seal, moisture can travel under the shingles even if the rest of the roof looks solid. After a storm, request a dedicated skylight inspection and a close look at shingle integration around the unit.
Find contractors experienced in skylight installation, flashing, and leak repairs to bring natural light into your home.

Brewster Roofing
(816) 750-5423 brewsterroofing.com
7926 E 171st St Ste 114, Belton, Missouri
4.7 from 90 reviews
Even though flat-roof work isn't the dominant residential style, Belton's market sees enough additions, porches, and mixed-roof homes to warrant careful low-slope evaluation. The water can stand where it shouldn't, and that short run to a seam or edge is where trouble starts. In this climate, freeze-thaw cycles amplify edge detail and membrane vulnerability, so drainage and membrane terminations deserve special attention on any low-slope area.
Storm events concentrate water at the lowest spots first. On low-slope sections, ponding can persist after a rain and expose underlying insulation and fasteners to more cycles of wet-dry. Seams and flashing are common failure points where water finds a path from the surface to the underlying structure. In Belton, a thorough inspection should treat these areas as stand-alone systems, not just extras to the main shingle roof. Look for scuppers, parapet terminations, and transitions where metal edges meet the membrane. Corner and edge surfaces are frequent stress points after hail or heavy wind events.
When inspecting, start with the main roof and then move to any low-slope sections separately. Check for signs of ponding that align with downspouts or scuppers, and verify that slopes remain continuous toward drainage paths. Inspect seams for hairline cracks, lifted edges, or dried-out sealant that indicates aging or movement. Pay particular attention to membrane edge details; these are easy to overlook if the focus stays on shingles. On porches or additions, treat the low-slope surface as its own roof system, ensuring its drainage plane remains continuous with the primary roof where they meet.
Keep drains and scuppers clear of debris after storms, and routinely verify that membranes terminate cleanly at flashing and edges. Re-seal any compromised seams promptly and monitor flashings for serviceability after harsh weather. If ponding persists, consider addressing the slope or adding secondary drainage paths that redirect water toward a defined outlet. For any low-slope section, document its condition separately from the main roof so future inspections or storm-response work don't miss it.
Find specialists in TPO, EPDM, and built-up flat roofing systems for residential and commercial properties.
Brown Roofing
(816) 322-2600 www.brown-roofing.com
16109 Kentucky Rd, Belton, Missouri
4.5 from 33 reviews


Missouri is a high hail-and-wind claim state, so insurer reviewers in Belton tend to scrutinize roof age, prior condition, and whether damage is storm-created or wear-related more closely than in gentler markets. Expect adjusters to compare current findings against the roof's original installation date, known previous penetrations, and any nearby hail events that might have contributed to existing wear. This scrutiny can influence how quickly a claim moves from inspection to approval, especially on older homes with mixed material decks or partial replacements already in play.
Photo sets should be date-stamped and comprehensive: close-ups of damaged shingles, flashing, vents, and any hail impact marks, plus a wider shot of the roof surface to show overall condition. Keep notes of interior leaks with dates, locations, and any staining or staining progression that aligns with storm events. Collect prior maintenance records, contractor notes, and any visible sagging or moisture beneath the attic sheathing. Documentation of interior damage can materially affect claim handling in this market, so organize it in a logical sequence by date and location.
Claim timelines in Belton can stretch when regional storms create adjuster backlogs across the wider Kansas City metro. Plan for potential delays in scheduling site visits and receiving written determinations. Proactively confirm appointment windows, and maintain a clear channel of communication with the insurer or its local adjuster. If a window of severe weather is forecast, document any interim sheltering measures taken to protect the interior and roofing components.
Keep digital copies of every document, and back up photo sets with timestamped backups. When speaking with the insurer, reference the storm date, the observed damage pattern, and any corroborating hail reports from local weather services. If multiple claims arise in the same neighborhood after a big event, consider coordinating with neighbors to provide a consistent, corroborated narrative for the roof's condition and its progression since the storm.
Connect with contractors who help homeowners navigate the claims process from damage assessment to final approval.
Brewster Roofing
(816) 750-5423 brewsterroofing.com
7926 E 171st St Ste 114, Belton, Missouri
4.7 from 90 reviews
M&M Exterior Services
(816) 401-0062 mmexteriorservices.com
8426 Clint Dr Suite 235, Belton, Missouri
4.8 from 24 reviews
Brown Roofing
(816) 322-2600 www.brown-roofing.com
16109 Kentucky Rd, Belton, Missouri
4.5 from 33 reviews