Last updated: Apr 19, 2026
Hingham sits on Boston Harbor with exposed shoreline areas around Hingham Bay, the harbor, Crow Point, and World's End, so some homes face more wind-driven rain and salt exposure than inland South Shore properties. That exposure isn't cosmetic-it accelerates gradual weathering of shingles, flashing, and roof edges. In these pockets, a minor load of ice buildup can become a receding problem when the wind continually hammers the same eaves and valleys. In short, coastal homes here demand vigilance because the shoreline environment compounds preexisting aging materials.
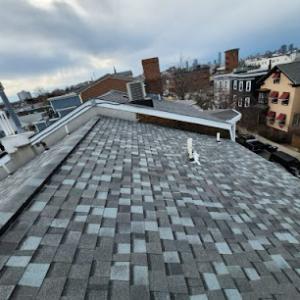
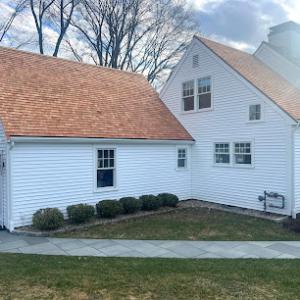
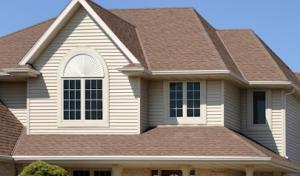
Massachusetts winter thaw cycles are a major local roof stressor, especially where older Hingham homes have marginal attic ventilation or uneven insulation that contributes to ice damming at eaves. When warm attic air migrates up and melts snow at the roof top, that moisture refreezes at the eaves, pushing against shingles and flashing. Over several seasons, repeated cycles create hairline cracks in underlayment and loosen tabs on asphalt shingles, or loosened seams in metal and tile. The net effect is a slow cascade of small leaks that only show up after a heavy melt or a late-winter freeze.
Spring wind and rain events matter locally because they often exploit already-weakened flashing, ridge caps, and shingle tabs after winter movement and moisture intrusion. After a brutal winter, ridge caps can lift, and valley flashing can bend or pull away just enough to admit water during frequent nor'easters and gusty squalls. The result is a pattern: moisture penetrates not just at the obvious seams, but around penetrations, vents, and chimney flashing that were already stressed by cold-season movement. When spring storms arrive, those vulnerabilities are exposed with a vengeance.
Act now if this past winter left you with damp ceiling spots or damp underlayment along eaves. Start with a thorough attic assessment: verify that insulation is consistently thick to keep heat where it belongs, and ensure ventilation paths are clear, with continuous intake and exhaust flows. Install or retrofit baffling to guarantee cold attic air reaches the roof deck, reducing warm-air melt that drives ice damming. Inspect all flashing along hips, valleys, chimneys, and vent stacks; secure loose flashing and replace any cracked sealant. Examine ridge caps for movement or gaps, and reseal or re-fastener as needed. In the field, look for uneven shingle wear near eaves and at penetrations, and address any damaged tabs or lifted edges before the next thaw cycle. If there's salt spray exposure, pay extra attention to metal flashings that can corrode and fail earlier than expected. Acting promptly on these areas minimizes ongoing moisture intrusion, protects interior spaces, and preserves the roof's remaining life in the unique coastal climate.
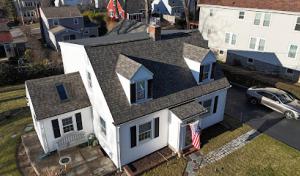
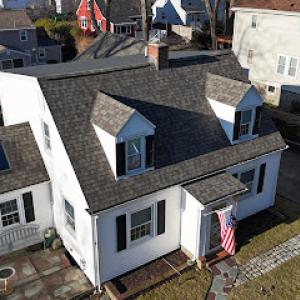
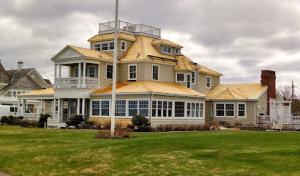
Older, character-rich homes line the harbor-adjacent streets and the historic district, where roof work must respect architectural lineage and surface detailing. In these settings, a leak-prevention plan starts long before materials are chosen. Inspect rooffaces for deteriorated valleys, chimney flashing, and dormer connections that tie into elegant but complex rooflines. The goal is to maintain the original silhouette and decorative edges while delivering a reliable weather barrier. Start with a careful assessment of where water tends to intrude: along crown mouldings, under leaded or rolled flashing, and at transitions from roof to brick and stone on porch roofs. A thoughtful approach pairs durable, compatible materials with precise detailing to keep historic fabric intact.
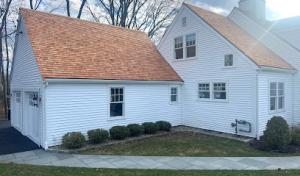
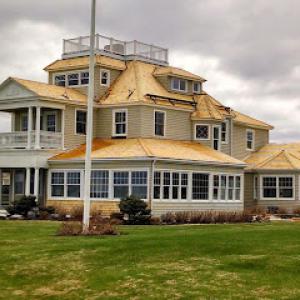
Hingham's mix of slate and copper reflects its stock of older, higher-end homes where repairability and appearance matter as much as upfront cost. When slate or copper is feasible, the result often blends best with the street's historic texture. Slate remains a long-lived option but requires finding slaters who understand the way it heels and weathers with the house's hewn edges and masonry. Copper can provide a natural patina that echoes historically copper-clad dormers and hardware, yet it introduces considerations about fasteners and underlayment that differ from asphalt or metal roofing. If repurposing existing slate, ensure the new pieces match grain, thickness, and nail line to avoid uneven shoulders that could trap ice or cause leaks. Copper accents should be planned with compatible flashing and a seamless transition to neighboring materials to prevent staining or ghost lines on brickwork.
Steeper, more intricate rooflines are a hallmark of older New England homes. In Hingham, flashing around chimneys, dormers, valleys, and porch intersections often governs leak resistance more than the chosen top layer. Plan for continuous drainage paths and deliberate design to minimize horizontal joints in valleys. Each dormer head and eyebrow window needs integrated flashing that ties into the main roof deck with counter-flashing that resists salt spray and freeze-thaw cycles. Where chimneys rise through multiple planes, consider a continuous counter-flashing system and a proper seal at the chase with corrosion-resistant materials. The far end of a porch roof, especially where it intersects with a main ridge, benefits from a dedicated kick-out flashing to direct runoff away from the soffit and walls.
The local climate can push water up and under roofing materials during thaw cycles, making ice dams a common foe. Start with attic ventilation and insulation that meet the needs of a historic drafty envelope without compromising historic space. For steeper roofs, ensure soffit vents, ridge ventilation, and baffles are balanced so cold air reaches the attic evenly. A well-insulated attic reduces meltwater on the upper slope, while properly sealed eaves prevent warm roof edge from feeding ice dam formation. When a chimney or dormer penetrates the roof, ensure the pipe-to-flashing interface includes a dripped seal and a continuous, impermeable barrier that resists snow buildup.
Choose a contractor who can demonstrate sensitivity to historic fabric and the nuances of slate and copper. Request detailed drawings of flashing transitions around dormers and chimneys, plus a plan for patching or matching existing roofing material and edge details. Expect a phased approach that prioritizes leak barriers in vulnerable zones-valleys, flanks where two roof planes meet, and the porch intersections-while preserving as much of the original surface as possible. A measured, site-specific plan makes it possible to maintain the town's venerable rooflines while reducing long-term vulnerability to leaks and ice-related damage.
Clifford Roofing
(781) 435-3194 cliffordroofingham.com
39 Main St suite 274, Hingham, Massachusetts
5.0 from 34 reviews
Clifford Roofing helps property owners maintain strong, reliable roofs that stand up to years of weather. The team handles projects of all sizes, from replacing damaged shingles to installing entirely new roofing systems. Each job begins with a detailed inspection to determine the best approach and materials for the structure. Customers often mention the professionalism of the crew, the consistent updates provided throughout the work, and the attention to detail in the final result. Clifford Roofing focuses on delivering roofs that combine durability, function, and a clean, polished appearance.

Mastercraft Roofing Siding Windows
(781) 829-2222 www.mastercraftroofingsidingwindows.com
49 Whiting St, Hingham, Massachusetts
4.8 from 64 reviews
Trust over Profit Since 1986 - *Estimators are Licensed professionals. Family business All types of Metal Roofing including shingle, standing seam & corrugated plus Asphalt Roof shingles, Synthetic Wood Roof Shingles,. All types of siding =15 years contractor for James Hardie fibercement Siding, Vinyl siding, Vinyl Everlast, LP siding All brands of windows = Andersen Certified and Vinyl windows Replacement and New Construction Windows, Doors, Graber Blinds dealer, Awnings
Ferrara Roofing & Contracting
(781) 925-5056 www.ferrararoofing.com
Serving
5.0 from 8 reviews
We specialize in residential and commercial roofing, siding & contracting projects.

Joseph T Cazeault & Sons
(781) 335-6800 josephtcazeaultroofing.com
100 Sharp St, Hingham, Massachusetts
3.9 from 7 reviews
Quality roofing for over 98 years

Flynn Roofing Company
(617) 479-3431 www.flynnroofing.com
Serving
5.0 from 63 reviews
Flynn Roofing is a small, family-owned Roofing business serving the South Shore, Metro West and greater Boston area. We have been in business for over 20 years and take pride in our work.
Pro Roof Solutions
(781) 223-6079 www.proroof-solutions.com
Serving
5.0 from 22 reviews
Pro Roof Solutions offers roofing services including roof replacement and residential roof repair. We provide sustainable, long-lasting, and cost-effective roofing solutions that meet your need and your budget. We are family owned and operated with 12 years of experience. Call us today.
Portanova Roofing
(617) 331-5815 www.portanovaroofing.com
Serving
4.9 from 107 reviews
Portanova Roofing, located at 110 King Ave, Weymouth, MA, specializes in expert roof repair, roof installation, and roof replacement services for residential clients throughout the Boston area. Founded by fifth-generation master roofer Ken D. Portanova, we blend meticulous craftsmanship with competitive pricing, making us a top “roofing contractor near me” in cities like Braintree, Quincy, and Weymouth. Our services include rubber roof replacement, architectural shingle installations, and energy-efficient roof restoration solutions. As a certified CertainTeed SELECT ShingleMaster and Owens Corning Preferred Contractor, we ensure high-quality materials and superior workmanship. Call us today for a free consultation!
South Shore Roofing
(781) 923-1072 www.southshoreroofers.com
Serving
4.9 from 112 reviews
We are a locally owned & operated roofing company completing quality, long-lasting roofing projects for local customers for 15+ years. We offer both residential and commercial roofing services, including roof repair, installation, and replacement. We also offer roof maintenance services. South Shore Roofing employs top-of-the line roofing products and state-of-the-art techniques and design to give your home or business the beautiful look it deserves, while protecting it from damage and decay from New England's harsh weather. We proudly serve customers in Massachusetts, particularly on the South Shore, accept credit cards and offer financing through a third party. Contact us for a free quote for your roof restoration or construction needs.
Doherty Customs
(774) 269-5425 doherty-customs.com
Serving
5.0 from 18 reviews
Full home remodels, custom cabinets/built-ins, fully licensed and insured, Owens Corning Preferred Roof Installer, roofing specialist, siding, windows, doors, baths, kichens

Choice Roofing
(617) 471-5888 choiceroofingcorp.com
Serving
5.0 from 12 reviews
Your first choice when it comes to commercial & residential roofing services in Quincy, MD.

Roofing Pros Plus
(781) 355-5021 www.roofingpros-plus.com
Serving
5.0 from 7 reviews
Roofing Pros Plus provides roofing, gutters, and siding services. Proudly serving the South Shore, greater Boston area, and upper Cape Cod. See the served list of towns and cities.

GN Exteriors - Roofers in Braintree
(781) 436-2234 www.gnexteriors.com
Serving
5.0 from 102 reviews
GN Exteriors is a local roofing contractor specializing in residential roofing and commercial roofing. As a leading roofing contractor in the South Shore and the best roofers in Braintree, we provide our customers with the highest quality roofing products for roof replacement, repairs, and maintenance. We believe in educating our customers on the roof installation process and the options available to them. We proudly serve Boston and surrounding areas including the South Shore. CertainTeed ShingleMaster TM and Owens Corning Preferred Roofing Contractor
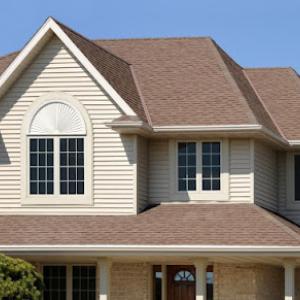
In this town, coastal exposure and freeze-thaw cycling shape material choices and details more than any single shingle brand. For bayfront and village houses, the underlayment, flashing, and ventilation system are often the real line of defense against leaks and ice damming. Asphalt shingles remain the broadest-fit option, but you'll get the best performance when the roof deck is dry and the attic space is well ventilated, with continuous ridge and soffit ventilation and properly sealed eaves. Pair that with a robust underlayment for coastal winds and you have a durable baseline that can tolerate salt spray, blowing rain, and cold snaps.
Slate and copper are locally relevant for historical and high-end homes, where patch repairs and flashing replacements come up repeatedly. In practice, that means matching visible details-fascia lines, step flashing, and dormer trim-so repairs blend in rather than stand out. Slate, when installed, benefits from careful, continuous underlayment and spacing that accounts for freeze-thaw movement. Copper flashing can offer long-term corrosion resistance, but it requires precise contingency planning for expansion at joints and around roof-to-wall transitions. On older homes, expect to replace flashing more often than you would on newer structures, and budget time to source subtle color or texture matches for repairs.
Tile and metal appear in the local market, but attention to structural loading, fastening, and detailing is essential because weather swings can stress rigid materials and exposed fastener systems. Clay and concrete tiles demand a solid, well-supported deck and appropriate ridge and eave detailing to prevent movement under snow and wind loads. Metal roofs deliver durability when fasteners are sealed and breaks are minimized, yet exposed fasteners or panel laps can become leak points if the profiles aren't properly seated against the deck and flashing is integrated with counterflashing at chimneys, skylights, and ventilation curbs. For historic homes, consider how a metal roof will age visually and whether it will require more frequent flashing refreshes to maintain a clean seal around irregular geometry.
Across all these choices, the common thread is how the roof interfaces with the house in late fall and winter. Bay and harbor-adjacent blocks often feature subtle deviations in wall lines and dormers, where leaks can travel from a loose edge flashing into the attic soffit. The best practice is to plan a roof assembly that treats each transition-chimneys, skylights, dormers, and valley intersections-as a combined system. Early attention to clean drainage, secure fastenings, and compatible sealants will save trouble when a nor'easter rolls through and the ice starts forming at the eaves.
Before any full re-roof begins, a building permit is required through the Town of Hingham Building Department. In this town, the responsibility for submitting the application typically lies with the contractor, but the homeowner can choose to submit if preferred. The permit review will look closely at how the roof ties into the house's structure, ventilation, and any historic or coastal considerations that affect flashing and weather-tight design. If you're working on an older coastal or historic property, expect questions about attic access, energy efficiency, and the method of venting the attic space. Have product specifications, roof layout, and a clear ventilation plan ready to accompany the application to minimize back-and-forth.
Inspections are commonly scheduled at key milestones to ensure the project remains compliant and weather-tight as work progresses. A first milestone often covers underlayment quality and ventilation alignment before any shingles or tile are installed, ensuring proper placement of baffles, soffit vents, and exhaust details. The final inspection occurs after completion, when the inspector will verify that all flashing, penetrations, and ventilation pathways are correctly installed and that the roof meets current Massachusetts code requirements. In a harbor-adjacent setting with routine freeze-thaw cycles, this final check is crucial for confirming there are no gaps around chimneys, skylights, or vent stacks that could trap moisture.
The review process in this town focuses on Massachusetts code compliance, with particular attention to attic ventilation and the overall roof assembly. If the project involves a vented attic, or if attic space conditions have changed due to the new roof, be prepared for questions or required clarifications about how air flows through the attic-especially in older homes with tighter original construction. If changes affect attic ventilation status, a note may be requested to document vented attic conditions and ensure continued protection against ice dam formation and moisture buildup. Keeping an explicit venting plan and details about insulation in the attic will smooth the review and aid in passing final inspection.
Coordinate with your contractor to align the timeline with permit issuance and inspection windows, and plan for potential weather-related delays typical of the area. Have contractor contact information and permit numbers readily available on-site for inspectors. If the home is in a historic district, verify any additional local requirements or approvals that may apply alongside the town permit. Proper documentation and proactive communication help keep the project on track and reduce the chance of rework tied to ventilation or flashing concerns.
Hingham's local material mix spans basic asphalt to premium slate and copper, so the town has a wider practical pricing spread than markets dominated by one or two roof types. On a typical project, asphalt shingles are the common starting point, while metal, clay, concrete, slate, and copper sit at the upper end. A practical weight to assign for budgeting is that roof replacement can range from a few hundred dollars per square for simple layouts to several thousand per square for high-end finishes and long-lasting materials. In older coastal neighborhoods and historic pockets, that spread matters more because crews may need to source specialty products or coordinate precise color and profile matching for historic accuracy.
Costs can rise on homes with complex historic roof geometry, chimney-heavy layouts, dormers, and higher-end finish expectations common in older village and waterfront neighborhoods. When the roof plane count rises or the eave line steps through multiple angles, installation time increases and waste management becomes trickier. For example, slate or copper projects in seaside towns can incur higher labor and material handling costs due to stair-stepped roofs, lead-coated flashing, and careful detailing around chimneys and dormers. If a roof has multiple ridges, valleys, and varying pitches, expect a higher per-square price even if the primary material is asphalt or metal. In short, the more traditional and intricate the roof, the more price pressure from both materials and labor.
Scheduling from late spring through early fall is generally favored in this part of Massachusetts, and storm-driven demand spikes after winter or spring weather can tighten contractor availability. If a project spills into peak season, you may see shorter crews and tighter timelines, which can push labor charges upward or compress the bidding window. Planning ahead helps secure preferred crews and avoid price jumps tied to storm cleanup or emergency replacements. If you're balancing between materials (for example, choosing slate for longevity or copper for a premium look) plan for lead times in sourcing specialty products, especially for historic clusters near the waterfront.
These ranges reflect a practical, local approach to budgeting in neighborhoods with mixed coastal exposure and historic detailing.
Get a clear picture of your project costs upfront - no commitment required.
Clifford Roofing
(781) 435-3194 cliffordroofingham.com
39 Main St suite 274, Hingham, Massachusetts
5.0 from 34 reviews
In Massachusetts, insurers commonly weigh roof age and material in claim decisions, which is especially relevant when the housing stock includes premium materials like slate, copper, and tile. If your roof is approaching or past a typical milestone, be prepared for closer scrutiny of whether damage is due to a covered peril or aging. Documentation that shows the roof's condition before a storm can matter when a claim is evaluated.
Coastal properties here may face closer scrutiny for wind-related damage documentation, so photo records of lifted shingles, flashing displacement, and interior staining are especially important. A clear set of photos taken soon after a wind event helps distinguish a new loss from long-term wear. Keep a dated archive of roof and attic conditions, and note any signs of moisture intrusion that could affect claim outcomes.
Adjusters often rely on contractor estimates and documentation, making prompt inspection after winter damage or spring storms important for homeowners pursuing a claim. Having a trusted local contractor who understands coastal exposure and typical failure points-valleys, flashing around chimneys, and eaves-can streamline the process. If you can, arrange for an early third-party assessment and share it with your adjuster to support your case.
When you suspect damage, contact your insurer promptly and request an on-site assessment within a reasonable window after a winter or spring event. Gather repair receipts, clear the area to facilitate access, and keep notes on any changes in comfort or indoor moisture. Knowing that documentation and timely inspections often influence outcomes helps you navigate claims without unnecessary delays.
Connect with contractors who help homeowners navigate the claims process from damage assessment to final approval.
Clifford Roofing
(781) 435-3194 cliffordroofingham.com
39 Main St suite 274, Hingham, Massachusetts
5.0 from 34 reviews


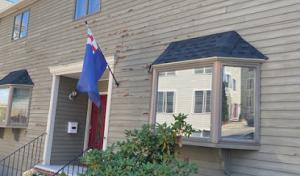
In a town with exposed coastal breezes and a mix of historic and add-on rooflines, skylight and chimney work shows up on more jobs than you might expect. The local contractor market has a clear demand for careful flashing details and venting integration, which fits older housing stock and more articulated roof designs. When planning upgrades or repairs, expect some lead time and a preference for specialty crews with masonry and flashing experience.
Skylights in mixed-era homes tend to be the most leak-prone feature when the surrounding roof is at risk. Start with a thorough surface inspection for cracked flashing, worn sealant, and improper curb height relative to surrounding shingles. In Hingham, wind-driven rain from the harbor can push water sideways under a skylight step flashing, so ensure the vertical and horizontal flashing meet cleanly with a tight seal. If a skylight is over a low-slope area, consider upgrading to a curb or a membrane-based seal that extends onto adjacent roof planes to reduce edge stress.
Chimney flashings are a frequent leak source, especially where old brickwork meets newer roof materials. In practice, check for missing or cracked mortar joints, rusted metal step flashing, and failed counter-flashing that climbs up the chimney. The goal is a continuous, watertight transition from brick or stone to the roof surface. When a chimney is perched near a hip or valley, prioritize coordinated flashing with the roof-to-wall interface to prevent water from tracking down the masonry.
Low-slope sections over porches, additions, and transitions are a recurring weak point, even though flat-roof work is not the norm here. Pay attention to decked transitions and edge terminations, where membrane seams can fail if not properly overlapped and flashed into the surrounding field. Ensure drainage is clear and that the membrane terminates with positive edge seals into parapets or flashing boot sections.
Leak tracing in this town often requires separating failures at masonry intersections, skylight flashing, and low-slope membranes rather than assuming the field roofing is the only problem. Start with a controlled water test from the suspect zones and trace inward along the most likely paths. Document any dampness at joints or seams and verify prior repairs in masonry with a close look at sealants, grout, and flashing steps.
Find contractors experienced in skylight installation, flashing, and leak repairs to bring natural light into your home.