Last updated: Apr 19, 2026
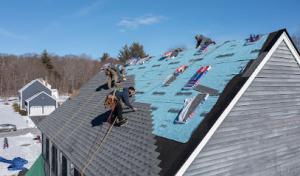
Plymouth's position on Massachusetts Bay leaves many neighborhoods exposed to Nor'easter wind-driven rain and winter storm cycles that can turn minor flashing defects into active leaks. The combination of coastal winds, drifting snow, and rapid thaw cycles creates a perfect storm for ice damming on roofs that aren't fully prepared. In sections where shingles have seen years of exposure to harsh weather, a tiny gap in flashing or a tired roof vent can become a channel for meltwater that backs up under shingles and leaks into the attic or ceilings. This is not a problem that develops overnight, but when a storm hits, the consequences can be immediate and costly.
Cold snowy winters followed by thaw periods make ice damming a leading roof concern in this area, especially where older roof assemblies have uneven ventilation or insulation. A roof with inadequate soffit intake paired with restricted attic airflow traps heat that melts snow from the bottom up. The meltwater refreezes at the colder eaves, forming ice dams that back up under shingles and into the roof deck. In coastal-adjacent blocks, wind-driven rain compounds the issue, pushing moisture under exposed-edge flashing and at roof-to-wall transitions. In practical terms, that means a small flashing imperfection can become a water entry point after a big storm or a rapid thaw.
Neighboring homes near the coast or along high-wind corridors may notice faster shingle wear, lifted tabs, and edge damage after repeated winter and summer storm events. Look for shingles that curl at the edges, soft or spongy sections in the decking, and metal flashing that shows gaps or corrosion. In the attic, check for damp insulation, dark stains along rafter tails, and any warm spots that indicate heat leaking from living spaces. While a few loose tabs might not scream catastrophe, the pattern of edge damage and recurring damp patches after storms is a loud warning signal.
First, address the attic as the first line of defense. Ensure a clear, continuous path for ventilation from soffits to ridge vents and verify insulation depth to meet climate needs without creating hot spots. If insulation is compressed or missing near the eaves, add or restore it, aiming for an overall level that reduces heat transfer to the roof deck. Seal air leaks around penetrations and fixtures in the attic to prevent warm room air from feeding ice dam formation. Improve or repair flashing where the roof meets walls, chimneys, and skylights, focusing on any areas with prior water marks or staining.
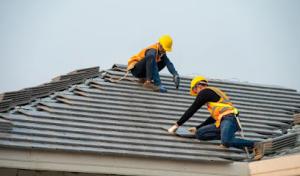
Second, inspect the roof surface for edge integrity. Prioritize repairs to any raised or lifted shingles, loose tabs, or missing granules on the lower edges of the roof. If a storm reveals a toppled seal around gutters or downspouts, address it promptly to keep meltwater from pooling at the eaves. Consider temporary measures during a heavy storm season, such as protecting exposed edges and ensuring downspouts are clear, to channel water away from the fascia.
Third, develop a rapid-response plan for leaks. If active dripping appears, minimize interior damage by placing buckets under drips, placing a tarp over the most vulnerable area from the exterior if access is safe, and calling a local roofer who understands winter conditions and coastal wind patterns. Quick action can prevent water from migrating into walls, ceilings, and electrical areas.
Think beyond a single season. A roof with balanced ventilation, adequate insulation, and durable edge protection stands up better to repeated freeze-thaw cycles and Nor'easter pressures. For homes closer to the coast, consider reinforced edge systems and high-quality flashing materials to resist wind-driven moisture. Choosing a roof assembly that pairs with proper attic conditioning can markedly reduce the chances of ice damming turning into active leaks, keeping homes safer and drier through the long Plymouth winters.
In Plymouth, asphalt shingles dominate replacements because they fit the area's large stock of pitched residential roofs and are easier to repair after storm damage than heavier specialty systems. They respond well to the freeze-thaw cycle, and recent architectural and premium asphalt options give durable performance with simplified flashing details around dormers, chimneys, and vent stacks. When choosing asphalt, pay attention to shingle weight and underlayment compatibility, as a light or mid-weight shingle paired with a robust underlayment can handle coastal salt spray exposure better than older, thinner varieties. For homes that have history or architectural details, selecting shingles that mimic wood or slate can preserve curb appeal while keeping the repair footprint small after a coastal storm. In practical terms, consider shading and ventilation in attic spaces to reduce ice dam formation, and ensure the roof deck is solidly nailed to resist high-wind events common in coastal storms.
Metal roofing is locally relevant for homeowners seeking better snow shedding and wind performance, but detailing at eaves and penetrations matters in freeze-thaw conditions. Metal panels shed snow quickly, reducing the spread of ice along the eave, which can otherwise back up under shingles and create damming. The key here is a careful edge and flashing plan: continuous soffit-to-ridge underlayment, proper end walls, and well-sealed penetrations for vents, plumbing, and skylights. In homes with historic cedar detailing or shallow eaves, a retrofit with metal over existing roofing requires precise trim and closure to avoid moisture traps. Choose metal profiles with good wind uplift resistance and consider a finish that holds up to coastal salt exposure. For new installations, a standing-seam system offers robust performance, while exposed-fastener panels should be paired with tight fastener seals and factory-applied sealants to avoid corrosion at fastener points.
Wood shingles and shakes remain part of the regional visual tradition around Plymouth, but moisture exposure and maintenance demands are a bigger issue here than in drier climates. Cedar holds up surprisingly well when kept dry, but coastal humidity and salt spray accelerate grain checking and moss growth on shaded sides. If choosing wood, select faster-drying stock and apply a high-quality, breathable sealant with periodic resealing to minimize water ingress. Roofs with wood surfaces should feature a robust ventilation strategy to reduce moisture buildup in winter, and a careful inspection plan after winter storms to catch loose shakes or surface cracks before they migrate into the attic. Local homes with historic lines may prefer wood for authenticity, but be prepared for regular maintenance cycles and potential spot repairs after storms.
Clay and concrete tiles bring a long lifespan and a distinctive look, but weight and wind performance demand careful assessment. In exposed coastal conditions, tiles must be securely anchored and adequately reinforced at hips, ridges, and eave lines to resist salt-laden windborne debris and freeze-thaw pressure. These systems work best on solid decks with reinforced framing capable of carrying the heavier load. If the roof slope and structure allow, these tiles can deliver excellent durability, yet installation complexity increases the risk of damage during severe weather events. Consider a detailed assessment of deck condition, roof-to-wall transitions, and vent and chimney penetrations to mitigate ice dam risk and wind-driven leaks.
Synthetic and composite shingles offer a modern blend of durability and design flexibility, often with enhanced resistance to hail and salt spray. In Plymouth, these can bridge the gap between traditional wood aesthetics and low-maintenance performance. Look for products with tested freeze-thaw stability and robust UV resistance, plus a sealant system that remains flexible in cold months. When selecting synthetic options, verify compatibility with existing roof decks and underlayments, and confirm that the manufacturer's installation guidelines address coastal salt exposure and wind zones. This can provide a practical, mid-range upgrade for homes transitioning from older asphalt or wood systems.
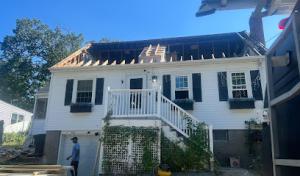
Plymouth pricing is affected by the town's mix of older homes, larger suburban houses, and coastal properties, which can increase tear-off complexity, access challenges, and flashing scope. When estimating a full replacement, start with the base price per square to match the roof material you choose, then add for specialties like ice dam mitigation, coastal salt exposure, and attic ventilation upgrades. In this market, you'll see a wider spread between low- and high-end materials, driven as much by labor and access as by the product itself.
Material selection drives both initial price and long-term performance against Nor'easter wind, rain, and winter freeze-thaw cycles. Asphalt shingles anchor the low end of the market, offering straightforward installation and decent wind resistance for relatively modest costs. If you're weighing metal, wood shingles or shakes, or tile, be prepared for higher tear-off complexity, additional flashing requirements, and more specialized labor. Synthetic or composite shingles sit in between for cost and durability, often delivering better curb appeal with competitive installation demands. In practice, asphalt might run in the range shown, while metal or tile could push labor closer to the higher end of the spectrum.
The typical cost range for common roof types in this climate looks like this: Asphalt Shingles from roughly 350 to 700 USD per square, Metal Roofing from 850 to 1500 USD per square, Clay Tile from 1100 to 2300 USD per square, Concrete Tile from 950 to 1800 USD per square, Wood Shingles/Shakes from 600 to 1100 USD per square, and Synthetic/Composite Shingles from 700 to 1200 USD per square. Those figures cover the material and basic labor, but Plymouth projects often require extra attention to tear-off debris, scaffold setup for multi-story homes, and precise flashing around chimneys and skylights.
Storm-driven demand spikes after Nor'easters and summer thunderstorm events can tighten scheduling and push labor pricing upward during busy repair and replacement periods. If a project lands during a peak spring-summer window, expect tighter crew availability and potential weather-related delays. In coastal areas, crews may also factor in salt exposure checks and corrosion prevention measures, which add a small but meaningful uplift to both material handling and fastening requirements.
When you're comparing bids, insist on a detailed breakdown that names tear-off scope, access challenges, and flashing work specific to your home's shape and exposure. Ask for a written plan addressing ice dam prevention, attic venting improvements, and gutter protection as part of the replacement package. Since coastal exposure can influence fastener choices and underlayment requirements, require confirmation that the proposal accounts for salt tolerance and wind-driven rain conditions. Finally, verify that the chosen material's warranty aligns with Plymouth's freeze-thaw cycles and storm load expectations so you're not surprised by mid-life repairs after a brutal winter.
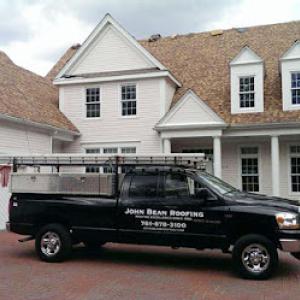
John Bean Roofing
(781) 878-3100 johnbeanroofing.com
Plymouth, Massachusetts
4.9 from 140 reviews
John Bean Roofing, a leader in the roofing industry for 40 years, proudly serves the surrounding areas of Boston, Plymouth County, Middlesex County, and Cape Cod with state-of-the-art commercial and residential roof repair and services. Whether you need a new roofing system, downspouts, or siding installed, we guarantee your project will be completed on time and within budget.
JRM Roofing Company
(781) 733-3671 www.jrmroofingco.com
19 Dickson Dr, Plymouth, Massachusetts
5.0 from 65 reviews
JRM Roofing Company is a multifaceted exterior contractor, offering specialized services in various roofing types, siding, trim, windows, doors, gutters, and more. Owner Joe Memmo draws upon his 18+ years of experience and knowledge to help clients achieve their desired exterior designs for their homes or businesses.

Marine Home Improvement
(781) 603-9133 www.marinehomeimprovement.com
Plymouth, Massachusetts
4.9 from 120 reviews
Marine Home Improvement, Inc provides roofing, siding, windows, doors, porches and deck construction services in the Boston and South Shore, MA area.
Atlas Roofing & Construction
(774) 313-7714 www.atlasroofing.net
102 Hedges Pond Rd Unit 2, Plymouth, Massachusetts
4.9 from 70 reviews
Atlas Roofing & Construction provides residential and commercial roofing, siding, and windows in the Plymouth, MA, area.
Hannigan Roofing
(508) 209-1352 hanniganroofing.com
6 Town Wharf, Plymouth, Massachusetts
5.0 from 17 reviews
Hannigan Roofing: Your Roofing Experts For 25 years, Hannigan Roofing has been a premier roofing service in the Cape and South Shore areas. As a local, family-run business, we specialize in high-quality roofing solutions. Our experienced team ensures top-notch craftsmanship, using premium materials and innovative techniques. Customer satisfaction is our priority; we tailor services to your needs, emphasizing clear communication and reliability. Trust Hannigan Roofing for all your roofing needs and experience excellence in every detail.

Craffey & Co Roofing
10 Cordage Park, Plymouth, Massachusetts
5.0 from 14 reviews
Craffey Roofing, your premier roofing contractor in the heart of Plymouth, brings unparalleled expertise and commitment to excellence in every project. With a legacy of craftsmanship spanning decades, our skilled team is dedicated to delivering top-tier roofing solutions tailored to meet the unique needs of our clients. From meticulous roof installations to swift repairs and thorough inspections, we prioritize quality materials and precision workmanship to ensure the longevity and resilience of your roof. At Craffey, we understand the significance of a secure and stylish roof, blending functionality with aesthetic appeal. Trust us for reliable, top-notch roofing services that stand the test of time.

Cazeault Roofing & Siding
47 Liberty St, Plymouth, Massachusetts
4.8 from 21 reviews
If your roof is showing signs of wear, it might be time for a roof replacement Plymouth. At Cazeault Roofing & Siding, we know how important it is to have a roof you can rely on. We’ve been working with Plymouth homeowners for years, providing solid, straightforward roofing solutions with no sales pressure. When you contact us, we won’t overwhelm you with jargon or unnecessary upsells. Our team arrives on time, works skillfully, and always leaves your property clean. You’ll get an honest quote with no surprises. Just a quality roof that will keep your home safe for years. If your roof is ready for an update, call us. We’ll make the process as simple as possible.
Kent Roofing Company
(508) 598-3977 www.kentroofingusa.com
Plymouth, Massachusetts
5.0 from 10 reviews
A proud family-owned and operated roofing company serving the Southern Massachusetts and Cape Cod area.
Emmanuel Construction
(508) 367-1679 emmanuelconstruction.com
Plymouth, Massachusetts
5.0 from 9 reviews
Emmanuel Construction, Inc is a local roofing contractor in Barnstable, MA that is committed to excellence in every aspect of our business. We uphold a standard of integrity bound by fairness, honesty, and personal responsibility. Our distinction is the quality of service we bring to our customers. Accurate knowledge of our trade combined with ability is what makes us true professionals. Above all, we are watchful of our customers' interests and make their concerns the basis of our business. We offer a variety of services such as roof installations, roof repairs, siding installations, and much more.
Falcone Roofing
(508) 746-6866 falconeroofingco.com
114 Long Pond Rd, Plymouth, Massachusetts
4.6 from 20 reviews
Falcone Roofing Company has proudly been in business for 29 years running as a family owned and operated company, serving Southeaster MA. We offer a variety of exterior services such as *Roofing*, *Siding*, *Windows*, *Skylights*, *Trim*, *Gutters*, and *Dumpster Rentals*. We are an exterior renovation expert company with Master Carpenters and highly educated employees looking to help our community build their dream homes. Falcone Roofing has been awarded Greater Plymouths Best Roofing Company for 21 years strait.
Gustafson Contracting
(508) 403-4943 gustafsoncontracting.com
14 Jonathan Cir, Plymouth, Massachusetts
5.0 from 4 reviews
Our team of skilled roofers has the tools and the knowledge to handle nearly any project. We're a locally-owned and -operated roofing company with over a decade of experience, and we proudly serve Greater Cape Cod We gladly provide free written estimates, and we'll file your claim should your repairs be covered under your insurance policy.
D & P Residential Contractors
(508) 591-7696 dandpresidential.com
Plymouth, Massachusetts
5.0 from 3 reviews
Call (508) 591-7696 for a free estimate! Fully licensed and Insured for all phases of roofing, decks, trim repair, gutters, windows, and doors.
When planning a full roof replacement, permits are not optional. The Building Department reviews the project scope and verifies contractor credentials before any work proceeds. In this coastal climate, where storms and freeze-thaw cycles stress structures differently, that pre-approval helps prevent risky substitutions or rushed work that can fail under Plymouth's demanding conditions. Expect the department to look closely at the proposed underlayment, flashing details, and the contractor's experience with the local roof types common to older cedar-shingle homes and newer suburban builds.
Inspections are not a box to check after the last shingle is nailed. In Plymouth, an inspection occurs before concealment of underlayment or attachment details, so every fastener pattern, venting, and margin detail must be accessible for review. This is your chance to catch discrepancies that could affect seasonal performance, especially during ice-dam prone winters and Nor'easter-driven debris from the coast. After completion, a final inspection confirms the work meets code and the specifics approved at the outset. Skipping or rushing this step can leave you with unresolved questions if a problem surfaces later.
Final approval matters beyond aesthetics; it can influence occupancy-related signoffs and permit closure. If you're moving into a newly installed roof-whether you're restoring a historic cedar-shingle or upgrading to a modern synthetic-confirm that the inspection closeout is complete and documented. Don't assume the contractor has handled every step. A clear, signed closeout ensures you have a definitive record that the work passed all required checks and aligns with Plymouth's expectations for durable, storm-ready roofing.
Coordinate with the Building Department early to align the project timeline with permit checks. Keep the inspector informed of any changes to materials or fasteners, especially if modifying from traditional shingles to metal or synthetic options common in coastal rebuilds. Have a clear plan for access to key attachment points during the pre-concealment inspection, and request written confirmation once the final inspection is approved. This proactive approach helps protect your roof and your peace of mind through Plymouth's seasonal extremes.
In the local climate, insurance adjusters expect clear lines between pre-existing wear and new storm damage. Massachusetts insurers commonly want documentation separating old wear from recent storm damage, which is especially important in Plymouth where winter storms and coastal wind events can create layered damage histories. When a claim hits, a well-documented roof story can determine whether damages are covered or restricted by aging-conditions.
You should photograph shingles, flashing, interior leaks, and any storm-date evidence quickly because adjusters may ask for both weather context and contractor estimates. Dry, daylight photos showing the roof's condition before and after a storm help tell the timeline of damage, particularly on shingles with curling, lifted flashing at valleys, or compromised soffits that can worsen water intrusion. Include close-ups of edges and gable or chimney flashings, and capture lingering leaks from attic spaces to corroborate where water traveled inside. Weather context shots, like storm clouds or high-wind gusts, can also be useful when presenting a claim.
Plymouth homeowners should understand that layered damage histories can complicate settlement decisions. A roof that has endured multiple coastal wind events and freeze-thaw cycles may show cumulative wear that tests the insurer's perspective on cause and extent. The more clearly you can separate what happened during the current storm from prior wear, the stronger the case for a fair adjustment. If a contractor's estimate is part of the claim, ensure it explicitly describes both the present damage and any longstanding issues that could affect repair or replacement decisions.
Roof age and material can affect premiums and underwriting in this market, making documentation more important for older roofs after major regional storm seasons. Your records should reflect the roof's original material and age, plus a concise note on any upgrades or repairs performed since. This helps an adjuster quickly assess the overall risk profile and accelerates the claim review, reducing back-and-forth during a stressful period.
Connect with contractors who help homeowners navigate the claims process from damage assessment to final approval.
JRM Roofing Company
(781) 733-3671 www.jrmroofingco.com
19 Dickson Dr, Plymouth, Massachusetts
5.0 from 65 reviews
Atlas Roofing & Construction
(774) 313-7714 www.atlasroofing.net
102 Hedges Pond Rd Unit 2, Plymouth, Massachusetts
4.9 from 70 reviews
In Plymouth's freeze-thaw climate, skylight curbs, chimney flashing, and roof-to-wall transitions are common leak points once sealants age or metal details loosen. Coastal exposure adds wind-driven rain that can exploit small gaps around penetrations long before a visible water stain appears. Older homes found throughout Plymouth often have multiple penetrations and masonry elements that need careful flashing integration during re-roofing, not just shingle replacement. Expect that the combination of sea air, salt, and fluctuating temperatures accelerates wear on seals, metal flashings, and counter-flashing around these features.
Skylight curbs sit at the intersection of flat surfaces and pitched roofs, where sealant dries, cracks, or shrinks over time. In this market, a neglected curb can shed water right onto the interior corner where the flashing meets the shingle line. Check the integrity of sealant joints, especially where the curb meets the curb flashing and where glass meets framing. If the curb flange shows corrosion or consistently wicks moisture after storms, plan for a flashing overhaul during a re-roof-not a quick reseal. Pay attention to wind-driven spray that can force moisture between the flashing and the curb even on roofs that look dry after inland-style storms.
Chimney flashing is a layered system: base flashing into the masonry, counter-flashing over the brick, and step-flashing along the sides where the roof meets the chimney. In harsh winters, freezing water can pry apart these joints as mortar spalls. Inspect the chimney cap and prevent moisture from migrating down through brick ties. When re-roofing, ensure step-flashing is continuous from the roof deck to the chimney sides, with proper sealant at saw-cut joints and masonry joints. Masonry elements require compatible flashing materials that resist salt-laden air and freeze-thaw cycles.
Where the roof meets a wall, improper or aged sealants and flashing can channel water behind fascia boards or gutter lines. In Plymouth, wind-driven rain often exploits these transitions first. During a re-roof, verify that the transition is integrated with continuous flashing behind the siding, plus a proper drip edge and kick-out flashing where applicable. If sealants pull away or color changes appear on interior ceiling corners near these areas, expect the leak path to follow the wall line up to attic rafters. Regular attention to these transition zones pays off when coastal storms hit.
Find contractors experienced in skylight installation, flashing, and leak repairs to bring natural light into your home.
JRM Roofing Company
(781) 733-3671 www.jrmroofingco.com
19 Dickson Dr, Plymouth, Massachusetts
5.0 from 65 reviews

Late spring through early fall is generally the most workable replacement window in Plymouth, but spring moisture and sudden summer storms can still disrupt tear-off schedules. If planning a full roof replacement, aim for mid- to late spring or early fall when temperatures are moderate and freeze-thaw risk is low. Historic cedar-shingle homes and newer suburban roofs alike benefit from avoiding peak heat and heavy coastal humidity, which can stress underlayment and fasteners. Scheduling with a local contractor who understands coastal wind patterns and seasonal rain gaps helps keep the project on track, even when a stray thunderstorm interrupts sequence.
Winter emergency work is common locally because snow load, ice dams, and active leaks can force temporary repairs before full replacement weather arrives. If a sudden leak appears after a nor'easter or during a cold snap, prioritizing rapid tarping and temporary fixes can protect interior spaces while awaiting a stable window. In Plymouth, the time between heavy coastal storms often creates a short, workable lull; use that window to advance inspection and planning so a longer replacement can be completed when conditions improve. Consider confirming that the chosen crew can perform safe, code-compliant temporary repairs during snow cover or icy access conditions.
Autumn in Plymouth brings leaf buildup and wind events that can hide drainage issues right before winter, making pre-season inspections especially useful. A thorough fall check helps catch clogged gutters, impaired fascia, and minor shingle damage before bones-chilling weather arrives. In neighborhoods with a mix of historic cedar and newer materials, a targeted fall tune-up prevents misreads caused by seasonal debris and ensures drainage paths stay clear. If a replacement is planned for next year, consider tying inspections to leaf fall timing so issues are flagged and scheduled before storms start to march in.
Coastal storms and busy contractor calendars can compress windows short, so book early and leave a flexible buffer for weather delays. For any replacement, secure a plan that prioritizes proper attic ventilation, ice-dam strategies, and sealant compatibility with existing materials. In Plymouth, align the project timeline with the seasonal rhythm-emergency work in winter, careful planning in spring, and preventative checks in autumn-to minimize disruption and maximize long-term performance.
While pitched roofs dominate Plymouth, low-slope sections commonly appear on additions, porches, and mixed-roof homes where drainage and membrane tie-ins become critical. Those easier-to-mail-through areas often hide leaks until a freeze-thaw cycle or a spring rain reveals the weaknesses. In this climate, the combination of coastal spray, salt, and sudden temperature swings accelerates wear on any visible seam or flashing.
Freeze-thaw cycling and spring rain can expose ponding or seam weaknesses faster on these smaller low-slope roof areas than on the main steep-slope roof. Look for pooled water near parapets, step-down transitions, and chimney penetrations. Seams along horizontal laps, flashing around skylights, and vent collars can deteriorate quickly after a harsh winter. In concrete and synthetic membranes, horizon lines where two planes meet are especially vulnerable to micro-tears caused by wind-driven spray and edge exposure.
Start with a seasonal walk to observe drainage patterns after rain and after a freeze-thaw event. Note any standing water that persists more than 48 hours and inspect membrane edges where additions tie into the main roof. On overhangs or covered porches, check for loose flashing, lifting edges, or exposed fasteners. At interior points where additions join the existing roof, look for staining or dark spots that suggest slow leaks forming behind insulation or drywall. If moisture is seen, document dates, locations, and any accompanying noises or odors to guide a professional assessment.
Plan a targeted maintenance cadence for these areas, focusing on ensuring proper slope and clear drainage from the added sections. Promptly address small repairs before they grow into larger issues, especially around penetrations and transitions. When seasonal storms or salt-laden winds sweep through, perform a quick post-storm check of low-slope interfaces and flashing to catch problems early and protect the longer-term integrity of the entire roofing system.
Find specialists in TPO, EPDM, and built-up flat roofing systems for residential and commercial properties.