Last updated: Apr 19, 2026
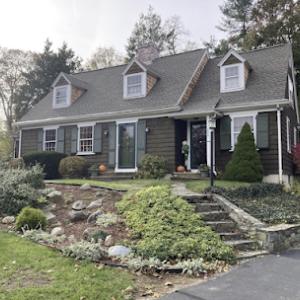
In this coastal setting, winter can feel relentless: freeze-thaw cycling that clings to eaves and around roof penetrations. When water melts on a sunlit day and refreezes at night, ice dams form and push against shingles, flashing, and vents. That repeated up-and-down cycle is the primary driver of moisture intrusion around dormers, chimneys, skylights, and vent pipes. If eaves aren't protected with solid insulation and proper attic airflow, meltwater backs up and leaks into soffits, decking, and interior ceilings. This is not a one-and-done problem; it's a season-long risk that compounds with every cold snap.
Humid summers compound the danger. Attics can trap heat and moisture, feeding condensation on rafters and through attic hatches or mechanicals. Condensation on ducts, baffles, and insulation layers can create long-term rot and mold risk that isn't obvious from the attic floor. When moisture sits against cold roofing members, it accelerates deterioration of underlayments, fasteners, and flashing. You're not simply fighting ice dams; you're managing a year-round moisture cycle that can quietly degrade the roof deck if left unchecked.
Ventilation design matters more than you might think, especially on full roof replacements. Attic airflow details are scrutinized during inspection; the intent is to prevent pockets of still, moist air that fuel condensation and frost damage. The fastest fixes are often simple: ensure a clear path for intake and exhaust across the attic, reduce thermal bridges, and verify that soffit vents, ridge vents, and baffles are properly sized and unblocked. In higher humidity months, balanced ventilation helps keep roof deck temperatures closer to ambient, reducing condensation potential. If the attic is too tight or leaky in the wrong places, you'll still get condensation on cold surfaces even with other measures in place.
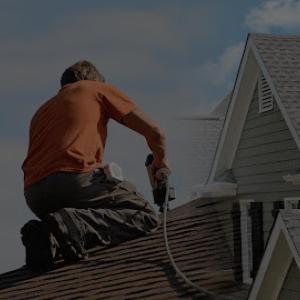
Scan for telltale signs: dark staining along eaves, curling shingle edges near roof penetrations, rusty or darkened fasteners, and soft decking around vent penetrations. Inside the attic, look for damp insulation, moldy rafters, and attic hatch condensation. Pay attention to areas where pipes, chimneys, or satellite dishes breach the roof line-these are common dam sites. If ice damming appears only after heavy snowfall followed by melt, tightening attic ventilation and insulation becomes a top priority, not a cosmetic concern.
Begin with a quick attic audit. Check insulation depth along the kneewall and attic floor; aim for a continuous layer that minimizes warm-air leakage into the roof cavity. Re-seat or install vent baffles to keep soffit vents open and ensure ridge vents can exhaust warm air. Clear any debris from soffits and air intakes. Seal obvious air leaks with high-quality sealants or closure products around attic access doors and around penetrations.
From there, coordinate a targeted roof replacement plan that integrates roof deck ventilation with the new materials. Choose flashing details and waterproof underlayment configurations that address potential dam sites around chimneys, skylights, and vents. For homeowners facing recurring ice damming, the emphasis should be on reducing heat loss into the roof line and improving attic dryness, because a dry roof plus robust flashing is your best defense against winter moisture damage.
Warwick's position on Narragansett Bay means wind-driven rain can slam roofs with less warning, seeping through marginal flashing, loose ridge details, and the exposed edges of aging shingles. A sudden Nor'easter or spring squall can press rain hard against the worst vulnerable spots, turning a quiet ceiling into a damp surprise. Even when a quick inspection from the ground looks fine, the wind can push water under the shingle edge or behind a low-flash collar, where you can't see it until the damage shows up inside.
Spring and fall storms in Warwick often arrive with high winds and heavy rain within hours, not days. That timing matters: the roof has little time to dry between gusts, and each burst of rain can exploit any small flaw. Ridge cap laps that have shifted, torn sealant, or compromised drip-edge corners become channels for water to funnel downward along joints. The result is leak events that may not be obvious from the street but will show up as ceiling staining, discoloration, or peeling paint between storms.
Local homeowners frequently need rapid tarping and leak response because storm timing can interrupt scheduling and leave roofs exposed between weather windows. When a storm is imminent or active, prioritize quick, decisive protection: cover suspected penetrations with sturdy tarps anchored to solid fascia or decking, and confirm that tarps extend far enough to channel water away from eaves and penetrations. After a storm, conduct a careful surface check for loose flashing, uplifted shingles, or damaged ridge lines, then address any exposed edge where water could re-enter.
Before the next big rain, walk the roof with a flashlight during dry periods to locate tired flashing, rusted nails, or lifted shingle edges along valleys and eaves. Re-secure loose metal flashings with roofing nails and sealant, paying attention to the joints where wind-driven rain tends to pool. Keep an eye on ridge caps; a cracked or displaced cap can act like a chimney for moisture under pressure. If a leak is detected, don't wait for a ceiling stain to appear-document the area with photos, place temporary tarps, and arrange a vigilant follow-up from a trusted roofer who can quickly mobilize between weather windows. In Warwick's coastal climate, the difference between a resolved leak and repeated water intrusion often comes down to swift, targeted action at the first sign of trouble.
Find local contractors experienced in assessing and restoring roofs after hail, wind, and severe weather events.
RTP Roofing
275 W Natick Rd Suite 800, Warwick, Rhode Island
5.0 from 196 reviews

Quality Exteriors & Roofing Of RI
(401) 738-8245 www.qualityexteriorsinc.com
117 Cady Ave, Warwick, Rhode Island
4.7 from 60 reviews
Couto Construction
(401) 420-7248 coutoconstruction.com
895 Post Rd, Warwick, Rhode Island
4.9 from 400 reviews
Couto Construction is the most-trusted home exterior renovation serving Warwick, Rhode Island and surrounding areas since 1987. A family-run business they are a one-stop shop for all your home's exterior needs, specializing in roof replacement and repair, siding, windows, doors, gutters, and attic insulation. Their team of certified contractors brings decades of expertise ensuring top-quality results that last. They use only the best materials and back their work with a peace-of-mind 50-year warranty. Get a free inspection and estimate and Couto Construction will work closely with you to understand your needs and budget, ensuring a smooth and stress-free home exterior remodeling experience.
RTP Roofing
275 W Natick Rd Suite 800, Warwick, Rhode Island
5.0 from 196 reviews
Established in 2006, RTP Roofing is a well-established, trusted roofing contractor serving the Rhode Island community. RTP Roofing is committed to delivering top-quality services, specializing in residential and commercial roofing. Whether fixing a leak, installing a new roof, or replacing an existing one, RTP Roofing has the expertise to handle all your roofing needs. Our roofing company also offers comprehensive siding and gutter installation services, ensuring that your property has a sturdy roof and boasts impeccable exterior features. With a focus on precision and customer satisfaction, RTP Roofing is the go-to choice for all your roofing and exterior improvement projects.

United Home Experts of Rhode Island
(401) 593-0101 unitedhomeexperts.com
3970 Post Rd, Warwick, Rhode Island
5.0 from 44 reviews
We are an exterior home and building improvement company, grounded by great people that love the craft. Our niche is long-term, low-maintenance roofing, siding, windows, doors and painting solutions. We’re changing the face and reputation of the home improvement industry by uniting top quality products, 25+ years of experience on New England homes, innovative technology and some of the most talented and kind people on earth. Based in Ashland, MA, and founded in 1998, we are family owned and professionally operated, servicing Massachusetts, Rhode Island, Northern Connecticut and Southern New Hampshire. Our passion is creating a company people love to work for and customers are proud to refer.
Paramount Roofing Solutions
661 Jefferson Blvd, Warwick, Rhode Island
5.0 from 20 reviews
Paramount Roofing Solutions is the trusted roofing contractor serving Warwick, RI, with a commitment to delivering high-quality roofing services for residential and commercial properties. Whether you're in need of a new roof installation, roof replacement, or expert roof repair, our team has you covered. We specialize in a variety of roofing options, including durable metal roofing, classic asphalt shingle roofing, and energy-efficient commercial TPO roofing. We also offer top-notch services for new construction roofing projects and flat roofing systems. With years of experience and a dedication to customer satisfaction, Paramount Roofing Solutions ensures your roof is built to last, protecting your property from the elements.
Quality Exteriors & Roofing Of RI
(401) 738-8245 www.qualityexteriorsinc.com
117 Cady Ave, Warwick, Rhode Island
4.7 from 60 reviews
Are you looking for the best roofing company in Rhode Island? You found us! At Quality Exteriors, we believe that success comes from doing a great job. Our company was established in 1980, ensuring that you are in good and experienced hands, and that makes the difference between a good and a bad roofing job! Being family owned means that we value our customers as individuals and not just as another job to be done, and that helps us to deliver the best customer service around. When it comes to roofing solutions that you can count on, we are your best choice. We offer residential, commercial, and industrial roofing solutions. And as always a job well done!!!!
Wellington Roof & Repair
30 Novelty Rd, Warwick, Rhode Island
5.0 from 8 reviews
Family owned and operated, hand nailing specialists! We treat every home like its our own. From roof replacements, repairs, gutter cleaning, gutter guard installation, and now power washing, you can trust us to get the job done right. Contact us today for a free estimate.
Mr. Roof.
110 Jefferson Blvd Unit "I, Warwick, Rhode Island
4.8 from 8 reviews
MR. ROOF. INC is a family-owned roofing company proudly serving Warwick, Rhode Island. We specialize in residential and commercial roofing, siding, windows, and gutter installation. Our expert roofing contractors handle flat roofs, skylights, and specialty metal work. Fully licensed, insured, and GAF/CertainTeed and Velux certified, we provide free estimates and 100% financing. With an A+ BBB rating and top reviews, we serve homeowners, property managers, and real estate agents. Trust our local roofers for quality repairs and installations. Contact us today for your next roofing project in Warwick!
RI Roofing Team
(401) 379-8636 riroofingteam.com
2465 W Shore Rd #6, Warwick, Rhode Island
5.0 from 3 reviews
RI Roofing Team provides solutions for an array of residential and commercial roofing services and installation in RI. Repairing or replacing a roof is a big project, and most people don’t have the time or expertise to do it themselves. There’s no need to worry though, when the skilled personnel from RI Roofing Team are ready to take on the challenge for you. Our absolute number one priority is our customers. Roof Repair Your roof is your home’s front line against the elements. New England’s hot summers and cold winters all put stress on your roof. Ice and storms wear out even the toughest roofs, so repairs are sometimes necessary to maintain their integrity. We provide competitively priced repairs, large and small, to any roof.
Erie Home
Serving
4.7 from 110 reviews
Since 1976, Erie Home has manufactured, supplied, and installed the best-performing roofing on the market. By providing ironclad warranties and convenient financing, we ensure that every homeowner we work with receives top quality service and value for their homes and properties. Erie Home professionals are the roofing company of choice in the greater Providence, RI area. Whether you need roof inspections or roof damage repair services, Erie Home has been the go-to roofing contractor for nearly 50 years because of our attention to detail and dedication to making sure our customers are satisfied with their results. Contact us today for a quote and see why we're the trusted roofing company Providence counts on.
Rhode Island Remodeling
Serving
5.0 from 177 reviews
Rhode Island Remodeling has been a trusted name in home improvement services in Rhode Island since 1988. We are a family-owned and operated business that takes pride in delivering high-quality workmanship and exceptional customer service on every project. We are pleased to serve the entire state of Rhode Island.
Miceli Roofing
(401) 433-7663 miceliroofing.com
Serving
4.9 from 151 reviews
Miceli Roofing is a family-owned and operated business that has offered residential and commercial roofing services since 1960. Our longevity is a testament to us having consistently provided homeowners and property managers a superior experience. We truly partner with our clients to execute precise roof installations (and repairs) that fulfill the desired goals. We’re licensed and fully insured. We also offer up to a 10-year labor warranty, which reflects the utmost confidence we have in our craftsmanship. Homeowners choose us for several reasons: roof customization; a wide selection of products; accountability for our work; affordability; and craftsmanship. Request a custom (on roof) quote today.
Tim's Fast Repair Leak Roofing
(872) 213-0649 tims-fast-repair-leak-roofing.ueniweb.com
Serving
5.0 from 14 reviews
Tim's Fast Repair Leak Roofing offers high-quality roofing design and services in Cranston. We are seasoned roofers who deliver top quality and budget-friendly roofing services. Get in touch with us on +18722130649. When you hire us, you know you’re getting skilled, passionate technicians you can trust to do the best job possible. And, as a bonus, we always feature competitive pricing on our services.
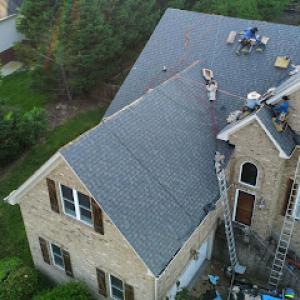
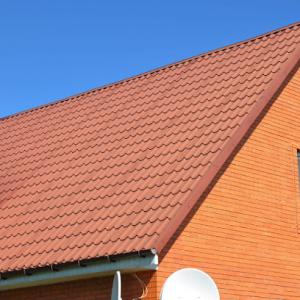
Asphalt shingles are the dominant practical choice for Warwick homes because they fit the city's broad mix of older residential re-roofing projects and moderate replacement budgets. In a climate with winter freeze-thaw cycles, the key is choosing a shingle with good adhesion and a solid underlayment to minimize moisture intrusion. Look for enhanced nailing strips, sealed edges, and proper attic ventilation to reduce the risk of ice dams. A well-seated, correctly vented asphalt roof can handle coastal humidity and the occasional salt spray when paired with an effective attic air-flow plan. For homes with shallow attic spaces or limited eave overhangs, prioritize shingles that maintain wind resistance and add a quality waterproof seal around penetrations and valleys.
Metal roofing is especially relevant for homeowners prioritizing snow shedding, coastal durability, and lower maintenance in exposed locations. In Warwick, metal can dramatically decrease ice dam risk by promoting rapid melt-off and reducing standing ice on slopes. When selecting metal, choose panels with integrated fasteners or concealed fasteners to minimize leak points, and ensure the roof has impedance to wind-driven moisture common in coastal areas. Metal's reflective surface helps temper attic heat gain, which can help the interior moisture balance during heavy winter conditions. Proper installation matters: use corrosion-resistant fasteners, robust flashing at hips and valleys, and a comprehensive underlayment to secure against salt-laden air.
Clay tile, concrete tile, wood shakes, and synthetic products appear in the market but require careful structural and moisture planning on Warwick's existing housing stock. Clay and concrete tiles bring durability and distinctive aesthetics, yet their weight demands a trained assessment of subroof framing, adequate ventilation, and compatibility with existing gutters and flashings. In coastal neighborhoods, moisture management around roof-to-wall transitions becomes critical to prevent recurring seepage. Wood shakes offer a traditional look but can be prone to moisture-related issues if not properly treated and ventilated. Synthetic products can mimic natural materials while offering improved resistance to moisture, but installation must respect existing rafters and insulation. In tight or older homes, consult a local pro to confirm roof deck capacity and the moisture-path control strategy before proceeding.
Across all options, the shared priority is reliable ventilation and flashing. In a coastal freeze-thaw climate, moisture control, attic airflow, and leak prevention around valleys, skylights, and chimney connections determine long-term performance more than material choice alone. Ensure soffit and ridge ventilation are balanced, and that flashing details are continuous and corrosion-resistant. For Warwick homes with older sheathing, consider upgrading to a breathable underlayment and sealing method that works with the chosen roof type to prevent ice dam formation and moisture buildup inside the attic.
For a full replacement, material choice drives most of the budget. In this market, asphalt shingles run from about 350 to 700 USD per square, metal from 600 to 1100, clay tile from 1000 to 1800, concrete tile from 900 to 1500, wood shingles or shakes from 700 to 1300, and synthetic or composite shingles from 600 to 1100. In Warwick, those ranges reflect not only the material itself but the realities of coastal weather, older home configurations, and typical roof pitches found on longer-standing neighborhoods. When you compare bids, look closely at how each contractor accounts for attic ventilation, drip edge or flashing details around chimneys, and whether tear-off is included or priced separately.
Warwick's active re-roofing market can create pricing pressure after winter damage and during storm-heavy spring and fall periods when demand spikes. That can push labor and disposal costs upward, particularly if a tear-off is required on an aged roof with brittle decking or multiple layers. A full replacement on an older home may involve more careful removal to avoid damaging plaster walls, overhead utilities, or historic features, which adds labor time. If chimney flashing or valley work is needed, expect additional costs for metal flashing, step flashing, and waterproofing membranes. These factors often influence total project duration as well, and longer projects can increase temporary living-space protection requirements and access fees.
In Warwick, ventilation upgrades and proper attic sealing are wise investments during a full replacement, especially to combat winter ice damming and moisture-related failures. If the plan includes new decking, vented soffits, or ridge vents, it should be reflected in both the scope and the price. Proper ventilation reduces condensation and helps preserve decking, underlayment, and shingles' lifespan in a freeze-thaw climate. For metal or tile options, verify whether the installation includes appropriate underlayment (fire-rated or insulated) and correct fastener choices to withstand coastal humidity and winter winds.
Material selection matters sharply in Warwick because of coastal exposure and freeze-thaw cycles. Asphalt shingles may offer the most economical path, but extended winter exposure could justify higher upfront cost for durability. Clay or concrete tiles bring long-term resistance to wind uplift and moisture, yet require a compatible deck structure and careful detailing around parapets and chimneys. Wood shingles or shakes provide texture but demand rigorous maintenance in damp conditions. Synthetic or composite shingles aim to balance price with improved moisture resistance and durability against salt air. Weigh not just the sticker price, but the longer-term performance, potential ice dam risk, and roof pitch suitability when planning a replacement project.
Get a clear picture of your project costs upfront - no commitment required.
Couto Construction
(401) 420-7248 coutoconstruction.com
895 Post Rd, Warwick, Rhode Island
4.9 from 400 reviews
Mr. Roof.
110 Jefferson Blvd Unit "I, Warwick, Rhode Island
4.8 from 8 reviews
When planning a full roof replacement, you typically need to secure a permit through the Warwick Building Department before any work begins. The local process reflects the city's coastal, older housing stock and rugged winter conditions, where proper detailing matters as much as the project itself. Start by confirming whether your project requires a permit for roof replacement or if a simpler roofing repair permit suffices. Collect the basics: property address, project scope, and anticipated start date. The department's intake is more thorough for larger jobs, so anticipate a brief review period and keep a clear line of communication with your contractor to avoid delays.
Warwick's review process may require scope information, plans, and proof of contractor licensing before permit issuance. That means you'll likely need a straightforward set of presentable plans or a job sketch that shows roof extent, ventilation strategy, and flashing details. If the roof is changing material or shape, expect the plan to include several elevations and a note on underlayment choices. Ensure your contractor's license is current and tied to the exact scope of work, not just a general roofing license. Having these documents ready streamlines the review and helps prevent back-and-forth that can push a start date into a colder, wetter part of winter.
Inspections in Warwick are typically conducted at rough-in and final stages, with attention to installation, ventilation, underlayment, and flashing details. At rough-in, inspectors look for proper roof deck sheathing, nailing patterns, and the placement of the underlayment and starter courses. In addition, ventilation requirements are closely checked-proper intake and exhaust venting are crucial to prevent moisture buildup that can escalate in coastal freeze-thaw conditions. The final inspection confirms that all components meet code, including flashing around chimneys, valleys, skylights, and annunciators that can be vulnerable to winter ice damming if not executed correctly. If your home has older withstood joints or complex eaves, expect a more detailed review of flashing transitions and drip edges.
Coordinate with your contractor to ensure a clear sequence that aligns with Warwick's winter exposure. Have all permit-related documents accessible on site during inspections, including any notes from plan reviews and licensing proofs. For homes with limited attic space or unusual roof shapes, document ventilation paths and attic insulation to show the inspector that moisture control is integrated into the project. If an issue arises during rough-in, address it promptly with your contractor and request a quick re-inspection window to avoid weather-related delays. Remember that a well-documented permit and a clean, well-ventilated installation reduce the risk of moisture-related failures once winter returns.
In Rhode Island, roofing claims are commonly tied to wind and precipitation rather than a singular hail-driven pattern. The bay-adjacent climate in this region can push shingles and flashing to the limit during winter storms, and a good part of the year brings damp air that hides moisture problems until they become obvious inside the attic or ceilings. This means that insurers will look closely at wind damage, edge fastenings, and any signs of sustained moisture intrusion caused by poor flashing or ventilation.
Warwick homeowners should expect insurers to request detailed documentation of storm damage and, in some cases, an independent adjuster review. Be prepared to supply photos showing damage on multiple elevations, dates of storms, and any prior roof issues that may interact with the claim. Independent adjusters are used to verify the extent of damage beyond what a homeowner can convincingly describe, so organized records help avoid back-and-forth delays and minimize surprises.
After a roof replacement, proof of installation may affect future premiums or endorsements, making final paperwork worth keeping organized. Save the contractor's warranty, material specs, and the job receipt in a dry, accessible location. If a warranty claim arises later, having the original installation notes and shingle lot numbers can simplify verification and support a smoother claim review.
Maintain a storm-damage photo log, dated attic moisture checks, and a simple attic vent and flashing condition note for each season. When arranging a claim, request a clear scope of loss and keep all correspondence organized by date. This city's coastal freeze-thaw cycles demand precise documentation; a well-kept file reduces friction and supports faster resolution.
Warwick's contractor market shows meaningful demand for flat-roof work, and low-slope sections are a common leak point during winter wind-driven rain. Start by examining the edge details where the low slope meets the parapet or wall, looking for now-tracking water stains that run toward penetrations. Pay close attention to membranes, proper termination at drains, and any aging or uplift on bituminous or single-pply layers. In practice, re-seal seems and seams at least where water tends to pond, and verify that a positive slope exists toward drainage. If a drain or scupper shows rust or staining, plan for re-flashing and proper clamping rather than duct-tape fixes. Regularly inspect after storms and after freeze-thaw cycles when-ice dams tend to form at transitions.
On homes with additions, porches, or mixed rooflines, transitions between steep and low-slope areas are common leak points during wind-driven rain. Inspect intersection corners, kick-out flashing at walls, and any step flashing where the two surfaces meet. Ensure flashing is continuous, with no gaps under shingles or membrane. When re-roofing or resealing, align flashing metal with the higher-velocity water path so that runoff doesn't re-enter the seam. Pay extra attention to fastener patterns in the transition zone, avoiding penetrations that create new leak pathways.
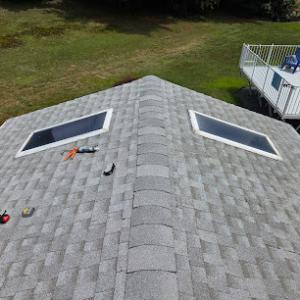
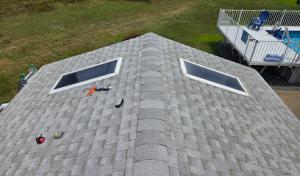
Skylight flashing and surrounding shingle integration are especially important in this climate because repeated freeze-thaw and heavy rain can expose installation weaknesses. Check skylight base flashing for splits, punctures, or lifted corners, and replace any cracked sealant. Ensure the shingle course around the skylight overlaps flashing correctly, preventing water from seeping under the shingles. In cold months, verify that ice and water shield behind the skylight base remains intact and unobstructed. Regular maintenance timing around storm season matters to reduce moisture-related roof failure.
Find specialists in TPO, EPDM, and built-up flat roofing systems for residential and commercial properties.
Paramount Roofing Solutions
661 Jefferson Blvd, Warwick, Rhode Island
5.0 from 20 reviews
Quality Exteriors & Roofing Of RI
(401) 738-8245 www.qualityexteriorsinc.com
117 Cady Ave, Warwick, Rhode Island
4.7 from 60 reviews
Mr. Roof.
110 Jefferson Blvd Unit "I, Warwick, Rhode Island
4.8 from 8 reviews