Last updated: Apr 19, 2026
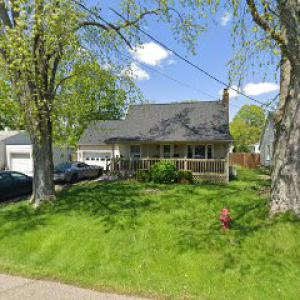
Cold winters in Knox County mean snow piles up on rooftops and then retreats, only to return with a vengeance. The repeated freeze-thaw cycles in this area can reopen tiny penetrations and weaknesses in flashing that you might have missed during a mild season. That means a roof that seemed sound after a late-fall inspection can start showing signs of trouble once March storms roll in and temperatures swing above and below freezing in a single day. For Mount Vernon homeowners, this isn't a theoretical risk-it's a seasonal reality that turns small issues into urgent problems if left unchecked.
Spring in central Ohio brings more than budding trees; it brings storm patterns that can interrupt roofing work just when you need it most. In Mount Vernon, those spring wind-driven systems often push through with sudden downpours, hail, and heavy rain that expose weakened seams and faulty penetrations that were minor in winter. If a minor aging issue is present, a spring storm can transform it into an active leak before crews can finish a full replacement or a major repair. The result for many homeowners is a race against weather to secure temporary fixes and protect living spaces, especially when the roof is carrying the cumulative stress of winter and the first heavy rains.
The local contractor signal mix is telling: storm damage, insurance claims, and emergency repairs are all highly active. That means weather events aren't rare aberrations; they're a driver of real-world roofing work. When a freeze-thaw cycle compounds exposure on flashing, step flashing, chimney boots, and vent collars, the risk of water intrusion rises quickly during a storm. You may find yourself juggling bookings with emergency crews or chasing a temporary patch that buys you days or weeks before a proper replacement can take place. In Mount Vernon, efficient triage-addressing active leaks first, then planning a full replacement-becomes not just a choice but a necessity to protect interior spaces from moisture intrusion.
Begin with a targeted inspection after every major thaw or storm, focusing on flashing joints, valleys, and any previously repaired patches. If you notice damp spots on ceilings, stained drywall near exterior walls, or shingles that look cupped or lifted, treat it as a warning sign rather than cosmetic wear. Prioritize securing a temporary water barrier around vulnerable penetrations, especially around chimneys, skylights, and vents, to minimize rapid water entry during a storm. Keep an updated list of reputable Mount Vernon area roofers who can mobilize quickly in adverse weather; seasonal peak times often fill schedules, but reliable crews know how to stage emergency responses and protect interiors until a full replacement can be scheduled.
A proactive approach can mitigate the cycle of freeze-thaw damage. If there is a history of repeated leaks at a particular seam or flashing detail, plan for a high-priority repair or preemptive flashing replacement before the next winter arrives. For homeowners with aging roofs in in-town vs rural properties, the risk profiles differ, but the underlying physics stays the same: moisture and temperature swings drive deterioration. Partner with a local contractor who can perform a careful assessment now, flagging components that are most vulnerable to freeze-thaw and to spring storms, so you're not pressed for time when the weather shifts. This targeted preparation isn't just smart-it's essential to maintain a water-tight roof through Mount Vernon's distinctive seasonal rhythm.
In this part of Knox County, insurance decisions after a storm hinge on documented damage. Ohio insurers tend to cover wind and hail damage when the specifics are clearly shown, so your claim rests on solid, date-stamped evidence of what happened and when. After a storm, that means noting where shingles or flashing look compromised, whether granules are in gutters, and if stains or soft spots appeared quickly or after a lingering leak. The clearer your documentation, the smoother the path from assessment to repair.
Adjusters reviewing claims in this area often request dated photos that show the progression from pre-storm conditions to post-event damage. They want notes on when leaks began, even if they seemed minor at first, and weather-event documentation such as local weather reports or witness accounts. Your goal is to connect the storm to the damage with a credible timeline. Keep a simple diary: the date of the storm, when you first noticed a leak or shingle lift, and any ladder or attic observations. If you have professional opinions from a roofer about wind-driven lift or hail bruising, that can strengthen the narrative.
Because insurance-claim assistance is a strong local contractor specialty signal, homeowners here are likely to encounter roofers who regularly work through claim paperwork and scope reviews. A local roofer who understands the claims process can help you organize a clean set of photos, compile a damage narrative, and translate inspector findings into a clear scope of repairs. This doesn't mean bypassing the insurer; it means providing the insurer with the precise information they require in a format they recognize. A good local contractor will also document any pre-existing conditions that aren't caused by the storm, so the decision between repair and replacement is based on the actual post-storm condition.
Weather events in this region can cause both isolated damage and widespread wear that shows up under freeze-thaw cycles. An initial assessment may recommend a repair to address a localized leak or shingle lift, but subsequent freeze-thaw cycles can reveal hidden weaknesses. Your claim strategy should reflect this reality: document the immediate storm-caused damage first, then track any additional deterioration that appears in the weeks or months after. Rely on your roofer for an informed judgment about whether the damage is contained or if a broader replacement is warranted to prevent future claims complexity.
Create a tight, organized file that pairs the dates of storms with corresponding photos, and attach any weather-event data from credible sources. Include notes on roof age, material type, and visible signs of damage such as punctures, granule loss, or sagging areas. If attic moisture is detected, capture that with photos and timestamped observations. Ensure your documents clearly tie the event to the observed condition, so the adjuster can see the link between wind or hail and the resulting need for repairs or replacement. In this community, having a trusted local contractor who can review, annotate, and help present the claim is a practical advantage you can lean on.
Connect with contractors who help homeowners navigate the claims process from damage assessment to final approval.
Whitt Roofing & Restoration
(614) 665-6125 whittroofingandrestoration.com
Serving
4.9 from 138 reviews

PRO TRADE SERVICES | Commercial Roofing Cleveland
(330) 591-4440 protradeservices.com
Mount Vernon, Ohio
5.0 from 10 reviews
We take care of all of the commercial roofing Cleveland will ever need! Whether it's industrial, commercial, flat roofs, metal roofs, we take care of it all for you. It's important for us to be the go to commercial roofing Cleveland can always count on. Call us to get an estimate on your next project! We're looking forward in meeting new potential customers and providing you with the highest quality and values for your roof.
Whitt Roofing & Restoration
(614) 665-6125 whittroofingandrestoration.com
Serving
4.9 from 138 reviews
Whitt Roofing & Restoration is a family-owned roofing contractor proudly serving Columbus and Mount Vernon, Ohio. As the Best Mount Vernon Roofing Company, we provide expert roofing services with high-quality materials and skilled craftsmanship. From Mount Vernon roof repair, replacements, and inspections to waterproofing and 24/7 emergency repairs—we do it all. We offer free consultations and estimates, and we’ll even help with insurance claims. Whether you're dealing with storm damage or routine wear, our experienced Mount Vernon roofers will guide you through the best options and handle the full installation with care. Trust Whitt Roofing & Restoration—your reliable Mount Vernon roofing expert.
Shields Roofing & Siding
Serving
5.0 from 10 reviews
Family owned and operated company serving Central Ohio and surrounding areas in all it's roofing, siding, and gutter needs. We do retail and insurance work. Providing excellent customer service and product for 25+ years.
Shoemaker Roofing
(740) 397-3572 www.shoemakerroofing.com
Serving
4.7 from 100 reviews
In business since 1979. We are your problem solving experts.
Working Class Roofing & Siding
(740) 833-5980 wcroofingandsiding.com
Serving
5.0 from 58 reviews
Old roof? Looking for a new roof? Working Class offers roof replacement services for shingle roofing, as well as a 50 year non-prorated shingle roof warranty. We also install slate, standing seam, cedar wood shakes, asphalt shingles, composite roofing, and flat roof products. We install siding too. Serving Mount Vernon, Delaware, Columbus, Sunbury, Lewis Center, Fredericktown, Dublin, Shawnee Hills, Morrow County, Westerville, and upper Arlington.

Revere Roofing Company
(740) 392-9450 revereroofingcompany.com
Serving
4.9 from 29 reviews
Revere Roofing Company offers expert roofing and gutter services across Central Ohio. GAF Master Elite® certified with 25+ years of experience. Expect more from your roof.
Superior Roof Systems
(740) 293-0024 superiorroofsystem.com
Serving
5.0 from 35 reviews
Superior Roof Systems is a commercial roofing contractor in Howard, OH, offering high-quality roofing services and comprehensive maintenance programs. Our team is experienced with metal roofs, single-ply roofs, membrane roofs, and other common commercial roofing materials. Contact us today to request a free quote and learn more about our maintenance plans.
Vicco Roofing & Restoration
(937) 503-8787 viccoroofing.com
Serving
5.0 from 21 reviews
When it comes to residential roofing in Dayton, Ohio, we know there are a number of roofing contractors to choose from. Homeowners from across the Dayton area continue to choose Vicco Roofing & Restoration for their home's roofing needs. Our team of experienced roofing professionals provide excellent customer service and high-quality craftsmanship. If you are a Dayton-area homeowner who is concerned with the condition of your home's roof, contact Vicco Roofing & Restoration today for a hassle-free inspection and estimate.
J&M Roofing Exteriors
(330) 419-3688 jandmroofingexteriors.com
Serving
4.5 from 65 reviews
J&M Roofing and Exteriors is a certified, award-winning local expert serving high-end residential and commercial clients across Akron, Canton, and Cleveland, Ohio. We specialize in premium roof replacement, storm damage restoration, and exterior remodeling, delivering long-lasting results that protect your property and increase its value. Trusted by property owners near the Rock & Roll Hall of Fame and the Pro Football Hall of Fame, our team is known for precision workmanship, honest guidance, and white-glove service. With Google 5-star ratings, industry-approved materials, and 24/7 service availability, we handle every project with professionalism and accountability. Request a quote or schedule your appointment today
Premier Restoration
Serving
4.9 from 17 reviews
Premier Restoration has been a Contractor in the Cleveland Ohio area since 2010 and expanded to serve North Carolina in 2019. We work hand in hand with your insurance company to ensure that your home is restored to perfection. Our team of experts has the know-how to tackle everything from the smallest of repairs to large-scale projects. No matter the size of the job, we take pride in our work. From coordinating projects to operational oversight, Premier Restoration will conveniently guide clients through our services step by step.

Nail It Roofing & Contracting
(614) 427-8811 www.nailitroofingandcontracting.com
Serving
5.0 from 15 reviews
Nail It Roofing and Contracting is a full-service roofing repair and replacement contractor providing home improvement services to residents throughout Central Ohio. We specialize in insurance mediation and storm damage repairs and replacements. Contact us today for a free inspection!

Elliott's Construction
(567) 241-2167 www.elliottsconstruction.com
Serving
5.0 from 11 reviews
Choose Elliott’s Construction for over 40 years of trusted, family-owned expertise in Central Ohio. We specialize in roofing, gutters, siding, storm damage repair, and insurance restoration. Our services also include excavation, foundation repair, basement waterproofing, and concrete work. We serve both residential and commercial clients, delivering efficient, code-compliant projects with a strong focus on quality and customer satisfaction. Experienced with government agencies and housing authorities, we manage subsidized housing projects professionally, efficiently, and fully compliant with all regulations.
Dry, moderate months are the sweet spot for a roof replacement project. In this area, winter brings persistent snow and ice that can delay tear-offs, hamper material handling, and complicate fasteners and underlayment work. Planning a tear-off when the days are dry and temperatures aren't swinging wildly makes it easier to protect landscaping, avoid shingle damage from freezing temps, and keep the bulky debris contained. If a roof needs attention after winter, aim for late spring or early fall when catches of weather are more predictable and you can keep the job on a steady pace.
Spring brings its own quirks. Heavy rain events in the Mount Vernon area can pause work mid-project, leaving crews to wait for a clean weather window before continuing. The key is building in a flexible schedule with a target block of dry days, plus a plan for tarp protection and quick-on, quick-off crews to minimize rain-related delays. If a storm cluster moves through, have a backup plan for securing materials and protecting interior spaces. Early spring is workable, but you'll benefit from aligning the project with an anticipated stretch of drier days rather than chasing a perfect forecast.
Summer installation is possible, but the heat brings its own set of realities. Dry, long days can help with fast progress, yet high daytime temperatures can slow pace and affect material handling, especially for larger re-roofs. Scheduling becomes a matter of staging: front-load substantial tear-off work in cooler mornings, then shift to underlayment and shingle lay-down when the sun climbs. Hydration, sun exposure, and glare off shingles matter for crew safety and quality control. Early morning starts and shaded staging areas can keep crews moving efficiently while protecting the roof and your landscaping.
If a roof needs replacement due to freeze-thaw stress or storm damage, map a season where the forecast shows the longest stretch of dry days. Talk with your contractor about a preferred start window, and ask how they handle rain days-whether they'll reschedule within the same week or need to push into the next window. For older homes with complex rooflines or multiple slopes, align the project with a balanced weather forecast to reduce the number of interruptions. Consider how nearby trees and driveways will be protected during tear-off and material deliveries, and confirm crews will prioritize staging to minimize heat exposure on steep sections.
In practice, you're aiming for a period with predictable, dry weather, manageable daytime temperatures, and a clear plan for rain contingencies. Mount Vernon homeowners benefit from coordinating closely with the roofing team to lock in a start date, with built-in buffers for weather that can shift week-to-week. By choosing a window that reduces ice-related delays, weather-induced suspensions, and heat-related pacing challenges, the project stays on track and delivers a solid, lasting roof.
Get a clear picture of your project costs upfront - no commitment required.
Whitt Roofing & Restoration
(614) 665-6125 whittroofingandrestoration.com
Serving
4.9 from 138 reviews

Typical pricing ranges from about 350 to 700 USD per square for asphalt shingles. In this climate, asphalt is common on older in-town homes and on rural properties where quick response after a storm is valued. Expect costs to rise modestly during regional wind or hail events when demand spikes and crews are scheduling full tear-offs. For frost-heavy winters, look for a shingle with good granule adhesion and a solid underlayment to guard against thaw-thaw cycles.
Metal is a practical option when storm-driven replacement is likely and quick scheduling matters. Prices generally run from 700 to 1500 USD per square. Metal's durability and faster installation can pay off after a heavy snow season, but premium finishes and thicker gauge metal push costs higher. In homes with complex flashing details, premium metal systems reduce the risk of ice damming and wind-driven leaks, which is a real concern around storm swaths that knock out power and leave crews prioritizing high-risk roofs.
Clay tile sits at the higher end, from 900 to 2500 USD per square, and is favored where long-term performance matters and the roof structure is reinforced for the weight. In frozen-on-snow conditions, tiles resist cracking better than some alternatives but require careful detailing around valleys and chimneys. The premium price reflects not just the tile but the added labor to handle, haul, and install a heavier roof system. After a major hail event, tile replacements can surge in price and scheduling.
Wood shingles or shakes cost about 550 to 1100 USD per square. They bring a traditional look, but freezing winters and snow loads demand robust underlayments and thoughtful flashing. In regions with frequent freeze-thaw cycles, expect a higher likelihood of maintenance notes or replacement sooner if moisture intrusion occurs. Storm-driven demand can push installation times longer on this material, especially if crews are balancing multiple tear-offs.
Synthetic or composite shingles run roughly 600 to 1200 USD per square. They strike a balance between cost and durability, performing well under freeze-thaw stress and snow loads. In a year with a heavy storm season, these can be a practical middle-ground choice, offering decent hail resistance and a longer service life without the weight of tile or slate.
Slate ranges from 1500 to 3000 USD per square and remains an option for long-hold homes where durability is the priority. Its natural resilience to freeze-thaw cycles is a strong advantage, but installation is labor-intensive and requires skilled trades. In storm-prone years, slate repairs or full replacements may command premium scheduling due to the specialty work involved.
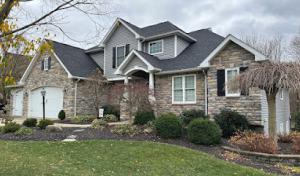
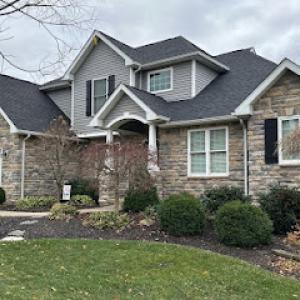
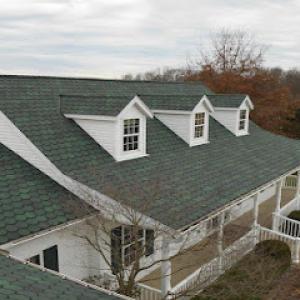
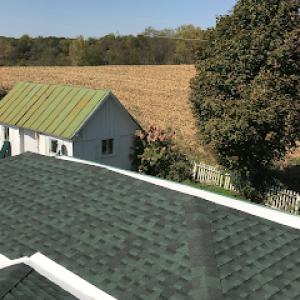
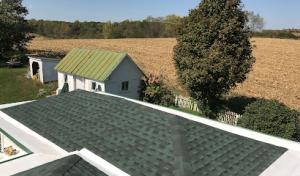
Asphalt shingles dominate the local roofing landscape because they fit a broad mix of replacement-focused residential roofs and align with moderate cost expectations. In a climate with cold-snow winters and frequent freeze-thaw cycles, asphalt offers dependable performance with a straightforward installation that can shed snow more predictably than some heavier options. For many Mount Vernon homes, a quality asphalt system provides solid durability against freeze-thaw stress while keeping total roof line proportions appropriate for older in-town houses and newer ranches alike. Look for architectural-style bundles or thicker shingle options that add wind resistance and extra layer of protection against the snowfall typical to Knox County winters.
Metal roofing is a meaningful local specialty in Mount Vernon, reflecting homeowner interest in longer-life systems that handle snow shedding and seasonal temperature swings well. Metal panels or shingles can offer excellent longevity and a fast shedding surface that helps reduce ice dam formation during midwinter thaws. Metal tends to pair nicely with homes that aim for a crisp, updated curb appeal or want to preserve a more modern or utilitarian look on rural properties. If you expect heavier snow events or want a roof that stands up to repeated freeze-thaw cycles with minimal maintenance, metal is a practical choice to consider, especially for bolder rooflines or new additions where long-term performance is a priority.
Higher-end materials such as slate and clay tile appear in the local material mix, which matters in places where some homes may need roof choices that match older architecture or support premium curb appeal. Slate and clay tile can complement heritage details on older structures while delivering exceptional longevity and a refined, timeless appearance. Be mindful that these materials can demand a heavier roof structure and careful integration with existing drainage and chimneys. In Mount Vernon, encountering homes with these premium options often reflects an emphasis on authentic character or a desire to maintain the historic silhouette, so compatibility with the building's original design is essential.
In neighborhoods with a blend of in-town houses and rural properties, selecting a roof type that harmonizes with the architectural language is important. Asphalt remains versatile enough to respect historic rooflines while offering practical performance in winter conditions. For older homes seeking authenticity, clay tile or slate can be a respectful fit, though structural and underlayment considerations must be evaluated. For newer builds or renovations aimed at durability through Glen-like snow events, metal can deliver a clean, low-maintenance appearance with strong winter performance. The best choice balances historic aesthetic, expected storm activity, and the roof's ability to resist repeated freeze-thaw damage over decades.
Explore specialists in steel, aluminum, and standing seam metal roofs built to last 50 years or more.
PRO TRADE SERVICES | Commercial Roofing Cleveland
(330) 591-4440 protradeservices.com
Mount Vernon, Ohio
5.0 from 10 reviews
Full roof replacements in this area are not treated as informal maintenance; they require a permit through the city building department. The process is designed to confirm code compliance, proper ventilation, and appropriate underlayment. Filing early helps avoid delays, especially if the job includes tear-off work or potential structural adjustments. The permit is not a formality to overlook.
For a tear-off and re-roof, the city reviews the permit application and schedules inspections as part of the normal process. Expect inspection points that verify sheathing condition, fastener types, and proper flashing around chimneys and vents. The final inspection seals the project, so keeping records and submit-ready diagrams or photos can smooth the walk-through.
Mount Vernon homeowners should expect possible inspection or approval delays during peak roofing season when permit volume is higher. Plan ahead if the local calendar shows a rush of permits, and align your project timeline with city inspection slots. Submitting requests early and ensuring all documentation is complete can reduce back-and-forth and postponed work.
Have a clear project scope, a current site plan, and product specifications on hand when applying. If the contractor handles the permit, verify that the submission includes all required drawings, ventilation details, and attic access notes. Incomplete applications are a common source of delays and can push your project into tighter weather windows.
Before work begins, review the permit's conditions with your roofer and confirm that all required inspections are scheduled. Keep the permit card accessible on-site and ensure any changes are reported promptly. A well-documented process minimizes surprises and helps protect your home through Mount Vernon's varied winters and storms.
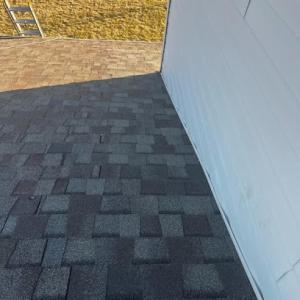
In Mount Vernon, freeze-thaw cycling can worsen small defects around flashing, valleys, and roof penetrations until they become interior leaks. That cycle-water seeping into micro-cracks, freezing, expanding, and repeating-makes seemingly minor gaps progressively larger. Left unchecked, you may notice after a thaw that a formerly dry attic or ceiling now shows a small drip around a chimney, vent stack, or step flash. The practical consequence is a slow yet steady erosion of roof lines, which is more likely on older houses with aging flashings or loosely sealed penetrations. If you spot a damp ceiling near a vent or a dark streak along a valley after a cold snap, treat it as a warning sign rather than a one-off incident.
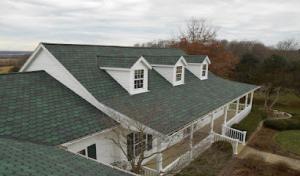
Snow and ice exposure in this area can stress aging shingle edges and underlayment, especially on roofs already weakened by prior storm impacts. When snow piles up or meltwater refreezes at eaves and in gutters, the resulting ice dam can push against shingles, lifting edges and exposing underlayment to repeated wetting. The effect compounds over successive winters, accelerating granule loss on asphalt, curling on wood or shakes, and loosening of fasteners. A roof with visible edge curling or torn shingles after a heavy snowfall deserves prompt attention to prevent interior moisture entry during the next melt cycle.
The local presence of emergency repair and skylight specialists suggests that leak-prone details and sudden weather-related failures are common enough to support dedicated service offerings. Leaks often appear where skylights or roof penetrations meet a roof plane under the pressure of wind-driven moisture and ice buildup. If a storm leaves a pinhole leak around a dormer or skylight, consider it a signal to address the vulnerable detail before it becomes a larger, more disruptive issue. Regular inspection after major snow episodes helps catch these patterns early.
Find contractors experienced in skylight installation, flashing, and leak repairs to bring natural light into your home.
Whitt Roofing & Restoration
(614) 665-6125 whittroofingandrestoration.com
Serving
4.9 from 138 reviews

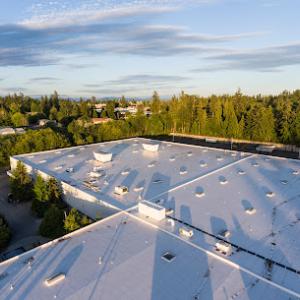
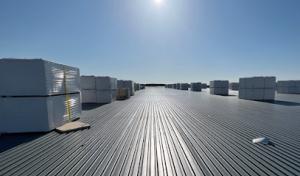
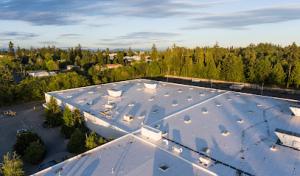
Flat-roof specialization exists in Mount Vernon, but this market remains secondary to the steep-slope re-roof demand you see on most homes and additions. In town and in surrounding rural properties, low-slope sections commonly appear on additions, porches, and mixed-use buildings where practicality and drainage reliability matter. That means you're more likely to encounter contractors who handle a mix of residential and commercial-style systems, which can be a real asset when planning a long-lived low-slope roof over a new porch, sunroom, or retrofit extension. Expect the best value when you align with a local team that understands how snow and rain interact with a flatter profile, and how to integrate step-flashing, drainage routes, and edge detailing with the existing roofscape.
Knox County's winter weather pushes flat and low-slope sections into the spotlight for water shedding and ice control. On additions and covered spaces, verify that the drainage plan quickly moves meltwater away from seams, vents, and joints, especially where the transition from a steep main roof to a low-slope appendix occurs. A properly pitched low-slope surface (even if only a few inches per foot) combined with crisp edge detailing helps prevent ponding and ice dam formation during freeze-thaw cycles. Regular inspection after heavy snow events is prudent: look for pocked, de-iced membranes, clogged gutters, and any signs of standing water that could divert underlayment and lead to leaks.
Because commercial work is meaningfully represented in the local contractor market, Mount Vernon homeowners with low-slope residential sections can often find contractors who also handle commercial-style roof systems. When interviewing, confirm experience with flat or near-flat substrates, proper drain placement, and compatibility with existing steep-slope materials. Ask for references on re-cover projects over additions and porches, and request a written plan that details flashing transitions, edge details, and a drainage-first approach to seasonal maintenance. A tight coordination between interior, exterior, and structural teams saves time and reduces the chance of mismatched materials or overlooked drainage paths.
Find specialists in TPO, EPDM, and built-up flat roofing systems for residential and commercial properties.
PRO TRADE SERVICES | Commercial Roofing Cleveland
(330) 591-4440 protradeservices.com
Mount Vernon, Ohio
5.0 from 10 reviews
Mount Vernon homeowners are hiring heavily for re-roofing and quick-response service, so responsiveness after storms is a real differentiator in this market. When a contractor answers within a business day and can schedule a temporary tarping or secure dry-in quickly, it signals reliability. Look for a firm with a clear on-site contact person and a concrete plan for storm-impacted days. If a dealer or crew promises week-long delays after a hail event, keep looking.
Cleanup is a prominent local hiring signal in Mount Vernon, suggesting homeowners here care about debris control and jobsite condition during tear-offs. Ask for a walk-through of cleanup expectations and post-project debris removal. Request a written promise for daily debris containment, cover boards on landscaping, and a thorough cleanup at project end. A strong crew will show up with windbreaks, trip-control measures, and a plan to protect mature trees along rural perimeters as well as in-town yards.
The market includes both affordable operators and long-established family businesses, so homeowners here often balance price against local tenure and service reliability. Favor a roofer with verifiable local projects, especially on homes with older sheathing or mixed-age roofs common in Knox County. Check for a track record with freeze-thaw cycles and storm-driven damage, where shingle adhesion, attic ventilation considerations, and fascia repair have been tested by Mount Vernon winters.
Ask for three recent, locally referenced jobs with notes on storm-response timing and cleanup outcomes. Confirm the crew size and the foreman's availability to answer questions during tearing and installation. Ensure the contract outlines the scope, timelines, and a single point of contact for change orders. A contractor who assigns a dedicated project supervisor often delivers steadier communication during the busy spring and fall rushes.
Be wary of outfits that cannot provide local references, minimal cleanup commitments, or vague scheduling. If a contractor refuses to describe their storm-response process or cannot present a written plan for site protection and debris control, proceed with caution. In this market, the best choice aligns quick, clear communication with solid cleanup and proven local experience.