Last updated: Apr 19, 2026
Zanesville sits at the confluence of the Muskingum and Licking rivers, creating a valley environment where moisture, fog, and humidity can linger around roof assemblies. That lingering moisture doesn't just sit on the surface; it works into shingles, underlayment, and decking, especially during shoulder seasons when temperature swings are wide. In practice, that means you're more likely to see slow creeping deck rot, hidden granule loss, or mold growth on softer roof edges long before obvious leaks appear. Your roof relies on a consistent dry layer beneath the finish, so pay special attention to any signs of moisture trapped near eaves and in low-slope pockets where cold air can't move through as freely.
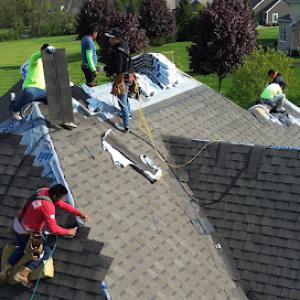
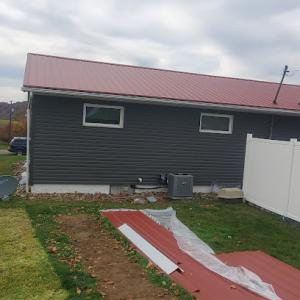
The city includes many older homes in established neighborhoods, making reroof projects more likely to uncover aged decking, outdated ventilation, and multiple prior roof layers. If your house was hatched with a couple generations of renovations, you may discover decayed sheathing, warped boards, or mismatched fasteners once you lift the old shingles. That means a reroof isn't just a surface replacement; it's a deck and attic health check. Expect to encounter older nail patterns that didn't account for modern ventilation or insulation, and be prepared to address that ventilation gap to prevent stale, humid air from frying shingles from the inside out. A careful assessment of attic baffles, soffit intake, and exhaust vent height is essential so you don't trap moisture above finished living spaces.
Local roof performance is strongly affected by cold winters followed by warm, humid summers, so roofs here are stressed by both winter moisture cycling and summer heat aging. Freeze-thaw actions can cause micro-cracks in shingles and flashing as water seeps into tiny gaps, freezes, expands, and widens those gaps. Over several seasons, flashing corners, drip edges, and chimney transitions can develop slow leaks that look minor at first but progress into more serious water intrusion. In practical terms, expect to see fasteners losing bite as metal expands and contracts with heat, and look for hairline cracks around vent boots or step flashing where moisture has just enough time to work its way behind the shingles. A proactive approach is to re-seat and seal critical flashing before winter arrives and to verify that roof penetrations are sealed with materials rated for freeze-thaw endurance.
That valley humidity magnifies the importance of proper flashing and deck integrity. In homes with multiple roof planes, flashing must be continuous across joints, seams, and collars to prevent capillary action from drawing moisture into the attic. If older decks are softened or spongy, new roofing won't fix the underlying path for water; it will simply carry on the same problem with a different surface. Ventilation becomes a frontline defense against warm, moisture-laden air that can condense on the underside of the roof deck in summer heat. Ensure attic ventilation is balanced: enough intake to feed the exhaust without creating negative pressure that pulls conditioned air through the deck. In practice, you'll often want to upgrade vents or add ridge or soffit improvements to keep the attic air fresh and dry, reducing the moisture load on the roof system.
With more frequent moisture cycles and older structures, maintenance routines should adapt. Clean gutters and valley channels regularly to prevent icicle formation and ice dam bridging, especially where downspouts meet the roofline. Inspect flashing around chimneys and skylights after heavy spring storms when wind-driven rain finds new paths along fasteners. If you notice changed attic humidity, be guided by it-persistent condensation can signal insufficient ventilation or hidden deck compromise that warrants professional evaluation before it progresses to a leak. In short, the local climate and housing stock push you toward a proactive, rather than reactive, approach to roof health, focusing on moisture control, deck integrity, and reliable flashing continuity.
In Zanesville, winter freeze-thaw cycles can worsen small leaks by repeatedly expanding trapped moisture in decking and around flashing details. That cycle quietly chips away at the roof's inner layers, and by the time you notice staining or soft spots, the damage has often spread behind shingles and into the decking. The combination of Muskingum-Licking valley moisture and aging attic ventilation means you can't assume a little water intrusion will stay small. It won't. Acting early protects the long-term structure and prevents costly surprises next winter.
Homes with older roof systems in the city are more likely to show soft decking at eaves, valleys, and around penetrations once shingles are removed. If you see sagging decking or a spongy feel when you step on the attic floor or roof deck, you're looking at moisture that has persisted through several freeze-thaw cycles. Valleys and chimney flashing are common stress points where a small leak hides behind the scenes. Do not wait for a visible drip to decide; reach for a flashlight and a mirror to inspect the underside of attic sheathing and the back side of vents and flashing during a dry stretch.
Begin with targeted probing around penetrations like plumbing vents, skylights, and chimney flashings. Look for a dark, damp edge on plywood or OSB near the rafter tails-this is a telltale sign of hidden moisture after a winter. Check eaves and overhangs for softened wood or peeling paint, which signals moisture wicking back into the decking. If shingles come off for any reason, stand ready to evaluate what lies beneath; soft decking in those areas is a red flag that moisture has worked its way in during multiple freeze-thaw cycles.
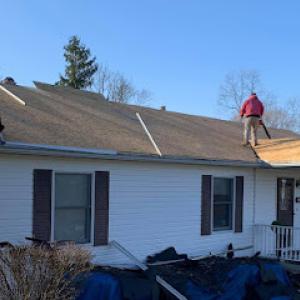
Because replacements are best scheduled from late spring into early fall, homeowners often use that window to address hidden moisture damage before the next winter cycle. If you plan a roof refresh, do the moisture check first, and tackle any soft decking, compromised underlayment, or degraded flashing now. This proactive timing minimizes the risk of a repeat cycle when temperatures swing below freezing and moisture re-enters via any compromised seam or joint.
Engage a local roofer who understands hillside homes and older decks. Have the roofer confirm the integrity of decking around eaves, valleys, and penetrations, and require a careful flashing inspection where roof planes meet walls or chimneys. If soft spots or moisture damage are found, prioritize replacing or repairing those sections during your spring project, before the next freeze-thaw season. Strengthen attic ventilation to curb condensation pressure, and consider a more robust underlayment in vulnerable zones to slow moisture migration. Time your replacement to finish before winter, so you step into the season with a roof that stands up to the valley's moisture and the town's stubborn freeze-thaw pattern.
Spring storms and hail are a major local trigger for roof inspections and replacement demand in Zanesville. After a winter of freeze-thaw cycles, the Muskingum-Licking valley leaves many roofs with micro-cracks, lifted granules, and hidden moisture pockets. When a spring squall arrives, those vulnerabilities surface fast. If your roof showed any hail impact or unusual granule loss last season, treat this spring as a high-priority red flag for inspection rather than hoping for a quick, inexpensive fix.
Ohio's storm-and-hail insurance environment means adjusters review photos, decking condition, and shingle warranty details during claim decisions. Be prepared to show dated photos that clearly capture edge damage, soft spots, and any leakage indoors after storms. Decking condition matters: warped boards, fastener corrosion, or sustained moisture can swing a claim toward replacement rather than repair. Have your shingle warranty information accessible, and note any batch or lot numbers if you can. In this market, clear documentation can shorten the path from damage recognition to appropriate coverage decisions.
After regional storm events, local demand can rise quickly, affecting scheduling and increasing the importance of documenting damage before temporary repairs or tear-off. If you temporarily tarped or tar-lapped a leak, document the pre-repair condition first. Temporary fixes are understandable, but insurers and contractors will want to see what the roof looked like before any patchwork. Waiting too long can complicate claim status or lead to misinterpretation of pre-existing conditions as new damage. Act promptly to photograph the entire roof from multiple angles and indoors to show any active leaks or staining.
Start with a hands-on inspection if safe to do so, focusing on evidence of granule loss, curling or cracked edges, and any damp decking visible from attic access. Photograph the soffit, fascia, and flashing where long-term water intrusion tends to begin. Note the age and type of roofing on your hillside home, because those older structures in this area respond differently to hail compared with newer builds. If damage is visible, contact a local contractor who understands seasonal patterns here and can help you prioritize cedar and asphalt areas alike, recognizing how freeze-thaw cycles leave some gaps easier to miss until spring storms arrive. Stay vigilant for rising demand and keep your plans flexible to avoid being squeezed by a crowded schedule.
Precision Roofing & Gutters
(740) 453-3649 ohioprecisionroofing.com
2333 Adamsville Rd, Zanesville, Ohio
5.0 from 241 reviews
Precision Roofing is the top-rated roofing company in Zanesville, Ohio. Family-owned business with over 100 perfect 5-star Google reviews. Specializing in residential shingle roofing, and metal roof replacements. We provide a lifetime workmanship warranty and install Atlas shingles with a lifetime warranty. We complete most roofing projects in a day and offer emergency roofing repairs when you need it most. We are experts at working with insurance companies, so call us to handle your claim. We make roofing simple and affordable! We can help with roof repair, roof replacement, storm damage repair, and roof installation projects. We also do gutter & gutter guard replacement and vinyl window & siding installations.
Am Roofing & Siding
(740) 974-8268 amroofingandsiding.com
1735 Nob Hill Rd, Zanesville, Ohio
4.9 from 68 reviews
AM Roofing And Siding provides expert roofing and siding services, including installation, repair, and replacements. With quality materials and skilled craftsmanship, we ensure durable, weatherproof protection for your home or business.
Muskingum Commercial Roofing
(740) 586-9670 www.muskingumcommercialroofing.com
3649 Olde Falls Rd, Zanesville, Ohio
5.0 from 18 reviews
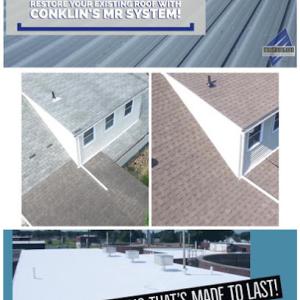
Whether your commercial roof is in need of repair, restoration, or a complete replacement, Muskingum Commercial Roofing is here to help. Our team specializes in leak detection, flat roof repair, as well as the removal, installation, and maintenance of commercial roofing systems. Our dedicated team specializes in Conklin Roofing Products; a trusted coating company for more than forty years that still delivers outstanding performance with each of their products. Our Conklin ENERGY STAR qualified products will start saving you money in no time.
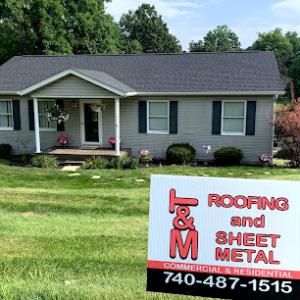
T&M Roofing & Sheet Metal
(740) 487-1515 tmroofing-services.com
2965 Adamsville Rd, Zanesville, Ohio
4.5 from 26 reviews
At T&M Roofing, we treat you like family. Our promise is to deliver top notch quality and service to each and every customer. We listen to your individual needs and tailor a customized solution to your roofing and siding needs.
River City Roofing
(740) 507-6586 roofrivercity.com
1100 Brandywine Blvd Unit H Suite E, Zanesville, Ohio
5.0 from 1 review
River City Roofing is a premier roofing contractor in Zanesville, Ohio, offering expert residential and commercial roofing services. As insurance restoration specialists, we are dedicated to helping you navigate the claims process and restore your property after storm damage. Our team specializes in hail repair, ensuring your roof is quickly and effectively repaired to protect your home or business. With a commitment to quality workmanship and exceptional customer service, River City Roofing is your trusted partner for all your roofing needs in Zanesville and the surrounding areas.

Henning & Sons
(740) 697-7292 www.henning-sons.com
Serving
4.3 from 15 reviews
Henning & Sons, Inc. is a family owned business, specializing in roofing service since 1959. We do not use sub-contractors. Our services are tailored to commercial and residential customers, such as factories, warehouses, homes, apartments and churches. Our specialists are here to handle all types of roofing jobs. We also offer Rheem furnaces and air conditioning systems, Rheem hot water heaters and American Standard fixtures for your bathroom and kitchen. When it's time for your roof to be serviced, commercial or residential dwellings, Henning & Sons, Inc. offers you quality service as we perform with the highest performance standards in your area. Give us a call today and consult with our specialists!

Shield Pro Roofing
(740) 877-9657 use.www.shieldproroof.com
Serving
5.0 from 36 reviews
Shield Pro Roofing specializes in insurance-paid replacements, offering seamless service and top-quality installations. Our team ensures a stress-free process, using premium materials to shield your home. Trust Shield Pro Roofing for hassle-free, high-quality roof replacement or repair that protects your home!
Bob Romine Roofing & Construction
Serving
4.3 from 4 reviews
Since 1970, Bob Romine Roofing & Construction has served Newark, Ohio, and the surrounding area with guaranteed quality roofing for both commercial and residential customers, specializing in flat roof installation. We have the capabilities to complete; shingled roof installation, metal roof installation, flat roof installation specialists, and seamless rubber roofing. Our dedicated roofing crews are highly experienced. Bob Romine Roofing & Construction in Newark, Ohio uses top-grade roofing materials to make sure your roofing job gives you years of high performance. We manufacture and use the RR-1 fastener system for single-ply roofing, which prevents roof puncture, condensation, heat loss, and roof corrosion.
T W Freeman Consultants
(740) 345-7889 twfreemanconsultants.com
Serving
Commercial Roofing, Wind Design, Due Point, Analysis, Specification Writing
Pjp remodeling
Serving
Offering all kinds home repairs and remodeling been I'm business 9+ years offer free estimates
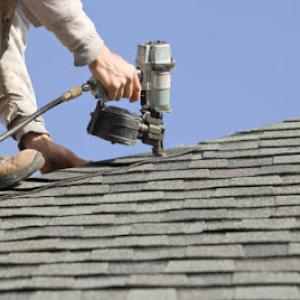
Asphalt shingles are common in Zanesville and fit much of the city's existing housing stock, but summer humidity and heat can accelerate aging while winter cycling stresses seal lines. When you choose asphalt, look for a high-wind rating and a laminated profile to better resist wind-driven rain and hail. In areas with repetitive freeze-thaw cycles, ensure the shingles have a robust underlayment and solid attic ventilation to minimize moisture trapped under aging seals. Regular inspections after harsh summers and wet springs help catch curling or lost granules early.
Metal roofs shed water efficiently and handle seasonal swings well, which matters in a valley climate with freeze-thaw stress. The key here is careful flashing and fastener work. In this region, flashing at chimneys, valleys, and along eaves should be sealed with corrosion-resistant material and checked after heavy storms. Fasteners must be properly seated, with synthetic washers that resist icing overhangs. Metal options can be a long-term value when installed by a crew experienced with older framing systems, because improper attachment can create leaks around penetrations.
Clay tile and concrete tile bring a distinctive look but add significant weight. Heavier systems may be limited by older framing conditions common in established neighborhoods, so structural checks are essential before installing. Wood shakes offer good curb appeal on hillside homes but require regular maintenance to prevent moisture intrusion and splitting in damp springs. Synthetic products provide a lower weight and good moisture resistance, but some formulations still need careful detailing around flashing and vents to avoid trap moisture.
Older decks and rafters, especially in homes with visible aging, need close attention to deck condition and potential rot. In any selection, plan for a conservative, staged inspection routine after winter and during spring storms. This helps catch moisture intrusion before it spreads and ties up interior damage in the attic or ceiling.
For a straightforward asphalt shingle roof, you're typically looking at a project in the range of $350 to $550 per square. Metal roofing runs higher, usually $700 to $1100 per square. For clay tile, expect roughly $1200 to $2100 per square, and concrete tile generally lands around $900 to $1700 per square. Wood shingles or shakes come in at about $600 to $1000 per square, while synthetic or composite shingles sit in the $550 to $1000 per square band. These numbers reflect material quality, local supply, and the need to match aging homes with historically proper looks.
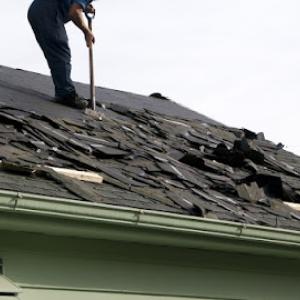
In this area, tear-offs uncover more than old shingles. When long-term moisture exposure and freeze-thaw cycles affect decking, expect additional costs for replacement of compromised boards and backer. In practice, that means budgeting for decking material and labor that can push the total well beyond the base roof material price. If the attic or crawlspace reveals mold or moisture damage, costs climb further. Such upgrades are more common on hillside roofs with limited venting and older decking found under many Zanesville homes.
Pricing can shift with storm-driven demand spikes in spring. That surge shows up as higher material costs and tighter scheduling windows. The complexity of reroofing older homes also matters: steep sections, chimneys, valleys, and ventilation upgrades all add time and specialty flashing. Homes with multiple valleys or intricate ridge lines tend to push per-square prices toward the upper end of the base ranges, and steep pitches call for more safety measures and equipment.
Older structures often hide a mix of materials and varying substrate conditions. Expect inspections to go deeper, with more notes on drip edges, underlayment, and flashing around chimneys or skylines. If ice dam risk is a concern, you'll likely see a focus on enhanced moisture barriers and better attic ventilation, which can influence material choices and overall cost. In practice, the final price reflects both the visible shingles and the condition of the layers beneath.
A building permit is required for reroof projects in Zanesville. This ensures that moisture control measures, flashing, venting, and underlayment are reviewed in the context of the valley's freeze-thaw cycles and older hillside housing stock.
The permit is filed with the City of Zanesville Building Department by the contractor or homeowner and includes project scope, proposed materials, and contractor details. The filing party should verify that the scope covers deck and roof edge flashing, vent placement, and attic ventilation to minimize moisture buildup during thaw cycles.
The permit packet should spell out the materials and methods planned for the reroof, with emphasis on proper flashing at chimneys, valleys, and wall penetrations, plus underlayment choices suited to damp basements and frequent spring moisture. If the project includes venting or attic insulation work, ensure those details are listed so inspectors can confirm code compliance during the review.
Inspections are scheduled during and after the work to verify flashing, venting, underlayment, and overall code compliance. Expect an on-site inspection when the new roof is in place but before fascia and drip edge finish, and a final inspection after completion to confirm that all flashing transitions and slope requirements meet local codes and the climate's moisture demands.
Coordinate timing with the Building Department to avoid delays during winter thaw periods when moisture control is most critical. Have the contractor provide a clear flashings plan and attic venting layout for the inspector. Retain all receipts and material warranties to simplify the review process and ensure long-term performance against freeze-thaw moisture issues.
In this city's hillside neighborhoods, storm season means more than a quick claim check. Because Ohio sees recurring storm and hail activity, Zanesville homeowners should treat roof documentation as part of the replacement process, not just the claim filing step. When you're making decisions about replacing decking or addressing hidden moisture, the photos you gather now become part of the project record you'll rely on later. Have clear images of the entire roof line, attic decking, and any visible gutters, so a contractor or adjuster can compare pre- and post-storm conditions without second-guessing textures or colors.
Insurers commonly want photos of existing conditions and any replaced decking, which matters in Zanesville where hidden moisture damage is often discovered during tear-off. Take wide shots and close-ups of eaves, flashing around chimneys, skylights, and dormers. Document signs of moisture intrusion in the attic-stains, warped decking, or mold growth-before any tear-off begins. Keep dated copies and store them in a single, organized folder so you can quickly share them if questions arise.
Timely filing is important after local storm events because adjuster review and warranty questions can affect whether damage is treated as covered storm loss or wear-related deterioration. Don't delay submitting the claim while waiting for perfect daylight or ideal weather. Coordinate with your contractor to schedule a coordinated teardown and deck inspection window, so the documentation aligns with what the team finds during removal. In storms that cycle through this valley, thorough, current records reduce ambiguity and help keep the process focused.
Late spring through early fall is the preferred replacement window in Zanesville because winter weather can interrupt tear-off and prevent proper sealant curing. That cycle lines up with the valley's pattern of rapid freeze-thaw cycles and the spring storms that push moisture into aging decking. Scheduling during this stretch helps ensure adhesives, sealants, and flashing can set and cure without sudden temperature swings interrupting the process.
Summer humidity can affect sealant performance, so timing and installation conditions matter even during the warmer season. Choose days with moderate humidity and avoid heat spikes that push products beyond their curing ranges. For older hillside homes, roof decks may already be stressed from prior freeze-thaw damage, so installers should monitor substrate dryness and ventilation to prevent vapor buildup from trapping moisture under coatings.
Autumn winds can create debris issues and scheduling pressure as homeowners try to finish projects before winter freeze-thaw returns. Coordinate with crews to keep the job area clean, with tarps ready and debris chutes secured to reduce shingle shingle loss and gutter blockages. On older roofs where flashing and decking show signs of moisture intrusion, plan a preliminary decking inspection and possible deck replacement before the main tear-off to avoid delayed reinstallation caused by hidden rot.
Work with a local contractor who can align the project with typical late-spring rain patterns and early-fall temperature swings. Set provisional milestones for weather-driven pauses and choose days with a stable lull in wind and precipitation to reduce debris exposure and ensure cleaner sealant seams. For hillside properties, establish a clear drainage plan to direct runoff away from vulnerable eaves and valleys during the replacement window.