Last updated: Apr 19, 2026
Elgin sits in the Central Texas storm belt east of Austin, where spring hail and wind events are a primary trigger for roof replacements and leak calls. After a storm, inspect the roof for obvious bruising on shingles, granule loss in gutters, and dark, rectangular patterns where hail can press through the surface. Warped edges, lifted shingles, or exposed underlayment are red flags that hail has compromised the system meant to shed water. In the attic, look for spiked insulation, water stains, or fresh odor of moisture near vents and chimneys-a sign that hail pressure penetrated the roof deck or flashing. Because those signs can appear quickly or develop over days, notable leaks after a hail event should be treated as high-priority.
The local insurance environment is heavily shaped by hail and wind losses, so homeowners need date-stamped photos, storm-date records, and prompt notice after a loss. Gather clear, dated photos of affected areas from multiple angles-roof surfaces, gutters, vents, and the interior attic shows where water entered. Save weather reports or radar screenshots showing the storm_date and track, and keep a simple log of when shingles first showed signs of damage or leaks appeared. When filing, reference the exact storm date and attach the image evidence. Prompt notice matters: delays can complicate coverage evaluation and undermine the claim's strength. If your roofer recommends a temporary patch to stop a growing leak, document the temporary fix with photos and notes, then pursue a formal claim promptly while the weather cooperates for an inspection.
Because Elgin's hottest summer periods can limit safe tear-off and installation windows, many reroof projects are scheduled after spring storm assessments but outside peak heat. The high heat and strong sun can bake underlayment and install-day conditions, so coordinating a plan that aligns with cooler late spring or early fall windows minimizes risk to the roof system and crews. If a hail event occurs during spring, the timeline often shifts: first, confirm damage with a reputable local roofer, then initiate the claim while the storm season remains fresh in records. Expect the work to be staged around the heat-sensitive portions of summer; crews will look for days with moderate temperatures and calmer afternoon winds to execute a thorough tear-off, nail pattern, and ventilation check. A timely, staged reroof in the shoulder seasons reduces the chance of re-communication gaps with the insurer and avoids rushed decisions during peak heat.
Right after a hail storm, conduct a careful exterior inspection from the ground if safe, noting any displaced shingles or dented metal. If a leak is suspected, place a temporary tarp or plastic sheeting over the most vulnerable area to prevent interior damage, but avoid walking on a roof that's slick or visibly damaged. Collect those date-stamped photos and storm records as soon as possible, because insurers may request them at the outset. Contact a local roofing professional who understands Elgin's wind patterns, hail history, and the quirks of the storm-season schedule to perform a careful assessment, help distinguish cosmetic from structural damage, and guide the claim process accordingly. Time matters: initiating an evaluation quickly protects the home's envelope and aligns repairs with a realistic, weather-conscious plan.
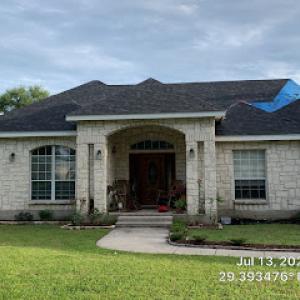
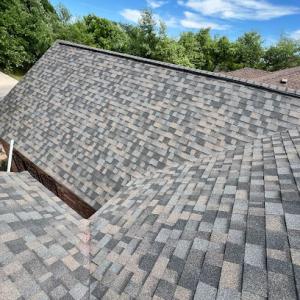
Asphalt shingles are common in Elgin because they fit local residential budgets, but strong UV exposure and hail can shorten service life compared with milder climates. In this town, you'll want a high-quality underlayment and a shingle line with good impact resistance if you expect heavy hail seasons. When inspecting after a storm, look for bruising, granule loss, and curling edges on shingles in the sun-drenched southern and western exposures. Regular maintenance matters: prune nearby trees to limit hail-driven ricochet damage and ensure the attic remains properly ventilated so heat doesn't accelerate deterioration of the deck and flashing. If you choose asphalt, consider a premium, impact-rated option and plan for timely reroofing if you see multiple hail events in a single season.
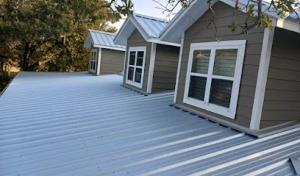
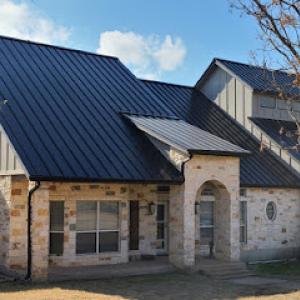
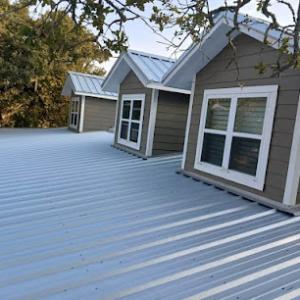
Metal roofing is a meaningful local specialty and is often considered in Elgin for better performance against sun exposure and for shedding rain quickly during seasonal storms. Metal panels tolerate high heat well and resist hail better than many other materials, especially if installed with a robust fastening pattern and unbroken ridges. Look for a standing-seam design or heavy-gauge panels with proper edge detailing to reduce the risk of wind-driven uplift. In practice, metal shines when you have a long-term view: less frequent replacement, smoother rain shedding, and fewer interior heat spikes if the attic is well vented. The initial installation needs careful alignment with roof geometry, especially around chimneys, vents, and skylights common on local homes.
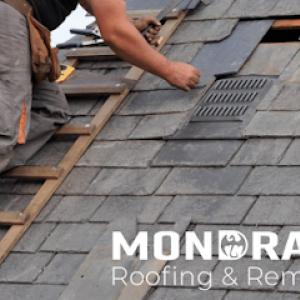
Clay and concrete tile appear in the market but require attention to impact vulnerability, roof structure, and replacement logistics after hail events common in this part of Texas. Tile can crack under hail impact, and broken pieces can compromise underlayment and ventilation. If you live in a taller home with complex rooflines, ensure the substrate and framing can handle the weight, and verify that fasteners and underlayment are suitable for copper underlayment and Texas sun exposure. Tile roofs need precise installation around penetrations to prevent leaks after hail. If you're considering tile, plan for increased inspection frequency after storms and be prepared for targeted repairs rather than full replacement in some situations.
Your choice should balance exposure to sun, hail risk, and the existing roof's structure. In many Elgin neighborhoods, combining sturdy underlayment with appropriate ventilation reduces heat buildup and extends the life of whatever material you choose. For many homeowners, the best approach is to match roof type to the house design, attic ventilation, and local storm patterns, then align expectations with the neighborhood climate realities. After a hail event, a careful, staged assessment helps determine whether the roof or only certain sections need attention, and it guides the timing of any planned replacements.
After the storm season, reroofing costs in this area move with the pulse of the Austin-area market. Local pricing for common replacement products falls within clear per-square ranges: asphalt shingles from 350 to 700 USD per square, metal roofing from 700 to 1300 USD per square, clay tile 1200 to 2500 USD per square, concrete tile 1100 to 2400 USD per square, wood shingles or shakes 600 to 1000 USD per square, and synthetic or composite shingles 700 to 1200 USD per square. Those figures serve as a practical framework when you're budgeting right after the hail and wind events that typically drive demand.
In the weeks after a heavy storm, the mix of material availability and contractor scheduling can tilt prices toward the upper end of these ranges. Asphalt shingles remain the most common default for budget-conscious homeowners, while metal roofs tend to rise quickest in cost when supply chains tighten. Clay and concrete tiles, already more cost-sensitive to handling and weight, can see noticeable spikes if crews are booked out and delivery windows lengthen. Wood shingles or shakes, though less common on new builds, will also feel the crunch when specialty crews are scarce. Synthetic or composite options strike a middle ground but still reflect the season-driven demand surge. Planning ahead with a preferred material and quantity can help you avoid the highest surge times.
Storm events at the edge of the Central Texas storm season tighten schedules across the Austin-area orbit. When crews are scarce, you'll notice longer wait times for inspections, permits, and installation slots, which translates to higher out-of-pocket because of extended labor chaining and potential material holdbacks. If you're weighing a reroof, consider locking in a reputable contractor early in the window after inspections are complete and weather windows align. This proactive stance helps stabilize labor costs and reduces the risk of last-minute price jumps caused by material shortages or crew bottlenecks.
Project totals hinge significantly on inspection-driven installation details: the underlayment, the ventilation strategy, and the nail pattern required for full reroofs. An upgrade to higher-grade underlayment, upgraded ventilation for attic comfort and long-term roof health, and a nail schedule that satisfies inspection expectations can add cost, but they protect against premature failure in our hot, sun-baked summers and hail-prone climate. Expect these factors to push totals upward within the per-square ranges, particularly for heavier systems like clay or concrete tiles. If you anticipate regional hail events again, budgeting for improved underlayment and enhanced ventilation becomes a practical safeguard rather than an optional luxury.
Get a clear picture of your project costs upfront - no commitment required.
EZS Roofing & Construction
(512) 781-8157 www.ezsroofing.us
331 Gruetzner Ln B, Elgin, Texas
5.0 from 14 reviews


EZS Roofing & Construction
(512) 781-8157 www.ezsroofing.us
331 Gruetzner Ln B, Elgin, Texas
5.0 from 14 reviews
At EZS Roofing and Construction, we proudly serve Elgin, Austin, Georgetown, and surrounding TX areas with top-tier roofing and siding services. As experienced roofing contractors, we specialize in roof installation, roof repairs, gutters, and waterproofing. Our commitment to quality, transparency, and customer satisfaction sets us apart. Whether you need a minor repair or a full roof replacement, trust our licensed team to protect your home with durable, beautiful solutions. Call now for a free estimate!
DV Roofing & Remodeling - Elgin, TX
2111 Co Rd 474, Elgin, Texas
4.9 from 11 reviews
DV Roofing is not just a roofing contractor. We specialize in roofing and as general contractors, we also have the capability and experience to assist with all of your storm related needs. If you need storm damage repairs on roofing, siding, chimneys, skylights, garage doors, fencing, decking, painting, broken window and screens, rain gutters, interior drywall or painting, roof re-decking, fascia and trim repairs, and so much more, we can put our experienced team to work for you. We have decades of experience in all phases of home remodel and repair. DV Roofing is a family owned and operated company with locations in San Antonio, Temple, & Elgin.
Elgin Roofing Company | Bill Sprauer Roofing
(737) 703-6290 billsprauerroofing.com
331 Gruetzner Ln, Elgin, Texas
4.6 from 18 reviews
We are a family owned and local roofing company.
Reyes Roofing Contractor
(512) 563-7420 reyesroofingcontractor.us
Serving
5.0 from 45 reviews
Since 1999, Reyes Roofing Contractor has been providing dependable roofing and exterior improvement services across the Manor, TX area. As a BBB-accredited and insured company, we serve residential and commercial clients within an 80-mile radius. With over 35 years of experience, we specialize in roofing installation, repair, and maintenance for all types of roofs. We also offer siding installation, interior and exterior painting, gutter maintenance, installation and repair, as well as durable fence construction and restoration. Free estimates are available for all roofing and exterior projects across the region!
Roofing Turtle
(833) 688-7853 roofingturtle.com
Serving
5.0 from 24 reviews
Roofing Turtle offers the the Highest Quality Roofing on the Market. Even though we specialize in synthetic F-Wave shingle. We do offer asphalt shingle repairs and asphault shingle roof replacements. Roofing Turtle is a GAF certified contractor. Offering repairs and metal roof replacement including standing seam metal roofs. This company is local to Central Texas and is a sister company of Butler Contracting. With incredible durability, un beauty, and premium affordability–everything else is just a roof. Schedule your roof inspection today. We inspect for hail damage, wind damage, and condition of your shingles, to help you make the best decision for you. If you need a new roof give your home the upgrade it deserves and Protect Your Shell!
River City Roofing
(737) 931-1133 roofrivercity.com
Serving
4.9 from 42 reviews
At River City Roofing, we're a trusted roofing contractor serving Manor, Texas, with expertise in both residential and commercial roofing. Our team is dedicated to providing high-quality roofing solutions tailored to meet the unique needs of your home or business. Whether you need roof repairs, replacements, or new installations, we use top-grade materials and the latest techniques to ensure your roof stands the test of time. We're committed to delivering exceptional service, from the initial consultation to the final inspection. Choose us for reliable, efficient, and affordable roofing services in Manor, Texas."
Mondragon Roofing & Remodeling
(512) 587-0335 mondragonroofing.com
Serving
5.0 from 8 reviews
Services: Roofing Siding Free estimates/inspections Remodeling Painting Drywall Flooring And more
Hernandez Brothers Restoration
(512) 379-1408 hernandezbrothersrestoration.com
Serving
4.9 from 10 reviews
Hernandez Brothers Restoration is your trusted roofing contractor in Bastrop, TX, dedicated to providing high-quality roofing solutions for every property. With a commitment to excellence, we ensure that every project is handled with precision, durability, and long-lasting protection. Whether you need a new roofing installation, a fast roof repair, or ongoing roofing maintenance, we have you covered. Our expertise spans a wide range of roofing services, including roof replacement for aging or damaged roofs, ensuring your property stays protected from harsh weather. If you’re experiencing leaks, our roof leak repair service quickly addresses the problem to prevent further damage.
Kahlo Construction
(512) 428-4719 kahloconstruction.com
Serving
4.9 from 34 reviews
We are a company that are trying to re define quality in the Home Improvement industry. We are experience and reliable company.
Spade Roofing & Gutters
(512) 237-8620 www.spaderoofing.com
Serving
4.9 from 109 reviews
WELCOME TO SPADE ROOFING AND EXTERIORS Spade Roofing and Exteriors is owned and operated by Ace and Courtney Fierro. Both Ace and Courtney are graduates of Smithville High School and Texas A&M University. Ace meets with every customer to discuss projects and Courtney handles all the business paperwork behind the scenes. Spade Roofing and Exteriors operates in Smithville and services all of the surrounding areas. Our mission is to provide homeowners with the best quality workmanship using the best materials in the industry.

Austin Southwest Roofing
(512) 926-3039 www.aswroofing.com
Serving
4.7 from 45 reviews
Austin Southwest Roofing has been providing roofing services to Austin, DFW and San Antonio since 1978. Our experience gives us the knowledge to get the job done right the first time. As a preferred vendor for most major insurance providers and a platinum contractor for Owens Corning, we are able to provide the you: - The best results in the quickest time frame. - The highest quality materials. - And the best warranties. We specialize in residential and commercial roofing and will work with your insurance company to get you the best deal when it comes to repairing or replacing your roof.
Roof It Pros
Serving
5.0 from 72 reviews
Roof It Pros is your reliable local roofing company based in Austin, TX, providing professional roof repair, roof replacement, and new roof installation for both residential and commercial properties. Our skilled team handles asphalt shingles, metal, tile, and flat roofing systems, and specializes in storm damage restoration, roof leak repairs, and roof inspections. We also offer seamless gutter installation, clogged gutter cleaning, and downspout solutions to protect your home. Committed to precision, affordability, and long-lasting results, we proudly serve Austin, Pflugerville, Round Rock, Hutto, Georgetown, Cedar Park, Leander, Manor, Bee Cave, and nearby areas. Contact us today to schedule your free estimate—we’re here to help!
When a full reroof is planned, a building permit is required rather than treated as a no-permit maintenance item. The city's process recognizes that renewing the roof entirely changes how the structure carries loads, vents, and underlayment, especially after hail events that can compromise the deck and sheathing. Do not assume a simple patch job will bypass permitting; a full reroof triggers the permit pathway and downstream inspections.
The contractor submits permit details together with the project scope, making scope accuracy important before tear-off begins. Inaccurate scope can lead to delays or rework, especially if the tear-off is wider than anticipated or if additional venting or underlayment upgrades are needed after the deck is exposed. For Elgin's storm season, the scope should explicitly cover underlayment type, ventilation upgrades, and nail patterns, since inspectors verify these components as part of the permit approval.
City inspections occur during and after the work to verify underlayment, ventilation, and nailing patterns before final approval. Inspections are typically staged: one while the roof is partially completed to confirm that the underlayment is properly installed and that attic ventilation is correct, and a final inspection once all roofing materials are in place and fastened to the required pattern. If storms are imminent, coordinate closely with the permit office and the contractor to keep inspection windows clear and avoid delays caused by weather-related access issues or material storage setbacks.
Given Central Texas hail exposure and intense sun, the inspector will look for a continuous, properly sealed underlayment, with adequate ventilation to prevent moisture buildup beneath the new roof. Ensure drip edge, starter courses, and fastener patterns meet the city's expectations for wind and uplift resistance. Keep alignment between the tear-off extent and the permit scope visible on site, so inspectors can quickly verify that the actual work aligns with approved plans. If any deviation from the permit scope occurs, consult the building department before proceeding to avoid costly rework and re-inspection fees.
Maintain a clear project binder with the permit number, approved plan set, and any addenda. As-built notes reflecting vent locations, underlayment choices, and fastener counts help during final inspection and post-installation questions from insurance adjusters. Having the contractor present for inspections helps resolve questions on the spot and keeps the reroof on track through Elgin's seasonal weather windows.
Texas roof claims in Elgin are commonly tied to hail and wind, so documentation quality often affects whether repairs or full replacement are approved. When a storm rolls through, the first thing a homeowner tends to notice is the visible damage-dented gutters, crushed shingles, and granule loss. But the file that actually moves the claim often hinges on the pictures and notes taken in the first 48 hours. High-resolution photos of the ridge line, the hail impact points, and any irregular staining on ceilings or walls can become the deciding factor between a simple repair and a full reroof.
Adjusters may be local or coordinated through large carriers, which can change inspection timing and create delays between storm damage discovery and claim decisions. If a storm hits on a busy week when multiple neighborhoods are filing, scheduling can stretch into days or weeks. It helps to have a clear sequence: document, contact, and coordinate. For homes with steep pitches or multiple stories, include foot-and-crest elevations and attic views to show how water would travel after a leak. If an interior leak is present, note when it first appeared and how it progressed after the rain stopped. This helps establish a timeline that guides the adjuster through the damage assessment.
Homeowners in Elgin should preserve photos of elevations, interior leaks, and any emergency tarping because storm-response timelines can overlap with high regional claim volume. Take wide shots from multiple angles to capture surrounding trees or structures that might have contributed to impact patterns. Close-ups of cracked shingles, lifted granules, and wind-driven debris are valuable, but pair them with context photos that reveal the roof's overall condition. Inside the attic, photograph any daylight patches, signs of moisture, or staining along rafters. If tarping is used, keep receipts and note when it was placed, who placed it, and for how long it will stay. This helps prevent later disputes about preexisting damage or urgency.
Keep a simple, organized folder or binder for all documents related to the claim. A chronological record-photos, dates of storms, initial observations, and correspondence with the insurer-can reduce back-and-forth and speed up the decision process. When in doubt, err on the side of thoroughness: clearer documentation lowers the risk that a claim is minimized or delayed, and it supports a smoother return to a solid, weather-resilient roof for your home.
Elgin's long hot season and strong sun exposure accelerate shingle aging, granule loss, and thermal stress on darker roof systems. In practice, that means you may see faster color fading, more granular grit in gutters, and a higher risk of blistering or splitting after a severe mid-summer heat spike. When inspecting after a storm or during maintenance, focus on the ridge lines and lower slopes where heat builds up, and look for curled edges or minor granule loss that wasn't there last season. Choosing materials with good UV resistance and color stability helps, but proper attic ventilation remains the key to slowing that accelerated aging.
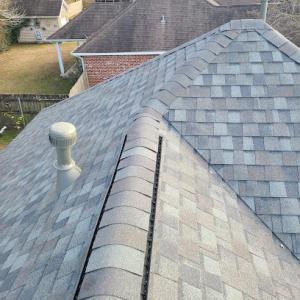
The reroof inspection in this market treats attic airflow as a core pass/fail item, not a comfort feature. Poor ventilation traps heat under the deck, which can dry out underlayment faster and push nails and fasteners toward failure. Ensure soffit intake and ridge or turbine exhaust are balanced to maintain consistent airflow through the attic. If the attic feels hot to the touch on a 100-degree day, or if you notice significant insulation compression near the ducts, that's a sign the system isn't breathing properly. A proper venting plan protects the roof deck, helps maintain shingle warranty conditions where applicable, and supports longer roof life in the Central Texas sun.
Replacement timing in this market often avoids the most punishing summer heat because high deck temperatures can complicate labor safety and installation pace. Plan for milder months when possible, coordinating with crews to work earlier in the day and minimize exposure to peak heat. Before work starts, review attic ventilation changes and confirm that the chosen underlayment and decking are compatible with hot-season installation. A well-ventilated attic paired with a sun-ready roof surface reduces hot-weather stress and supports a steadier, safer installation pace.
Although steep-slope residential reroofing dominates locally, active contractor signals show a real niche for flat or low-slope roof work in the Elgin market. Those sections-often added during renovations or as sunrooms-catch more wind-driven rain and hail-driven impacts than expected. The surface may look flat, but the layers underneath matter: a durable underlayment, properly installed edge details, and careful penetration sealing become your first line of defense when storms arrive. In this climate, neglecting those details on low-slope areas can translate into quicker moisture intrusion and repeat repair cycles after each hail event.
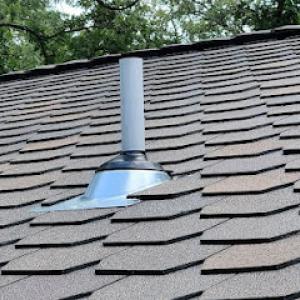
Seasonal storms and wind-driven rain in Central Texas make transitions and penetrations especially vulnerable on low-slope sections and additions. Corners where a flat roof meets a steep roof, skylight bases, vent stacks, and exhausts require extra attention. Metal drip edges, adhesive seam tapes, and flashings should be matched to the underlying substrate and compatible with any skylight flashing. If flashing components aren't integrated with the primary roofing system, even small wind gusts can push water into the joints. The risk increases with age, material choice, and a previous hail hit, so anticipate where water might travel from the surface toward interior spaces.
Skylight-related repair demand is present locally, which matters after hail events and during reroofs when flashing compatibility becomes a common leak point. When a roof is opened for replacement, ensure the skylight flashing is inspected and, if needed, upgraded to maintain a continuous seal. Poorly coordinated flashing between the skylight and the roofing membrane is a frequent culprit for slow leaks that worsen with the spring storm cycle. Plan for high-quality sealants, compatible flashing kits, and verified nail and staple patterns that won't compromise the skylight's waterproof envelope.
Find specialists in TPO, EPDM, and built-up flat roofing systems for residential and commercial properties.