Last updated: Apr 19, 2026
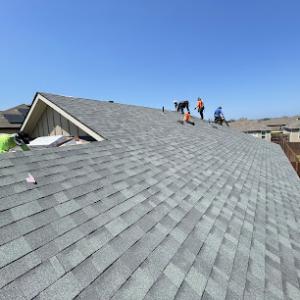
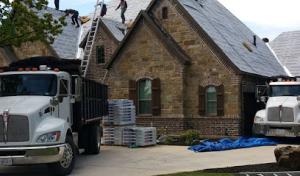
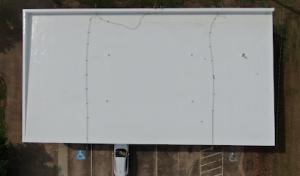
A high proportion of roofs in this market end up needing replacement after spring hail and wind events. The pattern in this area isn't random: a burst of severe weather in the spring routinely leaves battered shingles, dented metal, and uplifted edge details. When a storm hits, homeowners are first worried about safety, but the next concern is the roof's ability to keep the home watertight as quickly as possible. Claims spike as the local contractor network responds to post-storm inspections, and the emphasis shifts from "is it repairable" to "how fast can it be replaced." That urgency shapes the entire local market, from scheduling to material availability, and it's essential to align expectations with what the next few weeks will demand.
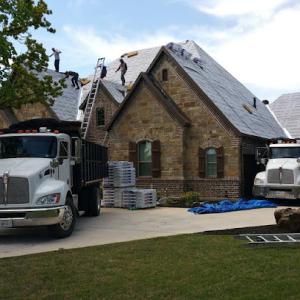
Contractors here are known to cluster around the storm damage window, and the claim process is a major part of the business cycle. A quick, thorough inspection after a hail event isn't optional; it's the first step toward a successful recovery. You'll see crews canvassing neighborhoods, documenting impact marks, and coordinating with insurers to confirm what qualifies as storm damage. The critical point for a homeowner is to act promptly: an early, accurate assessment reduces the risk of underinsurance, missed damages, or delayed replacements. If you're in this area, expect the inspector's report to be the hinge on which timing and material selection swing. Having documented evidence of hail impact, wind uplift, and possible underlying decking or underlayment exposure will shorten the claim path and minimize disputes.
Spring damage does not wait for perfect weather. Summer heat follows storm season, and exposed roof components deteriorate quickly when repairs are delayed into hotter months. Damaged shingles can curl or crack, exposed fasteners can corrode, and underlayment may begin to fail with repeated sun exposure and thermal cycling. In practice, this means a damaged roof left untreated for a few weeks can require more extensive replacement than one addressed promptly. A key action is to schedule a timely assessment if you suspect hail impact or wind uplift. Delays aren't just uncomfortable; they compound risk and can limit the options for everything from shingle color to attachment methods that best handle our local winds.
You should photograph and document any hail marks on the roof, gutters, and exterior surfaces as soon as safe access is possible. If a claim is initiated, keep every document, photo, and contractor contact in one place, and share it with your insurer promptly. Expect conversations about temporary protective measures-like roof tarping or debris handling-to be part of the immediate response, especially if a rain event is forecast after a storm. When you interview local roofers, prioritize those with a track record for clear communication, accurate damage assessment, and coordinated claim support. A dependable contractor can guide you through color and material choices that hold up under our sun and our frequent wind gusts while ensuring the replacement aligns with the home's original design and structural realities. In this market, the right partner not only fixes the roof but also helps navigate the claim process with efficiency and transparency.
Freetail Roofing
(737) 234-5734 freetailroofing.com
13800 TX-29 D, Liberty Hill, Texas
5.0 from 135 reviews
At Freetail Roofing, we prioritize the protection of your valuable investment. Our team is well aware of the unpredictable weather conditions in Texas, which can lead to roof damage, leaks, and other issues. With years of expertise, we possess the knowledge and skills to handle any roofing challenge effectively. Using top-notch materials and a meticulous approach, we ensure long-lasting results. Our mission is to offer our community unmatched peace of mind through exceptional service and attention to detail. Trust us to safeguard your home with the utmost care.
Accent Roofing & Remodeling
(512) 228-9416 www.accentroofingremodeling.com
5650 Co Rd 200, Liberty Hill, Texas
5.0 from 98 reviews
Top quality roofing re-roofing and remodeling service. Highly competitive prices and personalized service. Serving Williamson and surrounding counties. Storm damage specialist. Free inspections and estimates

Action Exteriors Austin
(737) 747-8987 actionexteriors.com
100 Sunset Ridge Dr, Liberty Hill, Texas
5.0 from 69 reviews
Action Exteriors Austin is your trusted partner for roofing, gutters, siding, and windows across Williamson County and Central Texas. Family-owned and locally operated, we specialize in roofing installations and storm damage restoration for homeowners and builders. From designer shingles to standing seam metal roofs, we install high-quality materials designed to withstand Texas hail, wind, and tornadoes. Our success is built on expert craftsmanship and an unwavering commitment to customer satisfaction. When you work with us, you’re treated like family. Protect and enhance your property with Action Exteriors Austin — call us today!
Duration Roofing & Construction
(512) 643-5255 duration-roofing.com
109 Bevers Rd Suite A, Liberty Hill, Texas
4.9 from 52 reviews
Duration Roofing & Construction | Leander, TX is your trusted partner for roof replacement, gutter installation & metal roofing. With years of experience, we offer high-quality new roof replacement designed to last, energy-efficient & reliable gutter services to protect your home. Our experts are committed to delivering excellent craftsmanship and ensuring your property remains safe & well-maintained. Whether you need a new roof, repairs, or professional gutter installation, Duration Roofing & Construction is here to help. Contact us today for a free estimate and discover why we're the preferred choice for homeowners Georgetown & Cedar Park, TX.

Roof Maintenance Systems
1636 County Rd 279, Liberty Hill, Texas
4.2 from 6 reviews
We are a team of roofing professionals dedicated to finding effective solutions to all your commercial roof repair needs. Since 2005, Roof Maintenance Systems, LLC has offered the fastest response time to services calls in the industry, because that's what do. Commercial. Industrial. Retail. Educational. Government. No matter what type of facility you own or operate, we have experienced technicians ready to handle your roof repairs any time, any day. If you are tired of long lead times before a repair crew shows up, or constant call-backs and low quality work, then give us a call to see how we can meet your roof repair needs.
Silver Creek Exterior & Construction
Serving
4.9 from 70 reviews
Serving Williamson County and the greater Austin area, we are your premier local roofing company specializing in comprehensive exterior solutions. Our expert team provides top-tier roofing services, from new installations and full roof replacements to skilled roof repair for storm and hail damage. We also handle a wide range of other crucial exterior work to protect and enhance your home's curb appeal. This includes professional gutter cleaning and seamless gutter installation, precise window replacements to boost energy efficiency, and high-quality exterior painting that revitalizes your property. Whether you're in Round Rock, Cedar Park, Leander, Georgetown, Hutto, or Pflugerville, our commitment is to deliver exceptional craftsmanship.
Noble Roofing
(737) 231-4839 nobleroofingtexas.com
Serving
5.0 from 40 reviews
Utilizing the best roofing practices for your Austin Texas home, making sure that your home has the best roof possible. This Roofing company does not play around when it comes to customer happiness. From insurance roofing to out of pocket roofing, we do it all. You're search for an Austin Roofing Contractor has come to an end here

Urtiz Roofing & Waterproofing
(512) 619-2976 urtizroofing.com
Serving
5.0 from 109 reviews
Urtiz Roofing & Waterproofing provides expert roofing repair, replacement and storm damage services to homeowners in Georgetown, Liberty Hill, Cedar Park, and Round Rock, TX. We deliver fast, professional inspections and quality workmanship backed by an A+ BBB rating. Call now for your free roof inspection!
Best Roof In Town
(512) 825-0090 www.bestroofintown.com
Serving
4.9 from 58 reviews
Best Roof in Town is a premiere roofing company and top rated of the Leander TX Roofing Companies and in the Greater Austin Area. Best Roof Town is a leader in Leander TX Roofing Companies specializing in Residential and Commercial roofing for over 10 years! Our Team of Roofing Experts are knowledgeable and always looking out for the best interest of our clients. We offer a Turn-Key Roofing Experiences from start to finish! Serving Cedar park , Round Rock and Austin Texas .

Coast To Coast Roofing & Building Contractors
Serving
4.4 from 222 reviews
Coast to Coast Roofs is a local Dallas / Fort Worth residential roofing company offering roof repairs, replacements and maintenance. We are driven by our commitment to outstanding customer care, community outreach, and our pledge to use sustainable materials and practices wherever possible. When choosing a full-service roofing company for your residential needs, you want a reliable service provider you can entrust with the safekeeping of your single biggest investment: your home. Coast to Coast Roofs is BBB Accredited and we’ve also earned the Business Dynamic Seal of Approval. We look forward to earning your trust and gaining the opportunity to serve you for all of your residential roofing needs.
Fur Sure Roofing
(512) 962-0287 fursureroofing.com
Serving
5.0 from 55 reviews
At Fur Sure Roofing, we're not just roofers. We're your neighbors, your friends, and fellow animal lovers. We understand the trust you place in us when you invite us to work on your home, and we don't take that lightly. At Fur Sure Roofing, we build more than just roofs – we build relationships and strengthen our community. When you choose us, you're not just getting a superior roofing service, you're making a difference.
Best Build Exteriors
(512) 877-2378 www.bestbuildexteriors.com
Serving
5.0 from 103 reviews
Locally owned and operated roofing and exterior contractor proficient in insurance claims and proper roofing, siding, window and rain gutter system installation processes and techniques.
Liberty Hill's pattern of summer heat plus afternoon thunderstorms means small storm-created openings can turn into active leaks soon after a weather event. The heat makes roofing materials expand and roads stay dry until a wind-driven rain opens up gaps along shingles, around vents, and at flashing joints. When a storm pushes through with gusty wind and a sudden downpour, water can slip through even a seemingly minor lift or crack. That dynamic is especially true on older sections of roof and at ridge lines where installed flashing can loosen over time. The result is a leak that doesn't wait for a full replacement cycle, and the clock starts ticking as soon as the rain stops.
Emergency response matters locally because wind-driven rain after spring and summer storms can exploit lifted shingles, damaged ridge areas, and flashing failures before a full replacement is scheduled. Look for new staining on ceilings, damp spots along interior walls near the attic, and musty odors that persist after the roof area has dried. Exterior cues include dark streaks along the edge of the roof, dampness at vent openings, and any visible peeling or curling of shingles. If a storm has just passed, even a light shower can reveal weaknesses that didn't show up during dry weather. Time is of the essence to verify whether a leak is active and to prevent further damage from a second wave of rain or elevated afternoon heat.
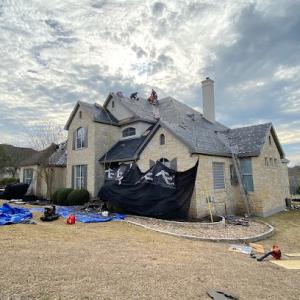
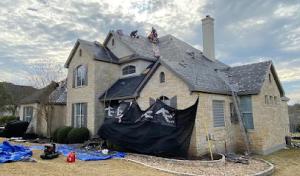
Quick-response and cleanup-included signals are especially relevant in this market because homeowners often need temporary protection first and full re-roofing later. Start by safely tarping or roofing a small section to channel water away from living spaces, prioritizing any area over the attic where insulation or decking shows moisture. Use sturdy plastic or a temporary roof patch to cover exposed openings while you arrange a more permanent fix. Collect drips with buckets or towels to minimize water damage and keep electrical fixtures dry. If shingles are visibly lifted, avoid walking on them; instead, place temporary boards over the area to prevent further damage while you contact a local contractor for an urgent assessment.
A skilled Liberty Hill contractor will prioritize weather-tight temporary solutions and a rapid plan for a full repair or replacement when the calendar allows. Expect an on-site inspection that focuses on shingles, ridge caps, flashing around chimneys, vents, and any area where water has tracked under the decking. Ask for documentation of the damage and a clear plan for temporary protection plus a realistic timeline for permanent work. In peak season, the right team coordinates temporary measures with a longer-term re-roofing schedule so you're not living with a leak any longer than necessary.
When you can't wait, these contractors offer fast response times to stop leaks and prevent further damage.
Freetail Roofing
(737) 234-5734 freetailroofing.com
13800 TX-29 D, Liberty Hill, Texas
5.0 from 135 reviews
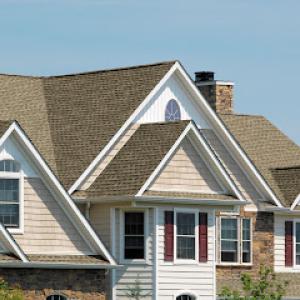
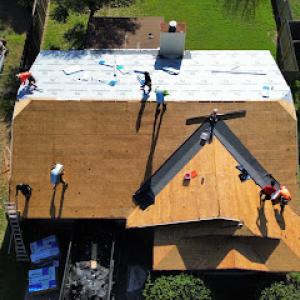
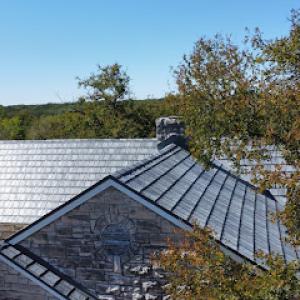
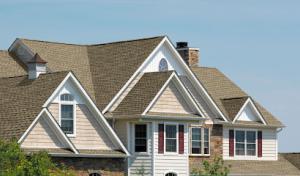
Asphalt shingles and metal roofing are the most practical mainstream choices in Liberty Hill, while clay and concrete tile appear in higher-end homes common in parts of the growing Hill Country fringe. The early post-winter storm season often reveals how these materials handle wind-driven hail and long stretches of sun. Asphalt remains familiar to most builders and remodelers, and metal roofs offer a durable, thinner profile that sheds hail with less ice dam risk. For standout homes on hilltop lots or tucked behind live oaks, tile and slate are less common but can be found where a homeowner prioritizes a distinct look and longer service life.
Liberty Hill's hot summers accelerate thermal aging on darker asphalt roofs, making ventilation, underlayment quality, and shingle grade especially important locally. A light-colored shingle can noticeably reduce attic heat gain, while an upgraded underlayment helps resist wind-driven leaks after a hail event. If the attic has sparse ventilation, you will see faster curling and granule loss on the exposed surface, which shortens the roof's effective life in this climate. For metal roofs, look for coatings rated to resist UV degradation and a proper sealant system where panels meet. Dark asphalt with poor ventilation can become an energy drain in peak July heat, so pairing the chosen roofing with a thoughtful attic vent strategy is not optional-it's practical.
Tile and metal systems can perform well in the area's heat, but storm exposure means homeowners need installers familiar with impact-related damage patterns and replacement logistics for heavier or specialty materials. If hail clobbers the first layer, heavier materials may suffer denting or riser damage, yet some metal systems can shed hail with less immediate surface damage if installed with the correct fasteners and flashings. Tile, when properly installed, resists uplift but weighs more and can crack on severe hail unless a thorough inspection follows every storm. Work with a local contractor who understands typical wind directions and tree line effects on your street, because small differences from block to block can affect how you stage a repair or replacement after a claim.
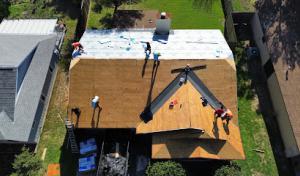
Choosing a locally experienced crew matters for long-term performance. A Liberty Hill crew will know to inspect vented soffits, ensure hip and ridge cap details are weather-tight, and verify that matching materials are available for an honest color blend with neighboring homes. In neighborhoods with mixed ages and styles, coordinating with neighbors on a replacement timeline can reduce disruption and ensure a consistent street appearance after a hail event. When a roof is nearing the end of its life, a phased replacement plan-prioritizing sections with the most sun exposure or storm impact-can minimize heat-related interior sections during work. Regular seasonal checks after spring hail season help catch loose fasteners, lifted shingles, or compromised seals before a small problem becomes a larger one.
Spring hail and wind events common to the area can leave hidden damage that isn't obvious at first glance. After a major storm cycle, inspect for missing granules, curled or lifted shingles, and signs of interior leakage near corners, vents, and skylights. With milder fall weather, the window for a replacement tends to open after the spring and summer storm cycle has run its course, giving you a more predictable climate for removal and installation. If your shingles show unusual wear, or if you notice accelerated granule loss after a hail event, replacement becomes more likely than a quick patch.
Shingle roofs typically reach a point where the cost and disruption of patchwork outweigh full replacement. If your roof is approaching the high end of its expected life and spring storms caused new damage, replacement is usually the prudent choice. Look for widespread granule loss, widespread curling, or flashing failures that create a chain reaction of leaks. In this market, the combination of hail-driven damage and aging roofing often pushes homeowners toward replacement rather than DIY or delayed fixes.
Spring storm activity can create demand surges that affect scheduling and push homeowners into temporary repairs before full replacement. If contractors are pressed, temporary patches may be offered to protect the home while the full replacement is scheduled. Coordinate with a contractor on a realistic timeline that aligns with weather windows and the contractor's availability. Setting expectations early helps minimize the risk of delays during peak season.
Rare winter freezes are not the main roofing threat, but they can complicate timing for exposed repairs or brittle materials after storm season. If winter conditions linger, consider delaying the most fragile steps until temperatures are consistently above freezing and moisture levels are manageable. Fall weather often provides a stable, cooler window for roof removal and installation, reducing heat-related wear on materials and worker fatigue.
Choose a local pro who understands how Liberty Hill homes age under Central Texas sun and sudden spring blowouts. Ask about tear-off logistics, scaffold and debris management, and how they handle storm-season scheduling pressures. Agree on a plan that prioritizes thorough inspection, honest damage assessment, and a clear replacement timeline that respects the unpredictability of spring weather and the calmer fall corridor.
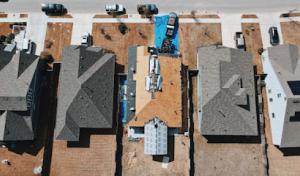
In this market, costs can swing with storm activity. Central Texas sees waves of replacement work after hail and wind events, and Liberty Hill is right in that pattern. When a cluster of hail reports hits the paper, reputable crews move quickly, and material prices can shift as crews chase demand. That means your final project price may reflect not just the roof type but how soon you're ready to book and how many nearby homes are replacing theirs at the same time. Expect tighter scheduling and potentially higher line items on materials and labor during peak post-storm windows.
Across the local housing stock, homeowners commonly choose from standard asphalt shingles to metal and tile systems, depending on the home's age, slope, and future value goals. Asphalt shingles remain the baseline, but the nearby market increasingly features metal, clay tile, and concrete tile on newer or upgraded structures. Here are representative ranges you'll encounter per square (a square equals 100 square feet) to anchor planning:
Because replacement work tends to surge after hail, you'll notice price pressures not only on materials but on crew availability and scheduling. Planning ahead for a replacement window that aligns with a dry season, and communicating clearly about the timeline, helps avoid last-minute price bumps. If you're weighing a tile system, factor in the longer installation timeframe and potential for extended labor hours during busy weeks. Concrete and clay tiles, while durable, can also slow down crews if your roof has complex hips or multiple penetrations. Asphalt remains the quickest option in many cases, which can translate to lower temporary costs if timeline flexibility is a priority.
Don't let upfront costs delay a critical repair - these contractors offer payment plans to fit your budget.

Heritage Roofing & Construction Company - Cedar Park
(512) 528-5559 heritagecctx.com
Serving
4.6 from 508 reviews
In Liberty Hill, a building permit is typically required for a full roof replacement. That requirement helps ensure that replacements meet wind and hail resistance standards common to the Austin metro's northwest edge, where new homes and older ranches share the skyline. Prior to scheduling a teardown, you should confirm whether any additions or structural changes accompany the roof project, since those can change permit scope. Local crews understand the terrain heat and summer wind patterns that stress shingles and underlayment alike.
The City of Liberty Hill Building Department handles roofing permit issuance and inspections. Your contractor will submit plans and a permit application, along with any required wind or energy documentation. Because the area has seen rapid growth, permit reviews can include material choices and fasteners that meet local wind uplift standards. It is wise to ask for a direct contact at the Building Department to understand whether additional inspections or amendments are needed before work starts.
A final inspection is usually required after completion, and processing times can vary based on department workload. After the roof is finished, your contractor should arrange the final inspection with the Building Department and ensure all penetrations, flashing, and ventilation details are accessible for review. Spring hail and wind season can create backlogs, so plan for a window that aligns with the department's schedule and weather-driven delays.
Keep copies of all permit documentation and any inspection reports, so you have records for future work or claims. Ensure access for inspectors to the attic and roof line, and coordinate any necessary permit amendments promptly if scopes change. If the project touches HOA rules or local overlays, confirm compliance before progress to prevent rework or delays.
Liberty Hill homeowners are operating in a Central Texas insurance environment where frequent hail and wind events generate high roof claim activity. The surge in claims during spring storms means adjusters see a lot of damage scenarios, from minor hail pings to full-coverage wind-strike losses. That reality makes thorough documentation not just helpful, but influential in how smoothly a file moves from first notice of loss to settlement.
Carriers commonly expect detailed documentation including photos, condition notes, prior claim history, and contractor estimates during the claims process. Clear, timestamped photos that show the roof from multiple angles, close-ups of damaged shingles or tiles, and evidence of any interior impact (ceiling stains, attic moisture) help tell the full story. Condition notes should reflect the roof's appearance before the weather event if known, and after the event with descriptive detail. If there have been prior claims, include that history so the adjuster can distinguish new damage from older issues.
Because adjusters may request evidence of pre-existing versus storm-related conditions, documentation quality can materially affect claim outcomes in this market. Start with a dated journal of storm events in your neighborhood, then align each photo with a short caption noting location and observed damage. Gather any independent contractor evaluations early, but ensure the documentation clearly differentiates pre-existing wear from post-storm findings. When you present materials, organize them in a clean, chronological package to help an adjuster verify the scope of the claim quickly and accurately. Remember, meticulous records often translate into quicker decisions and fewer back-and-forth requests.
Connect with contractors who help homeowners navigate the claims process from damage assessment to final approval.
Freetail Roofing
(737) 234-5734 freetailroofing.com
13800 TX-29 D, Liberty Hill, Texas
5.0 from 135 reviews
Accent Roofing & Remodeling
(512) 228-9416 www.accentroofingremodeling.com
5650 Co Rd 200, Liberty Hill, Texas
5.0 from 98 reviews
Action Exteriors Austin
(737) 747-8987 actionexteriors.com
100 Sunset Ridge Dr, Liberty Hill, Texas
5.0 from 69 reviews
In Liberty Hill, wind-driven hail and rapid temperature swings can stress roof penetrations where skylights meet the roofing surface. After a storm, pay close attention to the skylight curb, flashing transitions, and the seal around any glass or plastic unit. Even small gaps in sealant can become leaks when the next heavy rain arrives.
Localized leak sources are especially important here because heavy rain can follow closely behind wind events, exposing weak points before broad roof failure is obvious. Inspect around skylight edges, the intersection of skylight framing with shingles, and the shimmed or booted vent connections. Look for lifted shingles near skylights and any raveled or missing flashing along dormers or valleys.
Skylight-related contractor specialization is present in the local market, indicating this is a recurring enough repair category to merit homeowner attention. When choosing a contractor, ask for recent local projects, proof of licensing, and photos of previous skylight repairs in similar exposure. Request a written assessment of curb flashing, sealant type, and the compatibility of the skylight with the roof underlayment.
Practical next steps after a storm. Document interior damp spots and any stains, then contact a few qualified local skylight specialists for a thorough inspection. If a leak is confirmed, seek a repair timeline that minimizes further moisture exposure, and obtain a detailed written plan before any roof-cutting or flashing replacement. Your goal is to address compromised areas before interior damage expands.
Keep a photo log of roof features near skylights, note any wind scours, lifted shingles, or granule loss. In this market, the exposure means a rapid progression from minor seepage to more serious damage if left unchecked. Before signing any repair contract, request a full waterproofing assessment that includes flashing, sealant, and the skylight curb replacement if warranted. A careful, proactive approach reduces the chance of surprises during the next rain storm for you today.
Find contractors experienced in skylight installation, flashing, and leak repairs to bring natural light into your home.
Greater Austin Roofers of Leander
(512) 790-9348 www.greateraustinroofers.com
Serving
5.0 from 42 reviews