Last updated: Apr 19, 2026
Roanoke sits in the North Texas hail belt, where spring hailstorms and wind events are a primary driver of full roof replacements rather than purely age-based replacements. That means a roof can look sound yet still be structurally compromised by a single severe event. In this market, insurers and adjusters expect to see clear links between storm dates and the visible damage, not just general wear. If a storm occurs, don't wait to assess your roof; the clock on accurate documentation starts ticking the moment the clouds clear.
Local insurers consistently look for solid storm-date documentation, before-and-after photos, and notes tying visible damage to a specific hail or wind event. Take comprehensive photos from ground level and from the attic if you can safely access it. Capture close-ups of granule loss, dented vents, damaged edges, and any lifted or curled shingles. Keep a dated log of observed issues, including any interior signs like attic moisture or dark spots on ceilings picked up shortly after a storm. When you file, attach those photos with a concise narrative that connects the event to the damage you see on the roof and along roof-to-wall interfaces. If your insurer requests a weather report or a third-party inspection, respond promptly; delays can complicate or slow down recovery.
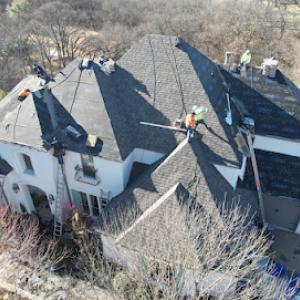
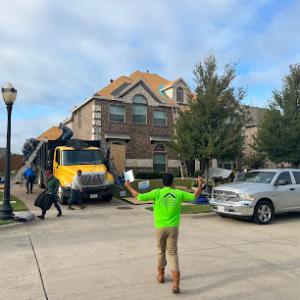
Because this market runs on storm response, contractor demand can spike immediately after regional hail events, affecting scheduling, pricing pressure, and how quickly temporary protection is needed. A common pattern is a surge in inquiries within 24 to 72 hours after a storm, followed by rapid queueing for inspections and roof measurements. If you delay securing temporary protection, further weather exposure can worsen damage and complicate claims. Have a plan for immediate temporary tarping or board-up, especially if there's a forecast for additional rain or high winds. You should also be prepared for a fast-moving assessment window, which can compress decision time and force prioritization among repairs, replacements, and insurance-documented timelines.
When a hail event hits, your first move is to protect the property. Lay down temporary coverings over vulnerable areas and ensure attic access points are safeguarded to minimize water intrusion. Next, gather storm-date proof-photos, notes, and any eyewitness accounts from neighbors who observed the same event. Contact your insurer with a clear, event-centered narrative and your documentation package; anticipate a request for a licensed inspector or adjuster appointment within days. In parallel, begin lining up reputable local contractors who understand the dynamics of the DFW storm-response market, including how to coordinate with adjusters and file claims efficiently. If a storm is forecast, secure temporary protections in advance and plan timing around the expected surge to avoid losing daylight to scheduling gaps or weather delays. This approach keeps you from being overwhelmed by the rush and helps ensure a smoother, faster path to repairs or replacement.
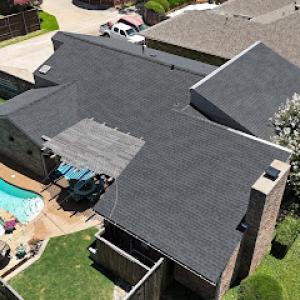
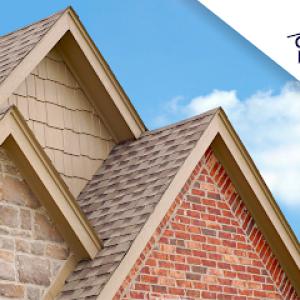
Asphalt shingles remain the dominant practical choice in this market because they fit common North Texas residential construction and the local replacement cycle. For a homeowner with traditional ranch- or cottage-style roofs, they're a straightforward upgrade that installers recognize, and they cycle through storm years quickly when hail and wind drive rapid replacement decisions. The trade-off here is hail bruising and accelerated granule loss under strong summer sun. When considering asphalt, you'll want a shingles profile with good impact resistance ratings and a color that minimizes heat load on attic spaces. In practice, you should focus on ensuring the underlayment and roof deck are sound, because hail damage can be subtle yet degrade ventilation and attic insulation over time. A step-by-step approach: inspect after hail events, verify granule shed patterns aren't concentrated on one slope, and choose a shingle with a durable surface and a proven hail performance record. If you expect quick turnover due to insurance-driven work, a familiar asphalt system can streamline scheduling and warranty coverage with local crews who understand North Texas sun exposure.
Metal roofing is increasingly relevant for homeowners prioritizing hail resilience and heat performance. In this market, you'll find metal panels that shed hail differently than shingles, with a potential for lower repair costs after storms and better reflectivity in blistering summers. The practical caveat is cosmetic denting after storms, which becomes a local discussion point in insurance talks. A sturdy metal roof can resist impact better than many shingle packages, but the overall system matters: ensure proper installation, ventilated attic space, and a robust underlayment to prevent condensation issues in hot months. If you're weighing metal, plan for a color and finish that minimize heat absorption and a profile that aligns with existing roof lines to avoid the "add-on" look that sometimes triggers complaints from nearby neighbors. Your step-by-step evaluation should include a panel type (standing seam vs. exposed fastener), paint warranty, and an installer's track record with hail-prone climates.
Clay tile and synthetic/composite systems appear in the market but require careful attention to impact performance, underlayment condition, and installer experience because North Texas hail can damage components even when the roof covering itself appears durable. In practice, clay tile can offer excellent durability and thermal mass benefits, but you'll want to verify the roof deck's ability to handle the added weight and the integrity of the underlayment and fasteners under repeated hail impact. Synthetic or composite options can mimic the look of tile with somewhat lighter weight, yet they still rely on sound installation and compatible underlayment to absorb hail energy. If you're exploring these routes, ask for a stamped engineering assessment that confirms load capacity, wind uplift ratings, and a detailed plan for flashing around chimneys, vents, and skylights. In a market where storms drive decisions, the best choice balances impact performance with a proven installation crew's experience and a compatible, well-seated underlayment system. In Roanoke, homeowners who pursue these options should expect a closer review of the edge details and fastener corrosion resistance due to temperature swings and hail exposure.
Typical installed cost ranges in Roanoke run about $350 to $550 per square for asphalt shingles, $600 to $900 for metal roofing, $800 to $1500 for clay tile, $550 to $1000 for wood shingles or shakes, and $500 to $900 for synthetic or composite shingles. Those numbers sit in the value range homeowners expect when minor to moderate storm damage is involved and the project stays within standard roof footprints. If your roof is straightforward-no tall rises, few penetrations, and a single simple slope-the prices tend to hug the lower end. On steeper homes or roofs with extra features, you can drift toward the higher end, even within the same material category.
In Roanoke, pricing can move upward after major North Texas hail events because regional demand surges across the DFW labor and material market at the same time. When a storm cluster hits, crews and suppliers scramble, and lead times push material costs up. If your roofer is juggling multiple insurance-driven jobs, scheduling becomes a factor as well. Expect a temporary bump in both material and labor quotes in the weeks immediately following a big hail event, even for resilient materials like metal or synthetic shingles. The takeaway: price transparency and a clearly defined seniority of work (inspection, estimate, replacement) matter more than ever in this window.
Costs can also vary with the roof style common in newer North Texas subdivisions and mixed-use growth areas around Roanoke, where steeper sections, multiple penetrations, and accessory features like skylights increase labor and flashing complexity. A design with dormers, skylights, or a multi-level layout adds flashing, edge work, and seam work that can nudge the final bill higher. If the roof includes a standing seam or tile system, the added precision and accessory components tend to push you toward the upper end of the range for that material. In these cases, a detailed scope and a staged payment plan help keep surprises manageable.
After a storm, you'll want a precise, itemized estimate rather than a rough quote. Get multiple written bids, ask for a breakdown of shingles, underlayment, flashing, and disposal, and confirm whether any work is intended to restore or upgrade attic insulation or venting along with the roof. If you're navigating insurance-driven work, ensure the scope aligns with the adjuster's findings and that the chosen materials meet the weather exposure North Texas faces. Even in a busy market, a careful comparison saves dollars and headache.
Upright Roofing & Construction
(817) 612-9662 www.uprightroofinggc.com
125 Country View Dr #108A, Roanoke, Texas
5.0 from 142 reviews
Upright Roofing & Construction offers multi-family, commercial, residential roofing, interior projects, & patio services. Specializing in roof replacement, repair and general contracting in DFW and all surrounding areas of Texas, our trained team provides excellent service with a quick project turn around time. Upright serves insurance agents, realtors, property management companies, commercial building owners, and homeowners, with a focus of combining quality roofing products with quality workmanship. We offer roof systems for both low-slope and steep-slope structures and are certified to install all Tier 1 roofing material brands. At Upright, we care about our customer’s satisfaction and are dedicated to providing you with the best result

Hawk 3 Construction
613 N Walnut St, Roanoke, Texas
5.0 from 105 reviews
Hawk 3 Construction, founded in 2020, is a family-owned roofing/construction leader in Roanoke, Texas. Specializing in standing seam, clay tile, slate, Spanish tile, concrete tile, barrel tile, stone-coated steel, TPO, and CertainTeed Presidential Shake shingles, we offer expert craftsmanship. Certified installers for most major manufacturers, our team excels in total roof replacement, home renovations, patios, pools, outdoor living, and home building or additions. Choose Hawk 3 for elite roofing, solar energy, and outdoor solutions. Come visit us in Downtown Roanoke near Oak Street
Trophy Roofing & Construction
(682) 438-2151 www.trophyroofingdfw.com
11975 Cleveland Gibbs Rd SUITE 110, Roanoke, Texas
5.0 from 47 reviews
Trophy Roofing & Construction proudly serves the greater DFW area with top-quality residential & commercial roofing, gutters, fencing, painting, patio covers, and concrete services. As a family-owned business, we value honesty, transparency, and comfort throughout your project. No high-pressure sales—just clear inspections, honest recommendations, and reliable service. Whether you need a roof repair or a complete exterior makeover, our experienced team is here to help. Call today for your free estimate or ask about our flexible financing options. If you are still stuck between contractors, feel free to give us a “Comfort Call”... Don’t forget about our financing options.
Rafter R&D Construction
(903) 269-7075 rafterrdconstruction.com
Serving
5.0 from 31 reviews
Rafter R&D Construction is a trusted, family-owned roofing contractor proudly serving Dallas Fort Worth. With decades of experience, we offer quality residential and commercial roofing services, including installations, repairs, inspections, and storm damage restoration. As a family business, we prioritize integrity, transparent communication, and top-tier craftsmanship. Fully Insured and bonded, we use only premium materials to ensure durable, lasting results. Discover the difference that local expertise and family values make—contact Rafter R&D Construction today for a free inspection!
Griffith Roofing of Southlake
(817) 800-4802 www.griffithroofing.com
Serving
4.6 from 28 reviews
Griffith Roofing is located in Southlake Texas and opened in 2001 with a single focus: to exceed customer expectations while providing high-quality roofing expertise. To that end, we hire only seasoned customer service professionals who will listen to your needs, address your concerns, and deliver on their commitments. Griffith Roofing prides itself on exceeding customer expectations. We are a full service roofing company that works with our clients from the beginning of a project to the end and are not finished until the customer is satisfied.
Quality Commercial & Residential Roofing
Serving
4.9 from 92 reviews
General Contractor able to handle all jobs under 2m. Roofing business able to handle jobs of any size both commercial and residential.
Anderson Roofing & Contracting
(972) 318-1500 andersonroofstexas.com
Serving
4.9 from 44 reviews
For over 25 years, Anderson Roofing & Contracting has been the trusted name in Dallas / Fort Worth roofing. With an A+ BBB rating and recognized as the Best Roofer of Denton County year after year, plus a Nextdoor neighborhood favorite, we bring expertise and peace of mind to every project. Fully licensed and insured, we minimize disruption while maintaining a professional jobsite. Specializing in all roof types for residential and commercial properties, we also handle siding, gutters, windows, fencing, and other exterior storm restoration needs. Discover the Anderson Roofing difference today!
BP Roofing & Construction
(817) 350-1636 bproofingandconstruction.com
Serving
5.0 from 41 reviews
At BP Roofing and Construction we service all of DFW and specialize in roofing repairs and roof replacements. At BP Roofing and Construction we treat each client with the same respect, care and attention to detail that we would with family. We will sit down with you after our initial inspection to explain the process, meet with your insurance adjuster, and give solutions to not only protect your roof, but improve your energy efficiency and curbside appeal. We also pride ourselves in having clean working crews and making sure no nails or trash is left behind.
SkyGuard Roofing Solutions
(682) 330-5088 www.skyguardrs.com
Serving
5.0 from 29 reviews
SkyGuard Roofing Solutions, a trusted name in roofing, provides exceptional service and quality craftsmanship for your home. Located in Fort Worth, their experienced team offers comprehensive solutions for all your roofing needs, from minor repairs to complete replacements. With a focus on durability and customer satisfaction, they ensure every project is completed with precision and the highest standards of safety. Choose SkyGuard for a reliable roof that protects your investment and provides peace of mind.
Qualis Roofing & Construction
(817) 286-3852 www.qualisgc.com
Serving
5.0 from 85 reviews
As a leading residential roofing contractor in Keller, TX, Qualis Roofing & Construction specializes in providing top-notch services for all your roofing needs. Our team offers 24 hour emergency roof repair services to ensure your property stays protected around the clock. We're also the top Keller roofing contractor for asphalt roof shingles installation. Trust us to deliver exceptional results that exceed your expectations! Founded in 2019, we've been serving the Keller community with integrity and professionalism. With our years of experience and expertise, we have earned a reputation for reliability and quality craftsmanship. Contact us today for a free roof inspection!
North Texas Roofing
(817) 741-0558 northtx-roofing.com
Serving
4.8 from 50 reviews
Residential and Commercial Roofing Installation, Replacement, Repair and Maintenance. Seamless gutter installation and repair. Exterior painting, siding and fencing. General construction.
S&B Roofing & Exteriors
(817) 281-6433 www.snbroofing.com
Serving
5.0 from 112 reviews
S&B Roofing & Exteriors is a trusted roofing and exterior services provider dedicated to quality craftsmanship and reliable service. From roof repairs and replacements to custom exterior solutions, S&B Roofing & Exteriors offers expert care for both residential and commercial properties. With a focus on durability and customer satisfaction, we ensure that every project is completed with precision and integrity.
Roanoke requires a building permit for full roof replacements, making permit compliance a core part of any legitimate re-roofing project in the city. That means before lifting the first shingle, you should verify that your contractor has started the permit process and that the project aligns with local code requirements. Permits help ensure that the work meets wind resistance standards common to North Texas weather, which is essential after hail events and during hot summer months when roof materials are stressed. Treat the permit as a milestone in the project-not a hurdle you can ignore.
Permit applications are typically submitted through the city building department's online process, and contractors may need to provide license information and project details as part of the filing. When planning timeline and scheduling, confirm who will handle the online submission and who will supply the required documents, such as proof of contractor licensing and the scope of work. It is common for multiple stakeholders to be involved, including homeowners, roofers, and sometimes engineers for structural components. Expect several digital steps: submitting forms, uploading installation plans, and receiving project-specific conditions or corrections. Keeping a clear line of communication with the contractor helps prevent delays caused by incomplete files.
City inspections occur during and after the roofing project to verify workmanship and code compliance, so scheduling and passing inspections is part of the local replacement timeline rather than an optional extra. A typical sequence includes an initial inspection to confirm permit activity and material choices, followed by intermediate checks as the roof is replaced, and a final inspection upon completion. Weather can influence inspection windows, especially after hail season when projects often move quickly through contingency planning and storm-response adjustments. Coordinate with the contractor to secure inspection appointments promptly and ensure access for inspectors to the roof, attic, and related structures. Missing an inspection slot can push a project days or weeks behind, so plan ahead and confirm the inspector's contact method and preferred access details.
In this market, timing matters: approvals, permit issuance, and inspections are integrated into the replacement schedule rather than afterthought steps. Ask the contractor for a clearly mapped permit-to-inspection timeline, including what to expect if weather or storm activity causes delays. If a storm leads to an accelerated replacement plan, ensure that the permit status is up to date and that inspections are arranged to align with the accelerated pace, maintaining compliance without compromising quality.
Roanoke's hot, humid summers beat down on roofs and accelerate aging faster than many neighboring markets. That heat isn't just uncomfortable for the crew; it can soften certain roofing products and make handling more tiring, which increases the risk of mistakes or compromised seals. If a roof is older or has delicate materials, the heat can push adhesives and fasteners toward less reliable performance. This means timing the project to avoid the peak scorch hours and hottest days matters, not just for comfort but for the longevity of the finished job.
Spring and fall offer the most practical balance in this climate. These seasons typically dodge the brutal peak summer heat while still aligning with the city's storm-driven repair cycles. By scheduling during these windows, you reduce the chance of heat-related material issues and keep crews from fighting both heat and wind. In practice, that means planning early and aiming for a stretch when rain is less frequent and temperatures stay moderate, yet the calendar still accommodates sudden storm responses that are common in this market.
Storm response is a defining feature of roofing work here, and the insurance-backed workflow can push scheduling into tight, sometimes chaotic windows. Hail events often create a cascade of quick assessments, rapid repairs, and urgent replacements. That urgency can collide with ideal weather, especially if a claim forces a faster turnaround than the crew's preferred cadence. Expect a few days of uncertainty after a major hail event, with early mornings and late afternoons serving as the most workable hours to avoid the worst heat while staying on track with storm-recovery timelines.
Winter fronts bring their own challenges, as occasional icing can interfere with adhesive performance and crew safety. Even though the area does not contend with prolonged freezes, cold snaps can pause or slow progress mid-project. When planning winter work, set expectations for potential delays and be prepared for temperature-sensitive materials to require flexible scheduling. Keeping a cautious mindset about weather-induced pauses helps protect the roof's long-term performance and the crew's ability to deliver a solid, weather-resilient install.
In Roanoke, common post-storm failure patterns include hail bruising on shingles, lifted or creased tabs from wind, and leaks that show up around flashing details after heavy spring rain. After a severe round of hail or a strong thunderstorm, those bruised shingles may not look dramatic at first, but the underlying damage often progresses quickly. If you notice shingles that sit unevenly, or tabs that don't lay flat, investigate promptly. Leaks around edges and along roof penetrations tend to appear after storms, not during, which makes it easy to overlook until water shows up inside an attic or ceiling.
Strong solar exposure in this part of North Texas can shorten the service life of asphalt systems by accelerating drying, granule loss, and visible aging on sun-exposed slopes. The sun-facing sections tend to show wear sooner, sometimes presenting as dull granules in gutters or dark, weathered patches on the most exposed pitches. This accelerated aging means that a roof may seem to hold up in quiet years but suddenly reveal weakened areas after just a few hot seasons. If you notice rapid color fading or unusual brittleness on the surface, it's a sign to inspect more closely for underlying moisture or micro-cracking.
Roof systems with skylights, chimneys, and other roof penetrations need careful flashing review because storm-driven rain and repeated thermal cycling often expose weak detail work before the field shingles fail. Flashed corners, step flashing along walls, and mastic seams can crack or separate after a hail event or a rapid temperature swing. In homes with multiple penetrations, a history of wet spots near chimneys or skylights is a red flag to re-check flashing integrity and the surrounding shingle edge work before larger leaks take hold. Regular, targeted inspections after storms help prevent small issues from turning into costly repairs.
Find contractors experienced in skylight installation, flashing, and leak repairs to bring natural light into your home.
Trophy Roofing & Construction
(682) 438-2151 www.trophyroofingdfw.com
11975 Cleveland Gibbs Rd SUITE 110, Roanoke, Texas
5.0 from 47 reviews
Roanoke sits in a high-claim North Texas insurance environment where hail and wind losses directly influence premiums, underwriting scrutiny, and how insurers evaluate older roofs. After a storm, adjusters often compare damage to known regional weather events and the roof's age and material before approving replacements. The market moves fast, and insurers frequently review whether damage lines up with recent hail swaths and wind events rather than isolated incidents. This makes timing and documented history critical to the outcome.
Keep date-stamped photos from before, during, and after a storm, and add notes about any visible granule loss or denting. Repair invoices, inspection reports, and contractor notes should be stored in a single, organized folder (digital copies backed up). Track storm history notes from reputable local sources or utility warnings. When filing a claim, provide this chronologically arranged trail to help the adjuster see a clear pattern of weather impact rather than a single event you can't corroborate.
Roof age and material matter heavily in local claim outcomes, with insurers commonly weighing the remaining life of asphalt, metal, tile, or composite systems against repeated hail exposure. Older roofs may trigger more scrutiny or depreciation considerations, while newer materials might bolster a full replacement outcome if damage aligns with documented storm activity. Understanding where the roof stands in its expected lifespan helps set realistic expectations for recovery and settlement. Gather the roof's build date, material, and any prior damage history to inform conversations with the insurer.
Connect with contractors who help homeowners navigate the claims process from damage assessment to final approval.
Upright Roofing & Construction
(817) 612-9662 www.uprightroofinggc.com
125 Country View Dr #108A, Roanoke, Texas
5.0 from 142 reviews
Hawk 3 Construction
613 N Walnut St, Roanoke, Texas
5.0 from 105 reviews
Trophy Roofing & Construction
(682) 438-2151 www.trophyroofingdfw.com
11975 Cleveland Gibbs Rd SUITE 110, Roanoke, Texas
5.0 from 47 reviews