Last updated: Apr 19, 2026
Keller sits in the Dallas-Fort Worth hail and wind claim environment, where insurers see elevated storm claim volume and homeowners should expect adjusters and roofing crews to move quickly after spring hail events. The window for action often closes fast: the moment a storm rolls through, the clock starts ticking on inspections, estimates, and scheduling. Heavy spring activity means crews can be booked days or weeks out, and a rushed assessment can push a full reroof decision sooner than you expect. In this climate, momentum matters more than ever, because a single strong hail event can cascade into weeks of back-and-forth with insurers, contractors, and your mortgage lender.
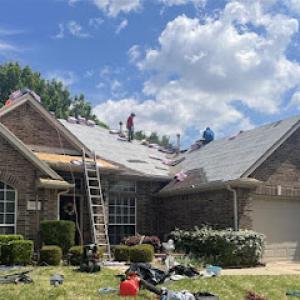
Spring hail storms and severe thunderstorms are the main local trigger for full reroofs, often creating short-term contractor backlogs and tighter scheduling windows across Keller and nearby Tarrant County cities. If a storm hits on a weekday, expect the initial inspection to be scheduled within 24 to 72 hours, with roofers potentially working weekends to clear the backlog. The urgency is real: the later you wait, the higher the risk of material shortages, scheduling gaps, and weather-related delays that complicate the replacement sequence. Weather patterns here can push a project from "pending" to "in-progress" in a heartbeat, especially when multiple neighboring roofs qualify for claims at the same time.
Because Keller roofs also take prolonged summer sun exposure, borderline shingles that survive a hail event may already be heat-aged, making replacement decisions more time-sensitive than in milder climates. A hail-hit roof that looks acceptable after one thunderstorm can deteriorate quickly as we bake through July and August. The sun can accelerate granule loss, chalking, and potential underlying deck exposure, which means a later assessment may reveal more damage than a cursory inspection shows. If you notice curling shingles, granule loss, or dips in your attic insulation before a full replacement is declared, the clock is effectively tick-tock on whether a claim moves forward or stalls.
Start by documenting every storm event with photos and notes the moment conditions settle. Keep a running log of inspector visits, dates, and who gave you what guidance. When an adjuster arrives, ask for a written, line-by-line scope of damage so you can compare it against a contractor's estimate. Secure two or three reputable local roofers who understand the peak-season rhythm and who can begin work soon after approval. If a contractor cannot promise a concrete start window within a short period after an adjuster's report, consider exploring options with another local firm that does. The goal is to lock a firm start date during the storm-driven surge, before the next round of weather and scheduling bottlenecks hits.
Insurers in this market expect quick progress after spring events, but the reality is a tight cadence that hinges on timely documentation and agreed-upon scopes. You should proactively align your claims timeline with your chosen roofing team: confirm the expected start, the anticipated sequence of inspections, and a realistic completion window. If a delay arises, escalate promptly with your insurer and contractor to avoid creeping timelines that risk deteriorating conditions on your roof and attic. Acting with decisiveness now reduces the chance of storm-season backlog undermining a proper, code-compliant reroof.
Find local contractors experienced in assessing and restoring roofs after hail, wind, and severe weather events.

Texas Select Construction
(817) 934-4226 texasselectconstruction.com
1670 Keller Pkwy Suite 255, Keller, Texas
5.0 from 164 reviews
S&B Roofing & Exteriors
(817) 281-6433 www.snbroofing.com
525 Keller Pkwy, Keller, Texas
5.0 from 112 reviews
3:16 Roofing & Construction
(817) 402-7663 www.316roofingtx.com
424 Keller Pkwy, Keller, Texas
4.9 from 233 reviews

Texas Select Construction
(817) 934-4226 texasselectconstruction.com
1670 Keller Pkwy Suite 255, Keller, Texas
5.0 from 164 reviews
Texas Select Construction, Roofing & Windows is a roofing contractor in Fort Worth, TX that services Tarrant County, Weatherford, Fort Worth and nearby areas. Our roofing company offers residential roofing, commercial roofing, asphalt shingle roofing, metal roofing and many more. Customers love us because of our 24/7 Emergency Services, plus our Affordable Financing Options. We also have industry affiliations and certifications such as CertainTeed, Master Shingle Applicator, Owens Corning, to name a few. If you want to experience your most trusted Fort Worth roofing company’s excellent services, call us now for a free estimate with your DFW local roofer today!
S&B Roofing & Exteriors
(817) 281-6433 www.snbroofing.com
525 Keller Pkwy, Keller, Texas
5.0 from 112 reviews
S&B Roofing & Exteriors is a trusted roofing and exterior services provider dedicated to quality craftsmanship and reliable service. From roof repairs and replacements to custom exterior solutions, S&B Roofing & Exteriors offers expert care for both residential and commercial properties. With a focus on durability and customer satisfaction, we ensure that every project is completed with precision and integrity.
3:16 Roofing & Construction
(817) 402-7663 www.316roofingtx.com
424 Keller Pkwy, Keller, Texas
4.9 from 233 reviews
Get Exceptional Roof Replacement & Roof Repair By 3:16 Roofing and Construction. Voted Best Fort Worth Roofing Company & Keller Roofing Contractor! We are a local roofer & licensed roofing contractor.
Qualis Roofing & Construction
(817) 286-3852 www.qualisgc.com
200 N Rufe Snow Dr, Keller, Texas
5.0 from 85 reviews
As a leading residential roofing contractor in Keller, TX, Qualis Roofing & Construction specializes in providing top-notch services for all your roofing needs. Our team offers 24 hour emergency roof repair services to ensure your property stays protected around the clock. We're also the top Keller roofing contractor for asphalt roof shingles installation. Trust us to deliver exceptional results that exceed your expectations! Founded in 2019, we've been serving the Keller community with integrity and professionalism. With our years of experience and expertise, we have earned a reputation for reliability and quality craftsmanship. Contact us today for a free roof inspection!
CSI Renovations & Roofing
(817) 503-2177 www.csiroofers.com
230 N Main St, Keller, Texas
4.9 from 120 reviews
CSI Renovations & Roofing was founded with the guiding principles of absolute quality and a continuous drive to exceed our client's expectations. The modern construction environment has numerous consumer pitfalls due, in part, to scrupulous companies that cut corners and take advantage of customers. Our company solely believes in providing our clientele with as much information as possible to allow an informed decision backed up by three decades of experience to ensure that a product of the highest standards is delivered to each and every homeowner or business owner. Whether roofing your home, or Commercial Building; CSI is committed to making you happy. In addition to our roofing services, CSI also offers quality renovations, skylight inst
BP Roofing & Construction
(817) 350-1636 bproofingandconstruction.com
Keller, Texas
5.0 from 41 reviews
At BP Roofing and Construction we service all of DFW and specialize in roofing repairs and roof replacements. At BP Roofing and Construction we treat each client with the same respect, care and attention to detail that we would with family. We will sit down with you after our initial inspection to explain the process, meet with your insurance adjuster, and give solutions to not only protect your roof, but improve your energy efficiency and curbside appeal. We also pride ourselves in having clean working crews and making sure no nails or trash is left behind.
Palafox Construction Group
(817) 232-3866 www.palafoxconstruction.com
133 Sports Pkwy E, Keller, Texas
4.8 from 163 reviews
Palafox Construction Group provides exceptional services in general construction, roofing, remodeling, interior and exterior painting, concrete, fencing, and patios to the DFW area. We are available 24 hours a day for any emergency roofing or construction needs.

Becker Roofing & Exteriors
(817) 898-7175 www.brexteriors.com
1103 Keller Pkwy Suite 203, Keller, Texas
4.9 from 59 reviews
Becker Roofing and Exteriors provides commercial and residential roofing and exterior storm restorations to Keller, TX, and the surrounding areas.

Integrity Roofing & Construction
(817) 788-8418 www.integrityroofingcompany.com
891 Keller Pkwy Ste 204A, Keller, Texas
4.7 from 70 reviews
Based in Keller, Texas we proudly serve the greater Dallas/Ft. Worth Metroplex and beyond. Established in 2004, IRC has a proven track record in the DFW community. Just ask our hundreds of satisfied customers. A top insurance agent in the North Texas region paid us one of the highest compliments when he said, "You replaced so many of my customer's roofs this past year. Because of you (Integrity Roofing), my customers have fallen in love with me all over again!"
North Texas Roofing
(817) 741-0558 northtx-roofing.com
Serving
4.8 from 50 reviews
Residential and Commercial Roofing Installation, Replacement, Repair and Maintenance. Seamless gutter installation and repair. Exterior painting, siding and fencing. General construction.
High Pointe Roofing & Construction
Serving
5.0 from 104 reviews
Roofing replacements. Roof Repairs. Gutter Replacements. Gutter Repairs. Construction. Exterior Construction. Roof Installers.
Pro Select Roofing
(682) 719-4435 www.proselectroofing.com
Serving
4.9 from 87 reviews
Pro Select Roofing provides residential and commercial roofing, gutters, and exterior painting in Denton and Tarrant counties, TX.
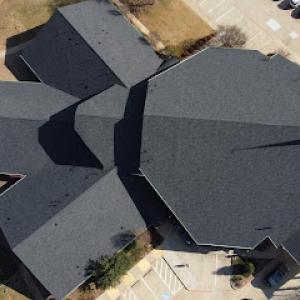
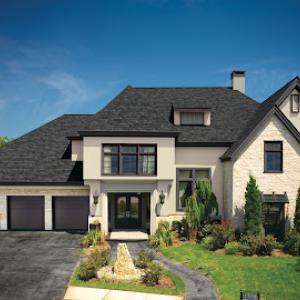
Asphalt shingles are a dominant choice because they fit mainstream North Texas residential construction and are widely used for storm-driven replacements after hail seasons. In this climate, you'll benefit from the balance of cost, ease of installation, and solid wind resistance when installed with proper underlayment and attic ventilation. For most Keller homes, standard three-tab or architectural shingles deliver reliable performance through hot summers and brisk winter swings, provided the roof is staged to shed heat efficiently and avoid heat build-up near edges.
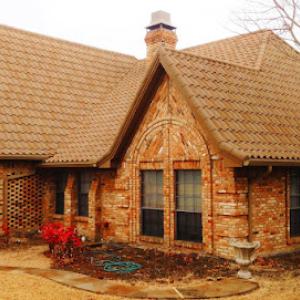
Metal, clay tile, concrete tile, wood shake, and synthetic/composite roofs all appear in Keller, but their performance has to be judged against the city's combination of hail exposure, strong UV, and occasional winter temperature swings. Metal can shrug off hail if installed without gaps and with correct fastener patterns, yet it can dent in hail events and expand/contract with cold snaps. Tile systems (clay or concrete) bring long life and distinctive aesthetics but add weight, require a solid structure, and respond differently to hail impacts. Wood shakes offer natural look and good airflow, yet they demand higher maintenance and can be more vulnerable to hail damage and moisture infiltration if not properly sealed. Synthetic or composite shingles provide hail resistance options and lighter weight, but quality varies by product line and installation details. In all cases, durability hinges on matching the roof system to your attic ventilation, deck structure, and existing construction.
Heavier tile systems and specialty materials can complicate reroofing decisions when a home was originally built for a different roof load or when matching existing neighborhood aesthetics matters. If the structure wasn't designed for heavy tile or if adjacent homes use a contrasting profile, you may face additional engineering considerations, faster wear on fasteners, or altered alignment with chimneys and skylights. In those cases, a design that preserves the visual rhythm of the street while maintaining wind and hail performance becomes a practical compromise.
Start with a hail-focused inspection that notes denting, displacement, and underlayment integrity, especially around edges and along dormers. Prioritize a shingle option when the roof deck shows signs of moisture risk or when rapid replacement is desired after a storm season. If you lean toward weightier materials, verify structure compatibility early and discuss warranty coverage for hail impact and UV exposure. For any non-asphalt choice, request a detailed layout of fasteners, roof venting, and drip edge compatibility to ensure you won't face early edge failures or water ingress during the Texas spring and fall transitions.
This city operates a permit-driven reroof process that every homeowner should plan for before lifting shingles. A full reroof in this area requires a building permit, so you should confirm that the permit is pulled before any tear-off begins rather than assuming storm work is exempt. The difference is real: pulling the permit upfront keeps inspections predictable and avoids delays tied to post-storm after-the-fact paperwork. If a contractor suggests you can skip permit steps because it's "just a replacement," push for a clear permit pull receipt and an assigned permit number before any shingles come off.
Inspections are a cornerstone of the local workflow. The city conducts inspections at key milestones, with particular attention to safety-critical stages. The initial framing or underlayment stage is commonly inspected early in the process. This review helps confirm roof deck integrity and proper application of underlayment materials, which matters greatly in North Texas wind and hail exposure. A final completion inspection closes out the job and confirms the roof installation meets code and the agreed scope. Knowing these milestones helps homeowners and crews coordinate scheduling, access, and any required rework promptly.
Plan review is generally not required for a standard reroof unless the project includes structural changes. For like-for-like replacements-where the existing roof is simply replaced with a comparable system-permit processing tends to be more straightforward. That said, any deviation from the existing structure that could affect load paths, attic ventilation, or skylights will trigger closer scrutiny. If your plan includes adding a new attic vent, changing roof pitch, or altering the chimney flashing, expect additional review steps and potential permit amendments. Stay proactive: have your contractor submit drawings or notes that clearly show the intended materials, roof profile, and any structural modifications if they arise.
First, verify with the contractor that a building permit will be pulled before any tear-off begins. Ask for the permit number and a copy of the permit card or approval email, and keep it accessible during the project. Schedule the framing/underlayment inspection as soon as the new deck is prepared and before applying the final shingles, so any deck or vent issues receive timely correction. Plan for the final inspection by coordinating a date with the contractor and ensuring all punch-list items are addressed prior to the inspector's arrival. If storm-driven needs prompt a quick replacement, insist on a clear path to permit processing and required inspections rather than bypassing the formal sequence. This approach minimizes the risk of rework and ensures the reroof remains compliant with city requirements throughout the repair or replacement window.
Typical Keller pricing ranges run about $350-$700 per square for asphalt shingles, $600-$1200 for metal, $750-$1500 for clay tile, $600-$1100 for concrete tile, $600-$1000 for wood shingles or shakes, and $400-$800 for synthetic/composite shingles. Those numbers reflect how the local market shifts when a big hail event hits and crews from the broader DFW area start competing for the same storm-driven work. In practice, the range you'll see is driven by the roof's current condition, the roof's geometry, and the material you choose. A simple one-story asphalt job can land near the low end, while a steep asphalt or a tile profile on a multi-gable home can push toward the top end of the range.
In spring, when hail spikes across the Dallas-Fort Worth metro area, labor capacity tightens quickly. Craft crews, insurance adjusters, and supply chains all tighten up as crews migrate toward storm-impacted neighborhoods. Costs can rise sharply as a result, even if the underlying materials are standard. If your roof is visibly dented, shingle granules are washing into gutters, or you notice leaks after hail, you'll feel the factor of demand in the quotes you receive. Expect a longer lead time for scheduling, and prepare for inspections that align with storm-driven replacement patterns rather than a smooth, steady calendar.
Tile, metal, and specialty systems are common locally, so upgrading from a basic shingles package can introduce added complexity. Clay tile and concrete tile bring their own installation nuances, from underlayment needs to fastener patterns to roof penetrations around chimneys and skylights. Metal roofs require precise panel alignment and weatherproof seals at edges and valleys. Wood shingles or shakes add maintenance considerations in a North Texas climate with sun exposure and potential for faster granule loss on asphalt-backed products. Synthetic/composite shingles provide flexibility but can carry a different lifecycle cost profile, which matters when you're weighing long-term performance against initial price. In this market, selecting a higher-end option can shift not only the upfront price but also appointment lead times and the pace at which crews can wrap a full replacement without overlaps or partials.
Get a clear picture of your project costs upfront - no commitment required.
Texas Select Construction
(817) 934-4226 texasselectconstruction.com
1670 Keller Pkwy Suite 255, Keller, Texas
5.0 from 164 reviews
Keller homeowners are operating in a high-claim DFW insurance market where hail and wind losses have increased documentation expectations for roof claims. In this environment, a well-documented claim can mean the difference between a tricky settlement and a straightforward replacement. Insurance adjusters are trained to look for clear, date-stamped proof of damage and a straightforward narrative that connects the storm event to the roof's current condition. The consequence of weak documentation is either a reluctantly limited payout or a claim denial, leaving you to shoulder more of the repair cost than anticipated.
For claims, date-stamped photos are non-negotiable. Take wide shots that show the entire roof, plus close-ups of damaged shingles, granule loss, and any hail impacts on edges or valleys. Shingle test-square documentation-a simple, repeatable method for recording visible damage-helps establish a pattern of wear tied to the storm rather than preexisting issues. Interior leak evidence, including stains, damp insulation, or ceiling discoloration, should be photographed and dated. Keep records of emergency tarping or temporary repairs, noting who performed them and when. Documentation should tell a chronological story from the storm through the repair decision, making it easier for an adjuster to see the link between the event and the damage.
Some carriers in North Texas have tightened availability and shifted more homeowners toward higher wind and hail deductible options, which directly affects whether a roof repair or full replacement makes financial sense. In this climate, adjusters expect thorough, orderly evidence that supports coverage decisions. Delays or gaps in documentation can slow the process and complicate the determination of whether a repair suffices or a full reroof is required. Being proactive with organized records reduces ambiguity and helps ensure the claim reflects actual damage rather than perceived wear. In a region where storm activity is a recurring pattern, clear, timely documentation helps navigate the often rapid settlement pace that follows the latest hail event.
Connect with contractors who help homeowners navigate the claims process from damage assessment to final approval.
Texas Select Construction
(817) 934-4226 texasselectconstruction.com
1670 Keller Pkwy Suite 255, Keller, Texas
5.0 from 164 reviews
S&B Roofing & Exteriors
(817) 281-6433 www.snbroofing.com
525 Keller Pkwy, Keller, Texas
5.0 from 112 reviews
3:16 Roofing & Construction
(817) 402-7663 www.316roofingtx.com
424 Keller Pkwy, Keller, Texas
4.9 from 233 reviews
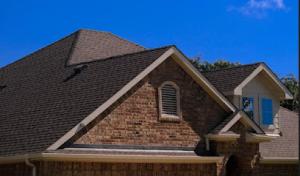
Keller's hot summers and strong sun exposure accelerate asphalt aging, granule loss, and sealant fatigue faster than in cooler climates. That means shingles can look fine at a glance but be structurally compromised sooner when granules erode and adhesion declines. You'll notice blistering or dark streaks after a long heat wave, and the faster you catch early signs, the better you protect the roof deck and attic insulation. In practical terms, the heat helps moisture move through materials more quickly, so ensure proper ventilation during replacement and choose underlayment that can tolerate high daytime temperatures. A local contractor who understands the summer sun will stagger tear-off and installation to minimize heat exposure for workers and your interior spaces.
The best replacement timing often balances post-storm urgency against extreme summer heat, which can affect crew productivity, material handling, and homeowner comfort during tear-off and installation. After a hail or wind event, you may see rapid inspection activity and demand spike. If possible, coordinate with a contractor to schedule within a window that avoids peak afternoon heat and the most humid periods. This reduces risk of heat-related delays, helps sealants set properly, and keeps indoor spaces cooler during work. In Keller, storm-driven bursts typically align with spring through early fall; plan around these spikes rather than rushing a roof when temperatures routinely exceed comfort thresholds. A thoughtful window can also help prevent unnecessary rework from heat-induced material movement or adhesive failure.
Occasional winter cold snaps in North Texas create temperature swings that can narrow ideal installation windows for some roofing materials even though Keller is not a snow-load market. When temperatures swing from warm days to cold nights, sealants and fasteners may behave differently, influencing shingle seating and nail spacing. If replacement spans multiple days, arrange consecutive days within a moderate range to allow products to acclimate and to reduce the risk of buckling or mis-seating. For best long-term performance, avoid starting installations on days forecast to swing into the teens or single digits, and seek crews experienced with the region's variable spring and fall transitions.
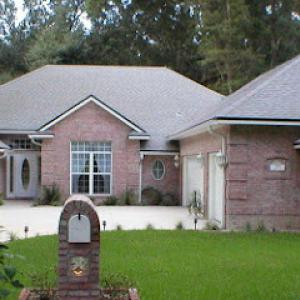
In Keller, skylights are a common feature on many homes, and flashing transitions around them often become leak points after hail or high-wind events. The most vulnerable area isn't the glass itself but where the skylight meets the roof deck and shingles. When storms slam through North Texas, that intersection is repeatedly tested by wind-driven rain and temperature swings that cause flashing to shift or degrade. Homeowners should inspect the perimeter of every skylight after a storm and watch for moisture at the interior ceiling near the skylight curb. A small drip can escalate quickly if the counterflashing or step-flashing under the shingles has pulled away or deteriorated. For many Keller roofs, a dedicated skylight flashing retrofit is the practical move when performance has declined, not a full roof tear-off. Prioritize inspections after hail seasons and after rapid temperature spikes that can stress seals.
Chimneys remain a frequent focal point for leaks across the local contractor mix. In Keller, the stack often ties into older roof planes in slightly different pitches, complicating the flashing geometry. If flashing around the chimney shows any loose or missing sealant, or if mortar joints have eroded, water can travel down the chimney chase and work its way under shingles. The practical concern is that minor gaps amplify with every storm surge and heat cycle, leading to interior staining or attic moisture. Addressing chimney flashing promptly-before a big storm season-helps reduce the risk of cascading leaks into living spaces or through ceilings where joists and insulation suffer.
Although steep-slope residential roofs dominate, Keller homes with porches, additions, or true low-slope sections introduce distinct leak-risk zones. Flat or low-slope transitions require careful detailing of surface drains, edge details, and transitions to higher-slope rooftops. In practice, those areas can hide imperfect flashing or inadequate counterflashing where it meets standard shingles. Regular checks should focus on the seam lines, edge pins, and any membrane transitions that serve as boundary lines between roof types. If a low-slope area shows persistent dampness after rain, treat the situation as a separate vulnerability rather than a minor nuisance.
After a hail event or strong storm, walk the roof edge and check around skylights, chimneys, and any low-slope pockets from ground level with a good pair of binoculars or a ladder with a friend. Look for lifted shingle edges, gaps in sealant, or dark streaks on interior ceilings near these features. If moisture appears, cautious temporary measures may include drying the area and calling a local roofer who handles flashing and counterflashing repairs specifically for these transitions. In Keller, consistent attention to these hotspots reduces the chance of storm-driven water intrusion turning into an interior restoration project.
Find contractors experienced in skylight installation, flashing, and leak repairs to bring natural light into your home.
3:16 Roofing & Construction
(817) 402-7663 www.316roofingtx.com
424 Keller Pkwy, Keller, Texas
4.9 from 233 reviews
CSI Renovations & Roofing
(817) 503-2177 www.csiroofers.com
230 N Main St, Keller, Texas
4.9 from 120 reviews
Becker Roofing & Exteriors
(817) 898-7175 www.brexteriors.com
1103 Keller Pkwy Suite 203, Keller, Texas
4.9 from 59 reviews
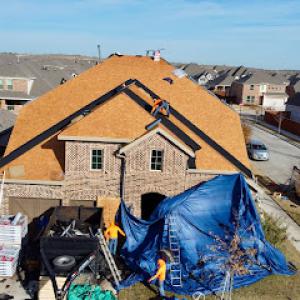
In Keller, the storm-response economy moves fast after hail and high winds. Homeowners should expect aggressive post-hail sales activity and should verify who will actually handle permits, inspections, cleanup, and supplement paperwork. The reality is that some crews rush to start in days, while others deliver a steadier, more hands-on approach that aims to preserve your home's exterior and interior from further damage. The choice matters when a storm leaves multiple roofs in need of attention and the calendar fills with milestone inspections.
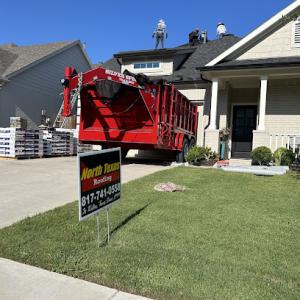
The local market strongly favors quick response and cleanup-included service, so homeowners should compare how contractors manage tarping, debris protection, and final site cleanup after a storm-driven reroof. Ask for a clear playbook: who sets tarps and barriers, who handles wind-blown debris, and what safeguards are in place to protect landscaping and vehicles. A firm that can document proactive site protection, a defined cleanup plan, and a transparent schedule is likely to minimize during- and after-storm surprises.
Long-established, family-owned, and manufacturer-certified firms are present in the area, giving homeowners a real choice between speed-focused storm operators and companies emphasizing tenure and warranty support. If a crew emphasizes speed above all else, verify their ability to complete the job cleanly and to back up workmanship. If a firm leans on warranty strength, ensure that coverage remains active after the first heavy rain or hail season and that claims handling is straightforward rather than a maze of paperwork.
Talk to neighbors who've navigated a storm-driven roof replacement and ask who actually handled the inspections and final cleanup. A reputable roofer should provide a tangible plan for maintaining your property during a project, detailing how debris will be contained and when the yard will be restored to its pre-storm condition. The goal is a proper, complete reroof without leaving your home exposed longer than necessary.
In this market, decisions flow from the sky more than from long-range planning. Keller roofs endure hail, wind, and intense summer UV, and storm events can shove homeowners into a replacement cycle with remarkable speed. After a big spring storm, the demand for full reroofs spikes as insurers and adjusters move through the same neighborhoods in short order. The result is a rhythm where a roof that might have lasted a decade or more under milder conditions suddenly becomes a high-priority project driven by wind-damaged shingles, bruised decking, and accelerated wear from UV exposure. Homeowners who understand this pattern are better prepared to evaluate replacement options quickly and confidently.
Roofing choices in this area are shaped by the local exposures rather than coastal or snowfall concerns. Hail and high-speed winds can leave granular loss and edge failures, while the Texas sun accelerates aging of any roofing surface. The rapid pace of contractor demand after spring storms adds a practical pressure to choose a system that not only resists damage but also offers predictable performance through the peak storm season and the following summer. A homeowner's decision toolkit often centers on evaluating storm-related damage, expected life span, and how a given material will stand up to Texas weather cycles without excessive maintenance.
Insurance pressures in the DFW market influence when and how a roof is replaced. After a damaging event, the coordination between the insurer, the adjuster, and the contractor can determine the scope of work and the speed of completion. Because many homes in Keller sit on established neighborhoods with similar roof lines and exposure, insurer-friendly options and contractor availability become decisive factors. Understanding this dynamic helps you align expectations for project timelines, material compatibility, and the handoff from claim approval to installation.
Start with a storm-focused assessment mindset: catalog damage indicators, prioritize rapid consultation with a licensed roofer, and plan for inspection milestones that keep the project on track despite the seasonal surge in demand. A concise, reality-grounded strategy helps you navigate the storm-first cycle while selecting a roof system that meets the region's harsh exposure and the practical realities of fast-moving contractor schedules.