Last updated: Apr 19, 2026
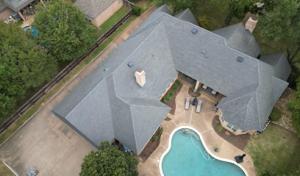
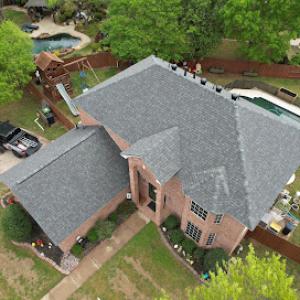
Spring in the DFW hail corridor brings a predictable spike in full-roof inspections and insurance claims. In North Richland Hills, a single storm can leave hidden damage under granules, dented shingles, and compromised underlayment that isn't obvious from the ground. When you hear of hail sizes larger than a quarter or see metallic or fiberglass shingle bruising, treat it as a potential roof claim. After a major wind event, the same issues can appear as lifted edges, punctures, or missing shingles. The urgency is real: the combination of hail and wind accelerates deterioration and can compromise attic insulation, ventilation, and interior moisture control if left unchecked. Your goal is to identify those hidden weak points early and prepare for a precise, documentation-driven claim process.
Insurers in this market expect solid photo evidence, roof condition details, and credible contractor estimates because hail and wind claims are frequent and closely reviewed. Start with wide exterior shots of each roof face, then close-ups of damaged shingles, dented gutters, and visible granule loss in the yard. Note any signs of sagging or leaks inside the attic, such as staining, mold, or unusual warmth near vents. Create a simple timeline: when the storm occurred, when you noticed issues, and when you first contacted a roofer. Your documentation should show both the exterior damage and any interior effects. A clear, timestamped record helps avoid lowball adjustments or disputes later in the process and speeds up the assessment by the insurer.
The local contractor market leans toward storm-damage and insurance-claim work, so many homeowners hire roofers after hail and wind events rather than for age-related replacement. To align with insurer expectations, prepare a concise damage summary for your contractor: where damage is located, how many shingles appear compromised, and any attic moisture signs. Request a written, line-by-line estimate that itemizes replacement scope and materials. Ensure the contractor includes a siding or fascia assessment if applicable, and verifies attic ventilation and insulation impacts. Your goal is a collaboration that yields an accurate, claim-ready estimate the insurer can review quickly, reducing back-and-forth and minimizing delays.
Given North Richland Hills' climate and housing mix, you'll want materials that resist impact from hail and hold up under strong spring winds. Asphalt shingles remain common, but metal, clay tile, and concrete tile are practical considerations when hail risk or wind exposure is high. When discussing options, focus on impact resistance ratings, wind uplift performance, and the expected lifespan in the Texas storm cycle. The right system should meet local exposure conditions, provide reliable warranty support, and work with your insurer's documentation expectations to secure a smooth replacement process.
After you've documented damage and gathered an estimate, schedule a rapid, in-person roof inspection by a trusted, licensed professional. Ask for a written assessment that supports your claim with objective measurements, photos, and a materials list. Communicate clearly with your insurer about the storm date, damage scope, and proposed repair or replacement plan. Stay organized: keep copies of all communication, receipts, and approvals. A well-documented claim paired with a transparent estimate accelerates resolution and gets your home back to full protection faster.
Deluxe Roofing & Construction
(817) 893-5044 www.deluxeroofingdfw.com
8032 Main St, North Richland Hills, Texas
5.0 from 245 reviews
Deluxe Roofing and Construction, LLC is a locally owned and operated roofing contractor that services North Richland Hills, TX and the greater North Texas region. Deluxe Roofing and Construction prides ourselves on providing top quality products and craftsmanship, and excellent customer service. Deluxe Roofing and Construction, LLC is a highly experienced and respected contractor in the roofing industry. Our Services: Roof Dfw Roof Repairs Hail Damage Repair Dfw Roofing Company Roofing Contractor Residential Roofing Contractor Commercial Roofing Contractor Storm Restoration Know who is on your roof. It is important to choose a roofing contractor that is local, reliable, trustworthy, knowledgeable, and most importantly, experienced.
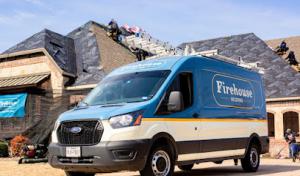
Firefighter Roofing
(817) 750-0911 firefighterroofing.com
5332 Davis Blvd, North Richland Hills, Texas
4.9 from 553 reviews
Firefighter Roofing is a roofing company based in Dallas-Fort Worth, TX providing comprehensive roofing services for homes and businesses. Our roofing services include roof replacement, roof repair, commercial roofing, emergency roof repair and a full range of roofing solutions, ensuring your property is fully protected. We are a full service roofing contractor servicing all of the Dallas-Fort Worth Metroplex and surrounding areas including Frisco, McKinney, Plano, Prosper, Southlake, Highland Park, University Park, Colleyville, Trophy Club, Flower Mound and more.
Lifetime Commercial Roofing
5109 Commercial Dr Suite B, North Richland Hills, Texas
5.0 from 100 reviews
You can trust Lifetime Commercial Roofing for all your roofing needs. We offer top-quality residential roof, commercial roof, and industrial roofing services, including free inspections and leak detection. All inspections come with a photographed detailed report for your records, regardless if we need to do any repairs. Our experienced team uses state-of-the-art infrared leak detection to ensure thorough and accurate assessments. Count on us for exceptional results with the best materials and techniques on your shingle roofs, metal roofs, slate roofs, clay tile roofs, TPO flat roofs, EPDM flat roofs, PVC flat roofs, and more. Get in touch today to schedule your FREE roof inspection and let our experts help you navigate your best options.
Precision Construction & Roofing
(817) 519-8985 www.precisionconstructionandroofing.com
7605 Davis Blvd, North Richland Hills, Texas
4.8 from 120 reviews
Precision Roofing and Construction has installed some of the finest custom roofing systems throughout the United States. We appreciate the opportunity to partner with you for all your roofing needs. Customer service is a concept we feel very strongly about and apply all of our resources to ensure it. We approach every job as if it was our own and pledge to exceed your expectations. Our staff is our lifeblood, and we ensure they are highly trained and experienced in every aspect of the roofing industry to ensure your end result is perfect the first time. Every time. This allows you to feel confident in knowing that you have made the right decision when you hire us. Customer service is our number one priority and delivering the best roofs.

Acme Roof Systems
(817) 752-4344 acmeroofsystems.com
9128 Belshire Dr, North Richland Hills, Texas
4.8 from 88 reviews
Serving the greater DFW Metroplex since 1995, Acme Roof Systems is a locally owned and operated business committed to enhancing your home. Our team of highly trained specialists is ready to assist with all your roofing needs. From residential and commercial roofing to skylight installation and ventilation solutions, we offer a comprehensive range of services. We also specialize in remodeling, including kitchens and bathrooms, and provide expert water damage restoration. We pride ourselves on delivering quality craftsmanship and reliable service to every customer.
Ahlers Roofing & Construction
(214) 214-7663 www.ahlersroofing.com
7709 Davis Blvd Ste 100, North Richland Hills, Texas
4.6 from 220 reviews
Ahlers Roofing and Construction was founded with two important founding principles; treat our customers like family and do excellent work everyday! The key to our success is keeping our customers happy by treating their property like it is our own. We are committed to quality in our work. That's why we use only the best materials available at Ahlers Roofing. With our goal of building lasting relationships with all of our customers in mind, we strive to provide exceptional service. We want you to be a customer for life. Ahlers roofing specializes in the most challenging roof projects including standing seam metal roofs. Danny, Tabatha, Elijah, Carmela, Oliver, and Ryland want to say thank you for doing business with us and God bless you.
Roofing Solutions of Texas
(817) 726-1369 roofingsolutionsoftexas.com
6720 Inwood Dr, North Richland Hills, Texas
4.7 from 59 reviews
Roofing Solutions of Texas strives to be a best-in-class roofing company for the North Dallas suburbs. From Arlington to Plano, McKinney to Carrollton, and everywhere in between, our roofers focus on quality for Texas homes. We specialize in hail damage and offer affordable pricing, quality advice, and timely roof installations. roof repair, and replacements, as well as making customer service a top priority at all times.
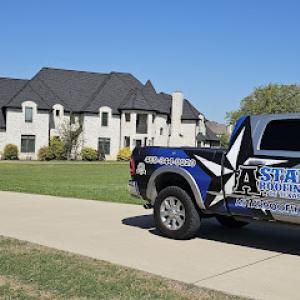
A Star Roofing of Texas
(469) 344-0020 www.astarroofingoftexas.com
Serving
5.0 from 72 reviews
"A Star Roofing of Texas, a North Richland Hills, Texas-based company, offers over 15 years of experience providing roofing services throughout North Richland Hills and Tarrant County. We uphold strong work ethics and traditional values, specializing in all facets of roof repair and replacement. Our mission at A Star Roofing of Texas is to consistently provide superior services at competitive rates. Our success is built upon unwavering dedication to our clients, ensuring their satisfaction remains our top priority on every project. For additional information, please contact us or visit our website. Always free No obligation roof inspections Jimbo 469-344-0020 or Shelby 817-771-2116."

Lake Dallas Roofing & Restorations
(469) 912-0561 www.lakedallasroofing.com
Serving
5.0 from 98 reviews
At Lake Dallas Roofing & Restorations, we take pride in our extensive experience working on all types of exterior remodeling for residential properties. We bring the same outstanding work ethic and customer support to every job that we undertake.
IFC Roofing
(817) 706-6070 www.ifcroofing.com
Serving
5.0 from 311 reviews
IFC Roofing specializes in repairing your property’s roof after a storm or natural disaster. We are a locally owned general contractor and construction company which manages roofing projects, hands-on, from start to finish. We also can help you navigate each step of, sometimes complicated, insurance claim process. If you suspect your home has been damaged by Mother Nature, give us a call and see why we're the highest rated and reviewed Roofing General Contractor in DFW!
Roofing by Mark
(817) 991-4017 roofingbymark.com
Serving
5.0 from 77 reviews
Haillelujah... Roofing By Mark Looking for a roofer who will respect your home, a person of his word, be present during the restoration, communicates to you throughout the project, is a local resident since 1982, has only 1 stellar and committed crew for 11 years. A joy to work with ... STOP RIGHT NOW... Because You Found YOUR MAN! Mark has been in the construction arena for more than 25 years serving homeowners with roof restoration, general repairs and energy efficiency. Mark has built his clientele strictly through relationships and referrals by being committed to building lasting relationships with his clients and having a servants heart. Mark treats all clients with integrity & respect on every project, from inception to completion.
K&M Services, Roofing & Construction
(817) 918-3940 kmservicepro.com
Serving
4.9 from 95 reviews
K&M Services Roofing & Construction is Colleyville’s go-to contractor for roofing and storm restoration throughout the Dallas–Fort Worth Metroplex. Family-owned, licensed, and insured, we specialize in roof replacements, hail damage repair, and full-service insurance claim assistance. We proudly serve Colleyville, Southlake, Arlington, Fort Worth, and surrounding areas with fast emergency response for storm and leak damage. From shingles to metal and flat roofs, we deliver expert craftsmanship, honest pricing, and personalized service. We also offer financing to fit your budget. Call 817-918-3940 or visit our website to schedule your free roof inspection today.
Hot DFW summers push roofing materials to their limits, and North Richland Hills homeowners notice the effects faster on asphalt shingles. Asphalt experiences faster aging when exposed to long, intense solar exposure, which makes heat tolerance a practical starting point when evaluating lower-cost shingles against longer-lived metal or tile systems. The choice isn't only about eye appeal-it's about how a roof holds up year after year under heat, sun, and the occasional seasonal storm. In markets with a broad material mix, heat performance often drives the long-term value of a roof more than initial appearance.
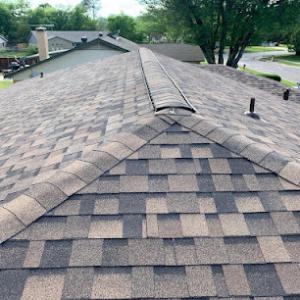
Heat management starts at the attic. A well-ventilated attic reduces heat buildup, lowers attic temperatures, and helps prevent premature shingle degradation across all materials. In North Richland Hills, attic ventilation strategies should be matched to the roof style and insulation level. For asphalt, effective attic venting extends life and helps hold color and granule integrity; for metal or tile, ventilation impacts temperature differentials that influence fasteners, sealant lifecycles, and thermal movement. A practical approach is to pair a ventilated soffit-and-ridge system with appropriate insulation, creating a cooler, more forgiving roof deck in the peak summer months.
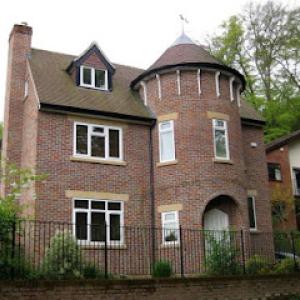
The local housing stock embraces asphalt shingles, metal, clay tile, concrete tile, wood shakes, and synthetic shingles. Asphalt remains the most common by prevalence and cost-to-performance balance, but metal and tile systems are far from rare or impractical. Clay and concrete tile offer superior heat resistance and longer service life in this climate when paired with proper attic ventilation and underlayment. Wood shakes introduce a distinctive look and good long-term durability when properly cared for but require maintenance to resist weathering and moisture-related issues. Synthetic shingles provide a middle ground, offering improved impact resistance and sometimes better weight management than traditional materials. The choice depends on the balance you're seeking between heat tolerance, wind performance, appearance, and how each option ages in the DFW sun.
Storm seasons in this area bring hail potential that influences material conversations beyond heat. Impact resistance matters alongside heat performance and curb appeal. Metal and concrete or clay tile often perform well under hail, with proper installation and fastening that accommodates wind and thermal movement. Asphalt can be upgraded with impact-resistant shingles, but the overall system must be evaluated for wind uplift and hail media. When hail risk is a consideration, look for ratings or tests that reflect real local hail impacts and verify that fasteners, underlayment, and edge details are designed to withstand North Richland Hills storm patterns.
When evaluating options, align the chosen material with heat tolerance, attic ventilation quality, and local hail exposure. For asphalt, focus on confirming granule retention and UV resistance, then pair with a ventilation plan to maximize lifespan. For metal, ensure proper coating, color selection with heat reflection in mind, and secure fastening to resist wind. Tile systems should emphasize underlayment compatibility, roof deck support, and appropriate fastener choices to handle thermal expansion. In all cases, match the installation to the region's seasonal extremes to achieve a durable, visually appealing roof that weatherizes both heat and hail.
In this city, a permit is generally required for a full re-roof, making permit compliance a real part of the replacement process rather than a contractor formality. The permit process is structured to ensure that the new roof is installed to current code standards and equipped to handle the region's typical hail and wind events. Beginning with planning, you should expect to gather basic project details, confirm any HOA or neighborhood requirements, and align with the contractor on a realistic timeline that accommodates permit review, material delivery, and weather-related delays common after severe storm seasons.
Roofing submittals are typically handled by the contractor through the City of North Richland Hills online portal, so homeowners should confirm who is actually filing before tear-off begins. This confirmation helps prevent miscommunication that could stall work or complicate inspections. If you are working with a smaller crew or a contractor who splits duties, ask for written confirmation of who will manage the portal login, the document uploads, and any required electrical or ventilation addenda. Keep a copy of all submittals and plan approvals in your project folder so you can reference them if questions arise during the tear-off or re-cover.
City inspections occur after roof removal and again at final completion, and final review may include wind-resistance and ventilation checks. The post-removal inspection verifies that the deck is sound, the roof-to-wall connections meet code, and that any existing attic ventilation or soffit intakes are properly addressed with the new system. The final inspection focuses on the overall installation quality, flashing details, and the effectiveness of your insulation and ventilation strategy in a climate known for shifting pressures and moisture. Preparing in advance with a clear record of the permit, submittals, and scheduled inspection dates can reduce delays and help the contractor coordinate any required adjustments before the final sign-off.
Storm seasons in this area can produce rapid shifts in wind loads and hail exposure, so coordinate your permit timing with expected weather windows to avoid rework. If a hail event triggers an insurance claim, ensure the insurer's process aligns with the city's permit and inspection sequence, and that the contractor's submission package reflects any insurance-required changes. Maintaining open lines of communication with both the contractor and the city portal contact will keep the project moving smoothly through permit review and through to a compliant, code-backed installation. North Richland Hills' online portal is the central hub for filings, updates, and inspection scheduling, so regular check-ins there will serve you well.
Typical local material ranges run about $350-$700 per square for asphalt shingles, $650-$1200 for metal, $900-$2100 for clay tile, $800-$1500 for concrete tile, $500-$1100 for wood shingles or shakes, and $600-$1000 for synthetic or composite shingles. These figures reflect the mix of suburban homes that lean toward standard sloped shingle roofs while still accounting for projects that add weight or special detailing. When estimating, remember that some upgrades-like extra ventilation, upgraded underlayment, or premium color blends-can push the per-square price higher, regardless of material type.
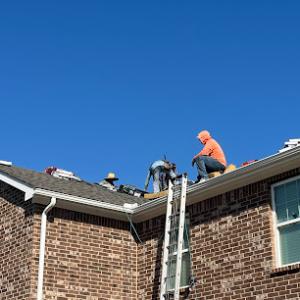
In the aftermath of DFW hail events, expect contractor availability to tighten and scheduling to stretch out. North Richland Hills sees this pattern: more roofers swing by homes showing hail damage, but the same weather-driven demand that helps a storm-damaged roof get noticed also squeezes appointment calendars and can raise pricing. If a storm hits, you may face a several-week to several-month window before work starts, depending on crew size and material backlogs. Budget accordingly and confirm a realistic start window when you sign a contract.
Costs here are shaped by the city's suburban roof mix, where many homes use standard sloped systems suitable for shingles but some properties add cost through tile weight, metal detailing, skylights, and ventilation corrections required at final inspection. Tile roofs-especially clay or concrete-often incur higher labor and access costs due to weight and handwork. Skylights, vents, chimneys, and rafters require careful detailing to keep drainage and roof lines watertight, which can elevate both material and labor costs. If the home has a large attic venting system or unusual roof geometry, plan for incremental increases in both price and project duration.
Start with a competitive price check across at least three local contractors, prioritizing those with recent storm-repair experience. Get itemized bids that separate materials, labor, disposal, and any additional work like weatherproofing or vent adjustments. If a storm spike is in play, ask for a projected start window and a written hold on material pricing to avoid escalation. For many homeowners, choosing a durable mid-range option (for example, synthetic or composite shingles or quality asphalt) can balance cost with long-term performance in a hail-prone climate. Finally, allocate a buffer for waste disposal and potential roof penetrations around skylights or chimneys, which frequently surface during inspections.
Get a clear picture of your project costs upfront - no commitment required.
David Martin & Son Roofing
(817) 236-9898 www.davidmartinandsonroofing.com
Serving
4.9 from 93 reviews
Spring and fall form the most practical roofing windows for this area, aligning with milder temperatures and fewer stressors on materials. The typical post-storm period that follows a hail event often fits best after crews have had a chance to assess damage and you've checked for insurance considerations. The goal is to avoid the peak heat of July and August while still catching a stretch when weather patterns aren't as volatile. This timing helps minimize heat-related delays and reduces the chance of material handling mishaps once work starts.
Hot summer installation conditions in this market can slow crews and complicate shingle handling. Workers contend with expanding materials, glare from sun, and higher risk of softening and distortion mid-day. If a project stretches into the hottest hours, productivity drops and the risk of imperfect seals or misaligned edges increases. Scheduling heat-intense tasks for early mornings or cooler weeks can keep crews safer and improve the long-term performance of edge seals and flashing.
Fall wind events are a common risk, especially when ridge lines, flashing, and edge sealing have already been stressed by prior hail damage or summer heat exposure. Detached or weakened components can become projectiles in a gusty afternoon, creating gaps that let water intrude at ridge lines or along eaves. In this season, a proactive inspection of sealant joints and metal flashing is crucial, so a robust, weather-tight initial installation doesn't become a second-round leak later.
Coordinating with insurer expectations and local weather forecasts helps minimize rework caused by sudden storms. If a hail season ends late, aim to complete critical flashing and ridge work before the fall winds pick up. Expect occasional contingency days due to heat or storm delays, and build a plan that allows for a careful, staged approach rather than rushing through sections that need precise sealing. A measured pace in spring or fall reduces the chance of call-backs tied to weather-driven damage.
North Richland Hills homeowners operate in a high-claim hail and wind environment, so insurance considerations often influence whether isolated damage is repaired or a full replacement is pursued. The adjuster will weigh the impact of a storm on the entire roof, not just the visibly damaged area. Clear documentation helps the claim move smoothly from assessment to approval, and reduces back-and-forth requests that slow repairs.
Local claim handling commonly depends on dated photos, close-up damage images, and contractor-prepared scope information because adjusters in the DFW market often request detailed documentation. Start with a dated overall roof photo, then sequence close-ups of impact points, lifted shingles, and signs of granule loss. Caption each image with location, approximate date, and what it shows. Include images of attic areas for signs of water intrusion, and a shot of the drip edge, vent flashing, and any skylights.
A contractor-prepared scope information helps define what a repair or replacement should cover. Have your roofer summarize areas needing attention, including hail impact across the ridge, wind-caused edge damage, ventilation issues, and any potential underlayment concerns. Attach the scope to the claim packet and note any pre-existing wear. If possible, obtain an estimate that separates repair items from replacement comments to help the adjuster understand the scope.
Wind-mitigated features and overall roof condition can affect how claims are reviewed, especially when the city final inspection may also look at wind resistance and ventilation. Document features such as secondary water barriers, properly sealed flashing around vents and chimneys, and attic ventilation adequacy. Acknowledging these elements in the submission can support whether a repair remains sufficient or a full replacement is warranted.
In this market, skylights are more than an feature upgrade; they're a practical part of many homes that weather frequent hail and wind. North Richland Hills has enough skylight, tile, and low-slope roofing activity in its contractor base that these are not fringe issues for local homeowners planning repairs or replacement. When evaluating a repair, verify that the installation crew has hands-on experience with skylight flashing in metal and shingle roof transitions, and with coordinating flashing around existing vent pipes and chimneys. A well-sealed skylight should align with the surrounding roof plane to prevent intermittent leaks after a strong storm season.
Tile and concrete systems common in parts of this market require attention to underlayment condition and roof structure planning that differs from standard asphalt re-roofing. Tile installations rely on a solid deck and properly lapped underlayment to accommodate thermal movement and hail impact. If a house features clay or concrete tile, inspect the existing underlayment and consider replacing it with a high-performance, fiber-reinforced option that resists puncture and provides a continuous moisture barrier. Pay attention to roof pitch and framing-some homes in this area carry structural nuances from older builds, and tile choices should match those realities to avoid future sagging or cracking around hips and valleys. Local crews will often coordinate tile layout with the existing ridge and eave details to preserve ventilation and water shedding behavior.
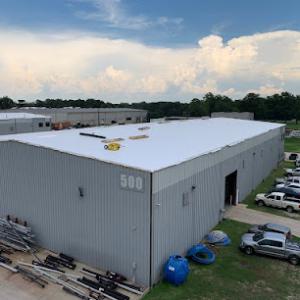
Low-slope sections over patios, additions, or transitions can become leak points after DFW storm cycles even when the main house roof is a steeper shingle system. In North Richland Hills, those transitions frequently intersect with skylight flashing, parapet walls, or deck membranes. The key is to ensure a continuous water barrier across the transition from the main roof to the low-slope area, using proper edge detailing and a compatible membrane system. Inspect join lines at valleys and around any newly added patio roofs for UV degradation, puncture resistance, and secure fastening that can withstand wind uplift. A careful, staged approach-matching flashing materials to the primary roof and incorporating pull-out tests for membrane seams-helps prevent future leaks during rapid weather changes.
Find contractors experienced in skylight installation, flashing, and leak repairs to bring natural light into your home.
Firefighter Roofing
(817) 750-0911 firefighterroofing.com
5332 Davis Blvd, North Richland Hills, Texas
4.9 from 553 reviews
Acme Roof Systems
(817) 752-4344 acmeroofsystems.com
9128 Belshire Dr, North Richland Hills, Texas
4.8 from 88 reviews