Last updated: Apr 19, 2026
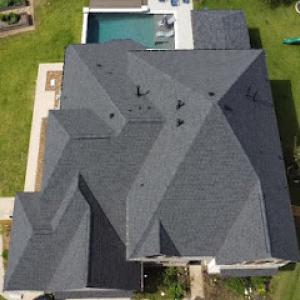
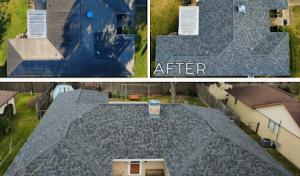
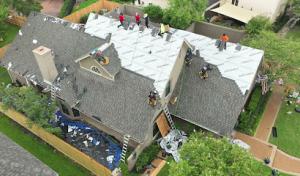
Texas City sits on Galveston Bay and is directly exposed to Gulf tropical systems, so wind-driven rain and hurricane-related roof claims are a central homeowner concern. When a storm rolls in from the bay, shingles lift, flashing shifts, and gutters clog with salt spray and debris. The wind can drive hail with surprising force, even on roofs that look sound from the ground. This isn't a quarterly annoyance; it's a recurring threat tied to the Gulf's storm track and the industrial shoreline that amplifies debris and moisture. The pattern isn't theoretical-it's practical, immediate, and demanding rapid, decisive action to protect your home and your insurance coverage.
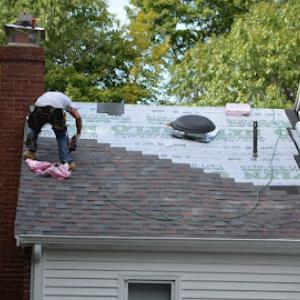
Spring triggers a distinct damage window. Sudden downpours, pea-to-golf-ball hail, and persistent wind can leave a roof weakened, with water finding its way under shingles or through compromised flashing. Fall tropical storm risk adds another layer of urgency, but spring's hail season often brings the first wave of claims and emergency repairs that set the tone for the rest of the year. Roof leaks from wind-driven rain can travel unseen, showing up as staining on ceilings or mold growth days later. In this coastal, industrial bay city, the combination of salt-laden humidity and high storm activity means inspections after any heavy storm are not optional; they're essential to stop damage from creeping into structural components.
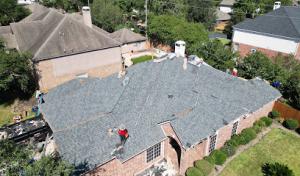
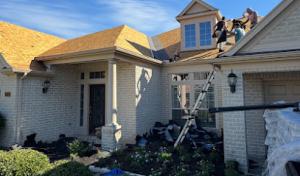
The local contractor market reflects this pattern with a high prevalence of insurance-claim work, storm-damage responses, and emergency repairs. That means you will likely be approached by multiple firms offering rapid tarping or temporary fixes. The urgent reality is to secure a trustworthy, experienced team quickly-especially one familiar with coastal wind uplift, salt corrosion, and bay-area debris. Look for contractors who can demonstrate successful resolution of hail and wind claims, provide photographs clearly showing pre- and post-storm conditions, and maintain organized documentation of roof surface, underlayment, and flashing condition. Avoid delay in contacting your insurer's claims representative and setting up a first-hand, on-site inspection that captures wind damage, hail hits, and moisture intrusion. If a contractor pushes for immediate, complete roof replacement without a thorough assessment, push back and request a detailed scope that differentiates wind-related damage from age-related wear.
Your roof's first line of defense is documentation. After a storm, photograph every visible impact: hail marks, lifted shingles, damaged flashing around chimneys and vents, and drainage issues at the eaves. Keep a storm diary: dates, wind speeds if known, rainfall amounts, and odor or moisture indicators inside attic spaces. Ask a trusted neighbor to note any noticeable changes in their roofs and gutters, creating a community baseline that helps corroborate the timing and severity of the event. When you file a claim, align your photos with a clear narrative of what happened, when, and how it progressed-especially noting how spray from the Gulf could have accelerated corrosion on metal components or mastic sealants. Finally, ensure emergency tarping is documented and billed as a mitigation step; delaying temporary protection can complicate claim adjustments and extend exposure to further damage.
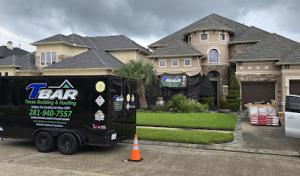
Guaranteed Roofing & Remodeling
(409) 945-6920 www.roofingtexas.com
2401 25th Ave N, Texas City, Texas
4.9 from 91 reviews
General contractor serving Galveston county and the surrounding areas since 1981! Family-owned and operated, we offer quality work done by skilled and compassionate craftsmen. Our services include home repair, remodeling, additions/conversions, roof repairs, roof replacements, windows, siding, and more! Please give us a call! We'll make your day!
Bichon Roofing & General Contracting
(713) 319-5814 gcbichonroofingtx.com
5013 Allen Cay Dr, Texas City, Texas
4.8 from 79 reviews
Look no further than Bichon Roofing in the Galveston area for the best roofing company. With years of unmatched roofing repair and replacement expertise, we are the top roofing specialist and general contractor across Galveston County. Fully licensed and insured, we offer roof replacement, repair, new construction, and regular maintenance for residential and commercial properties. Our unparalleled expertise and dedication to customer satisfaction make us the go-to choice for all your roofing contractor needs in Galveston. We take pride in our ability to cater to both residential and commercial properties. Count on us for reliable emergency roofing services available 24/7, 365 days a year. Your roof is in safe hands with Bichon Roofing.
Able Roofing & Construction
(409) 948-1033 www.ableroofingtx.com
1450 Texas Ave, Texas City, Texas
4.5 from 39 reviews
Roofing and New Home Additions
Brazos Urethane
(409) 965-0011 brazosurethane.com
1030 6th St N, Texas City, Texas
5.0 from 8 reviews
Texas-based commercial roofing experts with 35+ years nationwide service. SPFA National Excellence Award Winner. Specializing in spray foam roofing (SPF), waterproofing, TPO, EPDM & metal roofs. 5-star rated. 20-year warranties. Free roof inspection!
Texas City Roofing
Texas City, Texas
5.0 from 1 review
The roof is the most important part of your home. If you're not getting a new roof, it's time to start thinking about repairing or replacing yours. But if you don't know what kind of roofing material to use, how much it will cost, and when to get started - then this can be an overwhelming task. We are experts in all things roofs! Our team has been installing roofs for many years and we have seen just about everything that could go wrong with them. Let us help you figure out which type of roofing material is best for your needs and budget so that you can make an informed decision before making any big investments in your property.
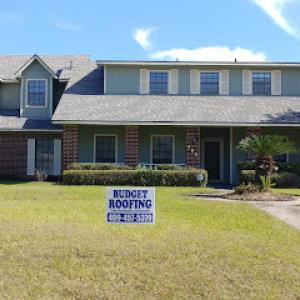
Budget Roofing
Serving
5.0 from 11 reviews
Budget Roofing specializes in complete residential and commercial roof replacements.
Rising Roofing Professionals Of Galveston County
(409) 502-5822 risingroofprosgalvestoncounty.com
Serving
5.0 from 4 reviews
Rising Roofing Professionals Of Galveston County is a residential and commercial roofing and total restoration general contracting company, specializing in insurance claim services. Headquartered in La Marque, Texas located in Galveston county. Rising was founded out of the noticeable lack of structure, customer service and quality control systems that plagues the roofing and storm restoration industry. The core foundation of Rising is designed for us to make our mark in the industry with our meticulousness in detail of our franchise model. We are not only here to stay, we are here to expand throughout the country offering our sophisticated solutions backed with traditional values.
Michael Tate &
(409) 682-6533 www.michaeltateroofing.com
Serving
4.8 from 53 reviews
Residential Roof Repairs
Goose Construction & Roofing
(346) 803-0177 www.gooseconstr.com
Serving
4.8 from 21 reviews
Roofing Contractor and General Contracting services
Windstorm Wizards Roofing
(713) 234-6437 windstormwizards.com
Serving
5.0 from 44 reviews
roofing companies near me, near me roofing company, roofing business near me, roofers near me, metal roofing, roofing companies, shingle roofers, roof repair near me, roof repairs, roofer, roofing contractors near me, roofer supply near me, standing seam metal roof, replace roof, gable roof, standing seam steel roof, metal roof cost, roofing contractors, metal roof prices, steel roofing cost, tile roofers, commercial roofing, slate roofers, metal roofing near me, steel roofing near me, metal roof sheeting, commercial roofing contractors near me, commercial roofers near me, thatch roof, leak in roof repair.
Emerald Roofing & Remodeling Services
(409) 999-3567 www.facebook.com
Serving
4.5 from 124 reviews
At Emerald Roofing and Remodeling Services, LLC, we provide reliable, high-quality roofing, remodeling, and home renovation services in League City, Texas (77573) and surrounding areas. Our Licensed team specializes in Roof Installation Services from Roof Repairs, Roof Replacements, Flat Roofs. Shingle Roofs & Anything Roof related. From Flooring, Drywall, Painting, and STORM RESTORATION .As your local trusted roofing company & go to for your home needs take pride in delivering honest, professional service and lasting craftsmanship. From minor home updates to full renovations, our goal is to protect and enhance your property with integrity and precision. Serving League City, Friendswood, Clear Lake, Dickinson, and the Greater Houston area.
League City Roofing
(281) 508-2009 www.leaguecityroofingllc.com
Serving
5.0 from 30 reviews
At League City Roofing, we transform the roofing landscape of League City, TX, with our commitment to exceptional service and craftsmanship. Founded in 2019 and locally owned, we bring seven years of roofing expertise to residential and commercial clients. Our mission is to deliver high-quality roofing services that combine our skilled team's expertise with the best products and advanced tools. This approach ensures our roofs are aesthetically pleasing, durable and long-lasting. We take pride in offering a comprehensive suite of roof repair, replacement, and installation services.
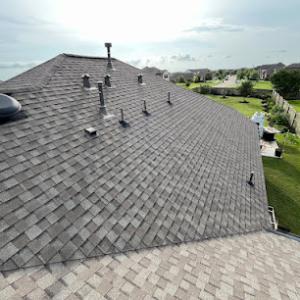
Texas City's Gulf Coast humidity and salt exposure make corrosion resistance and fastener performance more important than in inland markets. When comparing materials, the choice often boils down to how well a roof handles salt spray, humidity, and the area's hurricane-driven wind events. Asphalt shingles, metal, clay tile, concrete tile, wood shakes, and synthetic/composite shingles each bring a distinct balance of durability, maintenance needs, and repair ease. The key is matching a material to the house type, attic setup, and typical storm pattern rather than chasing the lowest upfront cost alone.
Asphalt shingles remain a common, versatile option for coastal homes. They provide a straightforward installation approach and a reasonable weight profile, but performance hinges on corrosion-resistant fasteners and well-sealed gaps to prevent wind uplift. If choosing asphalt, consider shingles with enhanced resistance to hail impacts and a robust underlayment system to keep moisture out during heavy rains. Metal roofing delivers standout wind resistance and long service life when installed with corrosion-resistant coatings and proper sealant choices for fasteners. In areas with salt-laden air, look for coatings designed for coastal environments and ensure panel seams and penetrations are addressed during installation. Both materials benefit from a well-vented attic and a clearly defined drip edge to manage moisture.
Clay and concrete tiles offer excellent durability under salt spray and high winds, but weight and install details matter more than inland applications. For coastal homes, verify the structural support can handle the load, and specify fasteners and lath that resist corrosion. Concrete tiles typically resist impact well and can shed wind-driven debris with proper interlocking systems. Clay tiles excel in heat tolerance, but brittle failure is a consideration in hail-prone winds; choose shapes and profiles that distribute impact energy, and ensure a professional install with careful alignment of flashing and venting. Regular inspection of tile rings and seals is essential in humid air to prevent moisture intrusion.
Wood shakes provide a natural aesthetic and good insulation, yet they require diligent maintenance to resist humidity and decay in a salt-air environment. If choosing wood, select species and finishes rated for coastal exposure, and plan for periodic refinishing to maintain the protective layer. Synthetic or composite shingles offer newer technology with reduced maintenance needs and better resistance to salt and wind, though performance varies by product line. Look for options specifically tested for coastal performance, and ensure manufacturer guidance on underlayment and fastener compatibility is followed.
Beyond material choice, proper attic ventilation matters more in this climate because trapped heat and moisture can shorten roof life and worsen shingle aging. A balanced combination of soffit, ridge, and powered or passive venting helps keep the attic cool and dry, reducing expansion and contraction that degrade seals and fasteners. In areas with frequent storms, ensure soffit and vented areas are kept clear of debris and that ventilation pathways remain unobstructed to maximize effectiveness during hurricane season.
In this coastal industrial bay area, a dry stretch matters more than you might expect. When a lull in rain rolls through, you want to line up the tear-off and underlayment exposure during those consecutive days of low humidity and dry skies. Track the forecast weeks ahead and lock in a window that promises at least two to three clear days back-to-back. If a shower sneaks in, be ready to pause and tarp exposed areas fast, because even brief exposure to moisture can compromise decking and the first layer of underlayment. Have tarps ready and a small crew member dedicated to securing edges at the first sign of rain. On days with any coastal breeze, bring materials down from the rack in the morning and keep them covered in heat when you're not actively working.
Summer heat makes long roofing shifts punishing for crews and dangerous for synthetic underlayment and ice/damp barriers. Plan high-effort tasks for early morning hours and wrap by mid-afternoon. On hot days, you'll want crews who understand how heat affects grip, fasteners, and ladder safety, as well as how to manage material handling on an exposed roof. Shade can help, but you still need hydration, rest breaks, and a plan to rotate crew members so productivity doesn't drop with the thermometer. If possible, stage materials to minimize repeated climbs and reuse pallets promptly to cut down on time spent on the hot surface. Expect occasional sessions where reflective roof coatings or synthetic underlayments need extra time to acclimate; factor that into your planning so you don't force a rushed sequence.
Autumn brings the Gulf's busy storm pattern, which can yank a planned re-roof into a sudden post-storm demand spike for labor and materials. Build a flexible schedule that accounts for early warning of storm tracks and the likelihood of short notice shifts. Have a ready-to-deploy backup crew and a secondary supplier list for leak-proof ridge cap and underlayment material if a storm delays shipments. After a storm, be prepared for rapid debris removal and quick inspection cycles to catch hidden leaks before they cause interior damage. Maintain a weather monitor in the pace you work, and set clear triggers for pausing work when gusts exceed safe limits or when flying debris threatens the exposed roof line. By aligning your timeline with these seasonal gusts and rain chances, the re-roof remains safer and more predictable.
Get a clear picture of your project costs upfront - no commitment required.
Texas City pricing is routinely pulled by storm-driven demand surges after hail and tropical weather, which can tighten labor availability and extend scheduling. When a major event hits, crews may be stretched thin, and suppliers may experience short-term price bumps for shingles, underlayment, and fasteners. If you're coordinating a re-roof in the wake of a storm, expect possible delays and localized price shifts, especially for premium or wind-resistant packages. Budget with a contingency for a few weeks of construction time and potential overtime costs if crews are pressed.
The local material range runs from lower-cost asphalt shingles to higher-cost tile and metal systems, with synthetic products often positioned between standard shingles and premium systems. Asphalt shingles typically come in at the lower end, while metal can push toward the upper mid-range to premium depending on coating, gauge, and corrosion-resistant finishes. Clay and concrete tiles sit at the higher end, favored for longevity in coastal environments but sensitive to weight and roof structure. Synthetic or composite shingles usually land between standard shingles and premium options, offering roughly similar performance with sometimes better hail resistance. Expect installed costs to reflect the blend of material choice, labor intensity, and the need for wind-focused detailing in a coastal bay setting.
Coastal exposure can raise system costs when homeowners choose upgraded underlayments, wind-focused installation details, or more corrosion-resistant components. Upgraded underlayment helps resist moisture intrusion and salt spray, while corrosion-resistant fasteners, coatings, and flashing resist rust in bay air. If the roof plan includes low-slope sections, or if the roof edge is highly exposed to gusts, wind-resistant fasteners and edge detailing may add to the price. In high-wind corridors, contractors may recommend additional strapping or hip and ridge reinforcement, which influences both materials and labor costs. Plan for these enhancements if your home has a long sea-facing exposure or a history of hail impact.
Heavy hail events or tropical storms can compress schedules, particularly in a city with industrial bays and lots of older homes. Coordinating with adjusters and installers requires realistic timelines; storms often leave multiple properties vying for the same crews. To lessen disruption, aim to confirm a start window, secure a weather-resilient crew readiness, and discuss staging of materials to avoid weather-driven delays. If you need a faster turnaround, be prepared to pay a premium for priority scheduling or a larger crew, understanding that this is a coastal market pattern rather than a standard residential timeline.
Don't let upfront costs delay a critical repair - these contractors offer payment plans to fit your budget.
Hill Heights Roofing & Construction
(940) 391-5751 www.hillheightsrc.com
Serving
5.0 from 18 reviews
When you plan a full re-roof in this coastal area, a permit through the City of Texas City Building Department is typically required. The process is designed to ensure the chosen roofing system, fasteners, and underlayment are appropriate for hurricane winds and salt-laturated humidity. Start by submitting project details, including roof size, structure type, and the proposed roof covering. The building department will assign a plan reviewer who checks for code compliance and inland wind-resistance expectations. If the project is minor or involves certain repairs, confirm whether a permit is necessary, but for full re-roofs, expect the standard permit pathway.
Texas City commonly uses a rough or underlayment inspection early in the project. This inspection focuses on the deck condition, roof-to-wall connections, and the integrity of the underlayment and starter courses. That checkpoint is your opportunity to address any rot, damaged sheathing, or fastener issues before the new roof goes on. Ensure that gutters, drip edges, and edge detailing align with local wind provisions and anticipated storm exposure. The inspector may also verify that a continuous, properly lapped underlayment system is in place to resist wind-driven moisture intrusion during the installation phase.
A final inspection is required after the installation is complete. The inspector will confirm that the new roof components meet state and local building codes, including wind-resistance requirements for the coastal environment. Expect checks on nailing patterns, fastener types, and roof-to-wall connections, as well as correct flashing around chimneys, vents, and skylights. Any deviations from the approved plan should be corrected before the final sign-off. Completing this step promptly can minimize delays and align with insurance documentation timelines, especially if updates were made to wind-rated components.
The building department may review wind-mitigation components as part of the permit process, and documentation gathered during or after installation can be valuable for insurance credits. Keep copies of permits, inspection approvals, and manufacturer specifications for fasteners, underlayment, and roof coverings. If your insurer requests proof of wind-resistance features-such as impact-resistant accessories, secondary water barriers, or reinforced nailing schedules-having the official inspection records ready can streamline the claim process. Coordinate with your contractor to ensure all wind-related features are properly documented and reflected in the final inspection package. This documentation often serves as a critical resource when filing post-storm claims.
This coast-hugging city carries a high-claim roof environment because hail and wind events show up with alarming frequency. Insurers often expect a thorough photo set and a clear scope of work before settling questions about damage. If a claim is filed after a storm, the more you can show-shingle condition, underlying decking, flashing integrity-the faster and more fairly the adjustment tends to go. A well-organized file now can prevent delays later when nerves run high.
Plan to photograph from multiple angles and include close-ups of impact marks, granule loss, curling edges, fastener rust, and any signs of moisture intrusion. Document attic ventilation, attic insulation, and visible roof decking where you can safely access it. Keep a contemporaneous record of dates, storm events, and any temporary repairs. A written scope that aligns with the photos helps the insurer move quickly from inspection to settlement, reducing the chance of miscommunication or scope creep.
Coastal exposure can shift how deductibles, underwriting, and coverage terms apply compared to inland areas. Wind-driven damage, salt-laden humidity, and corrosion-prone components may influence expectations on what is considered storm-related versus wear-and-tear. If a claim involves multiple days of wind-driven debris or hail impacts, document every affected area, including gutters, vents, and skylights, since these elements often intersect with the main roof assessment.
Wind-mitigation information matters during claims and when pursuing insurance credits after a compliant re-roof. Having certification-ready evidence of upgraded fasteners, underlayments, and reinforced hips or ridge lines can support favorable appraisal outcomes or credits. Prepare a concise summary of improvements and how they align with the current roof system to accompany the photo set.
Connect with contractors who help homeowners navigate the claims process from damage assessment to final approval.
Bichon Roofing & General Contracting
(713) 319-5814 gcbichonroofingtx.com
5013 Allen Cay Dr, Texas City, Texas
4.8 from 79 reviews
Texas City's frequent rain and wind-driven moisture make flashing details at penetrations especially important on low-slope sections and add-ons. The combination of salt-laden air and Gulf storms accelerates corrosion and magnifies the consequences of overlooked details. A missed seam, a poorly seated boot, or a cracked curb flashing around a skylight can become a persistent source of leaks that ruin ceilings, insulation, and interior finishes over time. In this market, a small lapse in the low-slope zone often turns into a bigger repair bill when a storm rolls through.
The local contractor signal set shows meaningful flat-roof activity, indicating that low-slope systems are a real part of the market here. Look for aging or mismatched penetrations where pipes, vents, or HVAC curbs pass through the roof. Skylights are an active specialty locally, which matters because curb and flashing failures are more vulnerable during Gulf storms. If the curb flashing has not been sealed with compatible sealant and a protective flashing membrane, wind-driven rain can force water laterally under the roofing material and into the envelope. Pay particular attention to transitions from flat to vertical surfaces where upturned edges meet curb installations.
Choose a contractor who prioritizes a wind-rated, continuity-focused flashing approach, especially around penetrations. Inspect skylight flashing not just at the curb but at the joint where the curb meets the roof surface; insist on integrated sealants and corrosion-resistant materials designed for salty coastal air. For any add-on or retrofit, map out every penetration and request a through-flash detailing that specifies membrane overlap, fastener pattern, and reinforcement at elbows and transitions. Regular pre-storm inspections that target these critical points can catch degradation before leaks become claim-worthy damage.
Find specialists in TPO, EPDM, and built-up flat roofing systems for residential and commercial properties.