Last updated: Apr 19, 2026
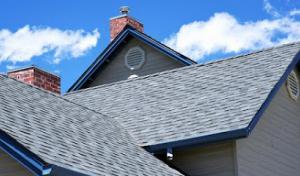
Menasha's cold, snowy winters create repeated freeze-thaw cycling that can shorten shingle seal life and stress flashing details. When moisture sits in gutters, valleys, and around chimney flashing, repeated freezing and thawing acts like tiny blows to the roof edge. You may see curling edges, lifted shingles, or granule loss after a few seasons of winter storms. The risk compounds if attic ventilation is inadequate, because warm, moist air meeting cold roof surfaces accelerates ice dam development and feathering of seal lines. The result is a slower, sneaky wear pattern that undermines a roof's ability to shed water properly, especially on lower slopes. If you notice white frost on interior soffits or damp spots along interior ceilings after heavy snows, a faster evaluation is warranted. Plan for proactive edge protection, ensure proper underlayment, and inspect flashing seals before and after severe thaw cycles.
Ice dam formation is a locally relevant risk and can affect replacement timing, repair urgency, and ventilation review during reroofing. Inconsistent meltwater that refreezes at the eave creates a dam that can force water to back up under shingles, potentially leaking into attic spaces and ceilings. Menasha roofs commonly experience this when late-wall heat loss and deficient attic venting meet substantial snowfall, especially after a few warm spells. If a roof is being replaced, the timing of tear-off must consider days when temperatures allow asphalt or metal to bond correctly and underlayment to dry thoroughly. A reroof that proceeds during prolonged winter conditions risks improper adhesion, improper seal at ridge vents, or incomplete inspection of roof deck damage. Expect crews to prioritize effective ventilation checks, complete underlayment installation, and a careful evaluation of any deck rot revealed during tear-off. Delays in replacement can be prudent if ice dams are actively forming, but do not let a freezing spell stall inspection of potential hidden damage.
Late spring through early fall is typically the preferred replacement window in Menasha because winter conditions can interfere with adhesion, tear-off conditions, and inspection scheduling. If a late-wall thaw forecast intersects with a scheduled project, anticipate potential delays or the need for staged work. In cases of prior ice dam issues, the reroof should include enhanced attic ventilation assessment: ridge and soffit vents should create a continuous flow path that reduces meltwater buildup. Underlayment integrity must be confirmed, especially where flashing details meet vents, chimneys, and valley intersections. A high-priority inspection should verify that any existing ice-dam damage is repaired before new coverings go on, to prevent quick re-leakage under new materials. In short: address ventilation gaps, confirm secure flashing, and schedule work where winter constraints won't compromise adhesion or deck safety. If you see recurring ice dam streaks after a roof is already in place, pursue an urgent assessment to prevent ongoing interior damage.
Spring storms in the area bring hail and high winds that spike the risk of damage on homes with standard shingle or metal roofs. In this part of Wisconsin, the rapid freeze-thaw cycle after a storm can expose minor impacts that quietly worsen into leaks or persistent drafts. Shingle edges can crack, granules loosen, and vent stacks can shift if the wind hits with enough force. When the sky darkens and hail begins, you need to switch from "ignore it" to "inspect now" mode. These storms don't just stress the roof; they stress the attic and ventilation system, which, in turn, can accelerate aging and invite ice dam formation if water can't drain properly.
A frequent Menasha concern is ice dam formation paired with the harsh spring melt. Freeze-thaw cycles push water to back up under shingles and into eaves if attic insulation or roof ventilation isn't keeping pace. After a hail event, you may see dented metal, cracked fiberglass, or granule loss on asphalt shingles. The first sign isn't always a leak-often it's water stains inside along interior ceiling lines after a warm day. In this climate, storm damage and wind-driven rain can compromise underlayment and vent seals, creating pathways for moisture that quietly degrade roof structure over weeks. Early detection matters, because once water sits, the cost to repair climbs quickly.
Local claim activity rises after hail and wind events, so photo documentation and product details are especially important following a storm in this area. If you notice a sudden uptick in stray granules in gutters, dented metal flashing, or hail hits on the vent pipe flashings, photograph from multiple angles, including close-ups of damaged areas and the surrounding undisturbed sections. Keep a log of dates and weather conditions, and note any changes you observe in attic space, such as damp insulation or unusual warmth after sun exposure. When discussing repairs with contractors, be prepared to specify roof type, age, and the exact products currently installed, so you can compare apples to apples rather than getting a marketing pitch.
If you suspect damage, initiate a careful inspection within 24 to 48 hours if safe to do so. Start outside: look for lifted or curled shingles, cracked edges, or displaced flashing near chimneys, skylights, and vent stacks. Inside, check for damp spots or a musty odor in the attic after drying periods. If you identify potential issues, limit access to the roof area to prevent loose debris from causing additional damage. When solicited by contractors offering storm or emergency services, verify references, check for local reputation, and request samples or product literature that matches your existing roof profile. Keep a steady approach: demand written evaluations, a clear scope of work, and a phased plan that aligns with the typical Menasha weather cycle so you aren't rushed into a full replacement before necessary.
Connect with contractors who help homeowners navigate the claims process from damage assessment to final approval.
Fox Valley Roofing & Siding
(920) 722-7682 www.foxvalleyroofingandsiding.net
1295 Appleton Rd, Menasha, Wisconsin
4.2 from 59 reviews
Great Lakes Roofing Corporation
(920) 996-9550 www.greatlakesroofing.net
1605 Drum Corps Dr, Menasha, Wisconsin
4.7 from 108 reviews
We've been providing award winning, full-service roofing since 1983. Specialized in commercial and industrial buildings, but capable of creating all kinds of roofing solutions. Let us help you today!
Allen Bontrager Carpentry
1488 Kenwood Dr ste 202, Menasha, Wisconsin
5.0 from 10 reviews
We are growing fast and have now opened our second Wisconsin location. Our Appleton office is open by appointment to facilitate face to face customer meetings in order to support our growing Appleton customer base. We specialize in steel and shingle roofing, especially standing seam, gutters and gutter guards, siding, windows, doors, and pole barn construction. Estimates are free, visit our website or call us for an estimate! 715-509-0000.

Nano Shield of Wisconsin
(920) 282-9652 www.nanoshieldwisconsin.com
W 6091 Zach St, Menasha, Wisconsin
5.0 from 9 reviews
Nano Shield of Wisconsin provides roof, concrete, and wood coatings for the Menasha, WI area.
Fox Valley Roofing & Siding
(920) 722-7682 www.foxvalleyroofingandsiding.net
1295 Appleton Rd, Menasha, Wisconsin
4.2 from 59 reviews
Fox Valley Roofing & Siding provides roofing, siding, gutter, and additional exterior home improvement services to Appleton, WI and the surrounding areas.
Romportls Contracting
(920) 460-6146 www.neenahroofing.com
Serving
5.0 from 94 reviews
Romportls Contracting provides residential roofing, commercial roofing and small buildings to clients in Neenah, WI and surrounding areas.
Erie Home
Serving
4.5 from 307 reviews
Since 1976, Erie Home has manufactured, supplied, and installed the best-performing roofing on the market. By providing ironclad warranties and convenient financing, we ensure that every homeowner we work with receives top quality service and value for their homes and properties. Erie Home professionals are the roofing company of choice in the greater Appleton, WI area. Whether you need roof inspections or roof damage repair services, Erie Home has been the go-to roofing contractor for nearly 50 years because of our attention to detail and dedication to making sure our customers are satisfied with their results. Contact us today for a quote and see why we're the trusted roofing company Appleton counts on.
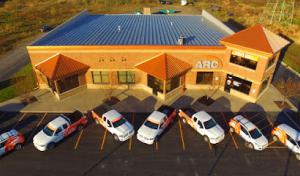
ARC Contracting
(888) 743-8086 www.arccontracting.com
Serving
4.4 from 464 reviews
At ARC Contracting, we only use high-quality materials manufactured by companies who guarantee their products for up to 50 years.

Keeney Home Services
(920) 558-4182 www.keeneyhomeservices.com
Serving
4.8 from 590 reviews
Keeney Home Services is a locally owned and operated roofing company serving Neenah and Northeast Wisconsin's homeowners since 2009. Specializing in solutions from the attic up, our mission is to provide homeowners in The Fox River Valley area with high-quality products and expert installation while making the roofing process as simple and stress-free as possible. We’re a certified Gutter Shutter® gutter installer, a GAF Master Elite Roofing Contractor, and a certified dealer of Dr. Energy Saver home insulation products. We also maintain an A+ rating from the Better Business Bureau for our unwavering commitment to providing reliable roofing services and first-rate customer care.
Upward Exteriors Roofing
(920) 879-2731 upwardexteriors.com
Serving
5.0 from 64 reviews
At Upward Exteriors, roofing isn't just our trade — it's our trust. We provide high-quality residential and commercial roofing services with an unwavering commitment to honesty, transparency, and craftsmanship. Whether you need roof repair, full roof replacement, or storm damage restoration, our team ensures every detail is handled with integrity. We serve homeowners and property managers with reliable timelines, competitive pricing, and work that stands the test of time. With Upward Exteriors, you get more than a roof — you get peace of mind.
Nasi Roofing
(920) 574-2599 www.nasiroofing.com
Serving
5.0 from 23 reviews
Nasi Roofing is your trusted commercial roofing partner in Wisconsin and Michigan. With over 40 years of experience, we specialize in installing, repairing, and maintaining flat and low-slope roofs using the industry-leading roofing systems. As a certified Duro-Last contractor, we've successfully completed over 2,000 projects, ensuring the highest quality and durability for your commercial property. Our team of skilled professionals is dedicated to providing exceptional customer service and delivering long-lasting roofing solutions. Contact us today for a free consultation and experience the Nasi Roofing difference.
Appleton Roofing Solutions
(920) 816-1048 appletonroofingsolutions.com
Serving
5.0 from 51 reviews
At Appleton Roofing Solutions, we provide reliable and affordable roofing services for homes and businesses in Appleton, Wisconsin. Whether you need a fast roof repair, a full replacement, or a detailed inspection, our team delivers quality workmanship with honest service. We understand the impact Wisconsin weather can have on your roof, and we’re here to help protect your property year-round. From asphalt shingles to flat roofing systems, we handle all types of residential and commercial roofs. Our team shows up on time, communicates clearly, and gets the job done right the first time. Need help fast? Call today for a free estimate or to schedule your next roofing service.

Ridge Top Exteriors
(920) 214-8484 ridgetopexteriors.com
Serving
4.7 from 480 reviews
Ridge Top Exteriors in Appleton is your trusted local expert for roofing, siding, windows, and gutter services tailored to withstand Wisconsin’s ever-changing weather. We specialize in high-quality materials, including energy-efficient vinyl windows and durable LP SmartSide siding, to enhance your home’s beauty, comfort, and value. Backed by over 20 years of award-winning service, our skilled team is committed to providing exceptional craftsmanship and a stress-free experience. With free consultations, transparent pricing, and a focus on customer satisfaction, Ridge Top Exteriors is proud to serve Appleton homeowners with superior solutions for their exterior needs. Call us today!
Asphalt shingles are a dominant choice in Menasha, matching the local reroofing market and year-to-year budgeting that homeowners typically use. They handle freeze-thaw cycles well when installed with proper underlayment and ventilation, and they're straightforward to repair after spring hail or wind events. If you're replacing on a mid-sized home, asphalt shingles offer reliable performance without the steep upfront cost, and they move quickly through the installation crews that local contractors typically employ for full replacements. Consistent attic venting helps manage ice dam risk by keeping the roof deck closer to the indoor temperature.
Metal presents a meaningful option for homeowners weighing snow-shedding and long-term durability in Fox Valley winters. In practical terms, metal sheds snow more predictably, which reduces the depth and weight of ice buildup on steeper sections. It also tends to resist wind-driven damage better than some fiber alternatives, a valuable feature after spring storms. When considering metal, look for panels with adequate fastening and corrosion resistance, and plan for flashing at transitions like chimneys and vents. Metal roofs can be installed over existing layers in some cases, but a full assessment ensures the best long-term performance.
EPDM rubber roofing appears in the market for flat or low-slope sections, where a seamless membrane helps minimize edge seepage during freeze-thaw cycles. EPDM is known for good hail resistance and, with proper drainage and edge detailing, it reduces concerns about ice dam formation on flat areas. This option pairs well with commercial-influenced designs or additions that introduce low-slope sections to a predominantly pitched roof. Ensure the system is installed with appropriate edge seals and flashing to address seasonal temperature shifts.
Clay tile and slate show up on a smaller share of homes, reflecting higher installed costs but offering distinctive aesthetics and durability. These materials can perform well in freeze-thaw conditions when properly anchored and vented, yet they demand careful structural assessment to support the load, especially on older rafters. Clay tile and slate shine on homes with clean, traditional lines or those undergoing stylistic updates, but the complexity of maintenance and repair can be a consideration after hailstorms or heavy snow.
In this area, the typical housing stock leans toward asphalt shingles and metal roofing, so your planning should start by comparing those two options. Asphalt shingles provide a common blend of upfront cost and year-to-year durability, with broad availability and straightforward replacements. Metal roofing, while higher in upfront price, can offer longer life and better wind performance for the Fox Valley climate. When you look at square footage, asphalt shingles generally land in the lower end of the local cost spectrum, while metal sits toward the upper range, with material choice driving much of the variance you'll see in bids.
Spring hail and windy spells can tighten contractor schedules for a few weeks at a time. That storm-driven demand can push timelines and, in some cases, squeeze prices if crews are in high demand or short supply. If a replacement is staged after a harsh winter when many homes need work, expect bidding cycles to run longer and for some crews to quote premium windows to lock in a date. If your project coincides with a busy stretch, it's wise to have a couple of approximate start windows and a readiness plan for an early-season opening.
Full replacements often reveal additional work that wasn't visible at a casual glance. Ventilation improvements or underlayment corrections identified during the review can add to the final bill. If the existing attic setup or roof deck shows signs of longer-term wear, factor in the possibility of upgrading components to meet local climate demands. When you compare bids, ask each contractor to itemize ventilation and underlayment recommendations and to explain how they address freeze-thaw wear and potential storm-related damage. This helps ensure the quote reflects the full scope and reduces the chance of sticker shock later in the project.
Get a clear picture of your project costs upfront - no commitment required.
Allen Bontrager Carpentry
1488 Kenwood Dr ste 202, Menasha, Wisconsin
5.0 from 10 reviews
In this area, a full roof replacement is treated as a permit-worthy project. A typical reroof project will go through the City of Menasha building department, and the contractor you hire usually handles pulling the permit on your behalf. Understanding how the flow works helps keep repairs on track, especially when freeze-thaw cycles and spring storms can complicate scheduling. The city's focus on ventilation and underlayment means you should expect those elements to be reviewed during the permit and inspection phases, not only during the physical work.
Contractors commonly pull the permit for reroof projects, which means you don't have to navigate the bureaucratic steps alone. Your contractor should submit the plans and required documentation, including a project scope and any ventilation details, to the City of Menasha building department. Once the permit is issued, keep a copy readily accessible for inspections and for your records. If your roof involves unusual materials or a retrofit to address ventilation concerns, have the contractor bring any special notes or calculations to the permit appointment so there are no delays later in the process.
Inspections typically occur after roof removal and again at completion, with the city paying particular attention to ventilation and underlayment requirements. In practice, that means you can expect a once-removed stage visit to verify that the decking is sound and ready for new underlayment and shingles, followed by a final inspection to confirm the system is correctly installed and weatherproofed. Scheduling around weather windows is common, since Menasha's late-wall storms and spring melt can push or pull inspection timelines. The inspector may coordinate with your contractor to review ventilation arrangement, attic baffles, and underlayment type in the early phases to ensure compliance before the shingles go on.
Because inspections depend on weather and the removal timeline, plan ahead with your contractor for a clear sequence: permit approval, decking inspection, underlayment and ventilation checks, and final shingle installation, with buffer days for potential weather interruptions. If your project involves a re-ventilation strategy, request a quick pre-inspection walk-through with the building department to confirm expectations. Keep access open for inspectors, especially around the roof edge, attic access, and ventilation outlets. Good communication between you, the contractor, and the city helps keep the project moving smoothly and minimizes hold-ups caused by rain, wind, or freeze-thaw delays.
In this market, Wisconsin carriers commonly ask for photos, your claims history, the contractor information you've engaged, and product specifications for the materials used on your roof. Having clear, high-quality images of hail dents, wind damage, and any missing or loose shingles helps the adjuster see the scope quickly. Documentation of the exact roof system you chose-shingle type, underlayment, ventilation details, and any upgrades-speeds the review and reduces back-and-forth. In Menasha, where weather swings can expose roofs to freeze-thaw cycles and spring storms, these details matter because they frame whether observed damage is a repairable wear issue or a storm-related loss.
Coverage terms and deductibles can vary by insurer in Wisconsin, so you need to verify how your damage is classified. The distinction between repairable wear, wind loss, or hail loss changes your claim handling and settlement approach, and it can influence how much is covered for replacement versus repair. If a carrier labels damage as wear rather than a weather event, you may face a different reimbursement path or deductible structure. Before you file, map out three plausible scenarios with your agent: potential wear-related wear-out, wind-induced damage, and hail-induced impact to your roofing system. This groundwork helps you contest or clarify decisions if the adjuster's initial assessment seems off.
Because Menasha experiences meaningful storm-damage and insurance-claims contractor activity, you should keep replacement scope and material details organized before the adjuster review. Create a concise file that lists the exact shingle or metal profile, underlayment type, ventilation components, and flashing details, plus current photos and any prior claim notes. If you had previous roof work, compile that history so the adjuster can see patterns or improvements in the system's performance over time. Presenting a tidy, complete package reduces miscommunications and helps ensure the evaluation focuses on actual damage rather than ambiguous documentation.
In areas where storm activity draws in many contractors, rely on verifiable references and written bids rather than word of mouth alone. In Menasha, where contractor availability can surge after a hail event or strong winds, you want a documented scope of work and material specs aligned with your insurer's expectations. Keep copies of all contractor communications, warranties, and product datasheets, and share them with your adjuster through your claim portal or agent to minimize delays and second-guessing during the review.
Connect with contractors who help homeowners navigate the claims process from damage assessment to final approval.
Fox Valley Roofing & Siding
(920) 722-7682 www.foxvalleyroofingandsiding.net
1295 Appleton Rd, Menasha, Wisconsin
4.2 from 59 reviews
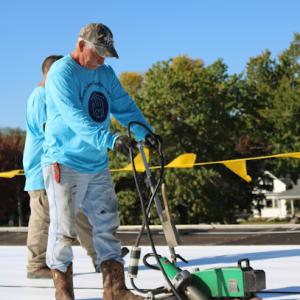
Flat-roof service is an active specialty in the Menasha market, which matters for homes or additions with low-slope sections using EPDM rubber roofing. When a flat or low-slope area is updated or repaired, pay close attention to edge transitions and curb details where the roof meets walls or parapets. In practice, schedule a thorough inspection after winter thaws to catch small pooling, blisters, or seam gaps before they worsen. Choose a contractor who routinely handles EPDM installations and has a track record with up-slope connections, Mansard-style additions, and any built-up roof remnants from older structures.
Skylight penetrations are a visible local specialty, making penetrations and flashing details a practical concern for planning reroofing. During replacement, verify that step flashing, counter-flashing, and the skylight flange are integrated with the roof deck and underlayment. In Menasha's climate, a well-sealed skylight curb plus properly fastened flashing reduces seasonal stress from freeze-thaw cycles. If a skylight is older, consider upgrading to insulated, impact-resistant glazing and a more robust flashing kit to minimize future leaks in spring wind events.
Freeze-thaw conditions in Menasha can be especially hard on transitions, penetrations, and flashing details where low-slope areas or skylights meet the main roof. Pay particular attention to the seam where the flat roof meets the vertical walls, and to the corners of any skylight openings. Ensure that the underlayment coverage extends beyond the flange and that resealed joints maintain a continuous barrier against water infiltration after rapid temperature shifts. Regular inspections after spikes in temperature or heavy snowfall help catch micro-leaks before they become larger issues.
Find specialists in TPO, EPDM, and built-up flat roofing systems for residential and commercial properties.
Great Lakes Roofing Corporation
(920) 996-9550 www.greatlakesroofing.net
1605 Drum Corps Dr, Menasha, Wisconsin
4.7 from 108 reviews
The Menasha market prizes quick response, strong reroofing experience, and diligent cleanup. When a storm hits or a freeze-thaw spike stresses shingles, you want a crew that can mobilize fast, protect landscaping, and leave the site broom-clean. Look for a contractor whose first impression is timeliness-phone calls returned the same day, on-time arrival windows, and clear, written project timelines. Cleanups should happen daily, with tarps and magnetic sweepers used to minimize nail and debris left around the yard.
Residential roofs dominate the local scene, so you should confirm experience with your specific system rather than assuming every contractor handles every material. If you have asphalt shingles, metal, or an occasional specialty system, ask for recent jobs with similar layouts and climate challenges. Ice dams, wind uplift, and the freeze-thaw cycle show up year after year in this area, so the chosen crew should demonstrate how they addressed those risks on comparable homes. Ask for before-and-after photos and homeowner references who faced comparable winter conditions.
In Menasha, affordable pricing signals value, but it also pairs with the presence of long-established, family-owned firms. Those companies can offer stability, predictable schedules, and a predictable cleanup standard. Balance price with a known track record and local reputation. Favor a contractor who can provide a detailed scope of work, including tear-off if needed, proper ventilation, and underlayment considerations that align with city expectations for full replacements. A solid written contract should cover job sequencing, material warranties, and post-project debris removal.