Last updated: Apr 19, 2026
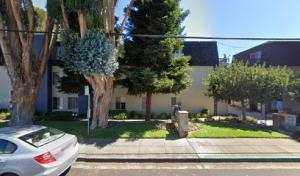
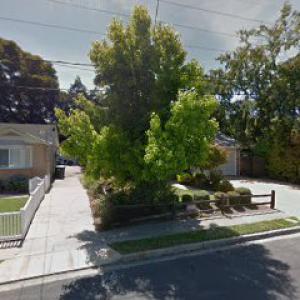
Belmont sits on the Peninsula between bay-influenced air and the western hills, so many homes experience morning moisture, fog exposure, and longer dry-out times than inland communities.
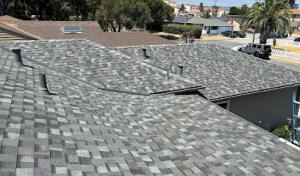
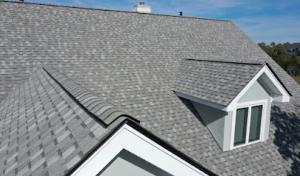
On hillside lots, fog lingers along the rooftops and eaves longer than in flat neighborhoods. That means surfaces stay wet into late morning, especially on north-facing slopes and shaded routes between trees. Roofs that drain toward interior valleys see repeated cycles of wetting and slow drying, which accelerates moss and mildew development on wood, tile, and low-slope sections. If your home has a mix of tile and shingle, expect the higher risk areas to be the shaded patches where cold fog condenses and dew forms daily during the wetter months. Plan on inspecting drip edges, underlayment transitions, and tile cleanouts after the wettest weeks of winter to catch slow leaks before mold takes root.
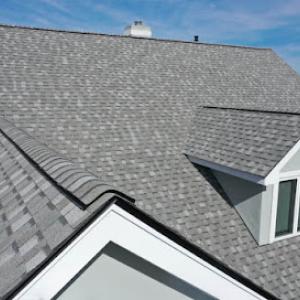
Tree canopy overhangs and hillside adjacency create pockets of persistent dampness. Moss tends to establish first on north-facing or shaded hips, then climbs to adjacent shingles, shakes, or tile surfaces. For concrete or clay tile, that means you might notice moss on lower edges or between ridges where moisture pools. In Belmont, the combination of fog-driven moisture and limited sun exposure means you should treat moss as a priority maintenance item, not a cosmetic issue. Regularly brushing moss from shingle surfaces and tile lips helps maintain the rainwater path and reduces moisture retention that can soften wood decking or underlayment. If you see consistent moss mats after winter, target those sections for a more thorough clean and reseal if applicable.
Because winters bring wet conditions and summers dry out, leak tracing often hinges on whether decking has stayed wet through the rainy season or can be opened during the summer window. Water that sits on decking or underlaminate during wet months can migrate into overlaps, fasteners, and flashing. If a roof section shows a hesitation in drying during May or June, treat it as a potential reservoir for late leaks-open the deck where safe to ventilate, and check for trapped moisture under boards and underlayment. Once the dry season arrives, you can more quickly evaluate decking and flashing for signs of moisture-driven damage without the confounding factor of continued rainfall.
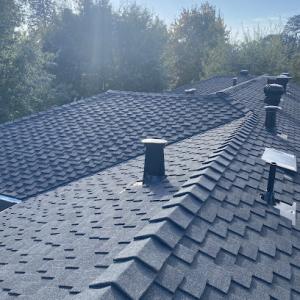
When inspecting, start with the shaded, north-facing, and hillside-facing slopes first. Look for dark staining, soft spots on decking, and any smoothing or sinking of fasteners on vents and edges. On tile roofs, examine broken or displaced tiles that trap moisture in valleys, hips, and eaves. For compositions, test for lifted shingles near overhanging branches and at roof-to-wall junctions where dampness can linger. Pay attention to fascia and drip edge condition-fog and rain can push moisture into the eaves, and slow drainage here invites rot. If you can access the attic, check for consistently damp sheathing or mildew on the underside of decking after wet spells, especially along north sides.
Treat moss promptly on shaded slopes with a non-destructive cleaner and a soft brush, avoiding pressure washing on fragile tiles. Maintain a clear roof ridge and valley flow path to prevent debris buildup that holds moisture. Improve ventilation where possible to shorten the moisture residence time in attic spaces, particularly on hillside homes where warm days can trap humidity. Consider a targeted reseal or flashing refresh on low-slope sections that channel winter moisture toward interior joints. Finally, map your roof's moisture-prone zones so future replacements or repairs can prioritize the areas most likely to suffer from fog-driven dampness.
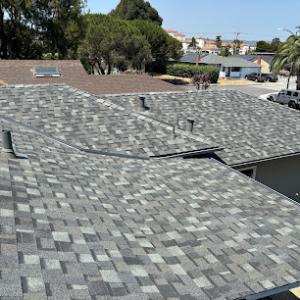
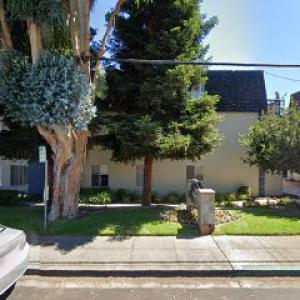
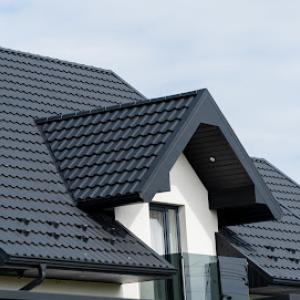
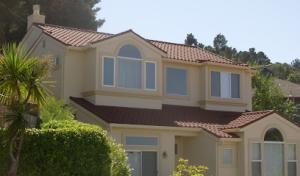
Belmont's residential roofs don't fit a single mold. Instead, you'll see a neighborhood tapestry of asphalt shingles, clay tile, concrete tile, wood shingles or shakes, metal, and synthetic composites. That variety isn't incidental-hillside siting and fog-driven winters push homeowners toward different performance needs. Asphalt shingles handle the quick weather shifts on sun-facing planes, while clay and concrete tiles bring long-term durability on more exposed slopes. Wood shingles or shakes offer a classic look but demand attention to moisture. Metal and composites bring lighter weight and a different response to fog-damp conditions. The key is recognizing that each material responds to Belmont's mixed exposure in its own way, so a one-size-fits-all maintenance plan won't hold up.
The hillside layout shapes how each roof plane behaves. On sun-baked slopes, shingles can experience faster granule wear and panel drying, while clay and concrete tiles may feel the brunt of thermal cycling. In fog-damp, shaded planes, moisture retention becomes more pronounced, which can lead to moss growth or tile degradation if drainage isn't up to par. The city's mix of sun-exposed and fog-exposed planes means materials perform differently on the same house. A clay tile roof might show surface brittleness on northern, fog-prone facets while the southern, sun-heavy sections remain comparatively intact. Understanding this split helps you plan targeted maintenance-checking the fog-prone sections more frequently for moss or micro-cracks and monitoring granule loss on asphalt shingles in drier, sunlit sections.
Heavier tile systems-especially clay and concrete-can place distinctive demands on framing in hillside construction. In Belmont, older framing stock paired with steep slopes can trigger closer structural review during plan checks for full replacement. When tile is chosen for hillside sites, ensure your roof deck and support structure are evaluated for the added weight and wind load typical to elevated coastal neighborhoods. Tile roofs also demand precise installation details: proper underlayment, secure battens, and adequate flashing at transitions to walls and chimneys. For concrete and clay tiles, the slope and alignment influence wind-driven rain pathways and potential water intrusion at overlaps, so ensure professional installation accounts for these factors from the start. On wood-shingle roofs, slope orientation matters for moisture balance-north- or fogward exposures can retain more moisture, accelerating rot if ventilation or drip edge details aren't robust.
Wood shingles or shakes bring warmth and compatibility with traditional Belmont aesthetics, but they demand vigilant moisture management. Shaded or fog-damp planes can accelerate moisture retention and lead to quicker decay without diligent maintenance. Synthetic composites, by contrast, often offer improved moisture resistance and consistent performance across varying exposures, though color fading and edge detailing should be considered in foggy, damp settings where microclimates intensify. Metal roofing tends to handle slope variety well and can shed moisture quickly on steep planes, but flashing details and panel seams require careful sealing on mixed exposures to prevent slow moisture ingress. When choosing among these options, weigh how each material's behavior aligns with the sun-dogged and fog-heavy portions of the roof.
With a mix of material types and slope orientations, a staggered approach to maintenance pays off. On clay or concrete tile, inspect for broken or displaced tiles after winter storms and fog events, and watch for separator cracks where debris or moss can lodge. Asphalt shingles on southern exposures should be monitored for granule loss and edge curling as seasons shift, while shaded planes merit moss control and occasional cleaning to prevent moisture lingering at eaves and gutters. Wood shingles require proactive moisture management: ensure adequate ventilation, inspect for soft spots after wet seasons, and treat or reseal vulnerable sections to slow decay. Synthetic and metal products typically benefit from seasonal inspections focusing on fastener integrity and flashing seals, especially at roof-to-wall junctions and chimneys on hillside homes. Crafting a plan that addresses each slope's exposure helps keep Belmont's distinctive hillside roofs durable through winter fog and sun-drenched months alike.
In this hillside community, material choice drives most of the variance in the final price per square. Asphalt shingles sit in a practical middle ground, with local pricing ranges around $450 to $750 per square. If a project leans toward metal, expect roughly $700 to $1200 per square, while clay tile stretches a bit more, typically $900 to $1700 per square. Concrete tile hovers in the same upper band, about $1000 to $1700 per square, and wood shingles or shakes run from $800 to $1400 per square. Synthetic or composite shingles are often the most affordable option among the premium choices, at about $700 to $1100 per square. These ranges reflect Belmont's mixed stock of tile, shingle, and low-slope roofs and the added factors that show up on the hill.
Belmont costs are often pushed upward by hillside access, staging difficulty on narrow or sloped lots, and the labor needed to protect landscaping and manage tear-off debris safely. Narrow driveways, tight yard spaces, and limited room for a dumpster or crane create scheduling constraints and additional crew coordination. The extra time spent setting up edge protection, protecting ornamental plantings, and transporting waste away from delicate hillside landscaping all adds up. Contractors routinely bill for safer teardown procedures and for extra trips to haul debris, which can nudge the price per square upward beyond basic material and roofing costs.
Summer usually allows faster installation in Belmont, thanks to drier conditions and more predictable weather windows. That said, the hillside microclimate still brings fog and mist that can dampen productivity on high-humidity days. Winter rain, wet decking, and peak-season permit or contractor demand can extend schedules and increase project friction. When rain lingers or crews must pause for safety checks on a slope, pacing shifts from a straightforward tear-off to a staged sequence with added temporary protections and contingency materials. This can translate into longer project timelines and, in some cases, higher labor costs to keep crews engaged through slower periods.
The local climate-fog-laden mornings, winter moisture, and periodic exposure to wind-driven dampness-makes certain assemblies more resilient yet pricier. Clay and concrete tiles offer durability against brushy hillside fires and long-term performance, but their weight and installation complexity raise the total cost. Metal roofs provide excellent moisture shedding and longevity but require careful detailing for snow and fog-induced condensation. Asphalt remains a flexible, more economical option, but on a hillside, the load distribution, underlayment choices, and edge protection for steep pitches become critical to avoid premature wear. Wood shingles or shakes deliver a traditional look but demand meticulous moisture management to prevent rot in shaded, damp spots. Synthetic or composite shingles offer a middle ground, balancing performance with cost on a hillside property.
When planning, benchmark the installed price per square rather than just listing material costs. Include the cost of premium underlayment and moisture barriers tailored to foggy, damp conditions, plus edge-to-edge protection for plant life on slopes. Factor in staged access needs, debris containment measures, and potential delays tied to weather patterns. Asking for a line-item breakdown that separates material, labor, staging, and waste management will help illuminate where Belmont-specific factors push the total above the base material range. In many hillside projects, a careful balance between initial material choice and the rigors of safe, efficient staging determines whether the project finishes on time and within budget.
Get a clear picture of your project costs upfront - no commitment required.
Signature Roofing
(650) 598-5444 www.signatureroofing.com
519 Marine View Ave suite g, Belmont, California
4.9 from 42 reviews

Signature Roofing
(650) 598-5444 www.signatureroofing.com
519 Marine View Ave suite g, Belmont, California
4.9 from 42 reviews
30 years specializing in local residential re-roofing using asphalt shingle products from GAF and CertainTeed. Free no obligation detailed written quote using a satellite measurement service for homes in San Mateo County and Santa Clara County. Request our highly rated "Roofing Process Guide." * Better Business Bureau A+ rating since 1993. * Contractor license in good standing with no complaints. * Carries $2M in liability insurance and required workers' comp. * Full time certified roofers, and dedicated cleanup crews. * Valid business license in your city. Visit our website today to learn more about the products we use, request our FREE Roofing Process Guide, and submit a request for a FREE detailed roof quote.

Zenith Roofers
(650) 670-0069 www.zenithroofers.com
555 Oneill Ave Unit 10, Belmont, California
4.8 from 25 reviews
We're a licensed, bond and insured family owned roofing business in Redwood City with more than two decades of experience. Our mission is to offer our neighbors in the Bay Area and its arounds the best quality work and experience with their roof replacements, repairs and new construction roofs. We offer different types of roof materials, such as composition shingles, presidential shake, wood shingles, torch-on flat roof systems, tile and more. We also offer gutter cleaning and replacement, sun tunnels and skylights installations and replacements. We take pride in what we do and aim 100% customer satisfaction.
Jim Hageman Roofing
(408) 910-9190 jimhagemanroofingllc.com
Belmont, CA
4.8 from 25 reviews
WE’LL TAKE CARE OF ALL YOUR ROOFING PROBLEMS Our experienced roofers in San Jose, CA can handle all types of roofing projects with ease. We can perform: Roof installations on your newly built home Reroofing, to replace your damaged roof Roof repairs on any kind of roof Gutter installations, to replace your corroded gutters
Belmont roof replacement & repair
(650) 686-2008 belmontroofreplacementandrepair.xyz
900 Chevy St, Belmont, California
5.0 from 6 reviews
RidgeRootPro Roofing, a premier roofing supply store in Belmont, is your trusted partner for all roofing needs. Situated at 900 Chevy St, we provide a comprehensive selection of high-quality roofing materials designed to handle any project, big or small. Our expertly curated inventory ensures you have access to the best products on the market, guaranteeing durability and performance. Whether you're a professional contractor or a dedicated DIYer, RidgeRootPro offers the essential supplies you need to build a strong, lasting roof. Visit us and discover the difference quality materials make.
Saber Roofing
(650) 368-9220 saberroofing.com
1404 Old County Rd, Belmont, California
5.0 from 5 reviews
Saber Roofing, Inc. is a second-generation family-owned business established in 1980, known as the Platinum Roofing Company of the SF Bay Area. We specialize in standard roofing materials (composition shingles, wood shingles, torch-on flat roof systems, elastomeric coatings, fire-retardant shakes) and are skilled in slate application. We also install seamless gutters, downspouts, solar panels, sun tunnels, and skylights, with attention to attic ventilation, insulation, and flashings. Our installers use state-of-the-art materials and techniques. "We go the extra mile with daily progress reports and follow-up thank-you cards. This personal touch results in 80% of our work coming from customer referrals."

Above All Roofing Services
(650) 622-9780 www.aboveallroofingservices.com
Serving
5.0 from 15 reviews
As certified roofing experts, we take pride in the work we do, and as Bay Area residents, we take pride in the community we serve. To us, you're more than just a customer, you're our neighbor, and we'll provide you with personal and professional service you won't get anywhere else.
Trusted Roof Repair Company
649 Old County Rd, Belmont, California
5.0 from 1 review
Trusted Roof Repair Company delivers dependable roofing solutions throughout Belmont and the San Mateo area. From emergency leak repairs to full roof replacements we handle residential and commercial projects with care. Our services include shingle installation tile roofing flat roof repairs and gutter systems. We are licensed bonded and insured offering free estimates and strong warranties on all completed work.
Greg Jones Roofing
(650) 720-2677 gregjonesroofing.com
Belmont, CA
5.0 from 1 review
Welcome to Greg Jones Roofing (GJR) For over 30 years, Greg Jones built a reputation as one of the most honest and hardworking roofing contractors on the Coast. In April 2024, Greg retired, passing the torch to Erick Sanchez and Tami Martinez, who are honored to continue his legacy. About Us Erick Sanchez has been in the roofing industry since 2002 and worked alongside Greg as a lead supervisor since 2009. With over 23 years of experience, Erick has mastered the craftsmanship and integrity that define Greg Jones Roofing. Our Commitment: At Greg Jones Roofing, we uphold the same dedication to excellence that Greg instilled in the company. We provide honest service, top-quality materials, and expert craftsmanship for your home
ELM Roofing Contractors
(650) 249-0784 elmroofingcontractors.com
Serving
4.9 from 153 reviews
ELM Roofing Contractors is a local San Mateo CA. roofing company. We are licensed and insured with a C39 contractor license. We offer roof replacement, roof repair and roof inspections to customers in San Mateo CA. and the surrounding areas. Our team is built out of some of the best roofers in the bay area. We offer our service for all types of roofs and work with leading brands of roofing materials. All our work comes with a warranty. In addition, a project manager is assigned to give regular updates to the customer and supervise each roofing project. We take the safety of our roofers and customers seriously. Our company offers free onsite consultations. Contact ELM Roofing Contractors to schedule a meeting with one of our licensed roofers
Andes Roofing
(650) 995-3565 www.andesroofingcorp.com
Serving
5.0 from 15 reviews
Andes Roofing- roofing contractor LIC#1098858, based in Redwood City and serving the peninsula and wider Bay Area.I specialize in all types of residential roofing. I look forward to connecting with you as your local roofer.
NC Roofing Solution Inc. San Mateo
(650) 664-3314 ncroofingsolution.com
Serving
5.0 from 112 reviews
NC Roofing Solution is a licensed and insured roofing company serving San Mateo and the broader Bay Area. They offer a range of services, including roof replacement, repair, rejuvenation, and gutter installation. Their expertise covers various roofing types, such as asphalt shingle, flat, standing seam metal, tile, TPO, and torch-down roofs. The company is recognized as a GAF certified roofing contractor, reflecting their commitment to quality and professionalism. They have received positive feedback from clients, highlighting their efficiency, professionalism, and high-quality materials. For residents and business owners in San Mateo seeking reliable roofing solutions, NC Roofing Solution

Spotlight Roofing
(650) 863-3730 www.spotlightroofing.com
Serving
5.0 from 66 reviews
Spotlight Roofing is a roofing contractor based in San Mateo, CA, providing residential and commercial roofing services. The company handles metal roofing installation, roof repair, and roofing replacement for a variety of property types. Services also include roof inspection to help identify wear, damage, or structural concerns. Spotlight Roofing works with different roofing materials and systems and supports new installations as well as existing roofs. All work is performed with attention to local building standards and project requirements in the San Mateo area.
Full roof replacement in this hillside community is typically treated as more than minor work, and a building permit is generally required. If the project involves replacing the roof with a heavier material or altering the roof structure, the permit process will look at load paths, nailing patterns, and how the new system integrates with the existing home. Skipping the permit or treating it as a simple repair can trigger rework, fines, and delays that cascade through winter weather windows when conditions are already tight on this slope.
Local review focuses on fire-code compliance and structural feasibility, especially when material choices shift-such as upgrading to tile or switching to a composite system with different weight and attachment needs. The review is more stringent if the current framing wasn't designed for heavier assemblies. A thorough plan review helps prevent post-project issues like underlayment failures, compromised ignition resistance, or uneven load transfer that could lead to future leaks or framing distress during winter moisture cycles.
Inspections commonly occur at two critical milestones: at the roof framing or underlayment stage, and again upon final completion. These checks verify that structure, flashings, and underlayment are correctly installed before concealment, and that the finished roof aligns with code and permit conditions. In busy roofing seasons, lead times for inspections can stretch, so anticipate delays and coordinate with the building department to avoid extended weather exposure on open framing. If any deviation from the approved plan is found, the project can stall until corrective work passes inspection.
Keep communications clear with the contractor about which materials are permitted and how the wind, fog, and winter moisture cycles affect fastening and drainage on a steep hillside. Have a clearly defined sequence for framing, underlayment, and tile or shingle installation, and plan for a mid-project review if material choices shift. Understanding the permit and inspection cadence helps prevent costly rework and protects the home's structure and fire-resistance performance when a roof even mildly changes its character.
Find contractors who integrate solar panels or solar shingles into your roof for long-term energy savings.
Saber Roofing
(650) 368-9220 saberroofing.com
1404 Old County Rd, Belmont, California
5.0 from 5 reviews
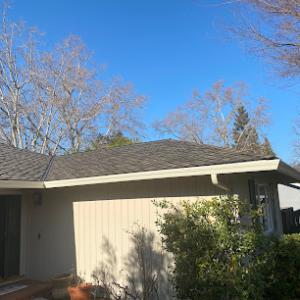
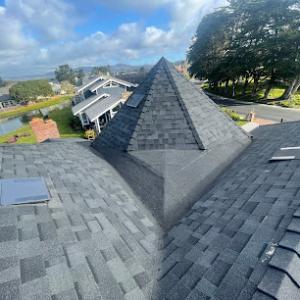
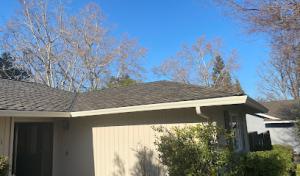
Belmont's housing stock features many homes where the main, steeper roof line connects to garages, additions, porches, or low-slope sections. These transitions weather differently and often carry more potential for moisture intrusion, especially where leaves accumulate or shade slows drainage. Recognize that the risk isn't uniform across the house: the point where a tile or shingle field meets a flat or low-slope membrane is a common trouble spot after winter fog and wet periods.
During wet-season inspections, pay special attention to ridge runs that meet low-slope patches, parapet joints where field tiles butt against membranes, and edge details near overhangs. Look for signs of slow drainage, such as pooled water after light rain, wet beneath leaf litter, or moss growth leaning toward the transition seam. In shaded areas, moss can bridge the seam and hide hairline leaks until a heavier rain proves the point. A careful walk-around after a storm often reveals the first hints of trouble.
When a steeper tile or shingle field abuts a low-slope area, ensure the transition includes properly integrated waterproofing, edge flashing, and drainage provisions. The membrane at the transition should extend well onto the steeper surface and onto the low-slope section with a clean, continuous seal. If flashing is visible and peeling at the seam, or if grout lines loosen where tiles meet the membrane, schedule a targeted repair rather than a full roof replacement.
Keep leaves cleared from transition zones so drainage isn't slowed or blocked. In areas with persistent shade, consider a periodic cleaning of moss and organic debris from the edge details, not just the visible tile field. Regular maintenance of these junctions is a practical step, as neglect here compounds later leaks and can lead to more invasive repairs.
Flat and low-slope work is a meaningful local service category, not an edge case. When selecting a contractor, confirm they have recent experience with mixed geometry roofs and verified performance at transitions between tiles or shingles and low-slope membranes. A focused inspection of these junctions should be part of any winter moisture assessment, with emphasis on drainage path continuity and seal integrity.
Find specialists in TPO, EPDM, and built-up flat roofing systems for residential and commercial properties.

Zenith Roofers
(650) 670-0069 www.zenithroofers.com
555 Oneill Ave Unit 10, Belmont, California
4.8 from 25 reviews
Saber Roofing
(650) 368-9220 saberroofing.com
1404 Old County Rd, Belmont, California
5.0 from 5 reviews
Fall and winter wind events paired with rain can lift vulnerable shingles, break tiles, and turn small flashing defects into active leaks. On hillside landscapes, steep pitches and shaded microclimates foster moss andior debris buildup that can trap moisture and accelerate deterioration. When you hear whistling around vent penetrations or see shingles cupping and small leaks near ridge lines, treat it as a warning, not a nuisance. Address these signs promptly to prevent broader interior damage.
Because exterior work can pause during wet periods in Belmont, homeowners often need temporary leak control and photo documentation before permanent repairs can be scheduled. Tarp or heavy-duty plastic over the affected area, weighted edges, and careful layering can reduce rain intrusion between storms. Take high-quality photos from multiple angles to document the leak before contractors arrive. This evidence helps you communicate urgency to adjust schedules and ensures the repair plan addresses the root cause rather than just the symptom.
Local insurance handling is influenced by California's broader underwriting pressure, so roof age, material type, and condition reports can affect both claims handling and future coverage options. Compile a dated history of issues, including wind events that preceded leaks, visible shingle or tile damage, and any temporary fixes you installed. When speaking with your insurer, present consistent photos, notes on rainfall reach, and a clear timeline of events to support faster decisions and a stronger repair path.
Connect with contractors who help homeowners navigate the claims process from damage assessment to final approval.
Zenith Roofers
(650) 670-0069 www.zenithroofers.com
555 Oneill Ave Unit 10, Belmont, California
4.8 from 25 reviews
NC Roofing Solution Inc. San Mateo
(650) 664-3314 ncroofingsolution.com
Serving
5.0 from 112 reviews
In California, insurers commonly weigh roof age and material when evaluating renewals and underwriting, which makes Belmont homeowners more sensitive to documented roof condition before problems escalate. If a roof shows signs of wear from winter moisture or fog-driven dampness, expect the underwriting to respond more cautiously. A clear, recent maintenance log and a record of durable, weather-appropriate materials can help set a steadier tone when the policy is reviewed at renewal time.
For Belmont claims tied to wind or wildfire-related events, adjusters often rely heavily on dated photos, contractor condition reports, and replacement estimates rather than homeowner descriptions alone. When storms or embers drift through the hills, a well-kept photo timeline and an independent condition report can mean fewer surprises and smoother communication with the insurer. Be prepared to show how the roof has resisted moisture intrusion and kept framing dry through the wet season.
Homes in the Belmont hills can face added insurance scrutiny because wildfire exposure and defensible-space concerns are part of the broader Peninsula and San Mateo County risk conversation. If the property sits on a slope with shade from mature trees, document how vegetation management and drainage controls mitigate risks. Proactively addressing moss growth, moisture staining, and potential wind-driven debris can help keep the renewal discussion grounded in observable conditions rather than impression.
Connect with contractors who help homeowners navigate the claims process from damage assessment to final approval.
Zenith Roofers
(650) 670-0069 www.zenithroofers.com
555 Oneill Ave Unit 10, Belmont, California
4.8 from 25 reviews
NC Roofing Solution Inc. San Mateo
(650) 664-3314 ncroofingsolution.com
Serving
5.0 from 112 reviews