Last updated: Apr 19, 2026
In the long, hot Oakley summers, underlayment and shingles take the brunt of the dry heat. The sun's ultraviolet rays bake material from the outside in, causing faster aging in exposed areas-especially on roofs with clay or concrete tiles, or where flashing sits exposed to sun and wind. This is the season where minor edge or ridge weaknesses may stay quiet, but the underlying fabric wears down more quickly. If you notice granule loss on asphalt shingles or a chalky film on metal surfaces, expect that the aging process is advancing even though you don't have leaks yet. Plan any major replacements for after peak heat when the attic is properly ventilated and the roofing stack is dry, because heat plus moisture can complicate adhesive performance for underlayment and sealants. If there are signs of curling shingles, distorted tiles, or exposed fasteners in the heat, treat those as a heads-up that the roof's life is being shortened by the season itself.
Winter brings the real test: cool, wet conditions that reveal weaknesses and drive leak timing. Oakley's winter storms and heavy rainfall make it common for leaks to appear suddenly after a dry spell ends, or during a front-driven downpour. That stress is especially evident around flashing details, chimneys, vents, and transitions between roof planes. When leaks become obvious, scheduling needs shift toward rapid action, but winter weather can delay tear-off and dry-in work. If you already have active leaks, plan for a temporary fix that protects interior spaces while an open schedule aligns with drier days. A cautious approach helps prevent further interior damage and preserves the roof deck for a cleaner, longer-lasting installation once conditions improve. The goal is to coordinate a tear-off when precipitation is forecast to stay away for a sustained period, not during a gusty storm front that could complicate repairs.
Occasional wind events in the East Contra Costa foothills can turn minor edge, ridge, and flashing weaknesses into visible damage even when the dry season made the roof look acceptable. In Oakley, those winds can pry up shingle edges, loosen coping, or peel back flashing along the eaves and valleys. After a windy spell, inspect the perimeter and flashing details carefully-ridges and hips are common failure points where wind pressure concentrates. If you notice lifted edges, creased shingles, or loose fasteners after a wind event, treat it as a warning sign that the roof is closer to needing more than maintenance. Prioritize tightening, resealing, or replacing compromised flashing to prevent a more disruptive failure during the next rainy period.
The practical strategy is to map projects around Oakley's climate pattern: hot, dry summers accelerate aging; cool, wet winters reveal leaks and complicate scheduling. For a re-roof, choose a window that minimizes exposure to both peak heat and soaking rains, while allowing adequate curing time for sealants and underlayment. If leaks exist, address them promptly with temporary containment and plan a full replacement window that avoids the wettest part of winter. By aligning work with the local seasonal rhythm, you extend roof life and reduce the risk of weather-driven delays that disrupt the project timeline.
The Delta-edge climate in this part of East Contra Costa means roofs bake through long, hot summers and then face a wet, windy winter that tests every seam. In Oakley, winter leak investigations should focus on flashing, underlayment, and penetrations because summer heat can embrittle components before the rainy season exposes them. When a winter storm rolls through, the first clues aren't always a gushing puddle-often the telltale signs show up as slow seepage at joints, or dampness that travels along rafters to an unsuspecting ceiling. The reliability of a roof hinges on how the underlayment sits under the tiles or shingles and how well flashing around chimneys, vents, and transitions holds up after months of heat cycling.
Because Oakley has many suburban homes with tile and composition systems, storm-related problems often involve displaced field pieces, failed valleys, and water entry around roof transitions rather than only obvious punctures. Valleys are especially vulnerable when temperature swings cause metal to expand and contract, loosening the metal-to-slat mating and allowing moisture to creep into the valley step or drip edge. Field pieces can shift after a wind event, creating tiny gaps that water can exploit during a heavy rain. Around penetrations-vent pipes, skylights, chimneys-look for dried sealant that has cracked or peeled away and for flashing that has lifted or separated from the deck. Even small gaps along ridges or at vent boots can become point sources for leaks once winter moisture moves through.
The hot-summer/wet-winter cycle alters not only when leaks start but how quickly they progress. In Oakley, heat embrittlement from summer can create micro-cracks in underlayment or degrade the granule grip on shingles, so the rain that follows finds those weak spots more readily. Water can travel along a seam or edge inside roof decking before showing up as a visible stain. This means that after a dry, sunny spell ends with a cold night and a rain front, the roof may reveal problems that were dormant through autumn. The timing of leaks often aligns with the first significant cold front after a warm spell, when expanding and contracting materials reveal their failures.
After a storm, check around all transition points-where roof planes meet walls, along dormers, and at chimneys-for lifted flashing or sealant gaps. Inspect valleys for any metal distortion, broken seams, or residual water pooling that could indicate a compromised installation. Look at underlayment where shingles or tiles have been displaced; if you can see exposed felt or a brittle edge, that's a red flag. In addition, snick or pry test at low-risk areas to see if roofing components shift underfoot, which suggests fasteners may have loosened. Finally, pay attention to any damp spots on interior ceilings that align with roof lines, particularly in rooms directly below attic zones with limited ventilation. If moisture is present, don't delay-plan targeted repairs that address flashing, underlayment, and penetrations first, then tackle field pieces and valleys.
Document storm-damaged areas with photos and notes of where water was observed entering, especially around transitions and penetrations. Share those observations with your roofing professional, emphasizing flashing integrity, underlayment condition, and any displacement at field areas or valley connections. Prioritize a detailed assessment that verifies upward ventilation performance and confirms fastener security across roof surfaces. Remember: the most urgent risks in this climate arise when persistent warmth has already aged components, and the next rain event finds those aged parts weaker than expected.
Find contractors experienced in skylight installation, flashing, and leak repairs to bring natural light into your home.
Dependable Roofing
(925) 777-1417 dependableexperts.com
5406 Elm Ln, Oakley, California
4.9 from 96 reviews


All American Roofing & Gutters
(855) 235-0472 masterlineroofing.store
1325 Birmingham St, Oakley, California
5.0 from 5 reviews
Based in Oakley, All American Roofing and Gutters is your premier choice for comprehensive roofing solutions. Our seasoned professionals specialize in all aspects of roofing, from initial installation to meticulous repairs and full replacements. We are dedicated to providing top-quality craftsmanship and reliable service to protect your home for years to come. Trust our expertise to elevate the safety and aesthetic of your property.

Town & Country Roofing & Solar
Serving
4.1 from 19 reviews
Town & Country Roofing & Solar, located in Brentwood, CA, is a GAF Gold Elite Commercial Contractor and GAF Master Elite Residential Contractor. For over 40 years, we have been providing premium commercial and residential roofing and solar panel installation. From small leaks to full roof replacements, our experienced, licensed roofers can handle it all. We offer warranties and free estimates, ensuring confidence and quality. Call us for reliable roofing and solar services backed by decades of expertise!
Lopez Roofing
(925) 483-0044 roofinglopezinc.com
Serving
5.0 from 11 reviews
Specializing in roofing & Gutters is your trusted partner for expert residential upgrades.

Neram Roof Repair & Install
(916) 234-2525 antiochroofrepair.com
Serving
4.8 from 17 reviews
At Neram Roof Repair & Install, we're on the cutting edge of both roofing and landscaping services. We're committed to delivering unparalleled expertise, craftsmanship, and personalized solutions to our valued customers. With an unwavering commitment to quality and integrity, our team of professionals leverages state-of-the-art tools and techniques to provide comprehensive roof maintenance, installation, and repair services. We extend our passion for excellence to intricate landscaping designs, transforming outdoor spaces into vibrant and functional masterpieces. AtNeram Roof Repair & Install, we strive to leave our mark on every project, creating lasting impressions and elevating your property's aesthetic appeal.

Dynamic Roofing
(925) 755-8482 dynamicroofbayarea.com
Serving
5.0 from 24 reviews
Roofing services, roof repairs, and gutter installation
Goode Painting
(209) 650-3836 www.goodepaintingco.com
Serving
5.0 from 25 reviews
Goode Painting is a licensed painting and home-services provider with over 20 years of experience. We specialize in roof cleaning and soft washing, pressure washing, roof coatings, residential and commercial painting, solar panel cleaning, bird netting, window cleaning, and exterior repair work. Whether it's restoring your roof, refreshing your property, or taking on a custom project, feel free to reach out with any questions.
Bailey's Roofing
(925) 334-0180 baileys-roofing.com
Serving
5.0 from 2 reviews
We're your go-to residential roofing and gutter installation specialists

B & K Roofing
(925) 625-1243 www.bandkroofing.net
Serving
5.0 from 6 reviews
B and K Roofing is proud to offer superior roofing and maintenance services to customers throughout the greater Bay Area. With over 30 years of experience in the industry, our company is committed to delivering the highest level of workmanship and customer service to every client we serve.
Steve Roofing
Serving
4.9 from 16 reviews
Steve Roofing Specializing in all your roofing needs. Cedar Shake, Asphalt Shingles, Tile Roof, Flat Roof, Gutter Repair/Cleaning. All types of roof Commercial building Please call today to get your free estimates (20mi Radius of Modesto, CA.) or second opinion.
Roof Tile Custom Specialists
(925) 634-8700 www.rooftilecustomspecialists.com
Serving
4.6 from 11 reviews
Roof Tile Custom Specialists provides tile roof installation, tile roof repair, tile roof flashings, dry rot repairs, and roof ventilation to the Contra Costa County, CA area.

V Mendoza Roofing
(925) 783-6265 vmendozaroofing.net
Serving
4.3 from 16 reviews
V Mendoza Roofing was founded by Valente and Yecenia Mendoza in 2008. Since then, the small business has installed new roofs on over a thousand residential and commercial projects. With 30 years of roofing experience, Valente prides himself in ensuring that his customers receive not only quality roofs but also quality customer service. Since their first service, V Mendoza Roofing has offered free estimates to all customers; offering roof installments on new construction, re-roofs and overlay on commercial and residential projects and roof repairs. The company also provides gutter services.

All Clean Gutters & Roofing
(925) 437-6934 allcleanguttersandroofing.net
Serving
5.0 from 3 reviews
Our company was built with the commitment to ensure cost-effectiveness and high quality in every gutter and roofing project we are hired to work on for the community of Antioch, CA and the surrounding areas. Our company was founded under the great values of: • Professionalism • Commitment • Diligence • Cost-Effectiveness Contact our team today and get a free estimate for any of the services that we offer. If you hire us to do the job, we will work hard and smart until your expectations are exceeded. Contact our professional and reliable company today to save time and money on your project!
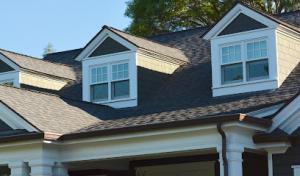
Oakley's roofing scene sits in the East Contra Costa Delta-edge climate, where long, hot dry summers bake underlayment and the winter rains and winds test flashing and tile. The dominant roofing mix includes asphalt shingles, metal, clay tile, concrete tile, wood shingles or shakes, and slate, so material choice is less about one universal best option and more about how each handles summer heat plus winter moisture. That means your roof should be evaluated not just for the material's appearance or style, but for how it ages under sustained sun, wind-driven rain, and shifting humidity. In practical terms, expect underlayment and flashing to bear the brunt of seasonal swings, especially on re-roofs where existing layers may be near the end of their life.
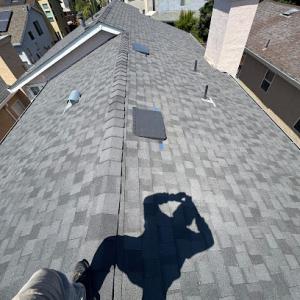
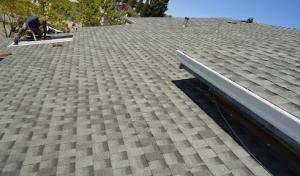
Asphalt remains a major practical choice for suburban re-roof projects because it fits many budgets, but the extended hot dry summers in Oakley can accelerate granule loss and underlayment aging compared with milder coastal markets. A typical shingle roof may show faster granule shedding on south- and west-facing exposures, and edge wear can progress more quickly if ventilation is inadequate. To maximize lifespan, prioritize a roof venting plan that moves hot air out of the attic and keeps the attic space closer to exterior temperatures. In addition, consider sun-reflective or higher-performance shingles in areas with the strongest sun exposure. Regular inspection of shingle edges and any signs of cupping or curling after the first few summers can help catch problems before leaks appear.
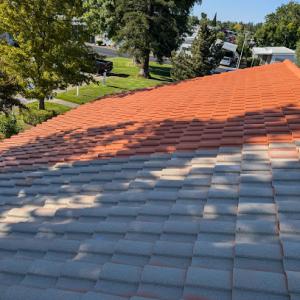
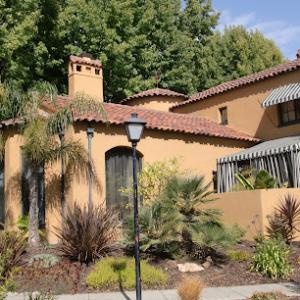
Tile roofs are especially relevant here because clay and concrete tile are both common locally, making underlayment life and replacement strategy a major issue even when the tile itself lasts longer. Clay and concrete tiles shed heat well and resist moisture intrusion when installed correctly, but their long-term performance hinges on the integrity of the underlayment and the durability of flashing around hips, valleys, and penetrations. In Oakley's climate, check for cracked or lifted tiles after winter storms and inspect underlayment where tiles overlap or where roof penetrations occur. A tile roof can outlive other systems, but a failure in underlayment or a compromised flashing detail can trigger leaks that appear during wet winters or after heavy winds.
Metal roofs handle heat well due to high reflectivity and rapid cooling after summer sun. In Oakley, metal commonly lasts well with proper coating, but expansion and contraction can stress fasteners and flashing in heat cycles. If choosing metal, look for a configuration that allows for thermal movement and a high-quality sealant around penetrations. The lightweight nature and wind resilience of metal can be advantageous in this area, yet periodic inspection of seam areas and fastener integrity remains essential, especially after severe winter rain and wind events.
Wood shingles or shakes provide a traditional look but require more consistent maintenance under Oakley's heat-wet cycle. Dry summers can dry out wood, increasing risk of cosmetics issues and fire concerns in certain setups, while wet winters test wood's resistance to rot at edges and fasteners. Slate offers long life, but installations must account for weight and proper underlayment; slate's durability is countered by the potential for failure if flashing and underlayment are not meticulously managed. In all wood or slate scenarios, emphasis on ventilation, underlayment condition, and timely replacement of brittle or cracked components helps prevent premature leaks.
In Oakley, replacement timing hinges on how well the roof handles the heat-wet cycle. A proactive approach emphasizes regular seasonal checks-after the dry season and again after winter rains-focused on underlayment condition, flashing integrity, and venting performance. Because the summer heat accelerates aging in underlayment and granule loss in asphalt shingles, align inspection cycles with seasonal heat peaks and post-storm wind events. Prioritize any signs of moisture intrusion, unusual attic temperatures, or attic insulation compression, since these indicate a pathway for heat-driven wear.
Oakley cost planning should use the provided per-square ranges across asphalt, metal, clay tile, concrete tile, wood, and slate, but final pricing can move sharply when tear-off reveals decking or structural work that the county may require before sign-off. When you start, map your roof by sections and note where existing decking shows delamination, knot rot, or soft spots. Those findings can trigger replacement of underlayment and even framing, pushing the price well beyond simple material costs. In practice, you'll want a staggered bid approach: a removal-and-exposure bid, a decking-and-structure bid, and a finish bid that covers flashing and accessories. This keeps you from surprises if the attic or crawlspace reveals moisture damage after the old layers come off.
Costs in Oakley are affected by the local re-roofing market, where affordability is a strong homeowner priority but emergency winter demand can tighten scheduling and raise the cost of rapid dry-in or temporary protection. Asphalt shingles sit at the bottom of the price ladder, with a typical range around four hundred to seven hundred fifty dollars per square. Metal roofing runs higher, often six hundred to around a thousand dollars per square, but it can pay for itself with longer life in hot summers and wet winters when you factor in fewer replacements. Clay and concrete tiles sit in the upper-mid to high range; clay tiles commonly run from around nine hundred to eighteen hundred dollars per square, while concrete tiles generally span seven hundred to twelve hundred. Wood shingles or shakes land in the five hundred to nine hundred band, and slate is the premium, roughly one thousand to twenty-five hundred per square. Remember: these are per-square costs and can shift if tear-off reveals decking or structural needs.
Tile-heavy roof designs common in East Contra Costa can increase labor and accessory costs compared with basic composition roofs, especially when valleys, flashing details, and underlayment replacement are involved. Expect additional charges for specialized flashing, venting, and ice-and-water shield in valleys and eaves, given how hot summers bake underlayment and how winter rains penetrates through weak spots. A simple roof line with minimal penetrations will usually be steadier on the budget, but a valley-laden, multi-hip design common on Oakley homes can push both labor time and material trips up. Plan for a contingency of 5-15% on top of the bid to cover unexpected decking, venting, or fascia work discovered after tear-off.
Get a clear picture of your project costs upfront - no commitment required.

For a full roof replacement, the work generally requires a building permit through Contra Costa County. In Oakley's climate, where long hot summers bake underlayment and winter rains test flashing and ventilation, getting the permit right from the start matters. The permit process isn't just a checkbox; it sets the scope for materials, installation methods, and safety. If the project encounters any deviations from current code or local practice, permit review can uncover those gaps and slow the timeline. Expect the county to require a clearly defined plan set with details on underlayment, flashing, ventilation, and fasteners before any roof work begins.
The local process includes plan check and on-site inspections, with inspectors reviewing underlayment, flashing, ventilation, and fasteners at key milestones and at final completion. In Oakley's Delta-edge climate, inspectors pay close attention to how the roof system handles heat gain and moisture management. During milestones, you may be asked to demonstrate nailing patterns, mounting details for tiles or shingles, and proper flashing at penetrations around chimneys, vents, and skylights. At final completion, the inspection confirms that the installed system aligns with the approved plan and meets current code. If any corrections are required, delays can ripple through the schedule, especially in late fall or winter when weather windows narrow.
Contra Costa can require additional work when tear-off exposes decking or structural issues, so Oakley homeowners should expect permit scope and cost to expand if hidden conditions are found. In practice, if decking shows water damage, rot, or compromised structural members, the permit may be amended to cover repairs beyond a standard replacement. This can push material and labor costs higher and extend lead times. Planning for a contingency in the budget and a flexible schedule helps avoid surprises when unexpected conditions surface after the old roof is removed.
Before pulling permits, gather recent photos of the roof, ventilation details, and a clear plan for underlayment and flashing choices. When the plan check is underway, keep in close contact with the contractor to respond quickly to any requested revisions. If tear-off reveals issues, acknowledge that the scope may shift and coordinate with the roofer and the inspector to document necessary repairs. In Oakley's climate, securing a solid sequence-from plan approval to final inspection-reduces the risk of rain delays and helps ensure a durable, code-compliant replacement.
In this Delta-edge climate, Oakley homeowners are operating in California's tightened insurance market, where carriers have pulled back or limited coverage in higher-risk ZIPs and roof condition can affect underwriting outcomes. The combination of long hot summers and winter storms means insurers are watching for wear, leaks, and flashing failures more closely than ever. If a roof shows obvious aging or past repairs, a setback in coverage or higher deductibles can follow. Being proactive about documenting what exists on the roof helps keep options available when a renewal or new policy comes up.
Adjusters increasingly expect strong documentation of roof condition, replacement history, product specifications, and warranty records, which is especially important after winter storm leaks or wind-related damage in Oakley. After a leak or a windy day, photos matter, but so do the timestamped notes from reputable professionals who inspected the roof, plus any material labeling on underlayment, shingles, or tiles. If a panel or tile has been replaced, the installer details and warranty terms should be easy to find. This level of detail can shorten claims, reduce back-and-forth, and improve the odds of a fair evaluation when weather stress reveals a weakness in the roof system.
Because claim decisions and payouts can be influenced by how well roof age and maintenance are documented, Oakley homeowners should keep permit records, inspection sign-offs, photos, and manufacturer information together. A simple, organized binder or digital folder with dated repairs, flashing checks, and the roof's original specification sheets helps tell the story if a claim is needed years after a storm. If a tile or shingle type has a known vulnerability under our hot-summer, wet-winter cycle, having the provenance and service history ready keeps the file clean and accessible for any adjuster reviewing the loss. In this climate, preparedness is the best defense against uncertainty in a recovery process.
Connect with contractors who help homeowners navigate the claims process from damage assessment to final approval.
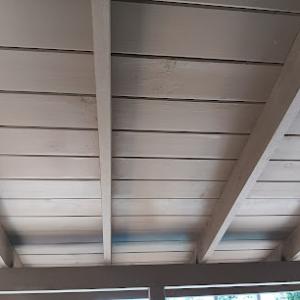
On homes with tile roofs, the critical long-term issue often isn't the visible tile surface but the waterproofing assembly beneath it. In Oakley, sun-baked underlayment can age differently than the tile itself, making the installer's choice of flashing, underlayment, and proper bed/crack prevention essential. Inspect the transitions where tile meets vent pipes, chimneys, and roof edges, because those details determine leak risk years after the tiles seem fine.
Low-slope sections and skylight penetrations become especially vulnerable once summer heat ages sealants and winter rain tests drainage and flashing integrity. In Oakley's hot-dry summers, sealants dry out and crack, while winter rains test the drainage paths around skylights and curb flashings. Pay particular attention to the flashing around skylights, the seal between curb and glazing, and the slope adequacy directing water away from penetrations.
Contractor signals show meaningful local demand for tile roofing, flat-roof work, and skylight repairs, indicating many homeowners need help with detail-heavy roof areas rather than only full replacements. When addressing flat sections, verify that edge terminations, drip edges, and vent flashing are integrated with surrounding slope to prevent ponding that can accelerate wear during Oakley's wet winters.
The hot-summer/wet-winter cycle influences timing of repairs. Plan proactive sealant and flashing resealing before winter rain begins, and schedule inspection of tile-to-flashing interfaces after the first cold spell or heavy rain. With skylights, treat seasonal transitions as opportunities to re-check flashing integrity, drain paths, and any micro-cracks that may have formed in heat-induced cycles.
Within your homeowner routine, focus on visible gaps around roof penetrations, the condition of sealants at skylight frames, and the integrity of edge flashing along low-slope areas. Lightly clean debris from valleys and around parapets to preserve drainage. If any tile cracks appear or flashing shows wear, address promptly before winter storms take hold.
Find specialists in TPO, EPDM, and built-up flat roofing systems for residential and commercial properties.
Dependable Roofing
(925) 777-1417 dependableexperts.com
5406 Elm Ln, Oakley, California
4.9 from 96 reviews